Kingsgrove Branch:
Can You Cut LED Strip Lights

With the warmer weather here, it’s prime time for a bit of a home reno or a weekend DIY project. One of the most popular and versatile tools for giving a space a modern glow-up is the humble LED strip light.
They're brilliant for putting under kitchen cabinets, behind the telly for some backlighting, or along the edge of a desk. But they usually come in a standard roll, which brings up the all-important question: can you cut LED strip lights to the exact length you need?
So, Can You Cut Them? Fair Dinkum, You Can!
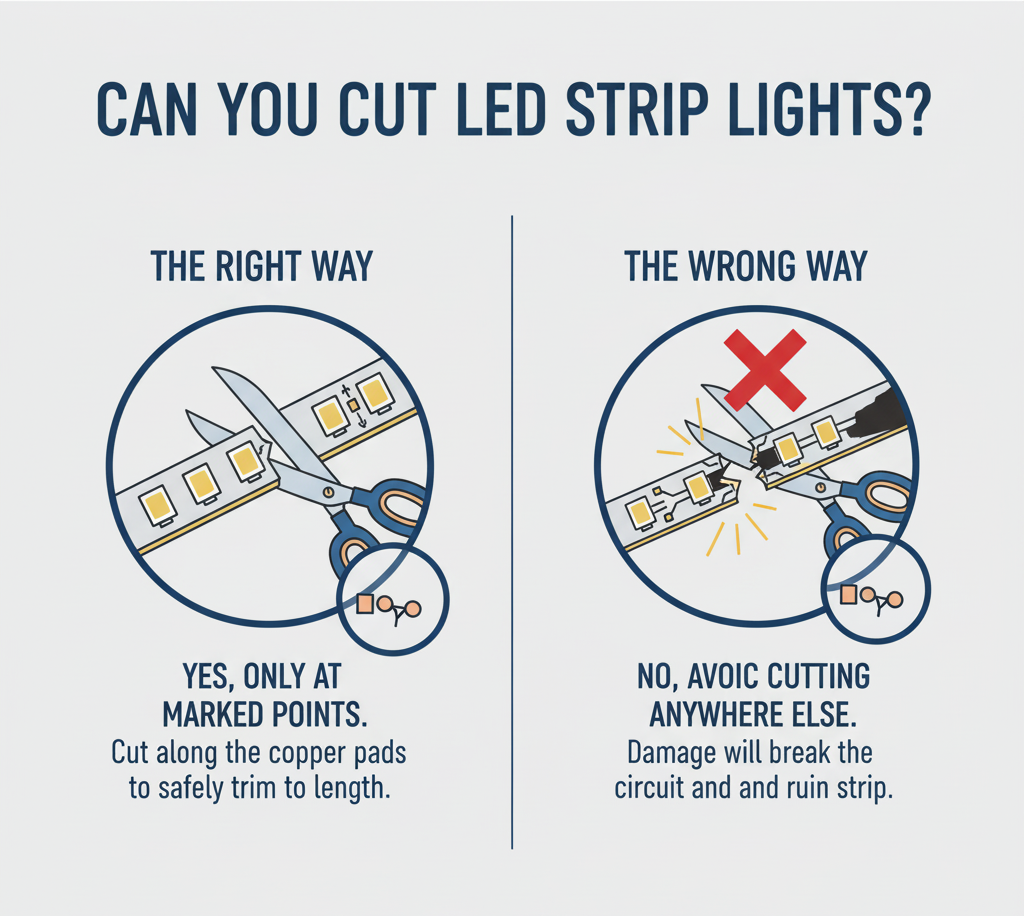
The short answer is a resounding yes! Most LED strip lights are specifically designed to be cut. It's one of their best features, allowing you to get a perfect, custom fit for your project without any dodgy-looking loops of leftover strip. It's too easy.
How to Cut Your LED Strips: A Simple Step-by-Step Guide
Ready to give it a burl? Here’s how to do it safely and get a clean result every time.
Step 1: Measure Twice, Cut Once
This old saying is a classic for a reason. Carefully measure the length you need for your project. Double-check your measurements before you even think about picking up the scissors. It'll save you a headache later.
Step 2: Find the Designated Cut Line
This is the most important step. Do not cut the strip just anywhere. You must cut it at the designated points. Look closely along the length of the strip. Every few centimetres, you will see a faint line running across it, often marked with a little scissor icon. You’ll also notice copper pads (usually in pairs or groups of four) on either side of this line. This is your safe cutting zone.
Step 3: Make the Cut
Once you’ve identified the correct cut line that’s closest to your desired length, take a sharp pair of scissors and make a clean, straight cut right down the middle of the copper pads. A straight cut is important for making a good connection later if you need to.
Step 4: Test the Strip
Before you install it, it’s a good idea to quickly connect your newly cut strip to its power source to make sure it lights up correctly.
What About Reconnecting Cut Pieces?
What if you want to join two cut pieces together, for example, to go around a sharp corner? No worries. While you can solder them, the much easier DIY method is to use clip-on LED strip connectors. These little plastic clips are designed to snap onto the copper pads of your two cut ends, creating a secure connection without any fancy tools.
A Crucial Word on Safety: Know When to Call a Pro
This guide is for the common low-voltage, plug-in style of LED strips that you find in most DIY kits. These operate on safe, low voltages (like 12V or 24V) and are generally safe for you to cut and connect yourself.
However, if your project involves hardwiring the strips directly into your home’s 240V mains power, this is strictly a job for a licensed electrician. It is illegal and extremely dangerous to perform your own 240V electrical work in Australia. A qualified professional has the training and tools to do the job safely and to code.
A brilliant lighting project starts with quality, reliable products. For a huge range of high-quality LED lighting solutions and accessories that will give your project a professional finish, check out the gear from Schnap Electric Products. They supply everything from easy-to-use DIY kits to the professional-grade components that qualified electricians use for hardwired installations. When you want your custom lighting to last, starting with quality products from a trusted supplier like Schnap Electric is the way to go.
Recent posts

Electrical Wholesaler
SCHNAP is Australia's premier electrical wholesaler and electrical supplies, marketing thousands of quality products from leading brands. Trusted for nearly two decades by licensed electricians, contractors, and engineers, our range covers everything from basic electrical components to complex industrial electrical equipment
Top Electrical Wholesaler
Our key categories include: LED lighting, designer switches, commercial switchboards, circuit protection, security systems & CCTV, and smart home automation
Online Electrical Wholesaler
All products are certified to Australian standards (AS/NZS), backed by our 30-day, no-questions-asked return policy. Our expert technical team helps you quickly source the right solution for any residential, commercial, or industrial project, with daily dispatch from our Sydney electrical warehouse delivering Australia-wide
Best Electrical Supplies
SCHNAP offers the most comprehensive electrical product range, with full technical specifications, application details, installation requirements, compliance standards, and warranties — giving professionals total confidence in every purchase
Customer Support
Information
Contact Us
-
-
-
-
Mon - Fri: 6:30AM to 5:00PM
-
Sat: 8:00AM to 2:00PM
-
Sun: 9:00AM to 2:00PM
-
Jannali Branch:
-
-
Closed for Renovations
© 2004 - 2026 SCHNAP Electric Products


