Kingsgrove Branch:
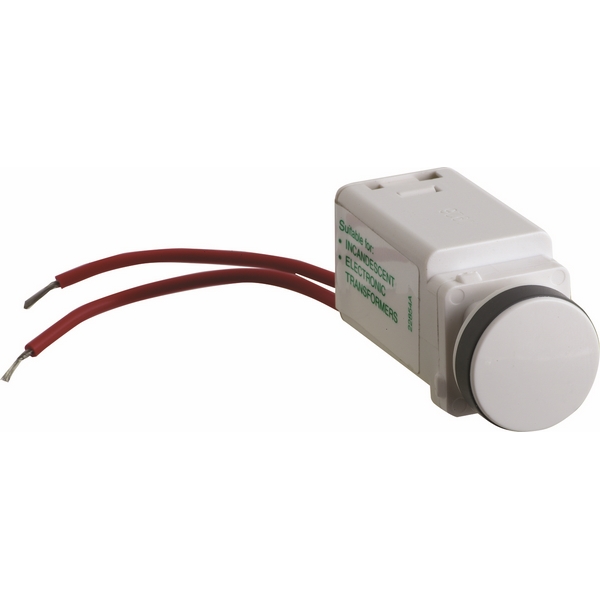
Dimmer Switch

Ever reckon it'd be good to change the lighting in a room from full-on bright to something a bit more chilled out? Whether it's for a movie night in the lounge or a relaxing dinner, a dimmer switch is a brilliant way to control the mood. Swapping out a standard light switch for a dimmer is a popular DIY job, but like any electrical work, it's gotta be done right to be safe.
This guide will walk you through how to wire a dimmer switch, so you can get that perfect lighting sorted.
Before You Start: The Serious Bit About Safety
Right, before you even think about unscrewing that old switch, let's have a yarn about safety. Mucking around with electricity is no joke. In Australia, all electrical work must comply with the AS/NZS 3000 Wiring Rules to keep things above board and, more importantly, to keep you safe.
Here are the non-negotiables:
- Kill the Power: Head straight to your switchboard (or fuse box) and turn off the power to the circuit you'll be working on. Flick that specific circuit breaker to the 'OFF' position.
- Double Check It's Dead: Use a voltage tester (or a multimeter) on the existing switch's terminals to be 100% certain there's no power. Test between the live and neutral/earth wires. No reading? You're good to go.
- Use the Right Gear: Make sure your new dimmer switch is compatible with the lights you're using. Older dimmers might not work with LED globes, so grab a modern LED dimmer switch if needed.
- When in Doubt, Call a Sparkie: If you're looking at a tangle of wires and feeling a bit lost, don't press on. It's always smarter (and safer) to call a licensed electrician.
How to Wire a Dimmer Switch: Step-by-Step
Got your safety sorted? Good on ya. Let's get this dimmer installed. Most dimmer switches in Aussie homes replace a standard, single-pole switch (one switch controlling one light). This is what we'll cover.
Step 1: Remove the Old Switch
First up, carefully unscrew and remove the faceplate of the old light switch. Then, unscrew the switch mechanism from the wall bracket. Gently pull it out so you can see the wires connected to the back.
You'll typically see two wires connected to the switch. These are usually your 'live in' (from the power source) and 'live out' (or 'switched live,' going to the light fitting). There might also be an earth wire (green and yellow) connected to a terminal.
Step 2: Disconnect the Wires
Using an insulated screwdriver, loosen the terminal screws and disconnect the wires from the old switch. Take a good look at how they were connected. Sometimes, the terminals are marked 'L' for Live, '1' for Load, or with arrows. If they aren't marked, it's a good idea to pop a bit of electrical tape on one wire so you don't mix them up.
Step 3: Connect Your New Dimmer Switch
Now, grab your shiny new dimmer switch. On the back, you'll see terminals for connecting the wires. It's usually a pretty straightforward swap:
- Connect the 'Live In' Wire: This is the wire bringing power from the circuit. Connect it to the terminal on the dimmer marked 'L', 'Line', or sometimes with an arrow pointing in.
- Connect the 'Load' Wire: This is the wire going up to your light. Connect it to the terminal marked 'Load', 'Out', or with an arrow pointing out.
- Connect the Earth Wire: If there is an earth wire and your new dimmer has an earth terminal, connect it. This is a crucial safety feature.
Give each wire a gentle tug to make sure it's secure in the terminal. A loose connection can cause big problems down the track.
Step 4: Fit and Test
Gently push the wires and the new dimmer switch back into the wall cavity. Screw the dimmer mechanism onto the mounting bracket, making sure it's straight. Attach the faceplate and the dimmer knob.
Now, head back to the switchboard and flick the power back on. Turn on your new dimmer switch and test it out. Does the light turn on and off? Does it dim and brighten smoothly? If it's all working a treat, you're done!
Get the Right Gear for the Job
To make sure your installation is safe and reliable, you need to start with quality components. For a top-shelf range of modern LED dimmer switches, faceplates, and other electrical essentials, you can't go past a trusted local supplier. Check out the fantastic range at Schnap Electric Products. As a go-to Australian electrical wholesaler, they stock the reliable gear that the pros count on, ensuring your DIY project is done right from the start.
Recent posts

Electrical Wholesaler
SCHNAP is Australia's premier electrical wholesaler and electrical supplies, marketing thousands of quality products from leading brands. Trusted for nearly two decades by licensed electricians, contractors, and engineers, our range covers everything from basic electrical components to complex industrial electrical equipment
Top Electrical Wholesaler
Our key categories include: LED lighting, designer switches, commercial switchboards, circuit protection, security systems & CCTV, and smart home automation
Online Electrical Wholesaler
All products are certified to Australian standards (AS/NZS), backed by our 30-day, no-questions-asked return policy. Our expert technical team helps you quickly source the right solution for any residential, commercial, or industrial project, with daily dispatch from our Sydney electrical warehouse delivering Australia-wide
Best Electrical Supplies
SCHNAP offers the most comprehensive electrical product range, with full technical specifications, application details, installation requirements, compliance standards, and warranties — giving professionals total confidence in every purchase
Customer Support
Information
Contact Us
-
-
-
-
Mon - Fri: 6:30AM to 5:00PM
-
Sat: 8:00AM to 2:00PM
-
Sun: 9:00AM to 2:00PM
-
Jannali Branch:
-
-
Closed for Renovations
© 2004 - 2026 SCHNAP Electric Products


