Kingsgrove Branch:
How to Clean an Exhaust Fan

G'day! Let's talk about one of the most overlooked, yet hardest working, bits of kit in our homes: the humble exhaust fan. Whether it's the one in the bathroom sucking out all that steam or the one in the kitchen getting covered in a fine layer of greasy dust, these fans do a cracking job.
But over time, they get clogged with a thick blanket of dust, fluff, and grime. A clogged fan can't do its job properly, meaning more moisture and odours hang around, and it can even become a fire hazard.
So, if you've looked up at your fan lately and thought, "yuck," it's time for a good clean. Don't worry, it's a pretty simple job you can knock over in no time.
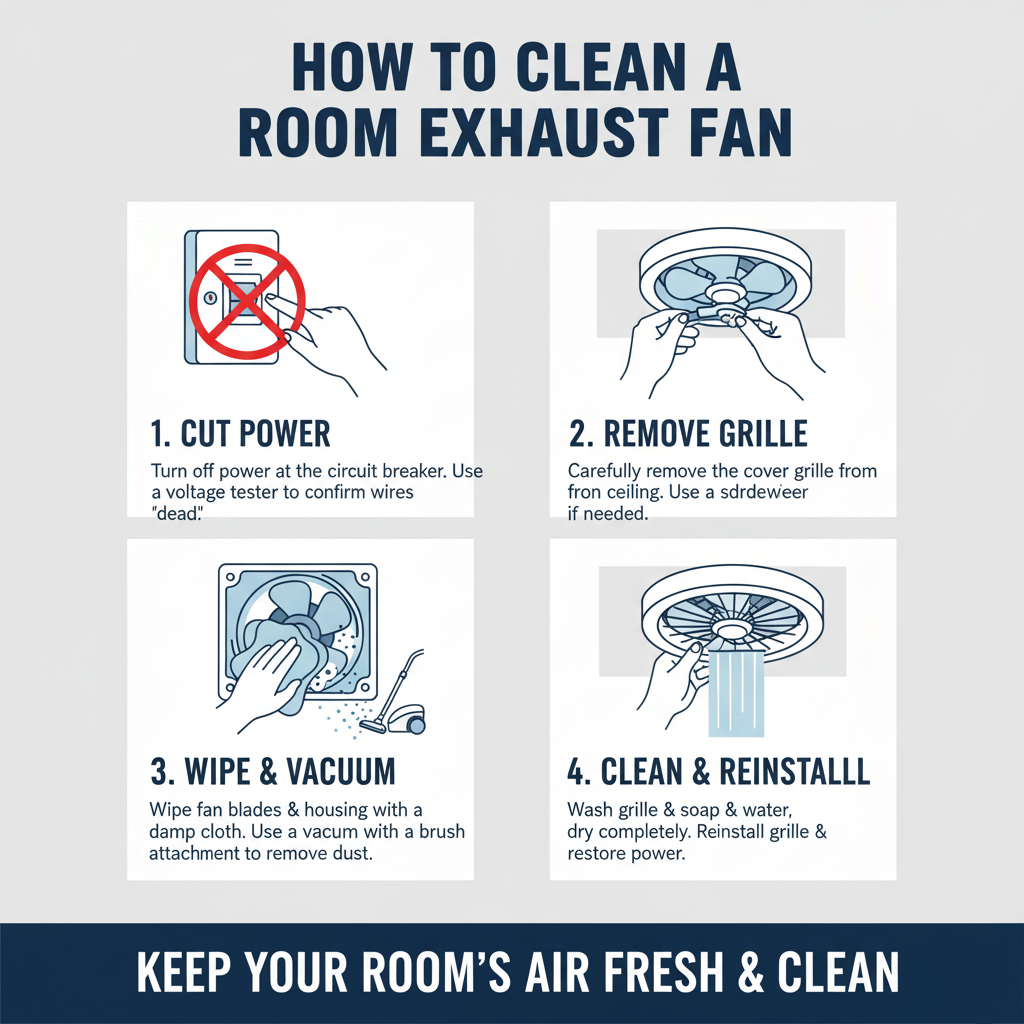
Safety First, Always: Power Down!
This is the most important step, and it's non-negotiable. Before you even think about touching the fan, you must turn the power off.
Go to your home's switchboard (fuse box) and flick the circuit breaker that controls the room you're working in (e.g., 'Bathroom' or 'Kitchen'). To be extra sure, flick the main power switch for the whole house.
How to Clean Your Bathroom Exhaust Fan
Bathroom fans are mostly dealing with dust and lint, making them the easiest to clean.
- Remove the Cover: Most modern fan covers are held in place by spring clips. Gently pull the cover down from the ceiling. You should feel it resist a little. Squeeze the metal springs together on the inside and the cover will pop right off.
- Give the Cover a Bath: Take the plastic cover to the sink and give it a good wash in warm, soapy water. Use an old toothbrush to get into all the little vents and crevices.
- Vacuum the Guts: Back in the bathroom, use the brush attachment on your vacuum cleaner to suck up all the loose dust and fluff from around the fan blades and the motor housing. Be gentle here.
- Wipe it Down: Use a damp cloth (not soaking wet!) to wipe down the fan blades and the inside of the fan housing.
- Dry and Reassemble: Make sure the cover is completely dry, then simply squeeze the spring clips and pop it back into place. Done!
How to Clean Your Kitchen Exhaust Fan (Rangehood)
Kitchen fans are a bit tougher as you're dealing with sticky, greasy dust. The process is similar, but the cleaning needs a bit more oomph.
- Remove the Metal Filters: These are designed to be removed easily. Look for a latch or slide that allows them to pop out.
- Soak the Filters: This is where the magic happens. Fill your sink with hot water, a good squirt of grease-cutting dishwashing liquid, and about a quarter cup of baking soda. Submerge the filters and let them soak for at least 20 minutes to dissolve all that grime.
- Scrub, Rinse, and Dry: After soaking, give the filters a scrub with a non-abrasive brush, rinse them thoroughly with hot water, and let them dry completely.
- Wipe Down the Hood: While the filters are drying, use a kitchen degreaser on a cloth to wipe down the fan blades and the inside and outside of the rangehood.
When to Call in a Professional
This guide covers the simple cleaning you can do yourself. If your exhaust fan is making loud, rattling noises, the motor seems to be struggling, or it doesn't work at all, the problem is likely electrical.
In this situation, do not try to fix it yourself. This is a job that must be done by a licensed electrician. A qualified professional can safely inspect the fan's motor, wiring, and switch to find and fix the fault.
If your old fan has given up the ghost, it might be the perfect opportunity to upgrade to a newer, quieter, and more powerful model. For a fantastic range of modern and efficient ventilation solutions, check out a trusted supplier like Schnap Electric Products. They stock a huge variety of high-performance exhaust fans for both bathrooms and kitchens, including the popular 3-in-1 bathroom units. Starting with a quality unit from a supplier like Schnap Electric is a great investment in a fresher, healthier home.
Recent posts

Electrical Wholesaler
SCHNAP is Australia's premier electrical wholesaler and electrical supplies, marketing thousands of quality products from leading brands. Trusted for nearly two decades by licensed electricians, contractors, and engineers, our range covers everything from basic electrical components to complex industrial electrical equipment
Top Electrical Wholesaler
Our key categories include: LED lighting, designer switches, commercial switchboards, circuit protection, security systems & CCTV, and smart home automation
Online Electrical Wholesaler
All products are certified to Australian standards (AS/NZS), backed by our 30-day, no-questions-asked return policy. Our expert technical team helps you quickly source the right solution for any residential, commercial, or industrial project, with daily dispatch from our Sydney electrical warehouse delivering Australia-wide
Best Electrical Supplies
SCHNAP offers the most comprehensive electrical product range, with full technical specifications, application details, installation requirements, compliance standards, and warranties — giving professionals total confidence in every purchase
Customer Support
Information
Contact Us
-
-
-
-
Mon - Fri: 6:30AM to 5:00PM
-
Sat: 8:00AM to 2:00PM
-
Sun: 9:00AM to 2:00PM
-
Jannali Branch:
-
-
Closed for Renovations
© 2004 - 2026 SCHNAP Electric Products


