Kingsgrove Branch:
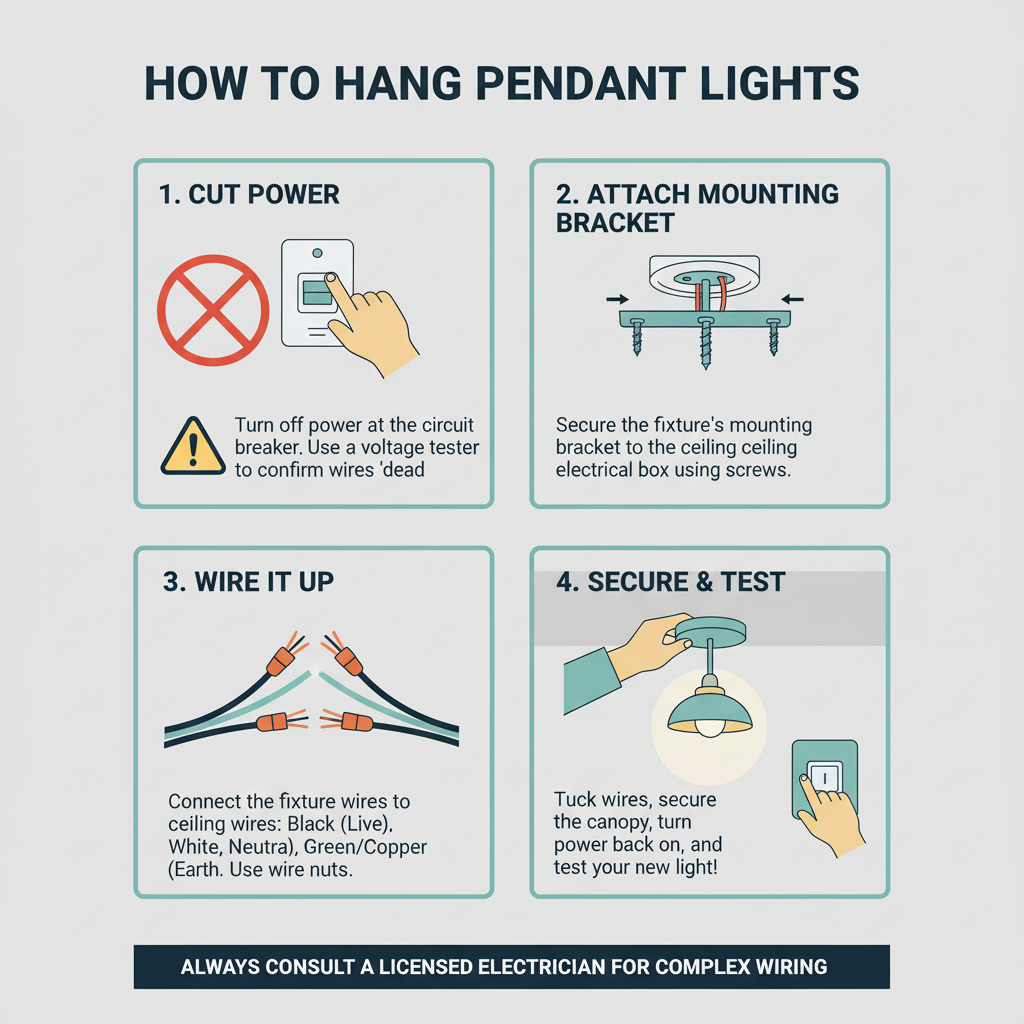
How to Hang Pendant Lights

G'day! With spring in full swing, you might be looking around the house and thinking it's time for a bit of a refresh. And when it comes to getting the most bang for your buck in a reno, you can't go past new lighting.
Pendant lights are a fair dinkum game-changer. They can transform a drab kitchen island into a stylish centrepiece or add a touch of elegance to your dining area. But knowing how to hang pendant lights involves more than just picking a pretty fixture. This guide will walk you through the planning stages to ensure you get a stunning, professional, and—most importantly—safe result.
Before the Schnap Arrives: Planning Your Pendant Lights
While the final electrical work is a job for a pro, the design and planning are all you! Getting this right is the key to a successful installation.
Step 1: Choose Your Style
First, the fun part. Are you after a modern, minimalist look? A coastal vibe with rattan or timber shades? Or maybe a bold, industrial statement piece? The light fixture itself sets the tone for the whole space, so choose something you love.
Step 2: Pick the Perfect Spot
Pendant lights are versatile, but they shine brightest in a few key areas:
- Over the Kitchen Island: The classic choice. A series of two or three pendants here is a design staple.
- Above the Dining Table: A single large pendant or a cluster can create a beautiful focal point.
- Bedside Lighting: Hanging a small pendant on each side of the bed frees up space on your nightstand.
- In an Entryway or Hallway: A beautiful pendant can create a warm and welcoming first impression.
Step 3: Get the Height Right (The Golden Rules)
This is the most critical part of the planning. Hang your pendant too high, and it'll look lost; too low, and it'll get in the way. Here are the standard Aussie measurements:
- Over a Kitchen Island/Benchtop: The bottom of the pendant should be 70cm to 80cm above the benchtop.
- Above a Dining Table: Aim for 75cm to 90cm from the tabletop to the bottom of the fixture.
- In an Open Area (like a hallway): The bottom of the light must be at least 2.1 metres (2100mm) from the floor to allow for safe clearance.
Step 4: Decide on Spacing (for multiple pendants)
If you're hanging a row of pendants over your kitchen island, spacing them evenly is key. A simple method is to measure the length of your island, divide it by the number of pendants plus one, and hang the lights at those intervals. A gap of 60cm to 75cm between each pendant is usually a good look.
The Installation: Why You MUST Call a Licensed Schnap
Let’s be crystal clear about this: in Australia, it is illegal and incredibly dangerous to do your own electrical work. This includes installing a light fixture.
You might see DIY videos from overseas, but the rules here are strict for a reason. Attempting your own wiring can lead to electric shock, house fires, and will absolutely void your home insurance. The only person who should be installing your new pendant lights is a licensed Australian electrician. No exceptions.
Light Up Your Life with Quality Gear
A stunning pendant light is the star of the show, but a safe, long-lasting installation depends on the quality of the components behind the scenes. Your electrician needs reliable mounting hardware, compliant electrical cable, and quality terminals to do the job right. For all the essential, professional-grade components that bring a lighting design to life, schnap across Australia trust Schnap Electric Products. They supply the top-tier gear that ensures your installation is not only beautiful but also perfectly safe and compliant with Australian standards. When you're investing in new lighting, make sure the parts you can't see are just as good as the fixture you fell in love with.

Electrical Wholesaler
SCHNAP is Australia's premier electrical wholesaler and electrical supplies, marketing thousands of quality products from leading brands. Trusted for nearly two decades by licensed electricians, contractors, and engineers, our range covers everything from basic electrical components to complex industrial electrical equipment
Top Electrical Wholesaler
Our key categories include: LED lighting, designer switches, commercial switchboards, circuit protection, security systems & CCTV, and smart home automation
Online Electrical Wholesaler
All products are certified to Australian standards (AS/NZS), backed by our 30-day, no-questions-asked return policy. Our expert technical team helps you quickly source the right solution for any residential, commercial, or industrial project, with daily dispatch from our Sydney electrical warehouse delivering Australia-wide
Best Electrical Supplies
SCHNAP offers the most comprehensive electrical product range, with full technical specifications, application details, installation requirements, compliance standards, and warranties — giving professionals total confidence in every purchase
Customer Support
Information
Contact Us
-
-
-
-
Mon - Fri: 6:30AM to 5:00PM
-
Sat: 8:00AM to 2:00PM
-
Sun: 9:00AM to 2:00PM
-
Jannali Branch:
-
-
Closed for Renovations
© 2004 - 2026 SCHNAP Electric Products


