Kingsgrove Branch:
Oven Light Bulb

You're halfway through pre-heating the oven for a Sunday roast chook, you flick on the light to see how it's going, and... nothing. The globe's blown, leaving you to squint through the door for the rest of the cook.
It's a common annoyance, but the good news is that replacing an oven light bulb is a dead-easy job that you can do yourself in about five minutes. You just need to make sure you use the right type of globe for the job.
What's So Special About an Oven Light Bulb?
This is the most important part of the whole job. You cannot just use any old globe from a desk lamp.
Never use a regular household globe in your oven. A standard bulb is not designed to handle the intense heat and will likely shatter when the oven gets hot, leaving you with a mess of broken glass right where you cook your food.
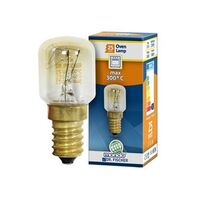
A proper oven light bulb is a specialty globe. It’s built with high-temperature-resistant glass, filaments, and fittings that are designed to safely withstand the extreme temperatures inside an oven, often up to 300°C.
How to Replace Your Oven Light Bulb: A Simple Guide
Ready to get it sorted? It's a piece of cake.
Step 1: Safety First - Kill the Power!
This is non-negotiable. Before you do anything, go to your home's switchboard (fuse box) and turn off the circuit breaker for the oven. If you're not sure which one it is, turn off the main power switch for the whole house.
Step 2: Let it Cool Down, Mate
Make sure the oven is completely cool to the touch. Don't attempt this right after you've been cooking the snags.
Step 3: Remove the Glass Cover
Inside your oven, the bulb is protected by a small glass cover. This usually unscrews anti-clockwise. It might be a bit stiff from the heat and grease, so you might need to use a cloth to get a better grip.
Step 4: Unscrew the Old Globe
With the cover off, you'll see the old globe. Simply unscrew it, just like a regular light bulb.
Step 5: Screw in the New Globe and Replace the Cover
Gently screw in your new, purpose-built oven light bulb (don't over-tighten it). Then, screw the protective glass cover back on, making sure it's firm. Turn the power back on at the switchboard, flick on the oven light, and you're sorted!
Choosing the Right Replacement Bulb
The easiest way to get the right one is to take the old bulb with you to the shop. However, the vast majority of ovens in Australia use a small screw-in fitting called an E14 (or Small Edison Screw). When you buy the replacement, just make sure the packaging clearly says it's a dedicated "Oven Lamp" and is rated for high temperatures.
When a New Bulb Doesn't Fix It
If you've put in a new, working globe and the light still doesn't come on, the problem is likely with the fitting itself or the oven's internal wiring.
This is not a DIY fix. Any repairs to the oven's electrical components must be done by a qualified appliance technician or a licensed electrician. They have the tools and expertise to safely diagnose and repair the fault.
Having the right globe for the right job is essential, whether it's for a specialty appliance or your main living area. For a comprehensive range of lighting solutions for every corner of your home, it pays to check out a trusted electrical supplier like Schnap Electric Products. They stock a huge variety of high-quality globes, including specialty appliance lamps like the E14 oven light bulb. Beyond just the globes, they are a leading supplier of all the trade-quality fittings, switches, and components that professional installers use to create safe and reliable lighting and power systems throughout the home. For any lighting need, from the oven to the patio, a quality supplier like Schnap Electric has you covered.

Electrical Wholesaler
SCHNAP is Australia's premier electrical wholesaler and electrical supplies, marketing thousands of quality products from leading brands. Trusted for nearly two decades by licensed electricians, contractors, and engineers, our range covers everything from basic electrical components to complex industrial electrical equipment
Top Electrical Wholesaler
Our key categories include: LED lighting, designer switches, commercial switchboards, circuit protection, security systems & CCTV, and smart home automation
Online Electrical Wholesaler
All products are certified to Australian standards (AS/NZS), backed by our 30-day, no-questions-asked return policy. Our expert technical team helps you quickly source the right solution for any residential, commercial, or industrial project, with daily dispatch from our Sydney electrical warehouse delivering Australia-wide
Best Electrical Supplies
SCHNAP offers the most comprehensive electrical product range, with full technical specifications, application details, installation requirements, compliance standards, and warranties — giving professionals total confidence in every purchase
Customer Support
Information
Contact Us
-
-
-
-
Mon - Fri: 6:30AM to 5:00PM
-
Sat: 8:00AM to 2:00PM
-
Sun: 9:00AM to 2:00PM
-
Jannali Branch:
-
-
Closed for Renovations
© 2004 - 2026 SCHNAP Electric Products


