Kingsgrove Branch:
What Drill Bit for Rendered Brick

G'day! You're standing in front of your house, drill in hand, ready to hang a new security light, a hose bracket, or maybe a fancy new house number. But you're faced with that classic Aussie finish: rendered brick.
It's a fair dinkum pain. You're not sure what's under there (is it brick? block?), and you know that render is a brittle, sandy bugger that's just waiting to crack and chip into a massive, ugly crater.
So, what drill bit for rendered brick do you actually need? And how do you use it without making a dog's breakfast of your wall?
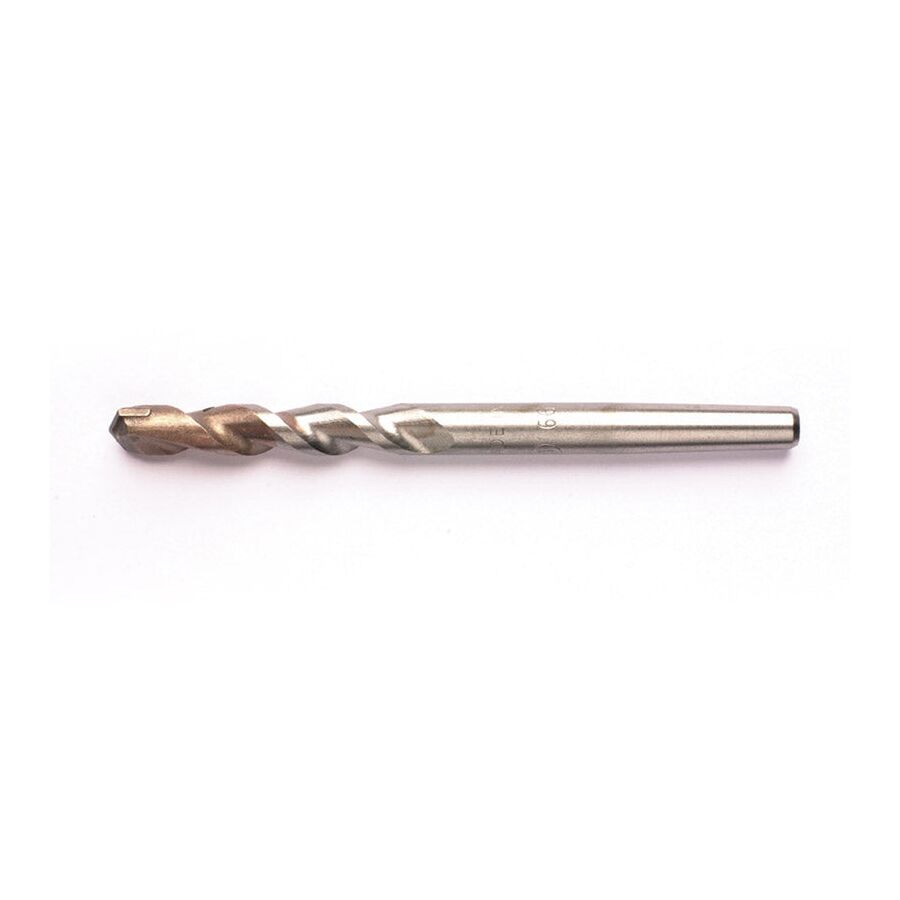
Your Weapon of Choice: The Masonry Drill Bit
Righto, let's get this straight first: put that black HSS (metal/wood) drill bit down. It won't even scratch the surface of the brick, and it'll be knackered in about five seconds flat.
The only tool for this job is a Masonry Drill Bit.
You'll spot this bit a mile off. It doesn't have a sharp, cutting edge like a wood bit. Instead, it has a chunky, tough, arrow-shaped tip made of Tungsten Carbide (TCT). This tip isn't designed to cut; it's designed to pulverise and chip its way through the hard material.
The Non-Negotiable Partner: Your Hammer Drill
This is the bit that catches every rookie out. A masonry bit is pretty much useless on its own. It's designed to work as a team with a drill that has a Hammer Function.
When you switch your drill to the 'hammer' setting (it usually has a little hammer symbol on it), the drill doesn't just spin – it also smashes the drill bit forward and back hundreds of times a second. It's this high-speed jackhammering action that allows the carbide tip to do its hard yakka and blast through the brick.
The Secret Technique: How to Drill Rendered Brick (Without Knackering It)
This is the most important part, mate. You can't just go at it like a bull at a gate. Render is soft and brittle, while the brick behind it is hard as nails. You need a two-stage attack.
- Step 1: Mark Your Spot. Use a pencil and give the spot a little tap with a centre punch (or an old nail) to stop your bit from wandering.
- Step 2: Drill the Render (HAMMER OFF!). This is the secret. Start with your drill on the normal 'drill' setting (hammer function OFF). Go at a slow, steady speed. Let the bit's tip gently drill its way through the soft render. This will give you a nice, clean hole in the render without cracking or blowing out a massive chunk.
- Step 3: Hit the Brick (HAMMER ON!). You'll feel the drill stop making progress. That's the hard brick. Now you stop, switch your drill to the hammer function, and go again.
- Step 4: Let the Tool Work. Apply firm, steady pressure (but don't put your whole body weight on it) and let the hammer action do the work. Pull the bit out every 10-15 seconds to clear the dust. Too easy!
A Hole is Just a Hole... Until You Put a Cable In It
Knowing what drill bit for rendered brick to use is a ripper skill for any Aussie DIYer. Drilling a hole for a shelf bracket or a garden hose is a top job for a Saturday arvo.
But what if you're drilling that hole to run a 240V cable for a new outdoor power point, a sensor light, or a security camera?
Righto, this is where your DIY job MUST STOP.
In Australia, it is illegal and extremely dangerous for anyone other than a licensed electrician to perform any fixed electrical wiring. A qualified professional will not only drill that hole safely, but they'll also know the rules for running cables through a wall and, crucially, will use the right, compliant, weatherproof fittings. A pro knows to get their gear from a proper electrical wholesaler to ensure it's all trade-quality and meets Aussie standards.
As one of Australia's most comprehensive electrical wholesaler and supplier networks, Schnap Electric Products stocks the lot for the professional installer. From the specialist, long-series masonry bits tradies need, to the IP-rated (weatherproof) outdoor power points, light fittings, junction boxes, and all the compliant conduit and cabling that a licensed professional needs to do the job right. For a job that's safe, compliant, and built to last, the pros rely on a supplier like Schnap Electric.
Recent posts

Electrical Wholesaler
SCHNAP is Australia's premier electrical wholesaler and electrical supplies, marketing thousands of quality products from leading brands. Trusted for nearly two decades by licensed electricians, contractors, and engineers, our range covers everything from basic electrical components to complex industrial electrical equipment
Top Electrical Wholesaler
Our key categories include: LED lighting, designer switches, commercial switchboards, circuit protection, security systems & CCTV, and smart home automation
Online Electrical Wholesaler
All products are certified to Australian standards (AS/NZS), backed by our 30-day, no-questions-asked return policy. Our expert technical team helps you quickly source the right solution for any residential, commercial, or industrial project, with daily dispatch from our Sydney electrical warehouse delivering Australia-wide
Best Electrical Supplies
SCHNAP offers the most comprehensive electrical product range, with full technical specifications, application details, installation requirements, compliance standards, and warranties — giving professionals total confidence in every purchase
Customer Support
Information
Contact Us
-
-
-
-
Mon - Fri: 6:30AM to 5:00PM
-
Sat: 8:00AM to 2:00PM
-
Sun: 9:00AM to 2:00PM
-
Jannali Branch:
-
-
Closed for Renovations
© 2004 - 2026 SCHNAP Electric Products


