Kingsgrove Branch:
How to Hang Festoon Lights

With the warm arvos and long evenings of spring and summer finally here, it’s the perfect time to get the backyard ready for a barbie, a party, or just relaxing with a cold one. And there is no easier way to add a bit of magic and create a ripper atmosphere than with a string of beautiful festoon lights.
They can transform any space, but just slinging them up any old how can lead to a droopy, sad-looking setup that won't last. So, how to hang festoon lights like a pro for a stunning and durable result? It's easier than you think.
Before You Start: The Pro Secret to a Long-Lasting Setup
Before you just string your new lights up by their own cord, here’s the number one tip that will make a massive difference: use a support wire.
While it's tempting to just hang the lights by their own electrical cable, this puts a lot of strain on the cord and the connections where the globes attach. Over time, and with a bit of Aussie wind and rain, this can cause them to sag, stretch, or even fail.
A thin, stainless steel guide wire (also called a catenary wire) takes all the tension, allowing your festoon lights to hang freely without any stress. It’s the secret to a neat, professional, and long-lasting installation.
How to Hang Festoon Lights: Your Step-by-Step Guide
Step 1: Plan Your Layout
Before you drill any holes, lay your festoon lights out on the ground in the pattern you're imagining. This helps you check you have enough length and decide on the best design. Popular patterns include:
- Zig-zag or 'W' Pattern: Criss-crossing a deck or courtyard area.
- Perimeter Pattern: Outlining the edge of a patio, pergola, or fence line.
- Canopy Pattern: Radiating out from a central point to create a stunning 'circus tent' effect.
Step 2: Install Your Anchor Points
You need solid points to hang your lights from. Install sturdy hooks, eye-bolts, or saddle clips into fascia boards, pergolas, established trees, or fence posts. Make sure they're nice and secure.
Step 3: Run Your Support Wire (The Pro Move)
Run your steel guide wire between your anchor points. Attach a turnbuckle to one end. This is a brilliant little device that lets you easily tighten the wire until it's nice and taut, with no sagging.
Step 4: Attach Your Festoon Lights
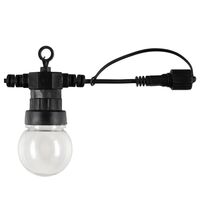
Now for the easy part. Starting from the end closest to your power source, begin attaching your festoon lights to the taut support wire. Most quality festoon light strings have a small hole or loop above each globe holder for this exact purpose. Use UV-resistant zip ties, carabiners, or strong string to connect the lights to the guide wire every metre or so.
Step 5: Plug In and Admire!
With your lights securely attached to the support wire, all that's left to do is plug them into a suitable outdoor power point, wait for the sun to go down, and admire your handiwork. You beauty!
What if I Need a Permanent Setup?
Most festoon light kits you can buy are simple plug-in systems that are perfect for a DIY installation.
But what if you want a fully integrated, permanent setup that's controlled by a wall switch? Or what if you don't have a power point where you need one? This is where you need to call in a professional. Any hardwired electrical work in Australia must be carried out by a licensed electrician. A qualified professional can install a proper weatherproof outdoor power point or switch, ensuring your entire setup is safe and compliant with Australian standards.
For those permanent, high-end outdoor entertaining areas, professional installers rely on trade-quality gear from trusted suppliers. Schnap Electric Products is a leading Australian supplier of all the essential components for a professional outdoor lighting installation. They stock a huge range of robust, IP-rated weatherproof GPOs (power points), outdoor-rated switches, and all the compliant wiring and circuit protection a qualified professional needs to create a safe, durable, and stunning outdoor space. For an outdoor setup that's built to last, the pros start with quality gear from a supplier like Schnap Electric.
Recent posts

Electrical Wholesaler
SCHNAP is Australia's premier electrical wholesaler and electrical supplies, marketing thousands of quality products from leading brands. Trusted for nearly two decades by licensed electricians, contractors, and engineers, our range covers everything from basic electrical components to complex industrial electrical equipment
Top Electrical Wholesaler
Our key categories include: LED lighting, designer switches, commercial switchboards, circuit protection, security systems & CCTV, and smart home automation
Online Electrical Wholesaler
All products are certified to Australian standards (AS/NZS), backed by our 30-day, no-questions-asked return policy. Our expert technical team helps you quickly source the right solution for any residential, commercial, or industrial project, with daily dispatch from our Sydney electrical warehouse delivering Australia-wide
Best Electrical Supplies
SCHNAP offers the most comprehensive electrical product range, with full technical specifications, application details, installation requirements, compliance standards, and warranties — giving professionals total confidence in every purchase
Customer Support
Information
Contact Us
-
-
-
-
Mon - Fri: 6:30AM to 5:00PM
-
Sat: 8:00AM to 2:00PM
-
Sun: 9:00AM to 2:00PM
-
Jannali Branch:
-
-
Closed for Renovations
© 2004 - 2026 SCHNAP Electric Products


