

Kingsgrove Branch:


Send us a photo and our team will help identify it.

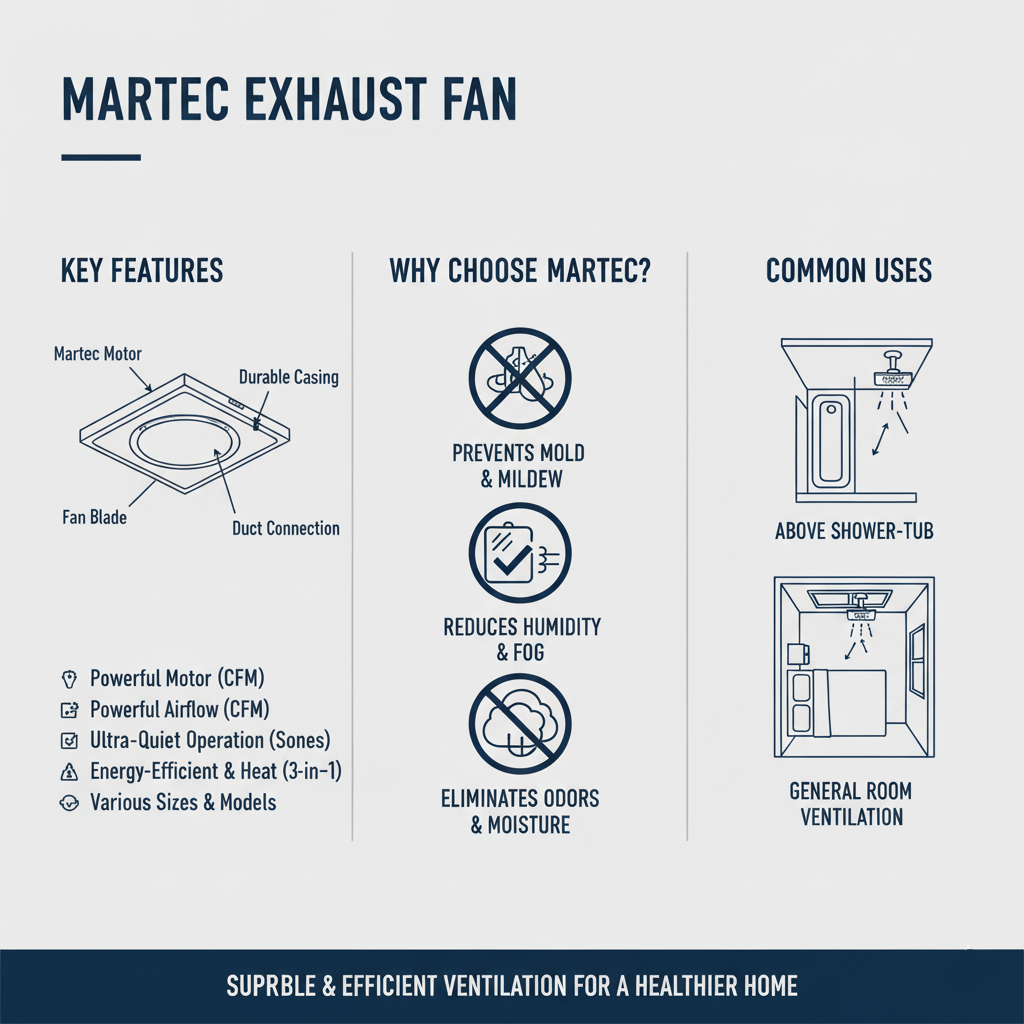
G'day! You're deep into planning your bathroom renovation, and you've reached the final touches that pull the whole modern look together. You've chosen the tiles, the tapware, and the vanity, but what about that boring old fan on the ceiling? A clunky, noisy unit can spoil an otherwise perfect design.
This is where a Martec exhaust fan comes in. As a proudly Australian-owned company, Martec has earned a massive reputation for creating ventilation products that perfectly blend sleek, contemporary style with powerful, quiet performance.
If you're looking for a fan that's as much a design feature as it is a functional appliance, Martec is a brand you need to have on your radar. They have become a favourite for Aussie renovators who want a modern aesthetic without compromising on the fan's core job: getting rid of steam and preventing mould.
They are known for their focus on innovation, using modern materials and technology to create products that look great and work brilliantly.
While Martec offers a full range of ventilation products, they are particularly famous for their modern take on the classic Aussie 3-in-1 (Heat, Fan, Light). Their range stands out for a few key reasons:
Many of Martec's most popular models, like the 'Profile' or 'Linear' series, feature a slimline, low-profile design. This means they sit much flatter against the ceiling than traditional, bulky units, creating a clean, minimalist, and architectural look that is perfect for a contemporary bathroom.
A Martec exhaust fan is built to perform. They are known for their powerful motors that deliver high airflow (m³/hr) to clear a steamy room in no time. Their heating elements, whether they're modern infrared lamps or powerful heat globes, are designed to provide instant, glorious warmth on a chilly morning.
Martec has embraced modern lighting technology. Most of their 3-in-1 units feature bright, energy-efficient LED light panels. These provide excellent, even illumination across the whole bathroom – a massive improvement over the single, dim bulb found in older units.
A Martec exhaust fan is a high-quality electrical appliance that must be hardwired into your home's 240V mains power. This is strictly not a DIY job.
For your safety, and to keep your product warranty intact, the installation must be carried out by a licensed electrician. A qualified professional will ensure the fan is installed according to the manufacturer's instructions, ducted correctly to the outside, and complies with all Australian safety standards.
Choosing an innovative, Australian-owned brand like Martec is a great step, and sourcing it from a supplier that offers a wide range of quality options is the perfect way to finish the job. For professional installers and discerning homeowners looking for a comprehensive selection of modern ventilation systems, a specialist electrical supplier like Schnap Electric Products is an essential resource. They stock a wide variety of high-quality exhaust fans from trusted, high-performance brands known for their style and innovation. By exploring the range at a knowledgeable supplier like Schnap Electric, you can compare the latest models and find the perfect high-performance ventilation solution for your modern renovation.
With the warmer weather here, it’s prime time for a bit of a home reno or a weekend DIY project. One of the most popular and versatile tools for giving a space a modern glow-up is the humble LED strip light.
They're brilliant for putting under kitchen cabinets, behind the telly for some backlighting, or along the edge of a desk. But they usually come in a standard roll, which brings up the all-important question: can you cut LED strip lights to the exact length you need?
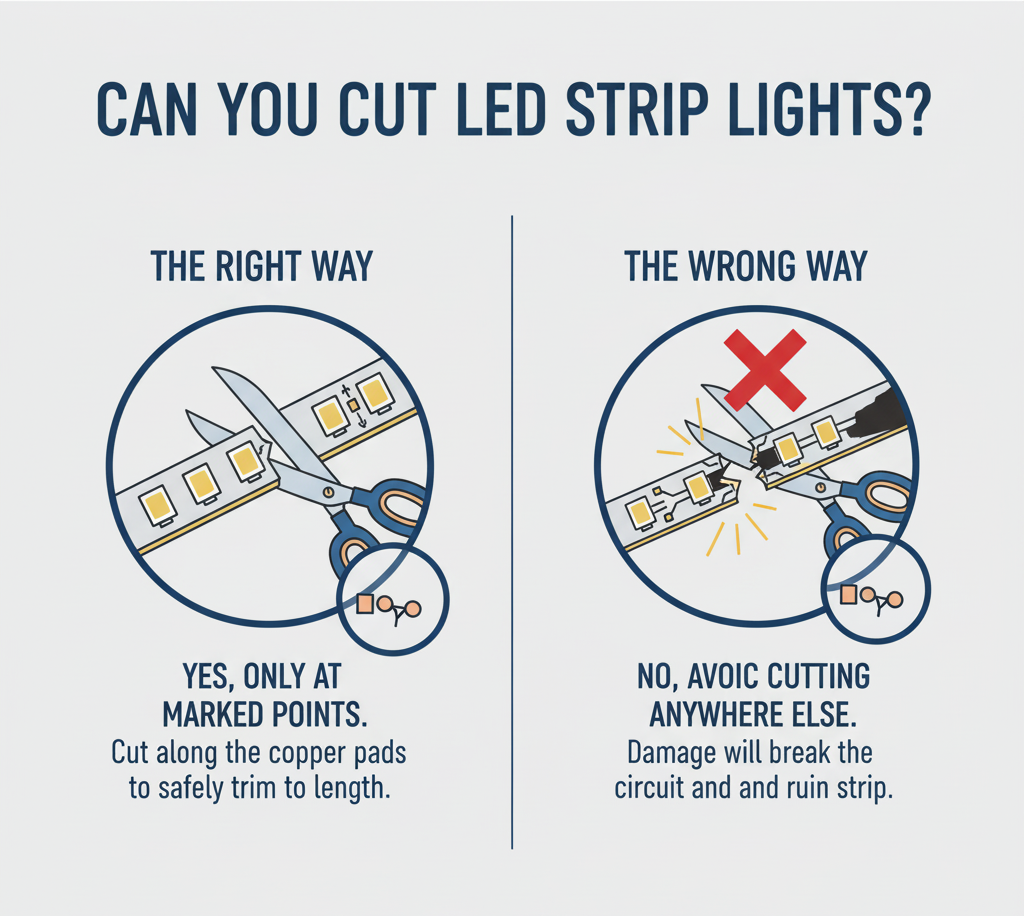
The short answer is a resounding yes! Most LED strip lights are specifically designed to be cut. It's one of their best features, allowing you to get a perfect, custom fit for your project without any dodgy-looking loops of leftover strip. It's too easy.
Ready to give it a burl? Here’s how to do it safely and get a clean result every time.
This old saying is a classic for a reason. Carefully measure the length you need for your project. Double-check your measurements before you even think about picking up the scissors. It'll save you a headache later.
This is the most important step. Do not cut the strip just anywhere. You must cut it at the designated points. Look closely along the length of the strip. Every few centimetres, you will see a faint line running across it, often marked with a little scissor icon. You’ll also notice copper pads (usually in pairs or groups of four) on either side of this line. This is your safe cutting zone.
Once you’ve identified the correct cut line that’s closest to your desired length, take a sharp pair of scissors and make a clean, straight cut right down the middle of the copper pads. A straight cut is important for making a good connection later if you need to.
Before you install it, it’s a good idea to quickly connect your newly cut strip to its power source to make sure it lights up correctly.
What if you want to join two cut pieces together, for example, to go around a sharp corner? No worries. While you can solder them, the much easier DIY method is to use clip-on LED strip connectors. These little plastic clips are designed to snap onto the copper pads of your two cut ends, creating a secure connection without any fancy tools.
This guide is for the common low-voltage, plug-in style of LED strips that you find in most DIY kits. These operate on safe, low voltages (like 12V or 24V) and are generally safe for you to cut and connect yourself.
However, if your project involves hardwiring the strips directly into your home’s 240V mains power, this is strictly a job for a licensed electrician. It is illegal and extremely dangerous to perform your own 240V electrical work in Australia. A qualified professional has the training and tools to do the job safely and to code.
A brilliant lighting project starts with quality, reliable products. For a huge range of high-quality LED lighting solutions and accessories that will give your project a professional finish, check out the gear from Schnap Electric Products. They supply everything from easy-to-use DIY kits to the professional-grade components that qualified electricians use for hardwired installations. When you want your custom lighting to last, starting with quality products from a trusted supplier like Schnap Electric is the way to go.
With the days getting longer and summer just around the corner, it's the perfect time to tackle those DIY projects you've been putting off. Whether you're kitting out the caravan for a summer road trip, adding some handy light to the back of the ute, or just want to give your kitchen a modern glow-up, there’s one product that’s a fair dinkum champion: 12V LED strip lights.
These flexible, easy-to-use strips have become a go-to for all sorts of projects, and for good reason. Let’s shed some light on what they are and why they’re so incredibly popular across Australia.
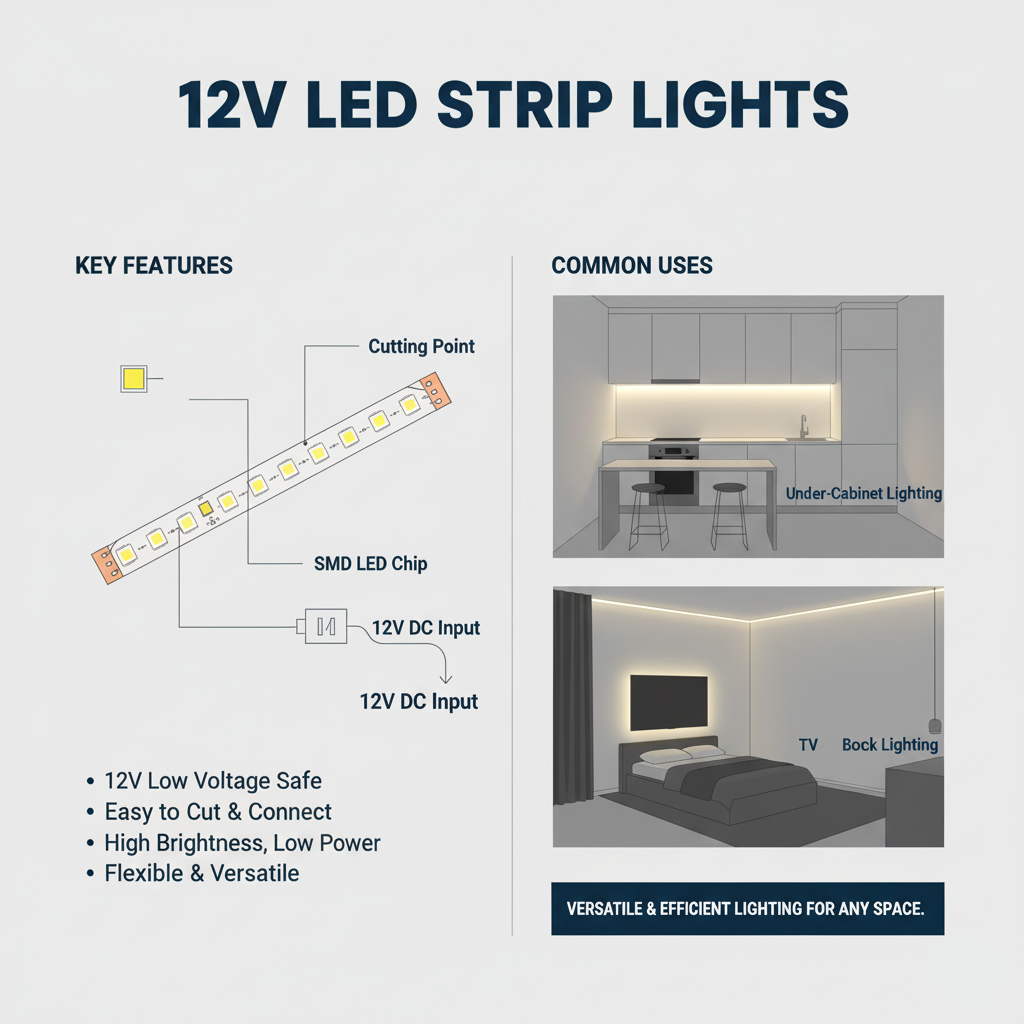
In simple terms, they are flexible circuit boards that have tiny Light Emitting Diodes (LEDs) mounted on them. The crucial part is the "12V". This means they run on a safe, low 12-volt electrical current.
To put that in perspective, the power points in your house supply a whopping 240 volts, which is dangerous. A 12V system is so low that it’s considered "extra-low voltage," making the strips themselves safe to touch and handle.
These lights are more than just a pretty glow; they're incredibly practical, especially for the Aussie lifestyle.
Because the strip itself is running on a safe, low voltage, it’s the perfect entry point for DIY lighting projects. You can handle it, cut it, and position it without the risk of a dangerous electric shock from the strip itself.
This is where 12V LED strip lights truly shine. Your car, caravan, campervan, or boat already runs on a 12V battery system. This means you can often wire these strips directly into your vehicle’s existing power system, making them a perfect match for adding custom lighting to your setup.
The uses at home are endless. The most popular applications include:
Most 12V LED strips are designed to be cut to the exact length you need. They have designated cut marks every few centimetres, allowing you to get a perfect, professional-looking fit for any space.
To use 12V LED strip lights at home, you need to convert the 240V from your power point down to 12V. This is done with a small device called a transformer or power supply (often called a "driver"). This transformer plugs into your wall, and the 12V strip then plugs into the transformer. It's a simple plug-and-play setup for most DIY kits.
While handling and connecting the 12V strip light is a great DIY task, it’s crucial to know where the DIY job ends and the professional's work begins.
Connecting the 12V transformer (power supply) directly into your home’s 240V mains wiring is not a DIY job. In Australia, this work must be carried out by a licensed electrician to be safe and legal. A qualified professional has the training and tools to ensure any hardwired installation is done to Australian standards.
A successful DIY project, whether it's big or small, always starts with using reliable, high-quality gear. For a massive range of lighting solutions that cater to every need, check out the offerings from Schnap Electric Products. Whether you're after a simple roll of 12V LED strip lights for a weekend project or the professional-grade transformers and components a qualified electrician would use for a full-scale installation, they have you sorted. When you want your custom lighting to be bright, reliable, and long-lasting, starting with quality products from a trusted supplier like Schnap Electric is the way to go.
G'day! With the days getting longer and the barbie season just around the corner, it’s the perfect time to get your outdoor space sorted for those long, warm evenings. If you’re looking for the easiest, cheapest, and greenest way to add a bit of magic to your deck, garden, or patio, you can't go past solar LED strip lights.
These clever kits have become a massive hit across Australia, and it’s easy to see why. They’re a simple, stylish, and incredibly effective way to create a fantastic atmosphere without any fuss.
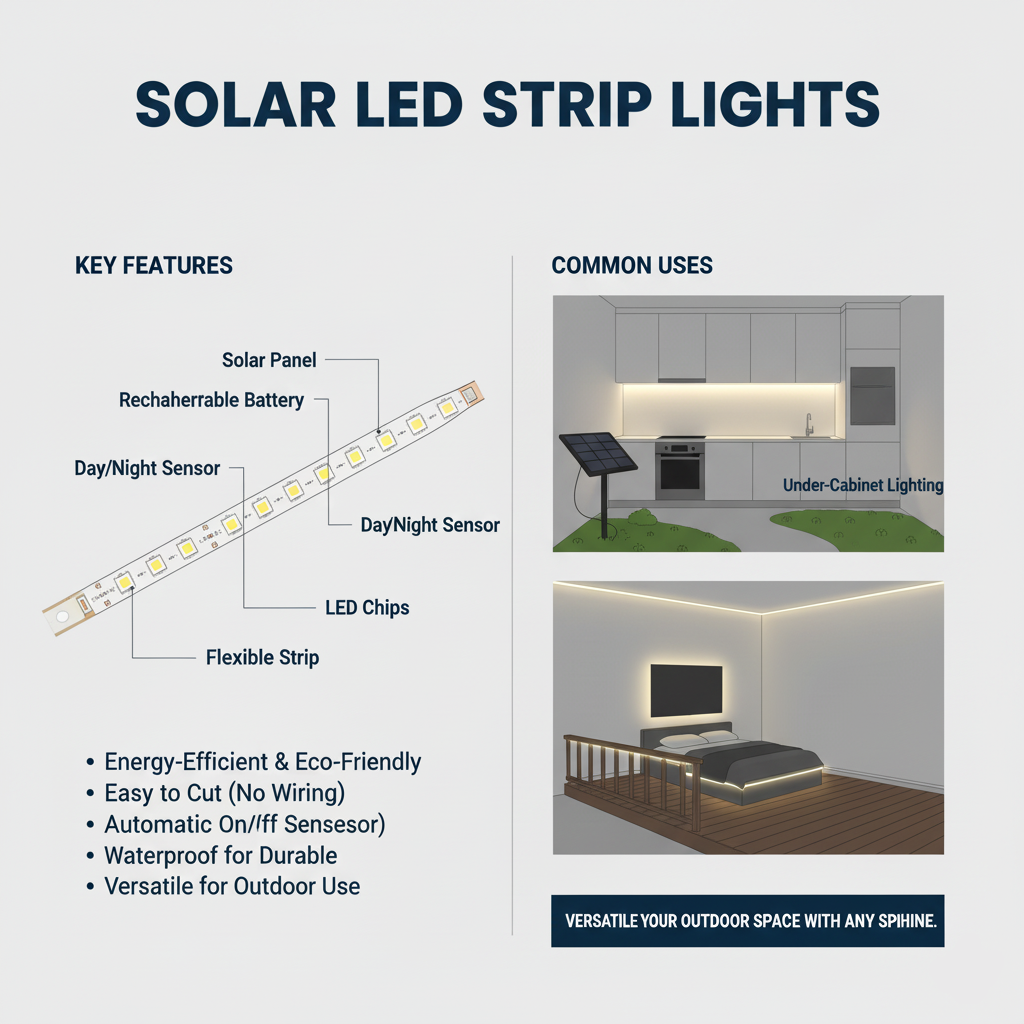
It’s a brilliantly simple setup. A typical kit comes with three main parts:
Most kits have a built-in light sensor, so when dusk settles in, the lights automatically turn on using the power they’ve stored up in the battery. Too easy!
There are some fair dinkum brilliant reasons to choose solar for your outdoor strip lighting.
This is the big one. Because they run on pure sunshine, solar LED strip lights won't add a single cent to your power bill. You can have them on every single night, completely guilt-free.
This is the best part for any home renovator. Because these kits are completely self-contained and don't connect to your home's main power, you don’t need to hire a qualified electrician. It's a genuine DIY job you can knock over in an afternoon. No digging trenches, no running cables through walls—just place, peel, and stick.
You can install them pretty much anywhere that gets a decent amount of sun. And if you change your mind, you can often move them without much hassle. They’re perfect for spots that are just too tricky or expensive to get normal power to.
Running your lights on renewable energy is a small but simple way to reduce your carbon footprint.
Need a bit of inspiration? Give these a burl:
While solar LED strip lights are a brilliant solution for easy, off-grid mood lighting, some bigger outdoor projects need the power and reliability of a mains connection. For permanent, high-powered lighting for security, driveways, or architectural features, you'll need a hardwired solution.
For those more substantial outdoor lighting installations, professionals and savvy homeowners turn to a trusted supplier like Schnap Electric Products. They provide a huge range of high-quality, weatherproof, mains-powered LED lighting and all the essential components that a licensed professional would use to get the job done safely and to Australian standards. When your project demands a permanent and powerful lighting solution, starting with professional-grade gear from Schnap Electric is the way to go.
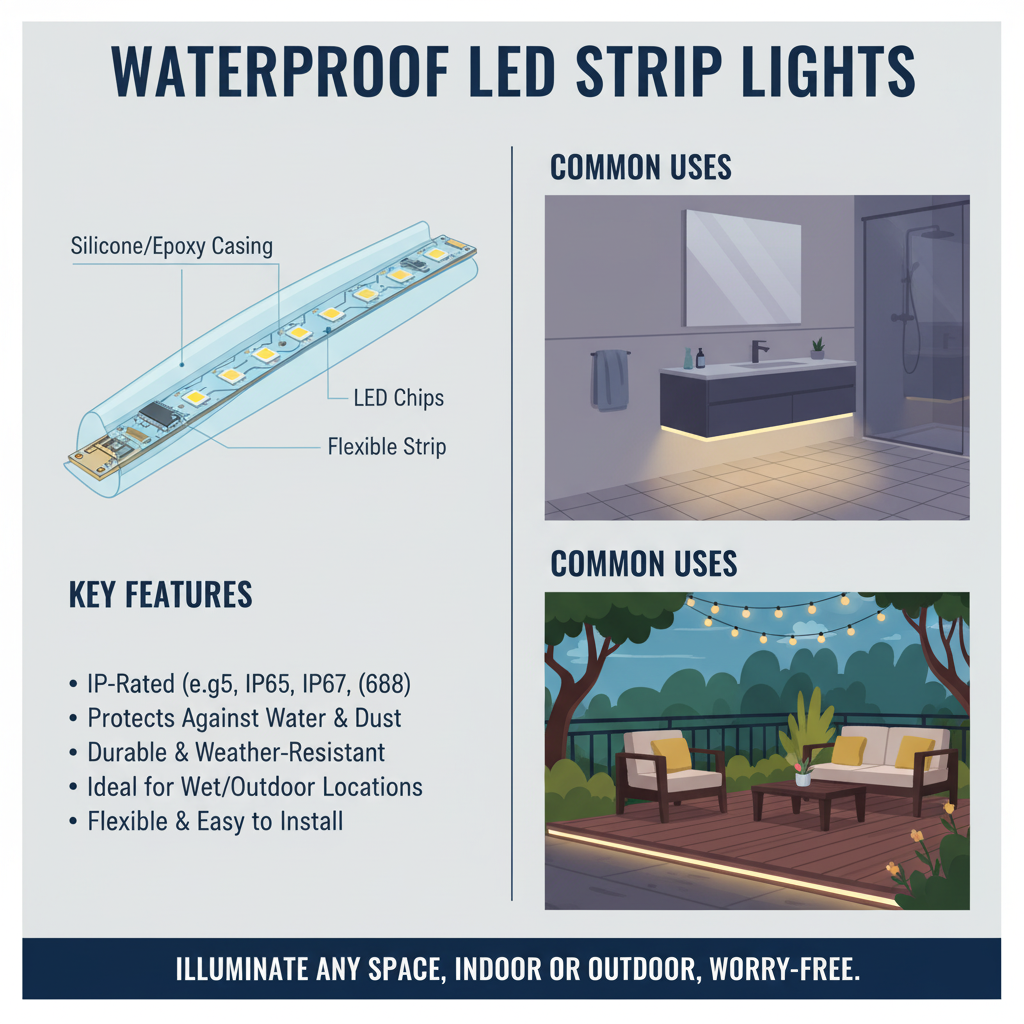
With summer just around the corner, our minds are turning to outdoor entertaining on the deck, sprucing up the garden, and maybe even tackling that bathroom reno. In all these projects, there's a common challenge: how do you add stylish mood lighting to areas that are likely to get wet?
The answer is simple: waterproof LED strip lights. These versatile, durable strips are an absolute game-changer, allowing you to add a brilliant, modern glow to places you never thought possible. But not all "waterproof" strips are created equal.
When you're shopping for any kind of outdoor or wet-area lighting, you'll see a code that looks like 'IP65'. This isn't just jargon; it's the most important thing to look for.
The IP (Ingress Protection) rating is a standard that tells you exactly how well a product is protected against solids (like dust) and liquids (water). It's made up of two numbers. The second number is the one we care about for waterproofing—the higher the number, the better the water protection.
An IP65 rating means the LED strip is protected against jets of water from any direction. It’s typically encased in a splash-proof silicone or plastic coating.
These are the top dogs of waterproofing. An IP67 or IP68 rating means the LED strip can be fully submerged in water for a period of time. They are usually encased in a thick, fully-sealed silicone tube.
This is a crucial point for safety.
If you're using a low-voltage (12V) waterproof LED strip light kit that comes with its own transformer and plugs into a standard power point, it's generally a safe and easy DIY job.
However, for any permanent, hardwired installation that connects directly to your home’s 240V mains power, you must use a licensed electrician. This is a legal requirement in Australia. A qualified professional will ensure all connections are properly waterproofed and compliant, which is absolutely critical for any outdoor or wet-area wiring.
A durable outdoor lighting setup is only as good as the quality of the products you use. For those serious, permanent installations, you need gear that's built to last in tough Aussie conditions. Schnap Electric Products supplies a huge range of high-quality, professional-grade waterproof LED strip lights and all the essential weatherproof components a qualified professional needs to ensure a safe, durable, and fully compliant installation. When you want your outdoor lighting to withstand the elements and look brilliant for years, starting with trade-quality gear from a trusted supplier like Schnap Electric is the only way to go.
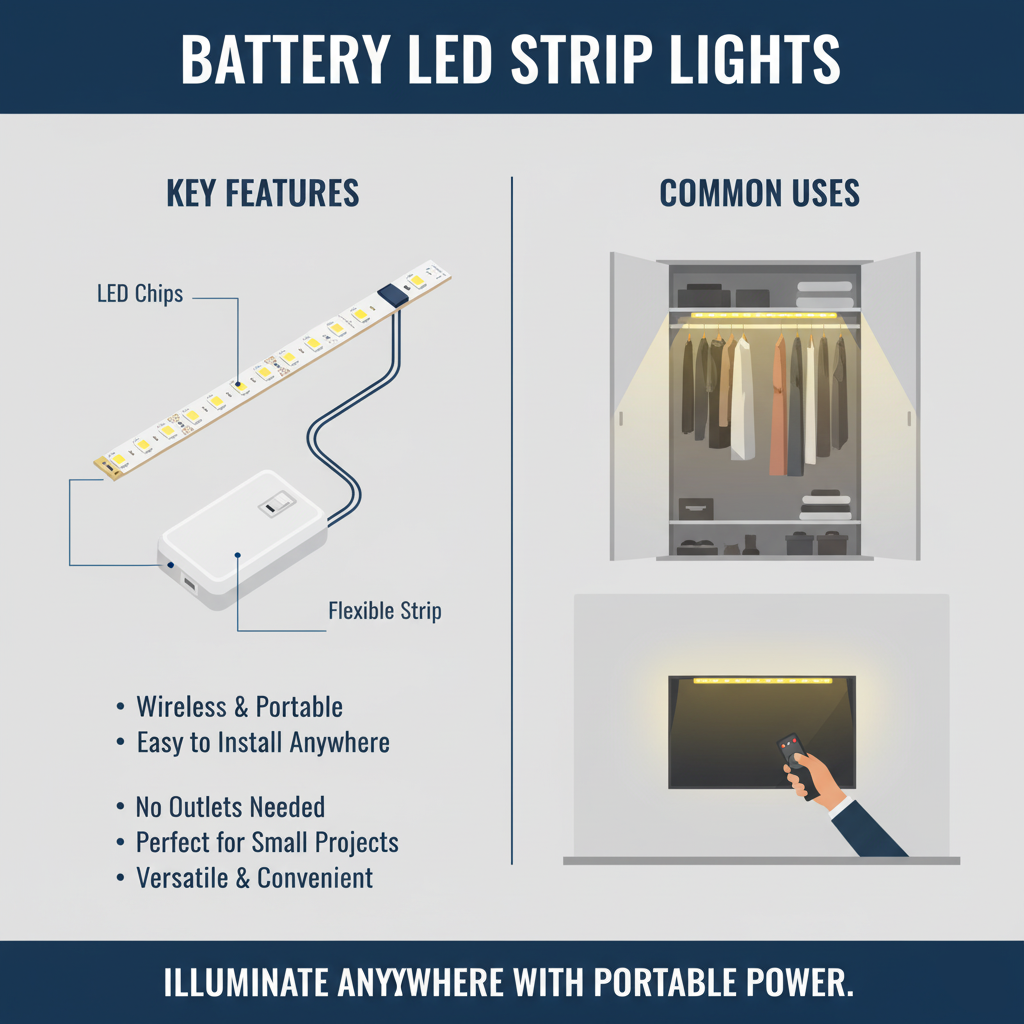
G'day! With the festive season and summer holidays on the horizon, you might be thinking about adding a bit of sparkle to your home, campsite, or party setup. But there's always that one spot—the dark wardrobe, the inside of a tent, or a display cabinet—where you'd love some light but there's just no power point in sight.
Running a long, messy extension cord is a real pain. But don't worry, there's a brilliantly simple solution: battery LED strip lights.
It’s a fair dinkum simple concept. You get all the flexibility and style of a regular LED light strip, but instead of plugging into a wall socket, it’s connected to a small, self-contained battery pack.
These packs usually hold a few standard AA or AAA batteries, while some newer models come with a handy USB-rechargeable battery. It's a completely off-grid, no-fuss lighting system.
For quick and easy lighting jobs, these strips are an absolute game-changer.
No plugs, no extension cords, no dramas. You can stick these lights literally anywhere you need them, from the back of the ute to the inside of a cubby house. This freedom is their biggest advantage.
This is the best part for any DIYer. Because battery LED strip lights are fully self-powered and don't go anywhere near your home's mains wiring, you don't need any special tools or a qualified professional. It’s a genuine DIY job that anyone can do in minutes. Most come with a peel-and-stick backing, so you just stick them up, pop in the batteries, and you're good to go.
They are the undisputed champion for temporary lighting. Think birthday parties, decorating a uni dorm room, adding some flair to a market stall, or lighting up the campsite. You can set them up and take them down without leaving a mark.
The ultra-low voltage and lack of heat make them a safe option for adding a bit of magic to kids' bedrooms, play areas, and toy boxes.
Battery LED strip lights are the perfect solution for quick, easy, and temporary lighting where convenience is key.
But when your project calls for a more permanent, powerful, and integrated lighting solution, you need to step up to a hardwired system. For those big-impact jobs—like a full kitchen reno with under-cabinet lighting or a permanent outdoor deck setup—you need gear that's built to last. Schnap Electric Products is a leading supplier of high-quality, mains-powered LED lighting and all the essential components that a licensed electrician uses for a flawless, fully compliant installation. When you're ready to move from temporary fixes to permanent features, starting with professional-grade gear from a trusted supplier like Schnap Electric is the way to go.
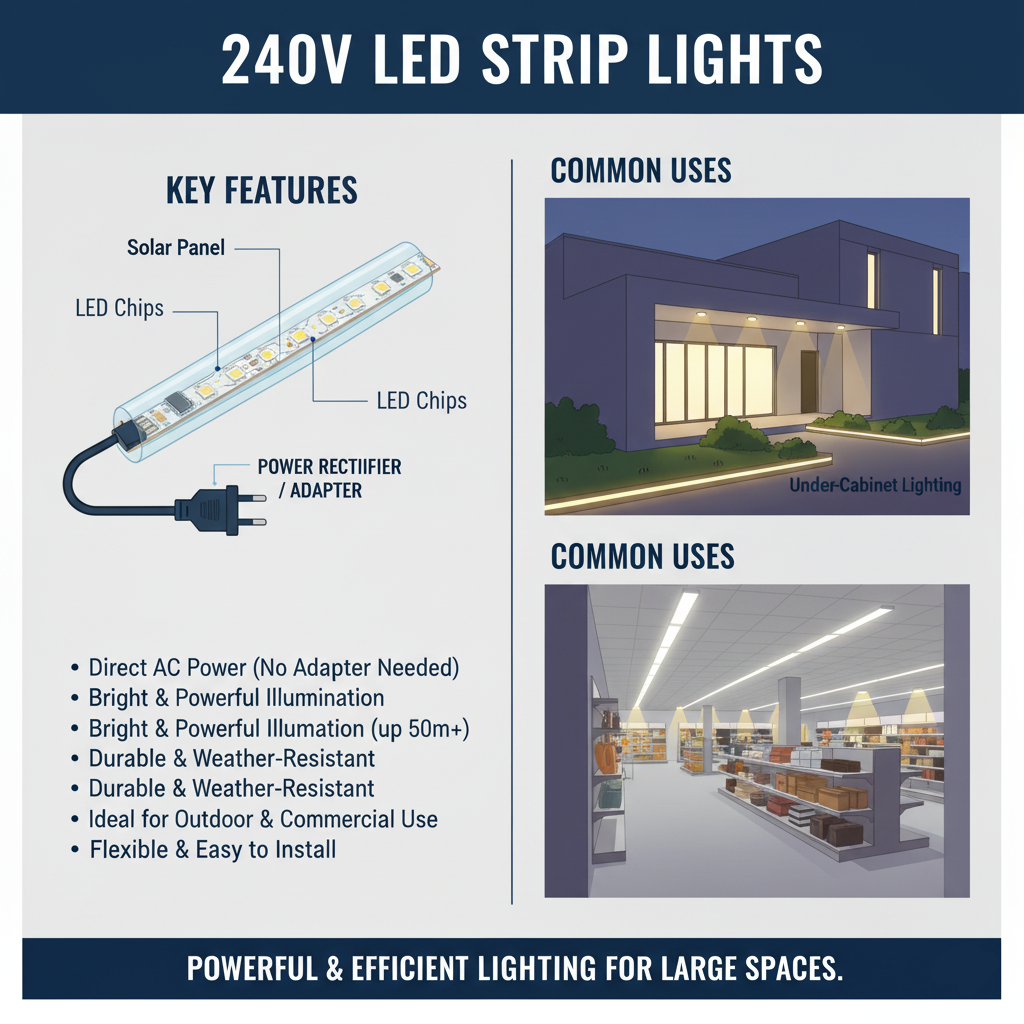
G'day! When you're tackling a big reno, a commercial fit-out, or a large-scale outdoor project, the standard plug-in LED strips you find at the hardware store sometimes just don't cut it. You need something that packs more punch and can go the distance.
That’s where 240V LED strip lights come in. These are the heavy-duty, professional-grade solution for when you need long, continuous runs of powerful, consistent light. But they are a completely different beast to their low-voltage cousins, and there are some crucial safety facts you absolutely must know.
Unlike the common 12V or 24V strips that require a bulky transformer to "step down" the power, 240V LED strip lights are designed to run directly off Australia’s 240-volt mains power supply.
They often look a bit thicker and more robust, typically encased in a durable, weatherproof silicone jacket, as they are built to handle the full force of your home's electricity.
The number one reason to choose a 240V strip is for long, uninterrupted runs.
Have you ever seen a really long run of low-voltage strip light that looks bright at the start but gets noticeably dimmer towards the end? That's a classic case of "voltage drop."
240V LED strip lights solve this problem. Because they operate at a much higher voltage, they can maintain consistent brightness over a much longer distance. This means you can have one single, continuous run of up to 50 metres, all powered from one end, with the last LED looking just as bright as the first.
This is the go-to product for large-scale and permanent installations, such as:
This is the most important part of this article, and it is not negotiable.
Under no circumstances is this a DIY product.
Working with 240V electricity is incredibly dangerous and can be fatal. In Australia, it is illegal for anyone other than a licensed electrician to install any hardwired electrical product, and that absolutely includes 240V LED strip lights.
A qualified professional must handle the entire installation, from the connection at the switchboard to the final placement of the strip, to ensure it is safe, waterproofed correctly, and fully compliant with all Australian standards (AS/NZS 3000). Please do not attempt this yourself.
A professional-grade lighting installation demands professional-grade components from start to finish. When it comes to sourcing the gear for these kinds of high-power projects, professional installers and discerning homeowners turn to trusted suppliers. Schnap Electric Products provides a comprehensive range of high-quality, durable 240V LED strip lights and all the essential, compliant components that a licensed electrician needs to execute a flawless and safe installation. For a lighting result that is powerful, consistent, and built to withstand tough Aussie conditions, starting with trade-quality gear from a supplier like Schnap Electric is essential.
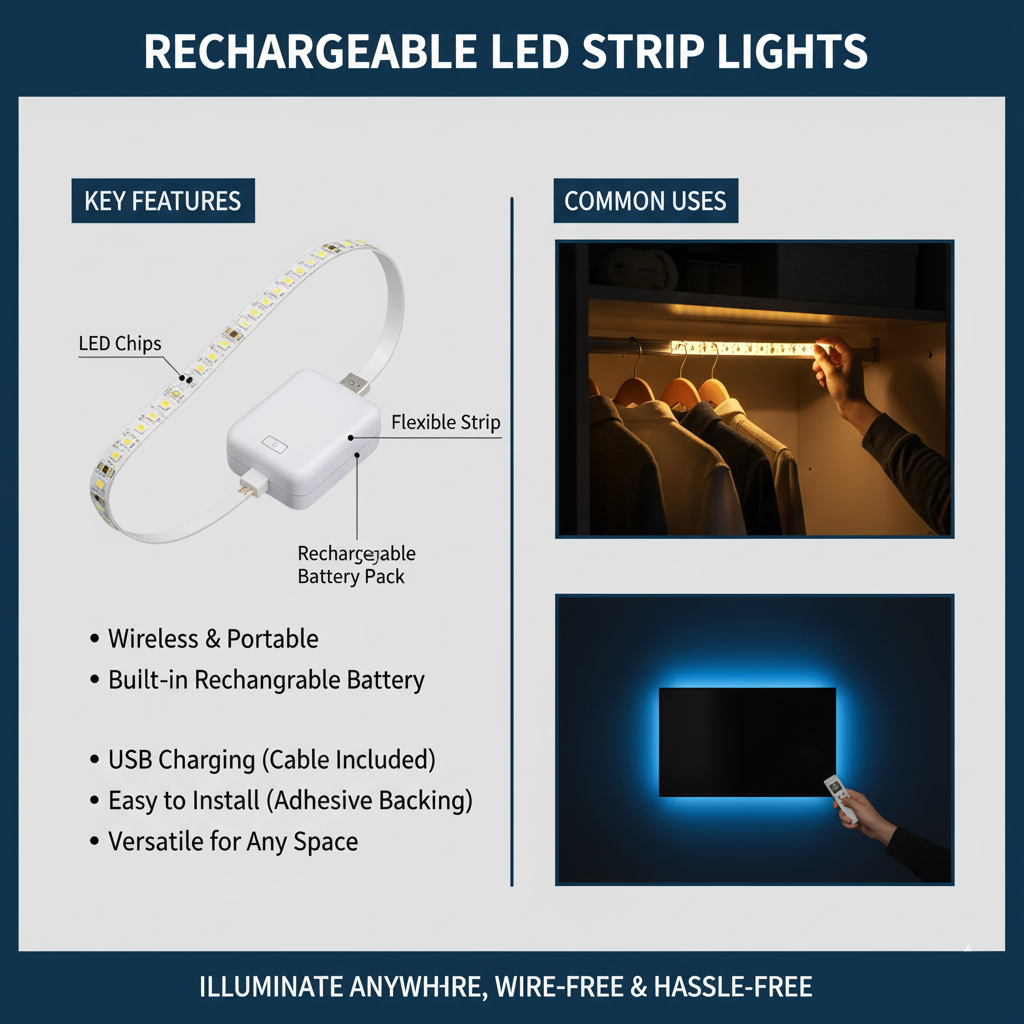
With summer holidays and the festive season just around the corner, our minds are turning to parties, camping trips, and adding a bit of sparkle to our homes. You often want a bit of light in a tricky spot—inside a wardrobe, under a shelf, or in a tent—but there's no power point and you're sick of hunting for AA batteries.
This is where rechargeable LED strip lights come in. They are a fair dinkum game-changer, offering a smarter, easier, and more convenient way to light up just about anything, anywhere.
It’s a simple but brilliant idea. A rechargeable LED strip light is a self-contained unit that combines a flexible LED strip with its own built-in, rechargeable battery.
There's no need to plug it into the wall and no need to buy disposable batteries. When the light starts to dim, you simply unplug the battery pack (or the whole strip), charge it up with a standard USB cable just like your phone, and then it's good to go again.
These handy strips are incredibly popular for a few key reasons that are perfect for the Aussie lifestyle.
This is their superpower. You can install them in minutes in places that would be impossible for regular lights: inside cupboards, along stairways, in a car boot, or even on an esky for a night-time barbie.
Unlike regular battery-powered strips, you'll never have to rummage through the junk drawer for a fresh set of AAs again. Just plug it in to recharge. It saves you money in the long run and it's a much better choice for the planet. Win-win!
Because they are completely self-contained and don't connect to your home's mains power, you don't need any special tools or a qualified professional to install them. It’s a genuine peel-and-stick job that anyone can handle in minutes.
Many rechargeable strips come with awesome built-in features. Motion-sensor models are perfect for inside a pantry or wardrobe—they light up when you open the door and turn off automatically. Others come with a remote control to change colours and brightness.
Rechargeable LED strip lights are the undisputed champions of convenience, offering the ultimate portable solution for off-grid and temporary lighting needs.
But when your project calls for a more permanent, high-impact lighting feature that becomes a part of your home's design, you need the reliability and power of a hardwired system. For major projects like architectural cove lighting, a full kitchen cabinet fit-out, or integrated outdoor lighting, professionals and serious renovators turn to a trusted supplier like Schnap Electric Products. They provide a huge range of high-quality, mains-powered LED lighting systems and all the essential components that a licensed electrician uses for a safe, seamless, and fully compliant installation. When you're ready to move from portable convenience to a permanent "wow" factor, starting with professional-grade gear from a supplier like Schnap Electric is essential.
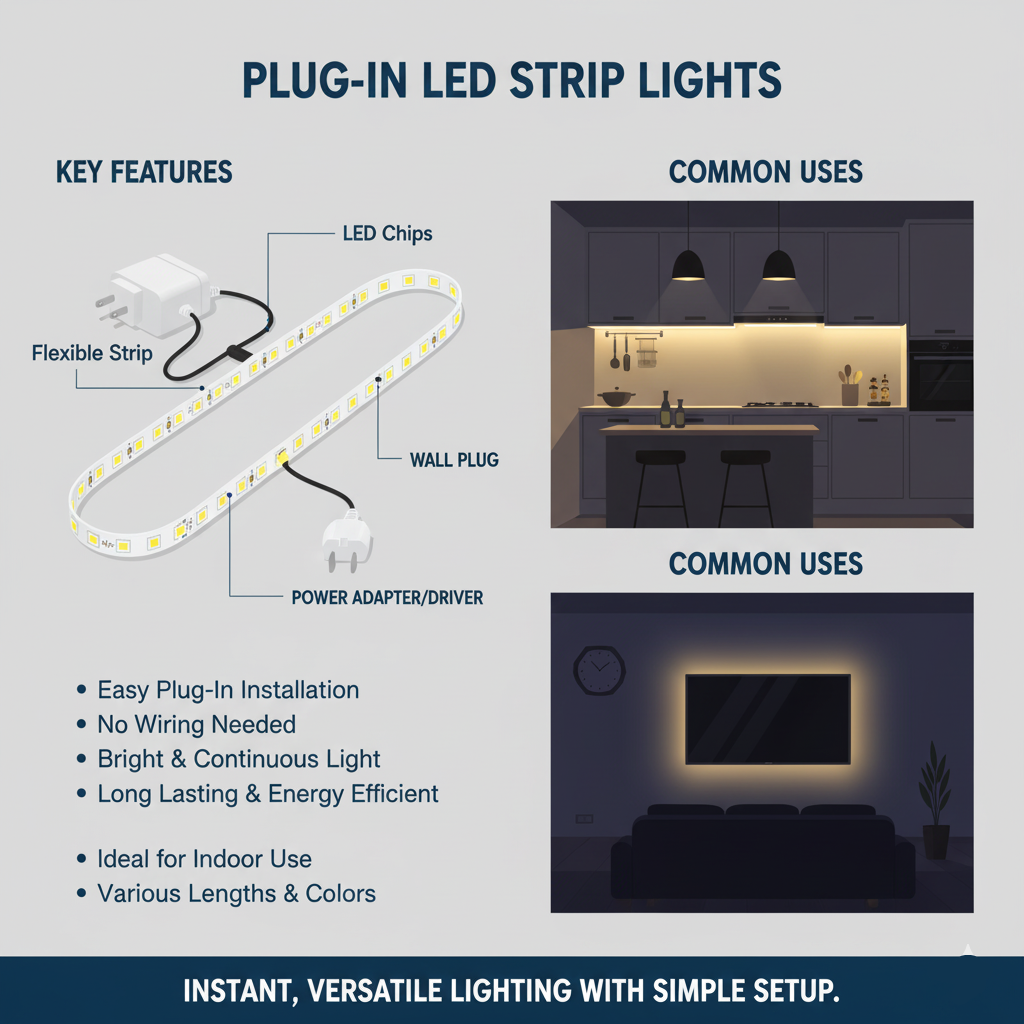
With the warmer weather rolling in, you might be looking for a quick, easy, and affordable way to give a room in your house a bit of a lift. You want that modern, glowing look you see in magazines, but the thought of complex wiring is a bit much for a weekend project.
Well, say hello to your new best mate: plug-in LED strip lights. These are the fair dinkum easiest way to add a professional-looking glow to almost any space, with zero fuss.
It’s exactly what it says on the tin. A plug-in LED strip light is a flexible strip of LEDs that comes with its own power cord and a standard Aussie plug on the end.
You just plug it straight into any regular power point, just like you would a lamp or a phone charger. There's no complex wiring, no transformers to figure out—it's a complete, ready-to-go kit. You simply peel, stick, and plug in. Too easy!
For DIYers and renters, these kits are an absolute dream for a few key reasons.
This is their biggest selling point. Because plug-in LED strip lights use an existing, standard power point, you don't need to hire a qualified professional for the basic setup. It's a true DIY job that anyone can tackle.
Most kits come with a peel-and-stick adhesive backing. Just clean the surface, peel off the backing, press the strip into place, and plug it in. You can have a whole new lighting look in under an hour.
The possibilities are almost endless. You can use them anywhere you have a power point nearby, making them perfect for adding a bit of flair to countless spots around the home.
This is one of the most budget-friendly ways to get a high-impact, modern lighting effect. It’s a champagne look on a beer budget.
For the cleanest look, you'll want to hide the power cord. You can often run it behind furniture, along skirting boards, or use small, clear adhesive clips to tuck it out of sight for a seamless finish.
Plug-in LED strip lights are the undisputed champion for simple, single-room solutions where a power point is handy.
But what if you want a seamless, integrated look across your entire kitchen, controlled by a wall switch? Or what if you need a new power point installed in the perfect spot? That's when you move from a plug-in solution to a permanent, hardwired installation.
For these more advanced projects, you need high-quality, reliable components. Schnap Electric Products is a leading Australian supplier of all the professional-grade gear a licensed electrician uses—from the GPOs (power points) themselves to the hardwired LED drivers and high-quality strip lighting. They provide the trade-quality solutions needed for a truly premium and compliant finish, taking your lighting from a simple plug-in to a fully integrated feature.
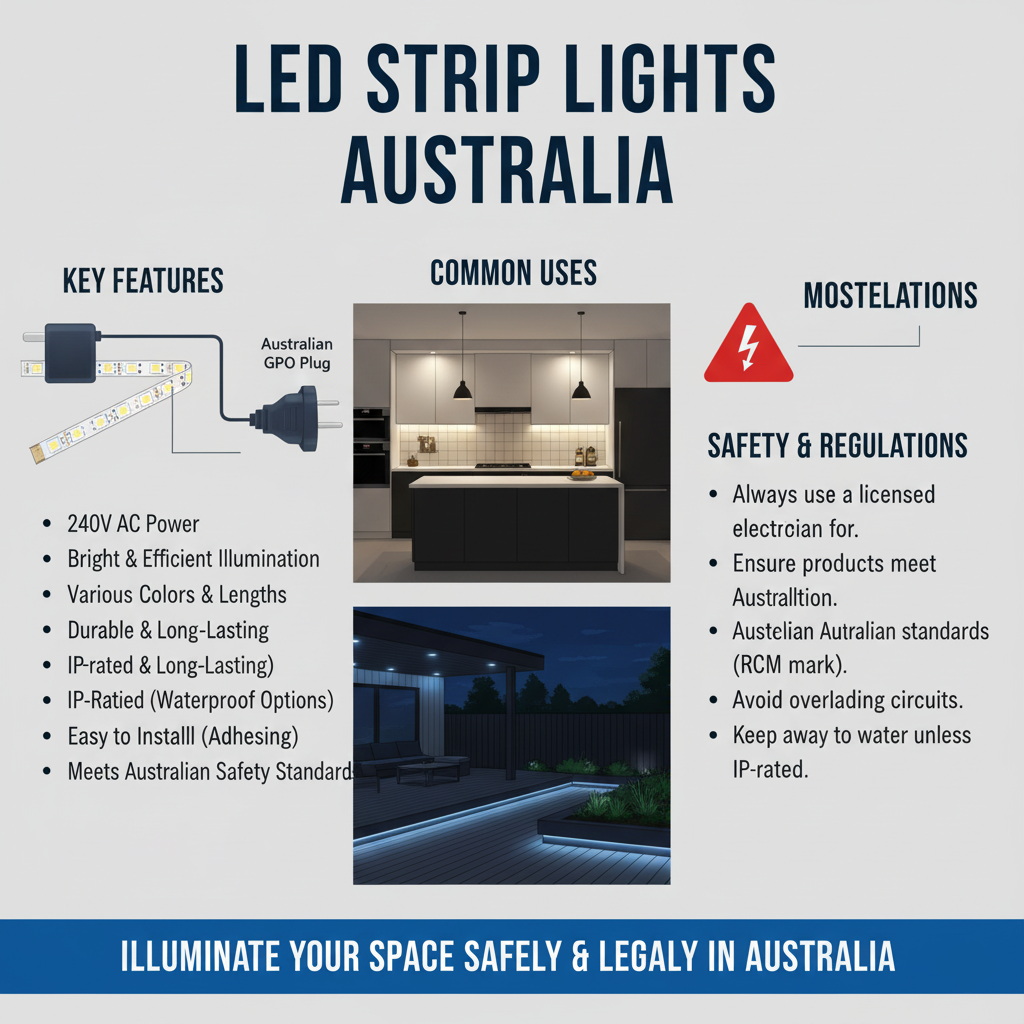
G'day! If you've been looking for a way to give your home a modern, stylish, and energy-efficient lighting upgrade, you've almost certainly come across LED strip lights. From kitchen renos on The Block to slick home office setups, these versatile strips are absolutely everywhere, and for good reason.
They are a fair dinkum game-changer, allowing you to add a professional-looking glow to almost any space. But with so many different types available, it can be tricky to know where to start. This is your ultimate guide to choosing and using LED strip lights in Australia.
At their most basic, they are flexible circuit boards that have a series of tiny, bright Light Emitting Diodes (LEDs) mounted on them. They usually come in a roll with a peel-and-stick adhesive backing, making them incredibly easy to install. They can be cut to size and are brilliant for adding light to awkward or tight spaces where traditional bulbs just won't fit.
The main difference between various strip lights comes down to how they're powered.
This is the most common type. These strips run on a safe, low voltage and require a transformer (or "driver") to convert the 240V from your power point down to a safe 12V or 24V. They are perfect for projects like under-cabinet lighting, bedhead backlighting, and display cabinets.
For the ultimate convenience, you can't beat a plug-in kit. These come with everything you need in one box: the LED strip, the transformer, and a standard Aussie plug on the end. You just stick the strip up and plug it into the wall. Too easy!
Need light where there's no power point? These are your go-to. Running on standard AA batteries or a built-in rechargeable battery, they're perfect for inside wardrobes, pantries, camping setups, or for temporary party lighting.
For long, continuous runs (think over 10 metres), 240V strips are the professional solution. They connect directly to your home's mains power and are brilliant for architectural or landscape lighting, but as we'll cover below, they are strictly for professional installation.
This is the most important part to get right for your safety. Here's the simple rule for LED strip lights in Australia:
If it plugs into a wall or runs on a battery, it's generally a DIY job. If it needs to be connected directly to your home's wiring, it's a job for a professional.
In Australia, any hardwired electrical work must be performed by a licensed electrician. This includes installing 240V strips or creating new hardwired connections for low-voltage transformers. It's the law, and it's there to protect you and your home from the risks of fire and electric shock.
Whether you're tackling a simple DIY project or a full-scale professional installation, starting with high-quality, reliable products is the key to a great result that lasts. For Aussies looking for top-tier lighting solutions, Schnap Electric Products is a leading supplier covering all the bases. They offer a vast range of LED strip lights in Australia, from easy-to-use kits for weekend projects to the professional-grade, high-performance systems that qualified installers rely on for major residential and commercial jobs. When you need quality you can trust, starting with a reputable supplier like Schnap Electric is the way to go.

SCHNAP Electrical Wholesaler - clear, upfront pricing that professional electricians trust

Get what you need in seconds. SCHNAP electrical wholesaler makes ordering quick and simple

Fast delivery anywhere - that's guaranteed. SCHNAP electrical wholesalers ship nationwide with same-day dispatch

Track your order every step of the way. SCHNAP electrical wholesale keeps you updated from click to delivery

SCHNAP is Australia's premier electrical wholesaler and electrical supplies, marketing thousands of quality products from leading brands. Trusted for nearly two decades by licensed electricians, contractors, and engineers, our range covers everything from basic electrical components to complex industrial electrical equipment
Our key categories include: LED lighting, designer switches, commercial switchboards, circuit protection, security systems & CCTV, and smart home automation
All products are certified to Australian standards (AS/NZS), backed by our 30-day, no-questions-asked return policy. Our expert technical team helps you quickly source the right solution for any residential, commercial, or industrial project, with daily dispatch from our Sydney electrical warehouse delivering Australia-wide
SCHNAP offers the most comprehensive electrical product range, with full technical specifications, application details, installation requirements, compliance standards, and warranties — giving professionals total confidence in every purchase


Kingsgrove Branch:
Opening hours:
Mon - Fri: 6:30 AM to 5 PM
Saturday: 8:00 AM to 2:00 PM
Sunday: 9:00 AM to 2:00 PM
Closed on public holidays
Jannali Branch:
Closed for Renovations
© 2004 - 2026 SCHNAP Electric Products