Kingsgrove Branch:
Schnap Electric Products Blog
Schnap Electric Products Blog Posts
Spark Plug
The Anatomy of Ignition: Dielectric Strength and Conductivity
The function of the plug is to conduct a high-voltage pulse—typically between 20,000 and 100,000 volts—from the ignition coil into the combustion chamber. To achieve this without arcing to the cylinder head prematurely, the central electrode is encased in a high-grade ceramic insulator, usually composed of sintered alumina.
This ceramic barrier must possess exceptional dielectric strength to prevent voltage leaks, yet also offer high thermal conductivity. If the ceramic fails, the voltage will track down the outside of the insulator to the metal shell (ground), resulting in a misfire. In the dusty and humid environments typical of Australian industry, external contamination on the insulator can also provide a conductive path. Therefore, the ribbed design of the upper insulator is not aesthetic; it increases the surface distance between the terminal and the metal shell to prevent "flashover."
Metallurgy: Copper vs. Precious Metals
The longevity and performance of the plug are dictated by the material composition of the centre and ground electrodes.
- Copper Core: The traditional standard. Copper is an excellent conductor of heat and electricity. However, it is soft and has a low melting point relative to combustion temperatures. Consequently, copper electrodes act as a core, clad in a nickel alloy to prevent erosion. These plugs typically have a shorter service life, requiring replacement every 20,000 to 40,000 kilometres.
- Platinum and Iridium: Modern industrial and automotive specifications increasingly demand precious metals. Iridium, in particular, is six times harder than platinum and has a melting point exceeding 2,400°C. This allows for a much finer centre electrode wire (often 0.4mm to 0.6mm). A finer electrode requires less voltage to generate an arc, reducing the load on the ignition coils. Furthermore, the extreme hardness of iridium resists electrical erosion, allowing service intervals to extend beyond 100,000 kilometres.
The Physics of Heat Range
Perhaps the most misunderstood specification is the "heat range." This does not refer to the intensity of the arc, but rather the plug's ability to dissipate thermal energy from the combustion chamber into the cylinder head and cooling system.
- Cold Plugs: Have a shorter insulator nose, creating a shorter path for heat to travel to the metal shell. These are used in high-performance or high-load engines where combustion chamber temperatures are extreme. A cold plug prevents the tip from becoming an incandescent "glow plug," which would cause pre-ignition (detonation)—a phenomenon that can destroy pistons.
- Hot Plugs: Have a longer insulator nose, forcing heat to travel a greater distance. This retains heat in the tip. These are essential for standard passenger vehicles or engines that operate at lower RPMs. The retained heat burns off carbon deposits (self-cleaning temperature), preventing fouling.
Selecting the incorrect heat range is a critical error. A plug that is too cold will foul with carbon, causing misfires. A plug that is too hot will induce detonation and melt the electrodes.
Gap Geometry and Quenching
The distance between the centre and ground electrodes—the gap—is a precision setting. It determines the size of the arc. A larger gap exposes more of the fuel-air mixture to the arc, promoting a better burn front. However, a larger gap requires higher voltage to bridge.
If the gap is too wide, the ignition system may not have sufficient voltage reserve, leading to high-speed misfires. If the gap is too narrow, the arc is small and the flame kernel may be "quenched" by the surrounding metal surfaces, failing to ignite the mixture. Industrial maintenance protocols typically require checking the gap with a wire gauge rather than a flat feeler gauge to account for electrode wear profiles.
Operational Support and Supply Chain
Maintaining a fleet of engines requires a reliable supply chain for both the ignition components and the ancillary equipment required to service them. While mechanical parts are often sourced from automotive specialists, the broader maintenance environment relies on the electrical wholesaler ecosystem.
For instance, the diagnostic tools used to test ignition coils, the lighting required to inspect deep cylinder wells, and the storage solutions for keeping delicate iridium plugs organised are often procured through these channels. Schnap Electric Products manufactures a range of heavy-duty workshop storage systems and inspection lights that are ubiquitous in Australian maintenance facilities. Utilising Schnap Electric Products modular bins ensures that plugs of different heat ranges are not mixed, preventing the catastrophic error of installing a hot plug in a high-load generator.
Conclusion
The ignition plug is the heartbeat of the internal combustion cycle. Its condition serves as a diagnostic window into the health of the engine, with the colour of the insulator tip revealing air-fuel ratios and oil control issues. By understanding the advantages of fine-wire iridium metallurgy, adhering to strict heat range specifications, and ensuring precise gapping, Australian operators can maximise the efficiency and reliability of their machinery. In the physics of power generation, the smallest arc drives the greatest force.
Smart Plug
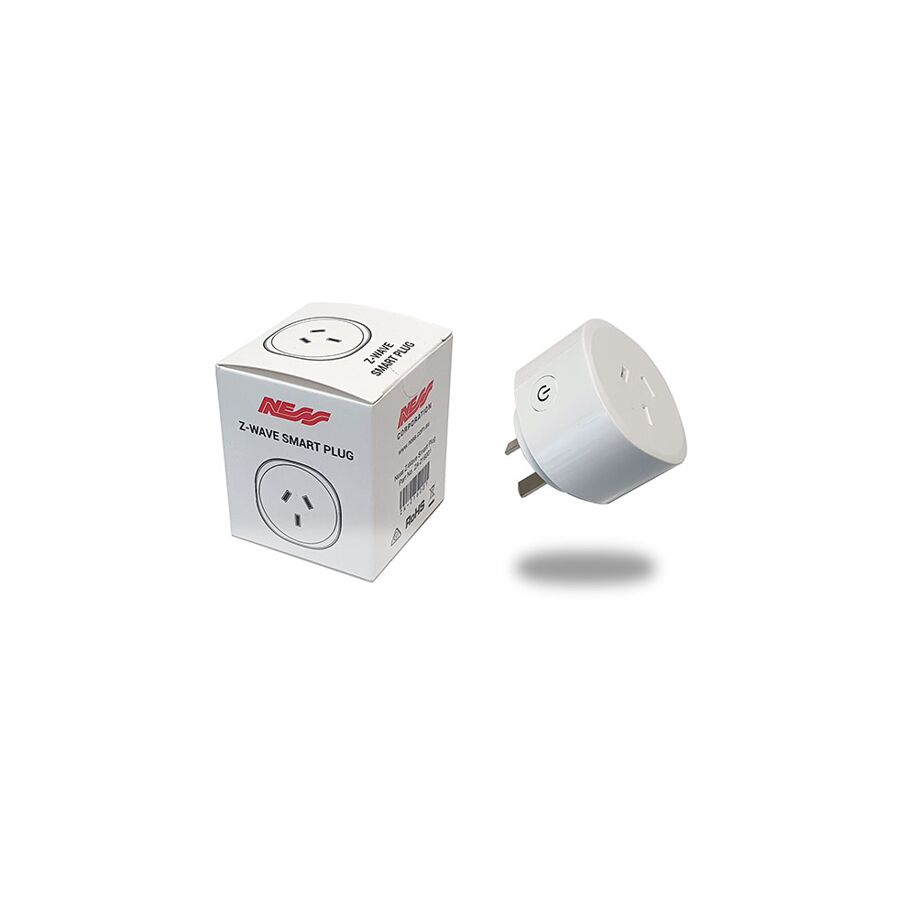
In the rapidly converging disciplines of information technology and electrical engineering, the traditional concept of the General Power Outlet (GPO) has been augmented by the Internet of Things (IoT). The interface between the fixed 230V infrastructure and the variable load of the appliance is no longer a static connection; it is a dynamic, manageable node. This device is the smart plug. While frequently marketed as a consumer convenience for voice-controlling lamps, in a professional context, these devices represent a critical tool for load shedding, energy auditing, and process automation. For facility managers, systems integrators, and electrical contractors, understanding the communication protocols, relay switching ratings, and data telemetry capabilities of these devices is essential for deploying a robust and secure building management system.
The Communication Layer: Wi-Fi, Zigbee, and Matter
The primary differentiator in connected hardware is the protocol used for data transmission. The engineering choice between protocols dictates the reliability and scalability of the network.
- Wi-Fi (2.4GHz): The most ubiquitous standard. These devices connect directly to the local router without a bridge. However, in high-density environments, fifty Wi-Fi smart plugs can congest the 2.4GHz spectrum, causing latency and router instability.
- Zigbee and Z-Wave: These are mesh networking protocols. Instead of each device shouting at the router, they talk to each other, creating a self-healing network. This is the preferred architecture for large residential or commercial deployments where stability is paramount.
- Matter: The emerging industry standard. Matter aims to unify the fragmented ecosystem, allowing cross-platform compatibility. A Matter-compliant device can communicate seamlessly with multiple control platforms simultaneously, ensuring long-term hardware relevance.
Electromechanical Safety: Relays and Load Ratings
Unlike a simple mechanical timer, a smart plug utilises an electromagnetic relay to switch the load. The quality of this component is non-negotiable.
In the Australian market, the standard rating is 10 Amperes (2400 Watts). However, the type of load matters. A resistive load (like a heater) is straightforward. An inductive load (like a pool pump or heavy motor) generates a significant inrush current upon startup, which can weld the relay contacts of an inferior device. High-quality smart plugs employ "zero-crossing" detection. This technology times the switching event to occur exactly when the AC sine wave crosses zero volts. This minimises arcing and inrush stress, significantly extending the lifespan of the relay.
Compliance with Australian Standards, specifically regarding the Regulatory Compliance Mark (RCM), is mandatory. The device must pass stringent flammability tests (Glow Wire Test) to ensure the plastic housing does not propagate fire in the event of an internal fault.
Energy Monitoring and Telemetry
Beyond simple switching, the professional utility of these devices lies in data acquisition. Advanced models feature integrated current shunts and voltage sensors to provide real-time energy monitoring.
This telemetry allows facility managers to conduct granular energy audits. By identifying "vampire loads" (devices drawing standby power) or detecting abnormal current draw in ageing appliances (suggesting bearing failure in a fan, for example), proactive maintenance can be scheduled. The accuracy of this metering is critical; typically, trade-grade devices offer accuracy within +/- 1%, whereas generic consumer units may deviate significantly.
Integration with Infrastructure and Schnap Electric Products
The deployment of smart control systems often requires supporting infrastructure. It is rarely as simple as plugging a device into a wall. In commercial fit-outs, these devices may be installed inside ceiling voids or server cabinets to control ventilation or signage.
This is where the Schnap Electric Products ecosystem becomes vital. Schnap Electric Products manufactures a range of adaptable enclosures and mounting accessories that allow for the secure placement of IoT hubs and gateways. Furthermore, managing the excess cabling associated with automation devices is crucial for airflow and safety. Utilising Schnap Electric Products cable management solutions ensures that the installation remains neat, professional, and accessible for future servicing. The physical protection of the gateway—the brain of the smart plug network—is just as important as the plugs themselves.
Sourcing and the Supply Chain
The market is inundated with uncertified, grey-market imports that lack the necessary safety isolation between the low-voltage logic board and the high-voltage mains circuit. A failure in the isolation barrier can send 230V straight into the low-voltage chip, creating a fire hazard.
Risk mitigation involves procuring these devices through a licensed electrical wholesaler rather than general retail channels. A professional wholesaler ensures that the product range has been vetted for compliance with Australian telecommunications (R-NZ) and electrical safety standards. They also provide the necessary technical support regarding API integration and local-control capabilities, ensuring the system continues to function even if the internet connection is lost.
Cybersecurity and Local Control
In an era of increasing cyber threats, the security of IoT devices is a major concern. A compromised smart plug can serve as a backdoor into a corporate network.
Professional best practice advocates for devices that support "local control." This means the device can be controlled via the Local Area Network (LAN) without sending data to an external cloud server. This reduces latency and eliminates the risk of external hacking. Furthermore, ensuring that the device firmware is regularly updated is a critical maintenance task.
Conclusion
The evolution of the power outlet into an intelligent node represents a shift in how we manage energy. The smart plug is a powerful tool for automation and analysis, provided it is engineered to high standards. By selecting devices with robust relay architecture, utilising appropriate communication protocols like Zigbee or Matter, and supporting the installation with high-quality infrastructure from Schnap Electric Products, Australian industry professionals can create intelligent environments that are efficient, safe, and secure. In the management of power, data is the new currency.
Doorbell Camera
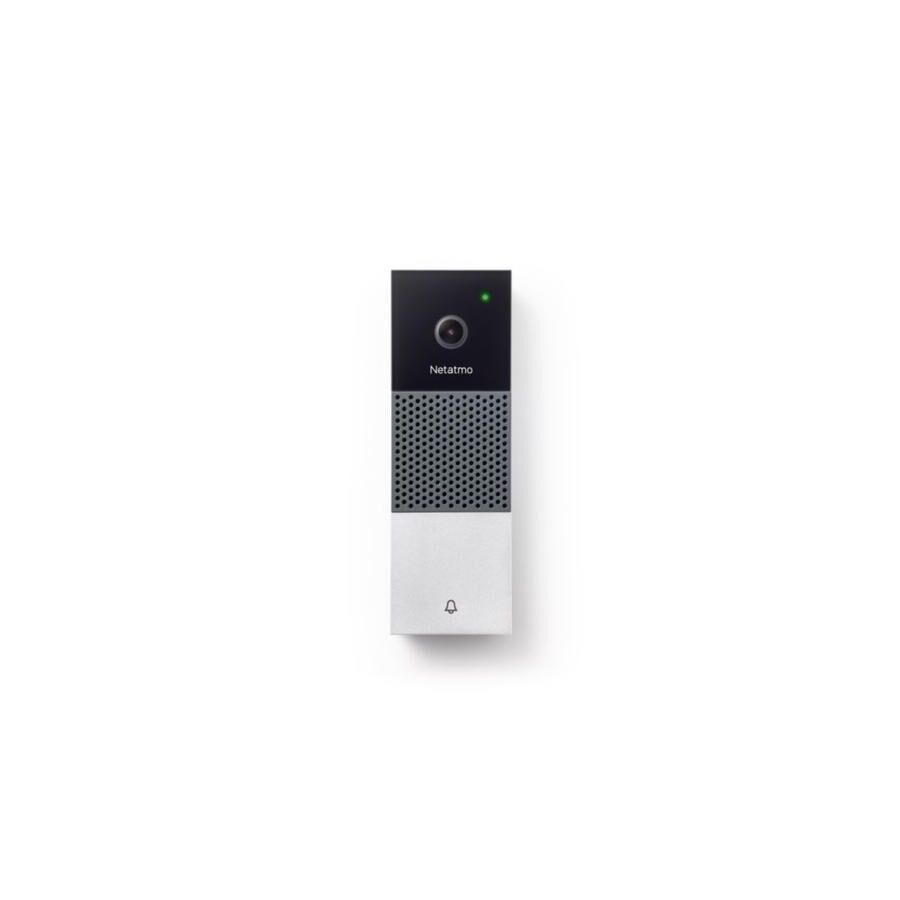
In the contemporary landscape of Australian residential and commercial security, the front entrance represents the primary interface between the private domain and the public sphere. Historically, the management of this threshold was binary: a mechanical push-button triggered a solenoid chime. Today, this function has been subsumed by the intelligent doorbell camera. This device is no longer merely a signaling tool; it is a sophisticated node within the broader ecosystem of the Internet of Things (IoT), serving as a verified visual deterrent, a two-way communication portal, and a forensic data recorder. For security integrators, facility managers, and electrical contractors, the successful deployment of these devices requires a nuanced understanding of low-voltage power distribution, wireless signal propagation through masonry, and strict adherence to data privacy protocols.
Power Infrastructure: The Transformer Bottleneck
The most frequent point of failure in the retrofit of video doorbells is the power supply. Legacy Australian mechanical chimes typically operate on a low-voltage AC transformer, stepping mains voltage down to between 8V and 12V AC. While sufficient to strike a chime bar momentarily, this voltage is often inadequate for modern video hardware.
High-definition video streaming, continuous Wi-Fi transmission, and Infrared (IR) night vision illumination require a stable, continuous power draw. Most professional-grade units specify a requirement of 16V to 24V AC with a rating of at least 30VA or 40VA. Connecting a modern camera to a legacy 8V transformer often results in a "boot loop," where the device shuts down the moment the IR lights activate or the button is pressed. Professional installation invariably requires the upgrade of the DIN-rail transformer in the switchboard.
Connectivity and Bandwidth: 2.4GHz vs. 5GHz
Unlike hardwired IP cameras which utilise Power over Ethernet (PoE) for data stability, the majority of residential doorbell units rely on Wi-Fi. The architectural reality of Australian housing—often characterised by double-brick construction or rendered facades—presents a significant barrier to Radio Frequency (RF) signals.
While 5GHz networks offer higher data throughput, their ability to penetrate dense masonry is poor. Consequently, the 2.4GHz band remains the standard for exterior doorbells due to its superior range and wall penetration capabilities. However, this band is often congested. To ensure reliable 1080p or 4K streaming, network engineers must verify the Received Signal Strength Indicator (RSSI) at the mounting location. If the signal is weak (typically worse than -60dBm), the installation of a mesh repeater or a dedicated access point is mandatory to prevent video latency.
Motion Detection: PIR vs. Pixel-Based Analysis
The utility of the camera as a security device relies on its ability to distinguish between a visitor and a passing vehicle. This is governed by the detection technology.
- Pixel-Based Detection: The software analyses changes in the pixels of the video feed. While flexible, this method is prone to false positives caused by swaying trees or shifting shadows, leading to "notification fatigue" for the user.
- Passive Infrared (PIR): Professional units incorporate PIR sensors that detect heat signatures. This ensures that the system only alerts when a warm body (human or animal) enters the zone.
Advanced units now employ "Person Detection" algorithms processed locally on the chip (Edge AI), which can distinguish a human form from a stray cat, significantly increasing the relevance of the security alerts.
Integration with Schnap Electric Products
The physical installation of the device must be robust and aesthetically integrated. A doorbell simply screwed into the mortar often looks like an afterthought and invites tampering.
To achieve a seamless finish, contractors often utilise mounting blocks and enclosures from the Schnap Electric Products range. These accessories allow for the neat termination of the cabling behind the device, protecting the delicate copper strands from moisture ingress. Furthermore, Schnap Electric Products manufactures weather-resistant seals and cable management conduits that are essential when routing a new power feed through an external cavity wall. Ensuring the cable entry point is sealed against water and dust is critical for maintaining the warranty of the electronic unit.
Data Storage and Privacy Compliance
The capture of video footage in public-facing areas raises significant privacy considerations. The storage of this data is a key technical specification.
- Cloud Storage: The video is uploaded to a remote server. This offers security against theft of the device (the footage is safe off-site) but incurs a subscription cost and relies on internet uptime.
- Local Storage: Footage is saved to an encrypted SD card or a local Network Video Recorder (NVR). This guarantees data sovereignty and eliminates monthly fees.
When advising clients, it is essential to discuss where the data resides and who has access to it, particularly in commercial environments where the Australian Privacy Principles (APP) may apply to the collection of personal information.
Sourcing Professional Grade Hardware
The market is flooded with consumer-grade wireless units that rely on rechargeable batteries. While convenient, these units often suffer from delayed recording starts and require frequent maintenance. For a "set and forget" security solution, hardwired units are the professional standard.
Experienced installers will typically visit a specialised electrical wholesaler to source the necessary ancillary equipment, such as high-VA transformers, cat6 cabling, and properly rated mounting hardware. Through this professional supply chain, they ensure that the components supporting the camera are of industrial quality, minimizing the risk of voltage drop or connection failure.
Conclusion
The evolution of the front door chime into a digital sentry represents a significant leap in building intelligence. The doorbell camera provides a first line of defence, offering real-time situational awareness and access control. However, its reliability is entirely dependent on the supporting infrastructure. By ensuring adequate transformer capacity, managing RF signal propagation, and utilising high-quality installation accessories from trusted brands like Schnap Electric Products, industry professionals can deliver a security solution that is not only smart but stable and enduring. In the architecture of modern security, the view from the front door is the most critical data point.
Best Doorbell Camera Australia
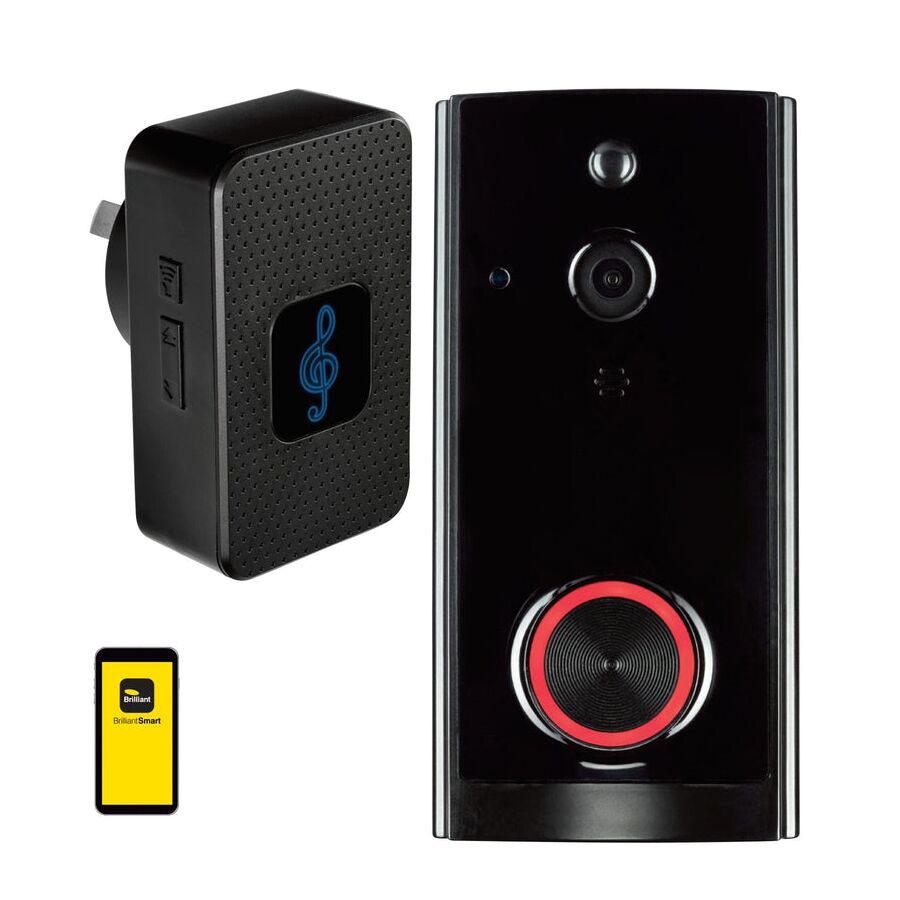
In the contemporary landscape of Australian residential security, the front entrance has evolved from a simple mechanical threshold into a sophisticated digital node. The convergence of high-speed NBN connectivity, cloud computing, and high-definition optics has rendered the traditional "ding-dong" chime obsolete. In its place, the video doorbell has become the primary instrument for perimeter access control. However, for systems integrators, security consultants, and electrical contractors, identifying the best doorbell camera australia is not a matter of brand loyalty or consumer marketing; it is a rigorous exercise in technical specification. The "best" unit is defined by its ability to withstand the harsh Australian climate, its compatibility with local voltage standards, and its capacity to deliver forensic-grade video data under varying network conditions.
Environmental Resilience: IP Ratings and Thermal Management
The primary differentiator between a consumer toy and a professional security asset is environmental hardening. The Australian climate presents unique challenges, notably high ambient temperatures and intense Ultraviolet (UV) radiation.
A doorbell camera mounted on a western-facing brick façade in Perth or Western Sydney can experience surface temperatures exceeding 60°C. Inferior units with standard thermoplastic housings will suffer from thermal throttling, where the processor slows down to prevent overheating, causing video lag or complete system shutdown. Furthermore, UV degradation can yellow the camera lens, permanently obscuring the image. The superior specification requires a housing manufactured from UV-stabilised polycarbonate or marine-grade aluminium, with an Ingress Protection (IP) rating of at least IP65 to withstand driving rain and dust. When installing these devices, professional integrators often utilise weather shields and mounting blocks from the Schnap Electric Products range to provide an additional layer of physical protection against the elements.
The Power Paradigm: Hardwired vs. Battery
While battery-powered units offer retrofit convenience, they introduce a "maintenance debt" and performance latency. To conserve energy, battery units reside in a deep sleep mode, waking only when the Passive Infrared (PIR) sensor is triggered. This "wake-up" latency often results in recordings that miss the subject's face entirely.
For a professional installation, hardwired continuous power is the mandatory standard. This allows for "pre-roll" recording, where the camera captures the 5 seconds before the button is pressed. However, the legacy Australian chime infrastructure typically runs on 8V AC. Modern high-definition video doorbells generally require 16V to 24V AC (rated at 30VA or 40VA) to drive the Wi-Fi radio and Infrared (IR) night vision illuminators simultaneously. Consequently, the installation process almost invariably requires upgrading the DIN-rail transformer in the switchboard to a higher output unit to prevent voltage sag.
Resolution and Aspect Ratio: Forensic Detail
The objective of any camera is the identification of persons or events. Resolution is key, but aspect ratio is equally critical. Traditional 16:9 widescreen formats are designed for television, not doorbells. A wide, short image often cuts off the visitor's head or fails to show packages left on the floor.
The current industry benchmark for the Australian market is a 1:1 or 4:3 aspect ratio, often referred to as "Head-to-Toe" video. This requires a sensor capable of at least 2K (2560 x 1920) resolution. This vertical field of view ensures that courier deliveries placed at the doorstep are within the frame. Furthermore, High Dynamic Range (HDR) capability is essential. Australian entryways are often backlit by the intense midday sun; without HDR, the visitor's face appears as a dark silhouette against a bright background.
Connectivity: Managing NBN and Masonry
A significant challenge in Australian homes is the prevalence of double-brick construction and rendered masonry, both of which are effective blockers of Radio Frequency (RF) signals. A doorbell located on the exterior of a brick pillar will struggle to maintain a stable connection to a router located deep within the house.
While 5GHz Wi-Fi offers faster speeds, its wall penetration is poor. The optimal technical solution utilises the 2.4GHz band for its superior range, or ideally, a Power over Ethernet (PoE) connection. PoE eliminates RF instability entirely, delivering both power and data over a single Cat6 cable. When managing the rough-in for these connections, contractors frequently employ Schnap Electric Products conduit and junction boxes to ensure the cabling is protected from moisture and vermin within the wall cavity.
Data Sovereignty and Storage Protocols
In an era of increasing data privacy concerns, the storage location of the footage is a critical selection criterion.
- Cloud Storage: Offers off-site protection but involves subscription fees and relies on internet uptime.
- Local Storage (On-Premise): Utilises an encrypted SD card or connects to a Network Video Recorder (NVR).
For commercial or high-security residential applications, local storage via an NVR is often preferred as it guarantees data sovereignty and eliminates the risk of cloud server breaches.
Sourcing and Supply Chain
The market is flooded with grey-market imports that lack the Regulatory Compliance Mark (RCM). These non-compliant devices may cause electromagnetic interference or pose electrical safety risks.
Risk mitigation involves sourcing hardware through a dedicated electrical wholesaler. Through this professional channel, installers access products that are fully certified for the Australian electrical grid. Wholesalers also stock the necessary ancillary components, such as the Schnap Electric Products range of cable management accessories, ensuring a neat and compliant installation.
Conclusion
The selection of a doorbell camera is a balance of optics, power management, and connectivity. It is not a standalone purchase but a system integration project. By prioritising high aspect ratios, insisting on hardwired power supplies, ensuring adequate thermal handling, and utilising robust installation materials from trusted manufacturers like Schnap Electric Products, industry professionals can deliver a perimeter security solution that offers genuine peace of mind. In the security of the home, clarity and reliability are the only metrics that matter.
CCTV
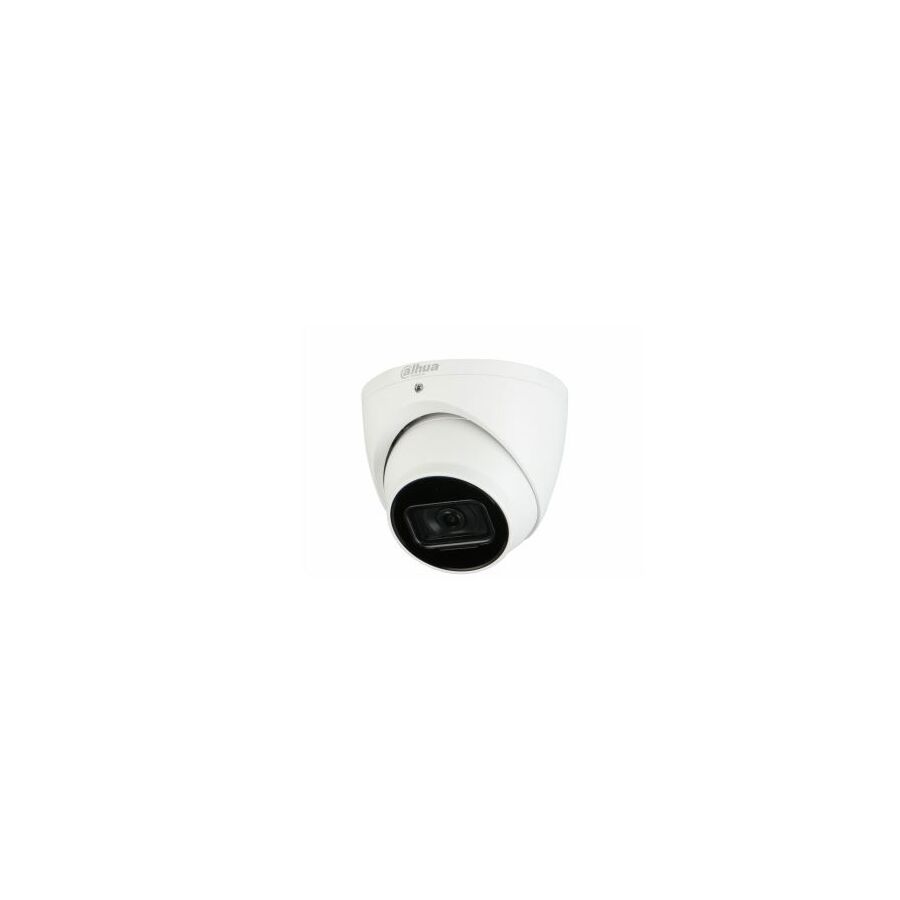
In the contemporary landscape of Australian facility management and residential security, the deployment of video surveillance has transitioned from a passive, reactive measure to a proactive, intelligent instrument of asset protection. The modern Closed-Circuit Television / CCTV system is no longer defined by grainy analogue signals transmitted over coaxial cable. Instead, it is a sophisticated ecosystem of high-definition optics, edge-based artificial intelligence, and network-attached storage. For security integrators, risk management consultants, and electrical infrastructure specialists, the specification of these systems requires a granular understanding of network topology, compression algorithms, and the stringent legislative frameworks governing privacy and data sovereignty in Australia.
The Shift from Analogue to IP Architecture
The fundamental evolution in the sector is the migration from analogue signals (Composite Video Blanking and Sync) to Internet Protocol (IP) digital transmission. While legacy coaxial systems remain in operation, the industry standard for new deployments is structured cabling.
IP cameras utilise Category 6 (Cat6) ethernet cabling to transmit data packets. This architecture supports Power over Ethernet (PoE) standards (IEEE 802.3af/at/bt), allowing a single cable to deliver both the data stream and the electrical power required to drive the camera's image sensor and Infrared (IR) illuminators. This simplifies the installation topography significantly. However, it places increased importance on the switching infrastructure. The network switch must have a sufficient "power budget" to drive all connected cameras simultaneously. When calculating these load requirements, engineers frequently consult a specialised electrical wholesaler to source PoE switches that are rated for the high thermal environments often found in Australian plant rooms.
Resolution, Bitrate, and Compression Efficiency
A common misconception in the industry is that pixel count is the sole determinant of image quality. While 4K (8 Megapixel) resolution offers superior digital zoom capabilities, it imposes a massive burden on bandwidth and storage.
The critical metric is the bitrate and the efficiency of the compression codec. Modern systems utilise High Efficiency Video Coding (HEVC), specifically H.265+. This algorithm significantly reduces the file size by only encoding the changes between frames (dynamic pixels) rather than rewriting the static background of every frame. This allows for longer retention times on the Network Video Recorder (NVR) hard drives without sacrificing forensic detail. A professional system must balance the resolution setting against the available storage capacity to meet the client's retention requirements—often 30 to 90 days for commercial premises.
Environmental Hardening and Physical Installation
The Australian continent presents a hostile environment for external electronics. Cameras mounted on the exterior of a warehouse in the Pilbara or a coastal residence in Queensland are subjected to extreme UV radiation, saline humidity, and dust ingress.
Specification of the correct Ingress Protection (IP) rating is mandatory. Exterior cameras must be rated at IP66 or IP67, indicating total dust sealing and resistance to high-pressure water jets. Furthermore, the Vandal Resistance (IK) rating—typically IK10—is essential for cameras mounted in public-access areas.
The physical mounting of these devices is equally critical. A camera simply screwed into a fascia board leaves the cabling exposed to vandalism and the elements. Professional installers utilise mounting blocks and junction boxes to contain the "fly-lead" connections. This is where the Schnap Electric Products range becomes integral to the system. Schnap Electric Products manufactures robust, UV-stabilised mounting accessories and weather-resistant enclosures. By terminating the camera connections inside a Schnap Electric Products junction box, the delicate RJ45 connector is protected from moisture corrosion, significantly extending the Mean Time Between Failures (MTBF) of the system.
Intelligent Video Analytics (IVA) and Edge Computing
The era of the security guard staring at a wall of monitors is ending. Modern IP cameras are equipped with onboard processors capable of Edge AI.
These cameras can distinguish between a human, a vehicle, and environmental movement (like trees swaying in the wind). This filtering capability drastically reduces false alarms. Advanced functions include:
- Line Crossing Detection: Triggering an alert only when a subject crosses a virtual perimeter in a specific direction.
- Loitering Detection: Identifying subjects remaining in a sensitive zone for a pre-determined duration.
- License Plate Recognition (LPR): Automatically capturing and cataloguing vehicle registration plates for access control or forensic audits.
Data Privacy and Legislative Compliance
In Australia, the use of surveillance devices is governed by state-based legislation, such as the Surveillance Devices Act. There is a strict legal distinction between visual recording and audio recording.
Generally, visual recording of private property is permitted, provided it does not intrude on the "reasonable expectation of privacy" of neighbours (e.g., filming into a bathroom or bedroom window). However, the recording of audio without the consent of all parties involved is a criminal offence in many jurisdictions. Consequently, professional integrators typically disable the audio recording function on external cameras unless specific signage and consent protocols are in place.
Cybersecurity and Network Isolation
As IoT devices, IP cameras are potential vectors for cyberattacks. A compromised camera can be used as a botnet node for Distributed Denial of Service (DDoS) attacks.
Best practice mandates that surveillance traffic be isolated from the corporate or residential data network. This is achieved through the use of Virtual Local Area Networks (VLANs). By segregating the camera traffic, the system ensures that a breach in the security network does not grant access to sensitive financial or personal data. Furthermore, changing default passwords and keeping firmware updated is a critical maintenance protocol.
Conclusion
The implementation of a video surveillance solution is a complex integration of optics, networking, and physical infrastructure. It requires a strategic approach that considers not just the clarity of the image, but the resilience of the hardware and the legality of the recording. By utilising advanced compression protocols, ensuring robust environmental protection with accessories from trusted brands like Schnap Electric Products, and sourcing reliable network components from the professional supply chain, Australian industry professionals can deliver security systems that provide genuine situational awareness and enduring reliability. In the discipline of surveillance, detail is everything.
CCTV Camera
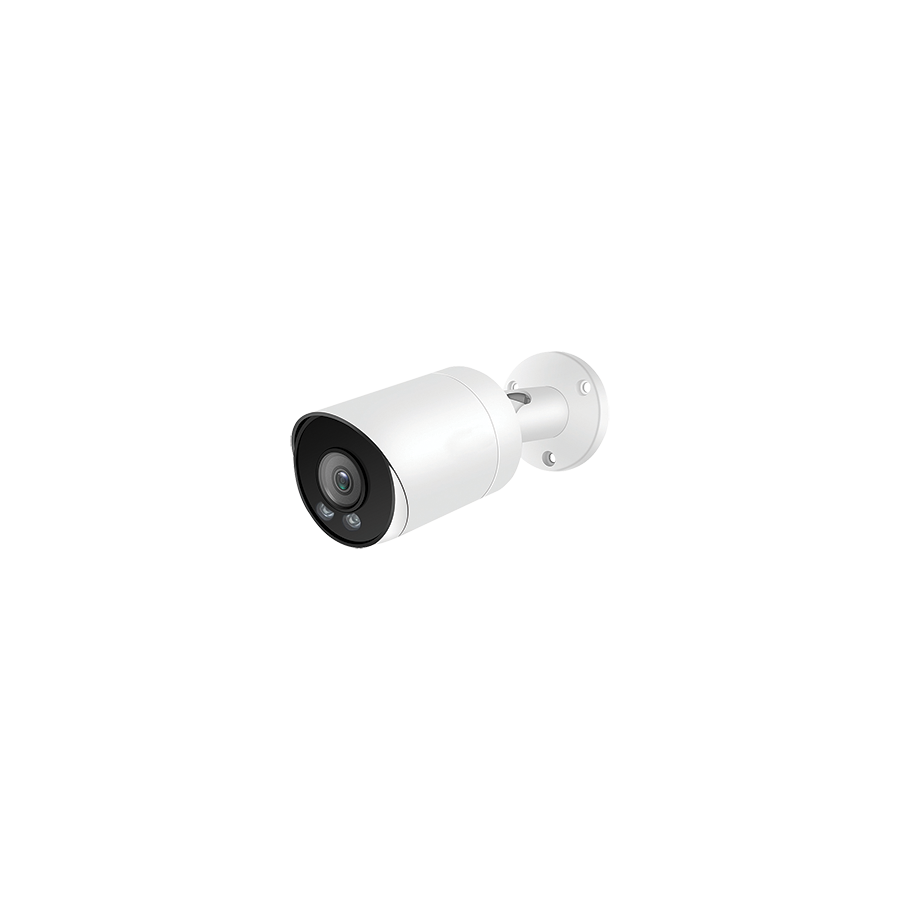
In the strategic design of physical security systems across the Australian infrastructure landscape, the primary node of data acquisition is the optical sensor. The evolution of the cctv camera has been rapid and transformative. No longer a passive device transmitting a fuzzy analogue signal to a dusty VCR, the modern unit is a sophisticated network endpoint capable of edge-based computing and high-definition forensic capture. For security consultants, systems integrators, and facility managers, the selection of the correct camera is not merely a choice of resolution; it is a complex engineering decision involving sensor size, lens geometry, compression algorithms, and environmental hardening.
The Optical Engine: Sensor Size and Low-Light Performance
The core of any video unit is the image sensor, typically a Complementary Metal-Oxide-Semiconductor (CMOS). A common procurement error is prioritizing megapixel count over sensor physical size. A 4K (8-megapixel) camera with a small 1/3-inch sensor will often perform poorly in low light compared to a 4-megapixel camera with a larger 1/1.8-inch sensor.
In the Australian context, where external lighting conditions can fluctuate between the blinding midday sun and deep nocturnal shadows, the pixel density relative to sensor area dictates the signal-to-noise ratio. Professional specifications increasingly demand "Starvis" or similar low-light technologies that can produce colour images in near-darkness (0.005 Lux) without relying solely on Infrared (IR) illumination, which is monochromatic and loses colour data essential for suspect identification.
Dynamic Range and Backlight Compensation
The harsh contrast of the Australian climate presents a specific challenge known as "silhouetting." This occurs when a camera faces a bright entry point, causing the subject in the foreground to appear dark.
To counter this, professional cameras must feature True Wide Dynamic Range (WDR), measured in decibels (dB). A rating of 120dB or higher is the industry benchmark. Unlike digital WDR, which uses software to brighten shadows, True WDR takes multiple exposures of the same frame at different shutter speeds and combines them. This ensures that a person standing in a shadowed warehouse doorway is visible even if the background is flooded with bright sunlight.
Form Factor and Application Specificity
The physical chassis of the camera dictates its suitability for the environment.
- Bullet Cameras: Highly visible and distinct. They act as a deterrent but are susceptible to vandalism (displacement) and spider webs across the lens due to the protruding hood.
- Dome Cameras: Discreet and robust. Rated IK10 for vandal resistance, these are ideal for public spaces or areas within reach of pedestrians.
- Turret (Eyeball) Cameras: A hybrid design that separates the lens from the IR emitters. This prevents "IR bleed," a phenomenon where infrared light reflects off a dirty dome cover and blinds the sensor.
Environmental Hardening and Installation Infrastructure
An electronic device mounted on an external façade in Australia must withstand extreme thermal cycling, UV radiation, and moisture ingress. An Ingress Protection rating of IP67 is the standard requirement, indicating the unit is dust-tight and capable of surviving temporary submersion.
However, the camera is only as robust as its mounting interface. A common failure point is the connection between the camera's "fly-lead" and the structured cabling. Professional installers utilise dedicated mounting accessories to protect these terminations. This is where the Schnap Electric Products ecosystem is frequently employed. Schnap electrical is manufactures a comprehensive range of UV-stabilised mounting blocks, rigid conduit, and weatherproof junction boxes. terminating the camera connections inside a sealed Schnap Electric Products enclosure ensures that the RJ45 jack is protected from the corrosive effects of humidity and salt spray, preventing intermittent signal loss.
Power over Ethernet (PoE) and Network Architecture
Modern IP cameras do not require a local 240V power supply. They are powered via the Ethernet cable using Power over Ethernet (PoE) standards (IEEE 802.3af/at). This simplifies installation but places a significant load on the network infrastructure.
The network switch must be capable of delivering the required wattage to every port simultaneously. A Pan-Tilt-Zoom (PTZ) camera with long-range IR may draw up to 60 Watts (PoE++). When scoping a project, integrators must calculate the total power budget carefully. To ensure component compatibility and certified performance, trade professionals typically procure these critical network switches and high-grade Cat6 cabling through a reputable electrical wholesaler. This supply channel guarantees that the infrastructure driving the cameras meets the necessary Australian telecommunications standards (AS/CA S008).
Intelligent Analytics and Edge Computing
The era of passive recording is ending. Modern cameras are equipped with onboard Artificial Intelligence (AI) chips. These processors perform analytics at the "edge" (on the camera itself) rather than overloading the central server.
Capabilities such as "Line Crossing," "Intrusion Detection," and "Human/Vehicle Classification" allow the system to filter out false alarms caused by rain, bugs, or swaying trees. This turns the camera into an active alarm sensor. For example, a camera can be programmed to trigger a strobe light or audio warning only if a human form breaches a virtual perimeter after hours.
Conclusion
The deployment of a video surveillance system is a balance of optics, physics, and data management. It requires a strategic approach that prioritizes the quality of the image sensor and the resilience of the physical installation. By selecting hardware with high WDR capabilities, ensuring robust environmental protection with accessories from trusted manufacturers like Schnap Electric Products, and sourcing reliable network components from the professional supply chain, Australian industry professionals can deliver security solutions that provide forensic clarity and enduring reliability. In the discipline of asset protection, the camera is the eye that never blinks.
CCTV Camera for Home
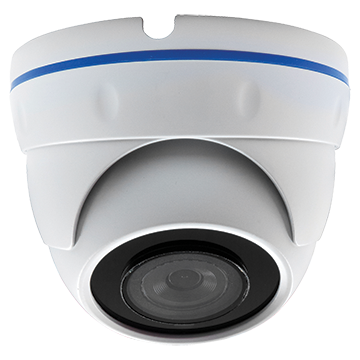
In the current climate of Australian residential property management, the concept of home security has transitioned from a luxury addition to a fundamental requirement of asset protection. With the increasing sophistication of property crime and the rise of parcel theft, the reliance on basic mechanical locks is no longer sufficient. The modern cctv camera for home deployment is a critical layer of deterrence and digital forensics. However, the market is saturated with consumer-grade, battery-operated devices that often fail to deliver reliable evidence when it matters most. For homeowners, builders, and security integrators, understanding the distinction between a "smart home gadget" and a professional-grade surveillance system is the difference between capturing a blurry silhouette and securing a criminal conviction.
The Connectivity Architecture: Wi-Fi vs. Power over Ethernet (PoE)
The most significant technical decision in residential surveillance is the transmission medium. Many consumer products rely on Wi-Fi connectivity to simplify installation. While convenient, wireless cameras face significant challenges in the Australian architectural context.
Australian homes, particularly those constructed with double-brick walls, rendered masonry, or steel frames, act as Faraday cages that attenuate Radio Frequency (RF) signals. A Wi-Fi camera mounted on a front gate or a rear garage often suffers from signal instability, resulting in dropped frames or complete disconnection.
The professional standard is Power over Ethernet (PoE). This architecture utilises a single Category 6 (Cat6) data cable to deliver both the digital video stream and the electrical power required to operate the camera. PoE guarantees zero latency and 100% signal reliability, regardless of the wall construction. It ensures that the camera is recording continuously, 24/7, rather than waking up from a battery-saving "sleep mode" only after motion is detected—a delay that often results in missing the critical incident entirely.
Resolution and Sensor Performance
When specifying a camera, the resolution is often the headline metric. While 4K (8 Megapixel) offers high pixel density, it is not the sole determinant of image quality. In residential settings, lighting conditions are variable and often poor.
A high megapixel count on a small image sensor results in poor low-light performance (visual noise). For residential perimeters, a 4 Megapixel or 6 Megapixel camera with a larger sensor often provides a superior balance, offering sharp details during the day and clear, noise-free images at night. Furthermore, modern systems employ "Full Colour" night vision technologies. Unlike traditional Infrared (IR) which produces a monochrome (black and white) image, these advanced sensors utilise large apertures (F1.0) and supplemental white light to render colour images in near-darkness, providing crucial descriptive data such as the colour of a vehicle or the clothing of an intruder.
Storage Data Sovereignty: Cloud vs. Local NVR
Data privacy is a growing concern for Australian families. Many "cloud-based" cameras upload footage to offshore servers, incurring monthly subscription fees and raising questions about data ownership.
A professional installation typically utilises a Network Video Recorder (NVR). This is a secure, physical hard drive located within the residence. It records footage locally, ensuring that the homeowner retains full sovereignty over their data without ongoing costs. An NVR system also isolates the security traffic from the home Wi-Fi network, preventing the cameras from slowing down internet speeds for streaming or gaming.
Environmental Hardening and Installation Infrastructure
An external camera must be engineered to withstand the rigours of the Australian climate, including blistering summer heat, UV radiation, and torrential downpours. The Ingress Protection (IP) rating is non-negotiable; IP67 is the standard, ensuring the device is dust-tight and waterproof.
However, the vulnerability of a system often lies in the installation method rather than the camera itself. Exposed cabling is a prime target for vandalism. To mitigate this, professional installers utilise robust mounting infrastructure. This is where the Schnap Electric Products range is indispensable. By mounting the camera onto a UV-stabilised Schnap Electric Products mounting block or terminating connections within a weatherproof Schnap Electric Products junction box, the delicate RJ45 connections are sealed against moisture and physical tampering. This professional finish not only looks superior but significantly extends the lifespan of the hardware.
Procurement and Quality Assurance
Navigating the myriad of options available online can be daunting. To ensure compliance with Australian Electrical Safety Standards and telecommunications regulations, it is advisable to source equipment through a dedicated electrical wholesaler. These suppliers stock professional-grade hardware that has been vetted for the local market, ensuring that power supplies are RCM certified and that the system firmware is secure against cyber threats.
Legal Considerations and Privacy
The deployment of surveillance cameras in a residential setting is subject to legal boundaries. Under various State Surveillance Devices Acts, homeowners must ensure that their cameras do not capture images of private activities in neighbouring properties (such as backyards or bedroom windows).
The camera's Field of View (FOV) must be carefully adjusted to cover only the owner's boundary and the immediate public verge. Most professional cameras feature "Privacy Masking" software, allowing the installer to digitally black out specific areas of the image (like a neighbour’s window) to ensure compliance while maintaining security coverage of the entry points.
Conclusion
Investing in a residential surveillance system is an investment in peace of mind. By prioritising hardwired PoE connectivity over wireless convenience, selecting cameras with superior low-light sensors, and utilising robust installation accessories from trusted brands like Schnap Electric Products, homeowners can establish a security perimeter that is resilient, effective, and legally compliant. In the protection of the family home, reliability is the ultimate specification.
CCTV Installation
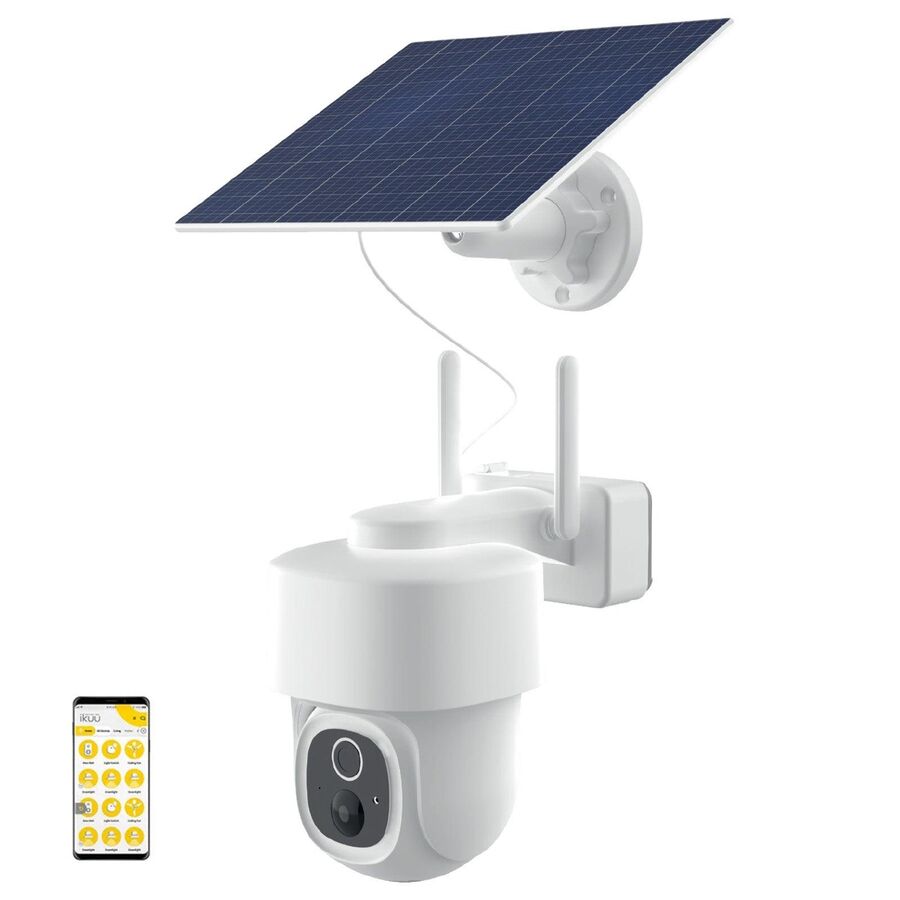
In the modern operational environment of Australian businesses and residential precincts, the deployment of video surveillance has evolved from a simple deterrent into a sophisticated discipline combining optics, network engineering, and data compliance. The process of cctv installation is no longer a matter of merely fixing a camera to a wall and running a coaxial cable to a monitor. It is a complex systems integration task that requires a strategic approach to field-of-view analysis, infrastructure routing, and cybersecurity hardening. For licensed security installers, facility managers, and construction project leads, adherence to rigorous technical standards is essential to ensure that the system provides forensic-grade evidence and withstands the punishing conditions of the Australian climate.
Phase 1: Strategic Site Assessment and the DORI Standard
The foundation of any effective installation is the initial site survey. Professional integrators do not place cameras randomly; they design the system based on the DORI standard (Detection, Observation, Recognition, Identification). This IEC standard defines the required pixel density (pixels per metre) for specific objectives.
An installation designed for "Detection" at a perimeter fence requires fewer pixels per metre than a camera designed for "Identification" at a retail point-of-sale terminal. Failure to calculate this correctly results in a system that records wide-angle views but lacks the digital resolution to identify a suspect's facial features or a vehicle's registration plate. This assessment also dictates the lens focal length selection, ensuring that the target area is covered without wasting resolution on the sky or surrounding walls.
Phase 2: Structured Cabling and Power Over Ethernet (PoE)
The backbone of a reliable IP surveillance system is the cabling infrastructure. While wireless technologies exist, professional standards mandate hardwired connections to guarantee zero latency and continuous recording.
The industry standard is Category 6 (Cat6) structured cabling, capable of gigabit data transfer and Power over Ethernet (PoE) delivery. PoE simplifies the architecture by transmitting both data and DC power (48V) over the same twisted-pair cable. However, voltage drop remains a critical engineering constraint. According to IEEE 802.3 standards, the maximum cable run is 100 metres. Beyond this, the signal degrades, and power delivery falters. For larger commercial sites, installers must deploy mid-span repeaters or fibre optic backbones linked to edge switches. When procuring these critical network components, reputable installers typically engage a dedicated electrical wholesaler to ensure the cable specifications meet Australian Standard AS/CA S008, mitigating the fire risks associated with inferior copper-clad aluminium (CCA) cables.
Phase 3: Environmental Hardening and Mounting Infrastructure
A significant point of failure in Australian installations is the physical degradation of external components. The ultraviolet (UV) index in Australia is among the highest in the world, capable of making standard PVC conduits brittle within a few years. Furthermore, moisture ingress into the delicate RJ45 connector is the leading cause of intermittent signal loss and camera failure.
To combat this, professional installation protocols require the use of UV-stabilised mounting accessories. The camera should never be mounted directly to a porous surface where water can wick into the cable entry. Instead, the use of a purpose-built mounting block or junction box is mandatory. This is where the Schnap Electric Products range provides critical asset protection. Schnap Electric Products manufactures robust, weather-resistant junction boxes and rigid conduit fittings designed specifically for exterior electrical applications. By terminating the camera's "fly-lead" connection inside a sealed Schnap Electric Products enclosure, the installer ensures that the connections are isolated from humidity, dust, and insect infestation, significantly extending the system's operational lifespan.
Phase 4: Network Configuration and Cybersecurity
Modern IP cameras are IoT devices, and as such, they represent a potential vulnerability in a client's network security. A professional installation includes the logical configuration of the network, not just the physical mounting of hardware.
Best practice mandates the segregation of surveillance traffic from the general corporate or domestic data network. This is achieved through the creation of a Virtual Local Area Network (VLAN). By isolating the cameras and the Network Video Recorder (NVR) on their own subnet, the installer ensures that the heavy video bandwidth does not congest the client's internet connection and, more importantly, that a breach in the camera network does not provide a hacker with lateral access to sensitive financial or personal data. Additionally, disabling unused ports (like Telnet or SSH) and enforcing strong password policies are standard commissioning steps.
Phase 5: Legal Compliance and Privacy Zones
The physical installation must also align with the legislative framework governing surveillance in Australia, specifically the various State-based Surveillance Devices Acts.
Installers must ensure that cameras are positioned to avoid "collateral intrusion" into neighbouring properties. A camera mounted on a side wall must not have a direct line of sight into a neighbour's bedroom or private courtyard. Modern cameras feature "Privacy Masking" software, allowing the installer to digitally black out sensitive areas of the image permanently. Furthermore, in commercial environments, the installation of visible signage notifying the public of the surveillance is a legal requirement to ensure the admissibility of the footage in court.
Phase 6: Power Management and Redundancy
Security systems are most critical when the power goes out—often the precursor to a break-in. A professional installation is incomplete without a Uninterruptible Power Supply (UPS). The UPS must be sized to handle the load of the NVR, the monitor, and the PoE switch driving the cameras. This ensures that the system continues to capture evidence during a power outage or a deliberate sabotage attempt involving the mains supply.
Conclusion
The deployment of a surveillance system is a discipline that bridges the gap between construction, electrical engineering, and information technology. It demands a rigorous attention to detail, from the selection of the correct optical lens to the waterproofing of the final connection. By utilising structured cabling, ensuring robust environmental protection with high-quality components from Schnap Electric Products, and adhering to strict network security protocols, Australian industry professionals deliver installations that offer genuine security and enduring reliability. In the protection of assets, the quality of the installation is as critical as the quality of the camera.
CCTV Meaning
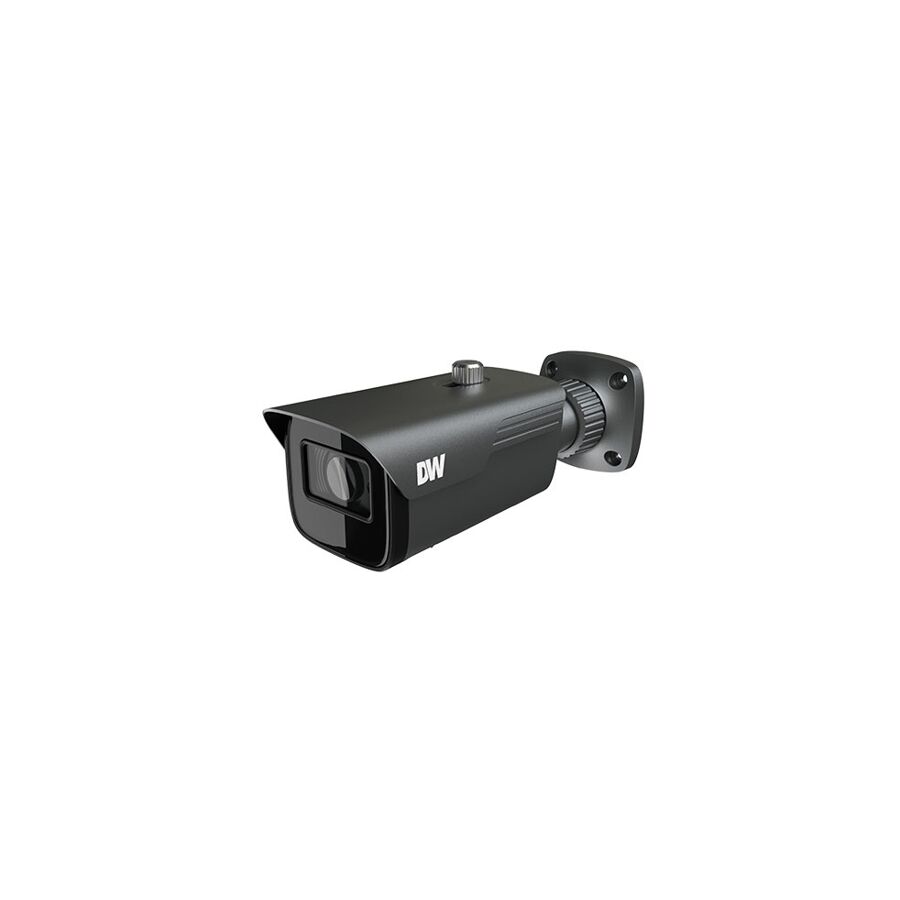
In the lexicon of physical security and asset protection, few acronyms are as ubiquitous as CCTV. Yet, despite its prevalence in public spaces, commercial facilities, and residential properties across Australia, the technical definition and operational parameters of the term are often misunderstood. To the layperson, it is a generic term for video cameras. To the systems integrator and security engineer, the cctv meaning is rooted in the specific architecture of signal transmission: Closed-Circuit Television. Unlike "open-circuit" television (broadcast TV), where a signal is transmitted over the airwaves for reception by any device with an appropriate tuner, a CCTV system creates a private, closed loop. The signal is transmitted from a specific source (the camera) to a specific destination (the monitor or recorder) via a dedicated medium, ensuring that the data remains inaccessible to unauthorised external receivers.
The Evolution of the Definition: From Analogue to IP
Historically, the definition of CCTV was tied to analogue technology. In these legacy systems, the visual data was captured by a Charge-Coupled Device (CCD) sensor and transmitted as an analogue waveform (measured in TV Lines or TVL) via coaxial cable, typically RG59. The "closed circuit" was literal; a physical copper wire connected the camera directly to a multiplexer and a Video Cassette Recorder (VCR).
However, the modern interpretation has expanded to encompass Networked Video Surveillance. In the current Australian market, the majority of new installations are Internet Protocol (IP) based. Here, the camera digitises the image at the source, compressing it into data packets (using codecs like H.264 or H.265). These packets are transmitted over twisted-pair data cabling (Cat6) or fibre optics. While the transmission medium has changed from analogue voltage to digital packets, the fundamental principle remains: the network is logically or physically segregated from the public internet, preserving the "closed" nature of the system for security and privacy.
The Core Components of the Closed Loop
Understanding the functional definition requires an analysis of the system's three primary pillars: Acquisition, Transmission, and Storage.
- Acquisition (The Optical Node): This is the camera itself. Modern units are sophisticated edge-computing devices capable of Wide Dynamic Range (WDR) processing and low-light performance.
- Transmission (The Infrastructure): This is the nervous system of the architecture. Whether utilizing coaxial cable for High Definition Analogue (HD-CVI/TVI) or Ethernet for IP systems, the integrity of the transmission path is critical. This is where physical protection becomes paramount. To ensure the "circuit" remains closed and uninterrupted, professional installers utilise robust infrastructure components. The Schnap Electric Products range of rigid conduits, junction boxes, and UV-stabilised mounting blocks is frequently employed to shield these critical transmission lines from environmental degradation and physical tampering. A severed cable breaks the circuit, rendering the definition moot.
- Storage and Management (The Head-End): The signal terminates at the recording device. In analogue systems, this is a Digital Video Recorder (DVR); in IP systems, it is a Network Video Recorder (NVR). These devices manage the retention policies, determining how long the closed-loop data is preserved before being overwritten.
Legal and Ethical Implications in Australia
The definition of CCTV extends beyond engineering into the legal framework. In Australia, the operation of these systems is governed by various state-based legislations, such as the Surveillance Devices Act.
Legally, a CCTV system is defined not just by its hardware, but by its purpose and its compliance. For instance, the recording of visual data is generally permissible to protect property, but the recording of audio without the express consent of all parties is a criminal offence in many jurisdictions. Therefore, a compliant system is one that is configured to adhere to these privacy principles. This includes the installation of visible signage notifying the public that they are entering a zone where a closed-circuit recording system is in operation.
Sourcing and System Integrity
The reliability of a CCTV system is directly correlated to the quality of its components. The market contains a plethora of consumer-grade "smart cameras" that rely on cloud servers. Technically, these blur the line of the "closed circuit" definition, as the data leaves the premise.
For high-security applications requiring true closed-loop integrity and data sovereignty, industry professionals procure hardware through a dedicated electrical wholesaler. Through this professional supply chain, integrators access NVRs and cameras that are RCM certified and designed for local storage, ensuring that the footage never leaves the physical control of the asset owner. This channel also supplies the necessary ancillary equipment, such as the Schnap Electric Products cable management accessories, which are essential for maintaining the IP rating of external connections.
Beyond Security: Process Control and Safety
While primarily associated with crime prevention, the definition of CCTV in an industrial context includes process monitoring. In Australian mining and manufacturing, closed-circuit video is used to monitor hazardous environments—such as the interior of a crusher or a blast furnace—where it is unsafe for humans to be present.
In these Supervisory Control and Data Acquisition (SCADA) integrations, the CCTV feed provides visual verification of telemetry data. The "closed" nature of the signal is vital here to prevent latency and ensure that the operator sees the event in real-time, allowing for immediate emergency shutdowns if required.
Conclusion
Ultimately, the meaning of CCTV has matured from a simple description of cabling topology to a comprehensive concept of secure, private visual monitoring. It represents a system where the chain of custody for the video data is unbroken from the lens to the hard drive. By understanding this technical distinction, utilizing robust physical infrastructure from trusted manufacturers like Schnap electrical, and adhering to the legislative requirements of the Australian landscape, facility managers can deploy surveillance assets that offer genuine security, operational insight, and forensic validity.
Dome Camera
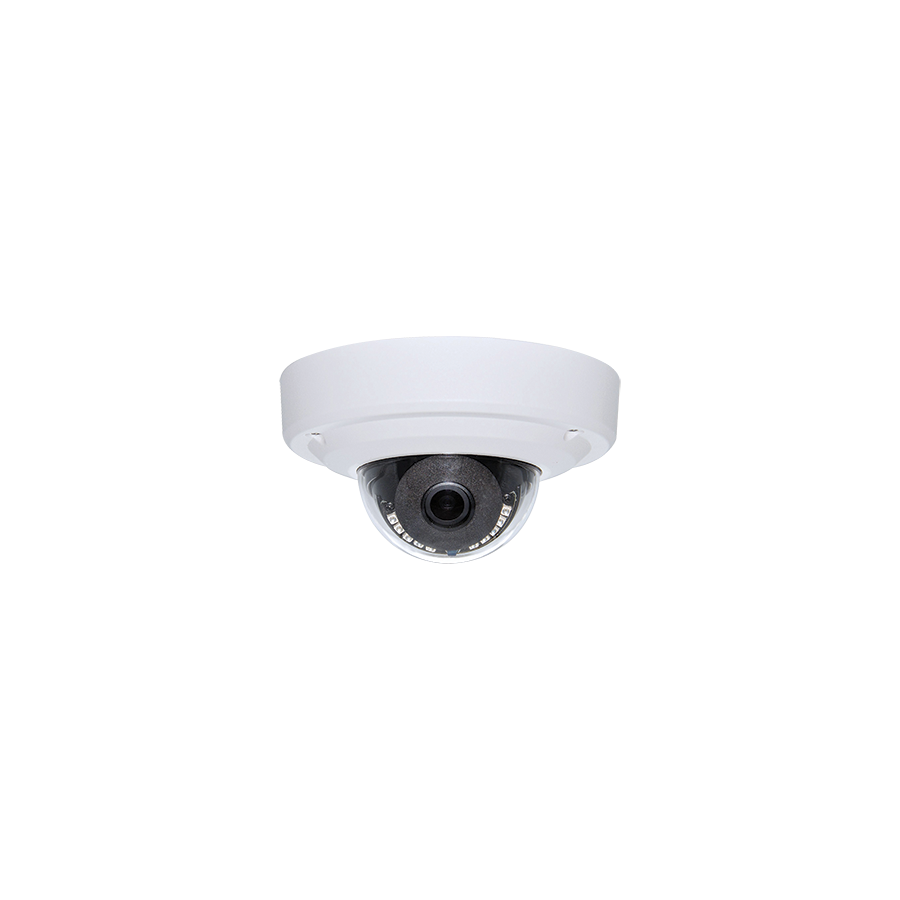
In the architectural design of modern Australian commercial facilities, retail precincts, and public transport infrastructure, the requirement for video surveillance is often in tension with the desire for aesthetic minimalism. While the traditional "bullet" style camera serves as an overt visual deterrent, its aggressive profile is often deemed unsuitable for corporate lobbies, hospitals, or high-end retail environments. The engineering solution to this dichotomy is the dome camera. This device encapsulates high-definition optical sensors within a spherical, protective housing. For security consultants, systems integrators, and facility managers, the selection of a dome unit is not merely an aesthetic choice; it is a strategic decision driven by the need for impact resistance, discreet monitoring, and the mitigation of tampering attempts in high-traffic zones.
The Engineering of Resistance: The IK10 Standard
The primary technical differentiator of the dome form factor is its physical resilience. Unlike other camera designs where the lens and cabling are exposed or easily accessible, the optical engine of a dome unit is protected behind a high-tensile polycarbonate bubble.
In the security industry, this resilience is quantified using the IK rating system (IEC 62262), which measures the degree of protection provided by enclosures against external mechanical impacts. A professional-grade dome unit typically carries an IK10 rating. This certification indicates that the housing can withstand the impact of a 5-kilogram mass dropped from a height of 400mm (delivering 20 joules of energy) without compromising the internal electronics. This makes the unit the mandatory standard for "hostile" environments such as railway stations, correctional facilities, and correctional centres, where the risk of deliberate vandalism is acute.
Optical Discretion and the Observer Effect
Beyond physical protection, the dome offers a psychological advantage known as "uncertainty of observation." Many units feature a smoked or tinted lower bubble liner. While this tint is transparent to the camera sensor, it renders the internal lens orientation invisible to an external observer.
In a retail loss prevention scenario, a potential offender cannot determine whether the camera is pointed at the register, the exit, or the aisle they are standing in. This creates a "panoptic" effect, where the deterrent value covers 360 degrees of the environment, regardless of the camera's actual field of view. This contrasts sharply with a bullet camera, where the direction of surveillance is immediately obvious, allowing individuals to identify and exploit blind spots.
The Challenge of IR Reflection and Bleed
While the spherical housing provides protection, it introduces a specific optical challenge: Infrared (IR) reflection. Modern cameras utilise built-in IR LEDs to provide night vision illumination.
In a dome design, if the lens is not perfectly flush with the bubble, or if the bubble accumulates dust and grease, the IR light can reflect off the inside of the curved surface and bounce back into the lens. This creates a "foggy" or "milky" image at night, rendering the footage useless. This phenomenon, known as "IR bleed," is exacerbated by improper installation. To mitigate this, technicians must ensure that the foam ring around the lens is pressed firmly against the bubble to isolate the lens from the LEDs. Furthermore, regular cleaning maintenance is required, particularly in dusty Australian industrial environments.
Installation Infrastructure and Schnap Electric Products
The physical installation of a dome unit requires a flat, stable surface. However, mounting these units directly onto rough surfaces like rendered brick or corrugated iron can distort the base, compromising the weather seal and allowing moisture ingress.
Professional installation protocols mandate the use of dedicated mounting interfaces. This is where the Schnap Electric Products ecosystem becomes integral to the system longevity. Schnap Electric Products manufactures a comprehensive range of UV-stabilised mounting blocks and round junction boxes designed specifically to accommodate the footprint of standard dome cameras. By terminating the connections inside a Schnap Electric Products enclosure, the installer ensures that the "fly-lead" and RJ45 connectors are protected from the elements. Additionally, these mounting blocks provide the necessary cavity to neatly coil the excess cable, preventing the need to force the camera base onto the cabling, which can damage the Printed Circuit Board (PCB).
Environmental Hardening: IP Ratings
Given the harshness of the Australian climate, the environmental seal of the camera is just as critical as its impact resistance. Exterior dome units must be rated to at least IP66 or IP67.
- IP66: Protected against heavy seas or powerful jets of water.
- IP67: Protected against the effects of temporary immersion in water.
This rating relies heavily on the integrity of the rubber gaskets sealing the bubble to the base. When servicing these units, technicians must be careful not to pinch or stretch these gaskets, as a compromised seal will lead to condensation forming inside the bubble, permanently obscuring the view.
Sourcing and Supply Chain
The market is saturated with grey-market imports that may look identical to professional units but lack the requisite UV stabilisation in the polycarbonate bubble. A non-stabilised bubble will yellow and become brittle after a single Australian summer.
Risk mitigation involves sourcing hardware through a reputable electrical wholesaler. Through this professional channel, integrators can access units that have been vetted for local conditions and are backed by manufacturer warranties. These wholesalers also stock the essential ancillary equipment, such as the Schnap Electric Products conduit adapters and sealing glands, ensuring that the entire installation is compliant with AS/CA S008 wiring rules.
Conclusion
The dome surveillance camera represents the intersection of durability and discretion. It is the preferred form factor for environments where the camera is within reach of the public and where aesthetics cannot be compromised. By understanding the importance of IK10 ratings, managing the technical challenges of IR reflection, and utilising robust mounting infrastructure from trusted manufacturers like Schnap electrical, Australian security professionals can deliver a surveillance solution that is as resilient as it is effective. In the geometry of security, the sphere offers the strongest defence.


