




Kingsgrove Branch:

A mower clips the edge of a footpath pit, or a delivery truck backs over one that was never meant to take that kind of load — and now there's a cracked Telstra pit lid sitting where a working one used to be. The pit body underneath is usually fine. The lid is the part that takes the punishment, and it's the part most contractors end up ordering in a hurry once they realise the old one is beyond patching.
The pit itself doesn't come with a label most days you're on site — the only clue is the shape and rough dimensions of what's left. Pit lids are sold by class, and the class needs to match the pit body it's sitting on, not just look like a similar size. A 600mm x 600mm lid rated for one class won't necessarily sit flush or lock correctly on a pit built for another class, even if the outer dimensions look close on a tape measure.
If there's any doubt, the safest approach is checking the broken lid's markings before it goes in the skip, or checking the choosing the right pit size for your job against what's already installed. Guessing from the hole size alone is how a second trip back to site happens.
Related Reading
These are the common concrete pit lid classes stocked for telco and comms pits. The class code is usually the fastest way to confirm you're ordering the right one, once you can see it on the old lid or in the site documentation.
| Class | Approx. Size | Typical Use |
|---|---|---|
| P300D | 300mm x 300mm | Small lead-in/junction pits |
| P4 | 400mm x 400mm | Mid-size distribution pits |
| P2 / P5 / P6-8 / P7 | 600mm x 600mm | Standard comms and joint pits — class code sets load rating and fit, not the outer size |
Note the last row — several classes share the same 600mm x 600mm outer footprint. In practice, that's exactly where mix-ups happen, because the lid can look like a straightforward swap when it's actually the wrong class for the pit frame underneath.
Pits installed under older Telstra infrastructure and pits installed as part of NBN builds don't always carry identical requirements, even where the physical class matches. Markings, load rating expectations, and sometimes the locking mechanism can differ depending on which network the pit sits on and when it was installed. This matters more on footpath and roadside pits, where load rating isn't just a compliance box to tick — it's what stops the lid failing under vehicle weight.
[!] Compliance note: if you're unsure whether a pit falls under Telstra or NBN Co requirements, check with the asset owner before ordering — swapping in a lid that doesn't match the network's spec can mean a failed inspection even if the physical fit is correct.
Ordering by outer dimensions alone. A 600mm x 600mm lid covers several different classes — matching just the size without checking the class code is how the wrong lid turns up on site.
Assuming Telstra and NBN pits take the same lid. Even where the class looks identical, network-specific compliance requirements can catch out a straight swap.
Not checking the broken lid before it's binned. The class marking is usually the fastest way to confirm what's needed — once the old lid is gone, you're back to measuring and guessing.
Overlooking pit depth as part of the same job. If the pit's being reworked anyway, it's worth confirming the burial depth of what's running into it is still correct before closing it back up.
what size is a P5 pit lid?
A P5 lid is one of the 600mm x 600mm classes used on standard comms pits. The class code, not just the outer measurement, is what determines whether it's the correct match for a given pit body.
can I get a lid to suit an existing P300D pit?
Yes — a 300mm x 300mm P300D lid is stocked separately from the larger 600mm classes, since it's a smaller pit footprint typically used for lead-in or junction points.
do I need council approval to lift a pit lid in the footpath?
In practice, working in or around a footpath or road-reserve pit usually requires the relevant permit or notification to the local council or road authority, separate to any network-owner approval. Check requirements for the specific council area before starting works.
is there a difference between a Telstra pit lid and an NBN one?
There can be, depending on the pit's age and which network installed it — see the compliance note above. A P5 class lid is one of the more commonly requested options for standard comms pits, but confirming the exact spec against the pit owner's requirements is the safer step before ordering.
Related Reading
Trade pricing and same-day dispatch from Kingsgrove NSW on the full pit lid range.
Browse telstra pit lid at Schnap -- trade pricing, trusted brands, dispatched same day from Kingsgrove NSW.
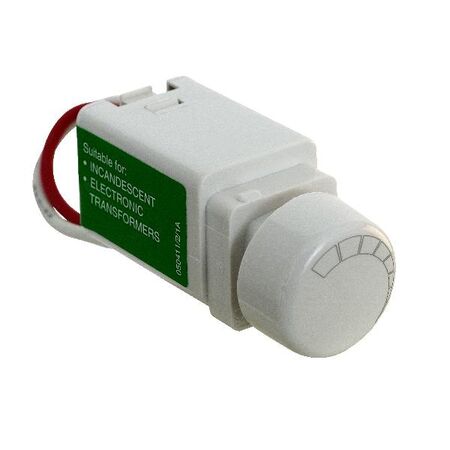
A sparky swaps twenty halogen downlights for LED retrofit globes on a Saturday job, leaves the existing dimmer in place to save time, and gets a callback the following week: the new LEDs buzz faintly and flicker whenever they're dimmed below about 30%. Nothing about the wiring changed. The dimmer did.
Halogen globes are resistive loads — they don't care much what shape of waveform a dimmer sends them. LED drivers are a different story. Most LED retrofit globes and downlights run on switch-mode drivers designed for a specific dimming curve, and older dimmers built for halogen or incandescent loads often cut the waveform in a way the driver reads as noise rather than a dimming signal. The result is flicker at low dim levels, audible buzz from the driver, or a minimum load the dimmer simply won't go below without dropping out.
This is also why flicker complaints tend to show up in clusters on the same jobs where how retrofit LED panels are sized for a ceiling grid — the same retrofit push that swaps out fittings usually leaves the original dimmer behind, and that's the actual point of failure.
Most LED drivers on the market are built to work with trailing edge dimming rather than leading edge. Trailing edge dimmers cut the tail end of the AC waveform, which is a gentler, more predictable transition for a switch-mode driver to interpret — in practice, this is usually the safer default when you're not certain what driver is inside the retrofit globe or downlight fitting. Leading edge dimmers cut the front of the waveform instead, which was standard for older halogen transformers, and can cause exactly the low-end flicker and buzz described above when paired with an LED driver that wasn't designed for it.
| Dimmer Type | Best Suited For |
|---|---|
| Trailing edge | Most LED retrofit globes and downlights, low-wattage LED driver loads |
| Leading edge | Legacy halogen transformers, and LED drivers specifically rated leading-edge compatible |
The safest habit on a retrofit job is checking the driver spec sheet or the fitting's compliance label before assuming trailing edge is the fix — some commercial-grade LED downlights are built leading-edge compatible specifically because they're expected to sit on older switchboards.
Related Reading
Wiring configuration is the second thing that trips people up. A 2-wire dimmer sits in the switch loop with no neutral required, which is common in older Australian homes with two-wire lighting circuits. A 3-wire dimmer needs a neutral at the switch plate, and swapping a 2-wire dimmer for a 3-wire model — or vice versa — without checking the existing wiring first usually means pulling the plate off twice instead of once. On multi-way or commercial fitouts, 3-wire controllers also tend to offer more consistent dimming range across mixed LED loads, which matters when a single circuit is feeding several different downlight brands.
[!] Compliance note: as a general rule, dimmer installation and wiring changes fall under licensed electrical work in Australia. Confirm the dimmer's minimum and maximum load rating against the total connected LED wattage before installing — running well under a dimmer's rated minimum load is a common, avoidable cause of flicker and premature driver failure.
Assuming the old dimmer is fine because "it's only a few globes." Even a small LED retrofit job can fall below a leading-edge dimmer's minimum load, which is exactly the scenario in the hallway job above.
Mixing LED brands on one dimmer circuit. Different drivers respond differently to the same dimming curve — one brand flickering while another on the same circuit runs clean is a strong sign of driver mismatch, not a faulty dimmer.
Overloading a single dimmer with too many downlights. Stacking more fittings onto one dimmer than its wattage rating allows produces flicker that looks like a compatibility issue but is actually a load issue.
Ignoring the neutral requirement on 3-wire dimmers. Forcing a 3-wire controller into a switch loop with no neutral present is a wiring fault, not a product fault — this gets misdiagnosed as a bad dimmer more often than it should.
Not checking the driver's dimming type before ordering. Some commercial LED downlights are leading-edge only. Installing a trailing edge dimmer by default without checking the fitting spec can introduce flicker where there wasn't any before.
Reusing a decades-old dimmer "because it still works." A dimmer that switched halogens cleanly for fifteen years was never tested against a switch-mode LED driver — age and prior reliability don't predict LED compatibility.
Why do LED downlights flicker on a dimmer that worked fine with halogens?
Halogen globes are resistive loads that tolerate almost any dimming waveform. LED drivers are electronic loads that expect a specific dimming curve — typically trailing edge — and an older dimmer built for halogen can send a waveform the driver reads as noise rather than a smooth dim signal, which shows up as flicker or buzz.
Can I just swap in an LED-rated dimmer without rewiring anything?
In most cases yes, provided the existing wiring configuration (2-wire vs 3-wire) matches the replacement dimmer. A 400VA trailing edge dimmer is a common drop-in replacement for a 2-wire halogen dimmer feeding LED retrofit downlights.
Is my existing dimmer 2-wire or 3-wire, and does it matter for LED?
Check whether a neutral conductor is present at the switch plate — if there's no neutral, the circuit is 2-wire. It matters for LED because 3-wire dimmers generally offer a wider, more stable dimming range across mixed LED loads, but they can't be installed where no neutral exists without rewiring.
What's the minimum LED load before a dimmer starts misbehaving?
Every dimmer has a rated minimum load, commonly printed on the datasheet or the unit itself. Running well under that minimum — a handful of low-wattage LED globes on a dimmer rated for a much higher load — is a frequent, overlooked cause of flicker. A leading edge dimmer controller rated closer to the actual connected wattage avoids this.
Do I need a licensed electrician to replace a dimmer switch in Australia?
Yes — dimmer switch replacement involves working on fixed household wiring, which typically requires a licensed electrician in Australia. This applies even when the replacement looks like a simple like-for-like swap.
Does a commercial fitout need a specific dimmer controller type for compliance?
Commercial multi-way circuits generally call for a controller rated for the full connected load and wiring configuration of the job, rather than a residential-grade unit. A multi-way 3-wire dimmer controller is typically the more appropriate choice for these jobs.
Related Reading
Schnap stocks trailing edge, leading edge, and multi-way c bus dimmer controllers with trade pricing and same-day dispatch from Kingsgrove NSW.
Find the full led dimmer flicker range at Schnap — trade pricing and same-day dispatch from Kingsgrove NSW.
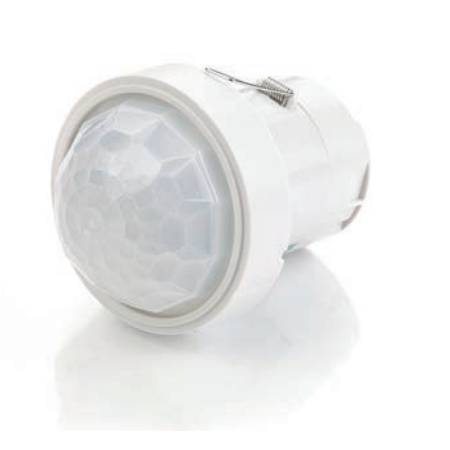
An integrator wrapping up a Sydney office fitout gets a call a week after practical completion -- the meeting room lights are staying on well after everyone's left for lunch. Turns out the DALI occupancy sensor spec'd for that zone was rated for standard indoor office use, but it ended up mounted near a plant room doorway with a fair bit of dust drift through it, and it's already misreading. Getting the IP rating right at spec stage is the difference between a system that just works and a callback six months in.
On a DALI-DSI job, it's easy to treat occupancy sensors as a line item you tick off once and move on -- pick a PIR, pick a microwave, done. In practice, the environment does most of the deciding. A standard open-plan office with clean, dry, climate-controlled air is a completely different install to a loading dock, a wash-down kitchen area, or an exposed high-bay warehouse ceiling. Specifying by environment first, then by detection type, avoids the retrofit-a-sensor-in-six-months problem entirely.
For standard indoor commercial space -- open-plan offices, corridors, meeting rooms with normal HVAC and no dust or moisture exposure -- an IP40 sensor is the usual fit. Step up to IP54 for areas with intermittent dust, light moisture, or wash-down proximity, like commercial kitchens or plant rooms adjacent to wet areas. For genuinely exposed conditions -- high-bay warehouse ceilings, loading docks, or anywhere temperature swings and airborne particulate are a daily reality -- IP65 is the baseline, not the upgrade.
| Environment | IP Rating | Typical Use Case |
|---|---|---|
| Standard office / corridor | IP40 | Open-plan office, meeting rooms, standard ceiling grids |
| Wet or dusty areas | IP54 | Commercial kitchens, plant rooms, wash-down adjacent zones |
| High-bay / exposed | IP65 | Warehouse high-bay, loading docks, exposed industrial ceilings |
Once the environment sets the IP rating, detection technology is the next decision, and it's not just a preference call. PIR sensors read infrared heat signatures and work well in line-of-sight spaces like open offices and meeting rooms, but they can struggle with occupants seated still behind partitions or desks. Microwave sensors detect motion through a wider field and can pick up movement behind partial obstructions, which makes them a better fit for broken-up floor plans, storage areas, or spaces with irregular furniture layouts.
For a straightforward open office, a PIR unit like the IP40 EBD-HS sensor covers most scenarios without over-specifying. Where the floor plan has partitions, joinery, or storage racking breaking up sightlines, a microwave option -- the IP40 MWS6 or the low-mount MWS5 slave unit for tighter ceiling voids -- reads occupancy more reliably. High-bay applications lean the same way: the IP65 mid-bay microwave sensor is built for exactly the kind of open, obstruction-heavy warehouse floor where PIR line-of-sight starts to fall short.
A lot of occupancy sensor jobs aren't new-build -- they're retrofits into an existing DALI-DSI ceiling grid where the panels and drivers are already in place and the sensor is the missing piece to get proper daylight harvesting or occupancy-based dimming working. In that scenario, the ceiling grid dimensions and driver compatibility matter as much as the sensor spec itself -- it's worth working through our LED panel retrofit guide alongside this one if the ceiling grid itself hasn't been finalised yet, since panel size and sensor placement both feed off the same grid layout.
Where an existing fitout has non-DALI luminaires that still need to sit on the same lighting control network, a DALI single-channel interface bridges that gap -- it lets a conventional 0-10V or switched circuit respond to the same DALI-DSI bus as the rest of the ceiling, rather than running a separate control system just for those fittings. It's a common enough situation in staged office fitouts where not every floor gets upgraded at once.
[!] Compliance note: DALI-DSI commissioning and integration into an existing building lighting control network typically falls within the scope of a licensed electrician's work under AS/NZS 3000 -- in practice, the sensor and driver programming side is usually where the extra care sits, since incorrect addressing can affect other zones on the same DALI loop.
Related Reading
Matching IP rating to the room name, not the actual conditions. A "kitchen" on the drawing might mean a full commercial wash-down kitchen or just a small staff kitchenette with a kettle and a fridge -- the IP54 jump only matters for the former, and over-specifying on every space with "kitchen" in the name adds cost without adding value.
Using PIR in partitioned or storage-heavy floor plans. This is the exact flicker-adjacent complaint that shows up as "the lights keep turning off while I'm still at my desk" -- usually it's a PIR unit losing line-of-sight behind a partition or filing cabinet, not a dimmer fault.
Forgetting the PSU/relay unit on programmable zones. Some sensor configurations, particularly ones with custom time-out or daylight harvesting logic, need the separate PSU relay unit to handle switching load correctly rather than relying on the sensor's onboard relay alone.
Assuming every luminaire on the floor is DALI-native. Mixed fitouts with legacy or non-DALI fittings need a single-channel interface bridging into the loop -- skip this and those fittings simply won't respond to the sensor at all.
Under-speccing high-bay sensors for cold storage or exposed roof spaces. Standard IP65 units aren't always rated for sustained low temperatures -- the low-temp -30°C variant exists specifically for cold storage and exposed high-bay applications where a standard unit's response time or lifespan can degrade.
what IP rating do I need for a DALI sensor in an open-plan office?
For a standard climate-controlled open-plan office with no dust or moisture exposure, an IP40 sensor is typically sufficient -- see the IP40 EBD-HS PIR sensor for a common option in this category.
can I use a PIR sensor behind partitions or joinery?
In practice, PIR sensors rely on line-of-sight infrared detection, so partitions and tall joinery can create blind spots. A microwave sensor generally handles broken-up floor plans more reliably.
do I need a licence to commission DALI occupancy sensors on an existing lighting network?
Yes -- DALI-DSI commissioning and integration typically needs to be carried out by a licensed electrician under AS/NZS 3000, particularly when the new sensor is joining an existing zone or loop.
what's the mounting height limit for a standard IP40 sensor?
Mounting height varies by model and detection pattern -- as a general rule, standard office-rated sensors are designed for typical suspended-ceiling heights, while high-bay applications need a purpose-built high-bay unit rather than a standard sensor mounted higher than intended.
can I mix DALI and non-DALI luminaires on the same sensor zone?
Not directly -- non-DALI fittings need a bridge onto the loop, such as the DALI single-channel interface, to respond to the same DALI-DSI control signal as the rest of the zone.
why would I need a separate PSU relay unit instead of the sensor's built-in relay?
For programmable zones with custom time-out or daylight harvesting logic, a dedicated unit like the EBD-HS PSU relay with UHS5 programmable controller typically handles the switching load more reliably than relying on the sensor's onboard relay alone.
Related Reading
Trade pricing and same-day dispatch from Kingsgrove NSW across the full IP40, IP54 and IP65 range below.
See the full DALI occupancy sensor range at Schnap and get same-day dispatch from Kingsgrove NSW.
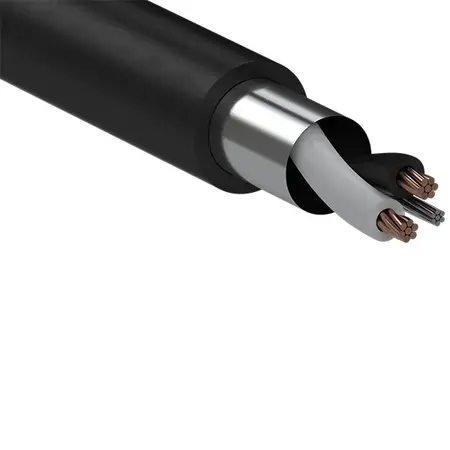
You're standing in the ceiling void with a wiring diagram in one hand and a cable order form in the other, forty metres of run between a new pressure transmitter and the PLC cabinet, and three pair counts on the supplier page that all look close enough to what the drawing calls for. Get the pair count or gauge wrong and you're either pulling cable twice or leaving spare cores dead in the wall. This is the decision that trips up even experienced installers when the drawing isn't crystal clear — see our DeviceNet cable guide for a similar sizing conversation on the fieldbus side.
A loop drawing that calls for "1 x 2C shielded" is telling you exactly one thing: one pair, screened, nothing more. It's easy to over-order out of caution — grab a 4-pair cable "just in case" — but every unused pair in a screened cable is a potential earth loop or noise path if it's left floating instead of properly terminated or isolated. For a single 4-20mA loop from a transmitter to a PLC input card, 1-pair cable is the correct call almost every time. Multi-pair cable only makes sense when the drawing genuinely shows multiple instruments sharing one cable run back to the same cabinet — a common setup on packaging lines or water treatment skids where several transmitters sit close together.
Where it gets murkier is when the drawing shows "spare pairs for future use." That's a legitimate reason to step up from 1-pair to 2-pair or from 4-pair to 6-pair, but it should be a deliberate decision noted on the drawing — not a default because nobody wanted to think about it twice.
Related Reading
Gauge selection comes down to run length and loop type. On that 40-metre pressure transmitter run, 0.5mm conductor is typically fine for a standard 4-20mA loop — the current draw is low and the run isn't long enough to cause meaningful voltage drop. Where 1.0mm or 1.5mm earns its place is on longer runs (past roughly 80-100 metres, as a general rule) or on loops powering the transmitter itself over the same pair, where every bit of conductor resistance eats into the loop's available voltage budget.
| Gauge | Typical Use Case | Common Run Length |
|---|---|---|
| 0.5mm | Standard 4-20mA signal loop | Up to ~80m as a general rule |
| 1.0mm | Longer runs or loop-powered transmitters | 80-150m typically |
| 1.5mm | Extended runs, sensitive loop budgets | 150m+ commonly |
These figures are a starting point, not a substitute for a proper voltage drop calculation on critical loops — but for the majority of straightforward transmitter-to-PLC runs, matching gauge to run length using this rule of thumb will keep you well inside spec.
Back to that ceiling void — if it's also acting as a return air plenum, or the run passes through a riser or shared building service space, that's usually the trigger for LSZH (Low Smoke Zero Halogen) jacket instead of standard PVC. Standard PVC cable releases dense smoke and corrosive halogen gas when it burns, which is generally the reason building compliance requirements steer plenum and riser runs toward LSZH — it's a life-safety consideration for anyone needing to evacuate or for emergency services attending a fire.
[!] Compliance note: Whether LSZH is mandatory depends on the building classification and where the cable run sits — as a general rule, plenum spaces, risers, and public building common areas are the situations most likely to require it. If you're unsure, check the project specification or ask the building's fire engineer rather than assuming standard PVC is acceptable.
If the run is staying entirely within a plant room or dedicated cable tray with no shared building air path, standard PVC-jacketed screened cable is typically the more cost-effective choice and performs the same electrically.
When a marshalling cabinet feeds several field instruments along the same route, one multi-pair cable often beats pulling separate single-pair runs — less tray congestion, fewer glands, and one screen to earth instead of several. Count the actual instruments on the drawing, add genuine spares if the project calls for future expansion, then round up to the nearest standard pair count (4, 6, 8, 10, 12, or 20 pair). Don't round up "just in case" beyond what the drawing supports — unused pairs in a shared screen still need to be terminated or isolated properly, and a cable pulled with double the pairs you need is wasted cost and extra gland size for no benefit.
Worth flagging: not every signal cable decision follows this same logic. Vibration monitoring and accelerometer cabling runs to a different set of considerations entirely — connector type, armouring, and intrinsic safety ratings matter more than pair count. If that's the run you're specifying, our accelerometer cable selection guide covers it in detail.
Ordering pair count from memory instead of the actual drawing. "It's usually 2-pair for these" is how spare cores end up floating in a junction box, or worse, a cable gets pulled short because the real drawing called for 4-pair.
Going thinner to save on cable cost over a long run. 0.5mm looks like the cheaper option on paper, but on a run pushing past 100 metres it can leave a loop-powered transmitter without enough voltage headroom to operate reliably — the saving disappears the moment the loop starts reading erratically.
Not checking whether the ceiling void is shared HVAC return air. This is the single most common reason a PVC cable order gets rejected on site and has to be swapped for LSZH — and it's avoidable with one question to the building services drawing before ordering.
Skipping the spare-pair conversation with the client or engineer. Pulling cable through a ceiling void or conduit run is the expensive part of the job, not the cable itself. If there's any chance of a future instrument being added to the same route, that's the moment to step up pair count — not after the ceiling's been sealed back up.
What pair count do I need for a single 4-20mA loop?
1-pair screened cable is correct for a single loop between one transmitter and one PLC input, unless the drawing specifically calls for spare pairs.
Does thicker gauge instrumentation cable actually reduce signal loss over long runs?
Yes, thicker conductor reduces resistance and voltage drop over distance, which matters most on loop-powered instruments. Our 1.5mm screened instrumentation cable is the typical step-up choice for runs pushing past 150 metres.
Do I need LSZH cable for ceiling void or riser runs?
Generally, yes if the ceiling void doubles as return air plenum, or the run passes through a riser or shared building service space — check the building classification and project specification to confirm, since requirements vary by project.
Can I run 20 pair instrumentation cable in the same tray as power cable?
As a general rule, screened instrumentation cable should be segregated from power cable in the tray or kept a reasonable separation distance apart to avoid induced noise on the signal pairs — check your site's cabling standard for the exact separation required. Our 20 pair screened instrumentation cable is commonly used for exactly this kind of consolidated multi-instrument run.
Full range of screened instrumentation cable in stock at Kingsgrove NSW, with trade pricing and same-day dispatch on orders placed before cut-off.
Find the full instrumentation cable range at Schnap -- trade pricing and same-day dispatch from Kingsgrove NSW.
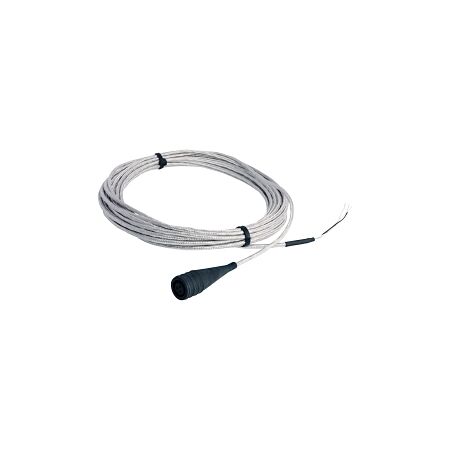
A pump bearing accelerometer that reads clean on the bench can go noisy the moment it's wired through a cable tray back to the data collector twenty metres away — not because the sensor's faulty, but because nobody thought about shield grounding or cable length until the readings started drifting.
Most top-connector piezoelectric accelerometers used in condition monitoring run on a 2-pin cable — one conductor for signal, one for return/shield. That covers the majority of vibration monitoring points on pumps, motors and fans. A 3-pin cable comes into play when the accelerometer or the data collector interface calls for a separate case ground or a third reference conductor — in practice, this is more common on certain triaxial mounting setups or where the collector manufacturer specifies it. Before ordering, check the connector spec on the accelerometer itself rather than assuming pin count from the sensor's physical size.
The same logic carries over to eddy current probe cables, which run alongside accelerometer cable on most reliability jobs. These are typically supplied as a matched pair (probe cable to extension cable) with a fixed pin configuration set by the probe manufacturer — swapping in a generic cable here usually isn't an option.
[!] Check before you order: Accelerometer cable pin count and connector type must match the sensor's data sheet exactly. A cable that physically fits but has the wrong pin assignment can still connect — and still produce garbage data — without any obvious fault indication.
If the run from bearing to data collector stays inside a cable tray or conduit for its full length, non-armoured ETFE-jacketed cable is usually sufficient and easier to terminate on site. Once the route crosses open floor space, drags near rotating equipment, or sits somewhere it could be stepped on or caught by a forklift, armoured cable earns its keep — the steel braid under the jacket protects the signal conductors from the kind of mechanical damage that shows up as intermittent readings months later rather than an immediate failure.
This is where sizing your instrumentation cable run properly matters just as much for accelerometer cable as it does for multi-pair signal wiring — a cable that's technically long enough but poorly protected along the route will cost more in re-runs than choosing armoured from the start.
Standard shield-grounded accelerometer cable is fine for most process plants — the shield ties to ground at one end (typically the data collector side) to avoid ground loops, which is the usual cause of 50Hz hum riding on the vibration signal. If the monitoring point sits in a classified hazardous area — a gas compressor skid or a fuel storage area, for example — intrinsically safe (IS) rated cable becomes a compliance requirement, not a preference. IS-rated cable is built to limit the energy that can reach the hazardous zone, and it typically needs to be installed and terminated according to the site's IS loop drawings rather than general good practice.
[!] Compliance note: Installing IS-rated accelerometer cable in a hazardous area typically falls under AS/NZS 60079 requirements in Australia. If you're not the one who signed off the site's hazardous area classification, confirm with the site's electrical engineer before substituting cable types.
It's tempting to grab whatever length is on the shelf and coil the excess, but excess coiled cable can act like an unintended antenna and add noise to a low-level signal. As a general rule, it's better to measure the actual run — sensor mounting point to junction box or portable collector position — and order the closest length above that, rather than rounding up generously. For permanent installations feeding a data collector via a Lemo-style connector, this matters even more, since the connector end is usually fixed and can't be trimmed and re-terminated on site the way a standard shielded cable can.
The same length-matching principle applies to fibre optic temperature probe extension cable, which often runs the same route as accelerometer cable on bearings that are monitored for both vibration and temperature. If that's part of your scope, it's worth reading how to choose between multimode and singlemode fibre for the temperature probe side of the run, since the wrong fibre grade over a longer run can cause its own signal loss issues — separate from anything on the accelerometer side.
Related Reading
Ordering by physical fit instead of pin assignment. A 2-pin and 3-pin connector can sometimes look similar enough at a glance that the wrong cable gets pulled from stock — always cross-check against the sensor data sheet, not the connector shape.
Grounding the shield at both ends. This is one of the most common causes of noisy vibration data — grounding both ends creates a ground loop. The shield should typically only be earthed at one end of the run.
Using non-armoured cable across an exposed route to save cost. It works fine until the first forklift pass or foot traffic incident, after which the fault can be intermittent and genuinely difficult to trace back to physical damage.
Coiling excess cable instead of measuring the run. Coiled cable behaves differently to a straight run electrically, and it's an easy way to introduce noise that wasn't there on the test bench.
Assuming standard cable is fine in a hazardous area. IS-rated cable and standard shield-grounded cable are not interchangeable in a classified zone, regardless of how similar they look on the reel.
do I need 2-pin or 3-pin accelerometer cable?
Check the connector spec on the accelerometer's data sheet. Most top-connector piezoelectric accelerometers use 2-pin; 3-pin is used where the sensor or collector interface calls for a separate reference conductor.
can I use the same cable for accelerometer and eddy current probe?
Not usually. Eddy current probes are typically supplied with a matched probe-and-extension cable set from the manufacturer, while accelerometer cable is generally sourced separately — see the instrumentation and multi-pair screened cable range for both.
do I need IS-rated cable for a bearing sensor near a gas compressor?
If the point sits inside a classified hazardous area, IS-rated accelerometer cable is typically required under AS/NZS 60079 in Australia. Confirm the zone classification with the site's electrical engineer before installing.
is a licence required to terminate accelerometer cable on site?
Terminating low-voltage instrumentation cable in Australia generally falls under the same licensing requirements as other electrical work, though scope can vary by state and site. Check with the relevant state licensing authority and the site's electrical safety rules before starting work.
why is my accelerometer reading noisy after a long cable run?
Common causes include shield grounded at both ends (creating a ground loop), excess cable coiled rather than run straight, or non-armoured cable picking up interference near motors and VFDs along the route.
what length accelerometer cable do I need for a 15m run?
Measure the actual route from sensor mount to junction box or collector, then order the closest standard length above that figure — for a genuine 15m run, a 15m armoured 2-pin shielded cable avoids both a short-fall and excess coiling.
can accelerometer data collector cable be extended?
Cables terminated with a Lemo-style connector to the data collector are generally supplied as fixed-length assemblies and aren't designed to be field-extended or re-terminated — order the length matched to your actual collector-to-sensor distance up front.
Related Reading
Trade pricing and same-day dispatch from Kingsgrove NSW across the accelerometer, probe and data collector cable range.
Browse the full accelerometer cable range at Schnap for trade pricing and same-day dispatch from Kingsgrove NSW.
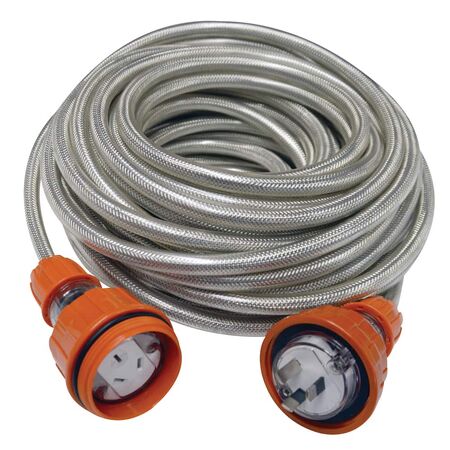
A driveway resurfacing job on a wet Tuesday morning is a common enough scene -- powering an angle grinder off a standard household extension lead that's been coiled on damp concrete since the last job. Within twenty minutes the RCD trips, the plug pins show the first signs of corrosion, and the lead gets binned by lunchtime. Most extension leads sold for indoor use simply aren't built to sit in water or cop direct weather, and that gap between IP20 and IP66 is where a lot of avoidable site delays start. If the job is landscape lighting rather than power tools, the garden lighting cable guide covers that scenario instead.
Standard extension leads -- the white ones most sites have a drawer full of -- are rated IP20. That rating covers protection against fingers and small objects getting into the socket, but it says nothing about water. Sitting one on a damp slab, running it through a puddle, or leaving it out in drizzle overnight is enough to get moisture into the plug or socket body over time, and that's usually what's behind an RCD that keeps tripping for no obvious reason on an otherwise fine tool.
It's rarely a single dramatic failure. More often it's a lead that keeps working, just less reliably, until someone notices the pins have gone green or the sheath has gone brittle where it sat in the sun. By the time that's obvious, the lead has usually already been the reason for a couple of unexplained trips or a callback.
IP66 is the rating that actually matters for exterior and wet-area work. It means the lead is dust-tight and rated against powerful water jets from any direction -- in practice, that's the difference between a lead that shrugs off rain and hose-down conditions and one that quietly degrades every time it's used outside its intended environment.
| Rating | What It Protects Against | Best Suited For |
|---|---|---|
| IP20 | Fingers and small solid objects only -- no water protection | Indoors, dry workshops, covered areas |
| IP66 | Dust-tight, protected against powerful water jets | Exterior sites, wet slabs, wash-down areas |
There's no in-between rating worth stocking for site work -- an IP66 lead handles the wet-area cases an IP20 lead can't, so once a job moves outside, the decision is really just about length and current from here.
Related Reading
Once the rating's sorted, the next decision is reach and current. A 5m or 10m lead covers most single-tool jobs close to a power point, while 20m-30m leads suit sites where the source is further from the work area -- a shed, a site shed, or a distribution board at the front of the block. As a general rule, running a long, thin lead at full load over its whole length introduces more voltage drop than a shorter run of the same rating, so for anything past 20m it's worth stepping up the current rating rather than pushing a 10A lead to its limit end to end.
Current rating matters more than most people budget for. A single grinder or drop saw sits comfortably on 10A, but running two tools off the same lead, or powering something with a higher startup draw, is where a 15A or 20A lead earns its place -- it's not just about the plug fitting, it's about not derating the lead under real load.
On sites with a lot of foot traffic or multiple trades working close together, a high-visibility orange lead is worth the small premium over a standard grey one -- it's one less trip hazard that gets missed in a walkaround, and it's the kind of thing a site supervisor notices during an induction check.
Grabbing whatever lead's in the van. The IP20 lead and the IP66 lead often look similar coiled up -- the difference only shows once one of them's sitting in a puddle for a few hours.
Coiling a hot lead straight after use. A lead that's been run at or near its rated current gets warm, and coiling it tight while still warm can accelerate wear on the outer sheath over time -- let it cool flat first where possible.
Undersizing for the actual load. Two tools daisy-chained off one 10A lead is a common shortcut on smaller jobs, but it's exactly the scenario that trips an RCD or causes the lead to run hotter than it should.
Leaving connections lying in standing water. Even an IP66 rated lead is rated for water jets, not permanent submersion -- a plug or socket sitting in a puddle for an extended period is still worth avoiding where it can be.
Assuming grey means indoor and orange means outdoor. Colour is a visibility choice, not a rating indicator -- always check the IP rating printed on the lead itself rather than going by colour alone.
Can I use a normal extension lead outside if it's under cover?
A covered area reduces direct rain exposure, but it doesn't stop moisture from ground contact, splashback, or humidity -- for anything genuinely outdoors, an IP66-rated lead is the safer default rather than relying on cover alone.
What length outdoor extension lead do I need for a driveway job?
It comes down to how far the power point is from the work area -- a 20m high-visibility lead covers most driveway or front-of-house jobs where the source is a garage or front power point.
Is a high-vis orange lead worth it for site work?
On any site with multiple trades or foot traffic, yes -- a high-visibility orange lead is easier to spot during a walkaround and reduces the chance of it becoming a trip hazard.
Do outdoor extension leads need to be on an RCD?
Yes -- portable leads used outdoors should generally be run through RCD protection regardless of their IP rating, and on many sites this is a standard induction requirement rather than optional practice.
What does IP66 actually mean on an extension lead?
It means the lead's plug and socket housings are dust-tight and protected against powerful water jets from any direction -- a braided IP66 lead is built to that standard specifically for exterior and wash-down conditions.
Can I leave an IP66 extension lead out in the rain overnight?
Short-term rain exposure is what IP66 is designed for, but as a general rule it's still worth disconnecting and coiling leads when a site is left unattended overnight, mainly to avoid trip hazards and reduce unnecessary wear rather than because the rating itself is inadequate.
Trade pricing and same-day dispatch from Kingsgrove NSW on the full range of extension leads below.
Find the full outdoor extension lead range at Schnap -- trade pricing and same-day dispatch from Kingsgrove NSW.
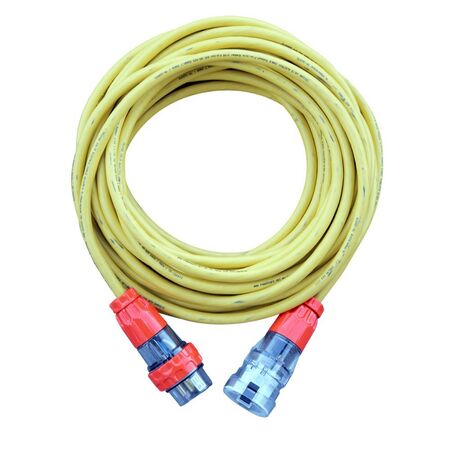
A contractor rolls out what looks like a solid heavy-duty lead to power a welder or a site compressor, plugs in, and the breaker trips within minutes. Nine times out of ten the cable itself was fine — the lead was rated 32A when the equipment was pulling closer to a 63A load. Getting a 3 phase extension lead right on site comes down to matching current rating to the machine, not just picking the longest or thickest-looking option on the shelf.
Most buyers start by asking how many metres they need. That's the wrong first question. A 3 phase extension lead is built around a current rating — 32A or 63A — and that number needs to match the equipment's rated draw with some headroom, not just cover the distance from the distribution board to the machine. Undersize it and you get nuisance tripping, or worse, a plug and socket running hot under sustained load. Oversize it unnecessarily and you're paying for cable and connectors you don't need.
The two common ratings differ in more than just amperage — the plug and socket format changes too, which is where mismatches often happen on a busy site.
| Rating | Plug/Socket | Typical Use | IP Rating |
|---|---|---|---|
| 32A | 5-pin, 6mm cable | Portable tools, smaller compressors, temporary lighting towers | IP66 |
| 63A | 5-pin, 16mm CEE cable | Welding plant, larger machinery, temporary switchboard feeds | IP67 |
A rough rule that holds up in practice: check the equipment's data plate for actual full-load current, not just the horsepower or kW rating printed on the side, before locking in 32A vs 63A. Machines with high inrush current — compressors and some welding sets — can trip a marginal 32A lead even if the running current looks fine on paper.
Related Reading
Before the extension lead question comes the supply question: what's actually feeding the temporary distribution point? Sites running on a genuine 3-phase supply — whether from a permanent switchboard or a temporary generator — need extension leads rated to carry that supply's output safely to the point of use, not the other way around. This is the same sizing logic that comes up when specifying a three phase EV charger connection — the supply capacity has to be confirmed first, and the cable or lead sized to match it, rather than assuming a standard lead will handle whatever's plugged into it.
On a temporary distribution setup, it's common to run one 63A lead from the main board to a spider box, then branch out with 32A leads to individual tools. Getting that hierarchy backwards — running 32A from the board and expecting it to feed multiple downstream loads — is one of the more frequent site call-outs electricians deal with.
Treating 63A as "just a bigger 32A" lead. The plug and socket pin configuration differs between the two ratings — a 63A lead won't plug into a 32A outlet and vice versa. Ordering the wrong one because "it's the same style, just heavier duty" is a common and avoidable delay on a job.
Sizing by length instead of load. A 50m 32A lead and a 10m 63A lead cost roughly similar amounts, but they serve completely different equipment. Picking based on how far the cable needs to reach, without first checking the machine's actual current draw, is how leads end up undersized for the job.
Ignoring IP rating for the actual site conditions. A lead sitting near wet concrete pours, in a dusty demolition zone, or exposed to rain overnight needs the connector rating to match — in practice, IP66/IP67 rated 5-pin connectors are the baseline for most outdoor or semi-exposed industrial sites, not an optional upgrade.
Daisy-chaining leads without checking cumulative run length. Joining two or three extension leads to reach a distant machine is common practice, but the combined length adds up against the total run the circuit was designed for — in practice, volt drop and heat build-up become more of a factor the longer the daisy-chained run gets, particularly under sustained heavy load.
what's the actual difference between a 32a and 63a 3 phase extension lead?
Beyond the current rating itself, the two use different pin configurations and cable gauge — a 32A lead runs a 6mm cable with a 5-pin plug, while a 63A lead steps up to a 16mm CEE cable and a larger 5-pin CEE plug. They're not interchangeable, and the socket on one won't accept the plug from the other. See an example 63A 5-pin CEE extension lead for the connector style.
can i run 3 phase power a long distance without volt drop issues?
Longer runs are fine in principle, but as a general rule, the further the run, the more volt drop becomes a factor, especially on 32A leads feeding heavier loads. For long site runs, stepping up to 63A cable or breaking the run at a spider box is typically the safer approach.
do i need a 5 pin plug for 3 phase equipment?
Most industrial 3-phase equipment in Australia uses a 5-pin configuration (3 phases, neutral, earth), which is the standard across both 32A and 63A extension leads. A 32A 5-pin extension lead covers the typical portable tool scenario.
do i need a licence to connect temporary 3 phase power on site?
Connecting or modifying fixed 3-phase wiring and switchboards requires a licensed electrician. Plugging a pre-terminated extension lead into an existing rated outlet is generally within scope for site crews, but anything involving new circuits, generators, or switchboard work should go through a licensed electrical contractor to stay compliant.
can i daisy chain two 3 phase extension leads together?
It's common practice on larger sites, but the combined length of both leads counts against the total run for that circuit. As a general rule, keep daisy-chained runs as short as practical and avoid stacking multiple leads on a circuit already feeding a heavy load. A 63A 50m extension lead can often replace what would otherwise be two shorter leads joined together.
what ip rating do 3 phase extension leads need for site use?
For most job sites, IP66 or IP67 rated connectors are the practical minimum, covering exposure to dust, rain, and wet concrete work. Leads used strictly indoors in a controlled environment can get away with less, but on an active construction site it's rarely worth the risk of specifying anything lower.
Trade pricing and same-day dispatch from Kingsgrove NSW on both 32A and 63A ratings, in braided sheath finishes built for site conditions.
Find the full extension lead range at Schnap — trade pricing and same-day dispatch from Kingsgrove NSW.
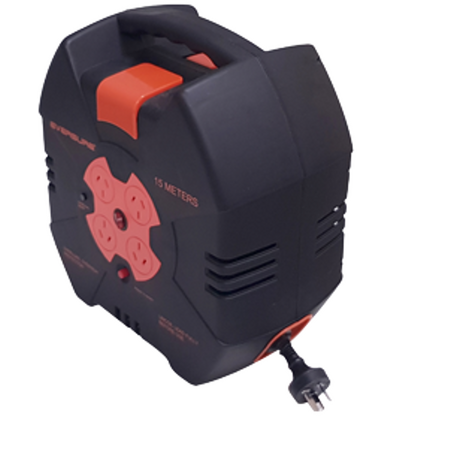
The 15-metre lead ends up in a heap behind the compressor every afternoon, and by Friday nobody can find the end that plugs into the wall. An auto-rewind cable reel fixes that specific problem — not because it's a fancier lead, but because it puts the coiling job on a spring instead of on someone's hands.
A straight extension lead doesn't fail because the cable is bad — it fails because of how it gets stored between jobs. Coiled loosely over a hook, stepped on, or dragged back in from the van floor, the plug end and the first metre of cable take the most damage. In a workshop running the same lead five or six times a day, that wear compounds fast. The core issue isn't the lead itself, it's that nothing forces a consistent, gentle coil every single time.
This is where an auto-rewind reel changes the equation. The spring mechanism winds the cable back onto the drum at a controlled tension every time, so the cable isn't kinked, crushed underfoot, or left half-coiled in a doorway. It's less about convenience and more about consistency — the reel does the same thing every time a straight lead relies on someone remembering to.
The mistake that shows up most in workshops isn't picking the wrong reel — it's picking one based on outlet count without checking what's drawing power through it. A 4-outlet reel looks like the obvious upgrade over a single-outlet lead, but if a compressor and a work light are running off it simultaneously, the combined draw matters more than how many things can physically plug in.
| Reel | Cable Length | Rating | Outlets |
|---|---|---|---|
| Auto Rewind Cable Reel 18m 10A | 18m | 10A, IP20 | 1 |
| Auto Rewind Cable Reel 18m 15A | 18m | 15A, IP20 | 1 |
| Auto Retracting 15m Extension Lead | 15m | 10A | 1 |
| Auto Retracting Power Lead Reel 15m 4 Outlet | 15m | 10A | 4 |
In practice, a 10A-rated reel is fine for a single tool or a light plus a charger — but running two mid-draw tools off a 4-outlet reel at the same time is where the total load starts to matter more than the outlet count. If the workshop regularly runs multiple tools off one reel, the 15A option gives more headroom before anything trips.
[!] Cable heat build-up: A reel left partially wound while running a high-draw tool typically runs hotter than one fully extended, because the coiled cable can't dissipate heat as easily. As a general rule, unwind the cable fully when running anything close to the reel's rated capacity for extended periods.
Related Reading
Buying on outlet count instead of combined draw. Four outlets look like more capacity, but if the tools plugged in draw more than the reel's amp rating combined, the extra sockets don't help — the circuit still trips.
Running tools with the cable still coiled. It's an easy habit to carry over from a straight lead — plug in and go — but a reel that's only half-unwound builds heat faster than the cable is designed to handle under sustained load.
Wall-mounting without checking the bracket load rating. A loaded reel is heavier than it looks once the full cable length is wound in, and a bracket rated for a lighter unit can work loose over months of vibration from workshop equipment.
Assuming IP20 covers outdoor or wash-down areas. IP20-rated reels are built for dry indoor use. Storing or running one in a van bay that gets hosed out, or leaving it exposed near an open roller door in wet weather, sits outside what the rating is designed for.
Treating the reel as maintenance-free. The retraction spring and cable guide still wear over time, particularly with multiple full-length pulls a day. A reel that starts rewinding unevenly or slower than usual is generally worth checking before it's relied on for a job that can't afford a dead lead.
can a 4-outlet reel run power tools and a work light at the same time?
Generally yes, as long as the combined draw of everything plugged in stays under the reel's rated amperage — the 4-outlet reel is rated to 10A total across all four sockets, not per outlet.
why does my retractable lead get hot when fully wound?
A coiled cable can't shed heat as efficiently as a straight run, so the effective safe current typically drops when the cable is only partly unwound. As a general rule, unwind the reel fully for anything drawing close to its rated capacity.
do retractable extension leads need to be tested and tagged in a commercial workshop?
In most commercial and trade environments in Australia, portable leads including cable reels fall under regular test and tag requirements — check the specific schedule that applies to the workplace, as intervals vary by industry and risk classification.
what's the difference between 10A and 15A cable reel ratings?
The rating reflects the maximum continuous current the reel is built to carry safely. For workshops running higher-draw equipment off one reel, the 15A rated reel gives more headroom than a 10A unit before load becomes a concern.
can I wall-mount an auto-rewind reel above a workbench?
Most auto-rewind reels are designed for wall or ceiling mounting — the 18m 10A reel is a common choice for bench-side mounting since it keeps the cable off the floor entirely. Confirm the bracket and wall surface can carry the reel's full loaded weight before fixing it in place.
how often does the auto-rewind spring need replacing?
There's no fixed interval — it depends on daily use. A reel used multiple times a day in a busy workshop will typically show wear sooner than one used occasionally, and uneven or slow rewinding is usually the first sign it needs attention.
Trade pricing and same-day dispatch from Kingsgrove NSW on the full range below.
See the full retractable extension lead range at Schnap and get same-day dispatch from Kingsgrove NSW.
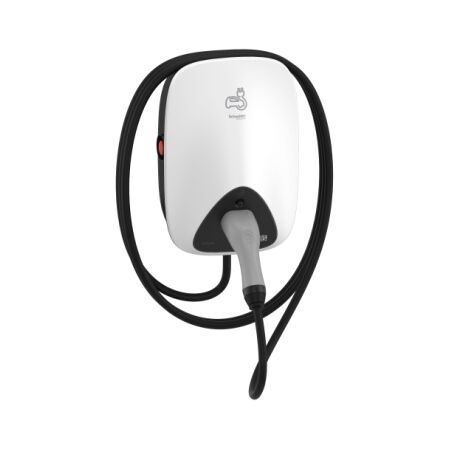
A property with three-phase power already run to the switchboard — common on larger homes, rural sheds, or small commercial sites — changes the EV charger conversation entirely. The question isn't just "which charger" anymore, it's whether to spend more upfront on a three-phase unit or stick with a cheaper single-phase charger that ignores the extra phases sitting unused in the switchboard. If your circuit sizing is also still an open question, our TPS building wire guide covers that side of the job.
A single-phase AC charger tops out at 7.4kW in most Australian installations, limited by the 32A single-phase circuit most switchboards are set up for. Three-phase changes that ceiling — 11kW and 22kW units are common on the three-phase range, spreading current across three active conductors instead of loading up one. In practice, that means a three-phase 22kW charger can put roughly three times the energy into a battery pack in the same overnight window compared to a 7.4kW single-phase unit — genuinely useful for a fleet vehicle or high-mileage daily driver, less relevant for a car that sits in the driveway for ten hours anyway.
The catch that trips a lot of buyers up: the car's onboard AC charger has its own ceiling, and it doesn't automatically match whatever the wall unit can deliver. Plenty of EVs on Australian roads still cap out at 7.4kW or 11kW AC input regardless of what's feeding them, which means a 22kW charger on that car is spending money on capacity the vehicle will never draw. If this install is for a fleet or a commercial depot with multiple vehicles cycling through, the sizing conversation looks different again — that's a separate calculation built around DC fast charging rather than AC phase count.
Related Reading
Before locking in a charger kW rating, the switchboard needs a genuine capacity check — not just "is there a spare three-phase breaker slot" but what's actually left over once existing loads (ducted air conditioning, pool pumps, workshop equipment) are accounted for. An electrician doing this properly will look at maximum demand across the whole property, not just what's drawing power right now, since a three-phase charger running overnight alongside daytime loads can catch out a supply that looked fine on paper.
Once the available capacity is confirmed, the supply cable itself needs to match the charger's draw — a 22kW three-phase charger pulling roughly 32A per phase needs a meaningfully heavier cable run than a 7.4kW single-phase circuit, and getting this wrong is one of the more expensive mistakes to fix after the fact. It's worth sorting cable sizing at the same time as the charger spec, not as an afterthought once the unit's already on the wall.
Higher-capacity chargers, particularly three-phase units at 22kW, commonly trigger a notification or approval step with the local electricity distributor before connection. This requirement varies by network and by the charger's total capacity, so it's typically checked as part of the initial site assessment rather than assumed either way.
Buying capacity the car can't use. A 22kW three-phase charger on a vehicle capped at 7.4kW AC input isn't future-proofing — it's paying for headroom that specific car will never draw, unless a faster-charging replacement vehicle is already on the cards.
Assuming a spare three-phase breaker means spare capacity. A free slot in the switchboard says nothing about what's actually left in the supply once existing loads are running at the same time as the charger overnight.
Sizing the charger before sizing the cable. Locking in a 22kW unit and only then checking whether the existing supply cable can carry it is a common sequence to get backwards — it's cheaper to confirm both together.
Skipping the network notification step. Assuming a three-phase charger install doesn't need distributor sign-off, then finding out otherwise partway through the job, adds delay that's avoidable with an earlier check.
Choosing tethered vs socket-outlet without thinking about the site. A tethered cable is convenient for a single dedicated vehicle; a socket-outlet unit makes more sense where multiple drivers or cable types need to use the same charger.
Do I need a three-phase EV charger if my car can only accept 7.4kW AC?
Not for that vehicle specifically — a single-phase 7.4kW charger will fully use what the car can draw. Three-phase only pays off once the vehicle's onboard charger can actually accept more, or if a faster-charging car is likely to replace this one within the next few years.
What's the real difference between an 11kW and a 22kW three-phase charger in charging time?
Assuming the car can accept the higher rate, a 22kW charger roughly halves overnight charging time compared to 11kW. Our 22kW three-phase wall-mount charger is a common pick where the vehicle's onboard charger supports it and the site has spare three-phase capacity confirmed.
Do I need approval from my electricity distributor to install a three-phase EV charger in NSW?
Generally yes for higher-capacity three-phase installs, though the exact threshold and process depends on the local network operator. This is typically confirmed as part of the initial site assessment rather than assumed either way — check with the installing electrician before committing to a charger size.
What licence does an electrician need to install a three-phase EV charger?
A licensed electrician with the appropriate electrical work licence for the relevant state is required — EV charger installation isn't a job for an unlicensed installer, given it typically involves new circuit wiring back to the switchboard. If cable sizing for that circuit is still unresolved, the TPS building wire guide is a useful reference for the licensed electrician doing that part of the job.
Can I start with a single-phase charger and upgrade to three-phase later?
It's possible, but it usually means a fresh circuit run rather than a simple swap, since single-phase and three-phase installs typically use different cable configurations back to the switchboard. If there's any chance of upgrading down the track, it's worth raising with the electrician at quoting stage — our 7.4kW single-phase charger is a common starting point where three-phase isn't justified yet.
Is a tethered or socket-outlet three-phase charger better for an outdoor installation?
Both are IP-rated for outdoor use across the three-phase range, so it comes down to how the site is used day to day rather than weather resistance. A tethered unit suits a single dedicated vehicle; a socket-outlet version is more flexible where different drivers or cable types need access to the same charger.
If this install is turning out to be a fleet or commercial depot job rather than a single vehicle at a home or small site, the sizing approach changes — that's a different conversation built around DC fast charging capacity rather than AC phase count.
Related Reading
Trade pricing and same-day dispatch from Kingsgrove NSW across the full AC charger range, from single-phase entry units through to 22kW three-phase.
Find the full three-phase EV charger range at Schnap — trade pricing and same-day dispatch from Kingsgrove NSW.
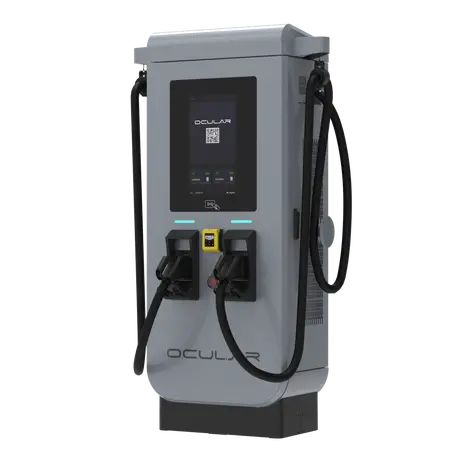
Twelve delivery vans need to be back on the road by 6am, and the depot's only 60kW charger can't cycle through all of them overnight. This is the kind of kW-and-connector math that trips up fleet operators moving from a single trial vehicle to a full depot rollout — the answer isn't just "buy DC", it's matching power rating and connector count to how many vehicles actually need to leave charged by shift start. For depots still deciding between a standard AC circuit and something heavier duty, our three-phase EV charger guide covers when AC still does the job before DC becomes necessary.
Most depot charging happens in a fixed window — vehicles roll in after the last run, and they need to be ready again before the first one the next morning. A 60kW charger is fine for two or three vans with a full eight-hour window, but it starts to struggle once you're trying to turn over ten or more vehicles, or if the window shrinks because of split shifts. Going up in power rating buys back time, but it also means checking with the site's network connection first — larger loads sometimes need sign-off from the local distribution network before they can be connected.
| Power Rating | Typical Fit |
|---|---|
| 60kW | Small depot, 2-3 vehicles, long overnight window |
| 90-120kW | Mid-size fleet, mixed shift patterns |
| 150-180kW | Larger fleet or shorter charging window |
| 240kW | High-turnover sites, multiple vehicles queued through the day |
These are general starting points, not a substitute for a proper load calculation — in practice, actual charge time also depends on the vehicle's own onboard charging limit, so a 180kW charger won't necessarily replenish a van's battery any faster than a 90kW unit if the vehicle itself can't accept more than 90kW.
Related Reading
A dual CCS2 charger lets two vehicles plug in to the one unit, which matters more for depot layout than most buyers expect — one charger footprint instead of two means less trenching, less conduit run, and one less unit to maintain. The trade-off worth understanding before ordering: on most dual-connector units, the rated power is shared across both connectors rather than doubled, so two vans charging at once will typically split the available kW rather than each getting the full rating. For depots running a handful of ev chargers side by side, this is usually still faster overall than queuing vehicles one at a time on separate single-connector units.
The Atlas Pro range adds a screen and card reader on top of the same dual CCS2 hardware, which matters if the depot also wants to charge visiting contractor vehicles or run the site as a semi-public bay — the standard Atlas range is built for internal fleet use where access is already controlled at the gate.
Depot layouts change — a new lease term, an extra loading bay, or a fleet that grows faster than the site plan anticipated. The Atlas and Atlas Pro range is built as a transportable unit rather than a permanently trenched installation, which means it can be repositioned within the site without a full civil works redo if the layout shifts later. For sites genuinely tight on space, a lower-output wallbox-style DC unit in the 25-50kW range is sometimes used instead of a full commercial charger, though that format trades off charging speed for a smaller physical footprint.
Where a depot has already locked in its layout and just needs maximum throughput at a fixed point — a corner bay that will always be the charging point, for example — a fixed-format unit like the 50kW or 100kW Delta chargers can be the more straightforward option, since there's no ongoing need for repositioning.
Sizing for today's fleet, not next year's. A charger bought for three vans this quarter often needs to service eight within twelve months once the switch to electric picks up pace — buying headroom into the power rating now is usually cheaper than adding a second charger later.
Assuming dual connectors mean double the power. As covered above, most dual CCS2 units share their rated output across both connectors — planning around full simultaneous power at both plugs is the most common miscalculation depot managers make when comparing spec sheets.
Skipping the network capacity check. It's easy to treat a DC charger purchase like any other equipment order, but anything drawing significant load can trigger a distribution network approval step that takes longer than the charger delivery itself if it's left until installation day.
Locking in a fixed unit before the layout is settled. A permanently trenched charger in the wrong spot is expensive to move. Sites still finalising their depot plan are usually better served starting transportable, then switching to fixed once the layout is proven.
Underestimating card-reader friction on shared-access sites. Adding payment or access control (Atlas Pro's screen and card reader) is worth it for any site with non-fleet vehicles charging, but it does add a few seconds of setup per session — a detail that only shows up once the charger is actually in daily use.
how many kW do I need to charge 10 vans overnight?
It depends on the charging window and each vehicle's onboard limit, but as a general rule, a depot running ten vehicles across a standard overnight window usually looks at something in the 120-180kW range rather than a single 60kW unit — spreading the load across a dual-connector charger like the Atlas Pro 120kW dual CCS2 charger is often more practical than one very high-output single-connector unit.
can one DC charger charge two EVs at the same time?
Yes, on any dual CCS2 model — but as covered above, the two connectors typically share the unit's total rated power rather than each getting the full output, so charging speed per vehicle drops when both bays are in use at once.
what's the difference between a 60kW and 120kW commercial EV charger?
Beyond the raw power rating, the practical difference is charging window — a 120kW unit can typically get a vehicle back to a usable charge in roughly half the time of a 60kW unit, assuming the vehicle itself can accept that higher rate. For small fleets with long overnight windows, the extra speed often isn't needed.
do I need a licensed electrician to install a commercial DC EV charger in Australia?
Yes — DC fast charger installation involves fixed wiring work that must be carried out by a licensed electrician, and depending on the state, may also require notification to the local network operator given the load involved. Site-specific requirements are worth confirming with the installing electrician before committing to a power rating.
can a commercial EV charger run on single phase power?
No — DC fast chargers at commercial power ratings require a three-phase supply. Our three-phase EV charger guide covers what that connection typically involves for sites that haven't run three-phase power before.
does a transportable EV charger still need a permanent electrical connection?
Yes — "transportable" refers to the physical unit being repositionable within a site, not to the electrical connection, which still needs to be installed by a licensed electrician at each location it's used. It just avoids the trenching and civil works that a fully fixed installation requires if the charger later needs to move.
Trade pricing and same-day dispatch from Kingsgrove NSW on the full range of ev chargers below, from transportable depot units to fixed high-throughput chargers.
Browse the full commercial EV charger range at Schnap for trade pricing and same-day dispatch from Kingsgrove NSW.

SCHNAP Electrical Wholesaler - clear, upfront pricing that professional electricians trust

Get what you need in seconds. SCHNAP electrical wholesaler makes ordering quick and simple

Fast delivery anywhere - that's guaranteed. SCHNAP electrical wholesalers ship nationwide with same-day dispatch

Track your order every step of the way. SCHNAP electrical wholesale keeps you updated from click to delivery

SCHNAP is Australia's premier electrical wholesaler and electrical supplies, marketing thousands of quality products from leading brands. Trusted for nearly two decades by licensed electricians, contractors, and engineers, our range covers everything from basic electrical components to complex industrial electrical equipment
Our key categories include: LED lighting, designer switches, commercial switchboards, circuit protection, security systems & CCTV, and smart home automation
All products are certified to Australian standards (AS/NZS), backed by our 30-day, no-questions-asked return policy. Our expert technical team helps you quickly source the right solution for any residential, commercial, or industrial project, with daily dispatch from our Sydney electrical warehouse delivering Australia-wide
SCHNAP offers the most comprehensive electrical product range, with full technical specifications, application details, installation requirements, compliance standards, and warranties — giving professionals total confidence in every purchase


