




Kingsgrove Branch:

A switchboard upgrade isn't signed off until the directory is labelled -- and on a 12-circuit board with a mix of new RCBOs and old fuse-based circuits, guessing which breaker feeds which room isn't good enough for an inspector. Getting switchboard labels right the first time saves a return trip, and it's one of the easiest parts of the job to get wrong if you're relying on a permanent marker and a steady hand. Once the board itself is sorted, the individual cables running into it need their own electrical cable tags too.
A switchboard directory isn't just a courtesy for whoever opens the board next -- it's part of what gets signed off. AS/NZS 3000 requires switchboards to be clearly and durably marked so each circuit can be identified without guesswork, and in practice that means every breaker or RCBO needs a description an inspector (or the next tradesperson) can read at a glance. "Circuit 1", "Circuit 2" written in biro doesn't cut it once there's more than a handful of circuits on the board.
On a typical residential upgrade -- old fuse box out, new RCBO board in -- you're often relabelling everything from scratch, because the old fuse carrier labels don't map cleanly onto the new circuit breakdown. That's the point where it's worth deciding on a labelling system before you start writing anything, rather than filling in the directory card as you go and running out of room or consistency halfway through.
There isn't one correct way to label a switchboard -- it depends on the board type, how much room the directory card gives you, and whether you're labelling once or expect to update it later. A die-cut label kit gives you pre-cut, consistent labels that slot straight onto a standard directory card, which is the fastest option when you're labelling a full board of new circuits in one sitting. Adhesive labelling strips work well when the board doesn't have a standard directory card at all, or when you're labelling the enclosure itself rather than a card insert. Cable ID tape is the more flexible option -- useful when you need to label something that isn't a standard rectangular slot, like a sub-board isolator or a spare way.
| Label Type | Best For | Notes |
|---|---|---|
| Die-cut label kit | Full board relabel, standard directory cards | Fastest for a complete board; blank refill sheets available once the printed set runs out |
| Adhesive labelling strip | Boards without a card insert, flush-mount enclosures | Sticks directly to the enclosure surface |
| Cable ID tape / labels | Isolators, spare ways, non-standard slots | Write-on or pre-printed, cut to length |
The label itself is only half the job -- what's written on it matters just as much. "Power" or "Lights" as a description on a 12-circuit board tells nobody anything once there's more than one circuit doing each job. A description that names the area and the load is worth the extra few seconds: "Kitchen GPO", "Ensuite Lights", "Hot Water RCBO" reads clearly to an inspector and to whoever's back on that board in five years for a fault.
RCD and RCBO circuits are worth flagging separately on the directory rather than folding them into a generic area description, since it's common for a homeowner (or the next electrician) to need to know at a glance which circuits have RCD protection and which don't.
Writing generic descriptions to save time. "Circuit 1" through "Circuit 12" might feel faster on the day, but it means the directory is effectively useless to anyone who wasn't on the job -- including the electrician doing the fault call two years later.
Using a marker straight onto the enclosure. Handwritten labels in permanent marker fade and smudge faster than most people expect, especially on boards mounted somewhere that gets any sun or temperature swing. It reads as unprofessional on a job that's otherwise been done properly.
Not updating the directory after changes. Adding a circuit or moving a load without updating the label for it is one of the most common things picked up on a re-inspection -- the board no longer matches what's actually installed.
Buying a label size that doesn't fit the directory card. Directory card slot sizes vary between board brands and models -- a label kit sized for one board can leave text cramped or overhanging on another. Check the card size before ordering, not after the kit arrives.
Leaving spare ways unlabelled. An unlabelled spare way looks like an oversight to an inspector, even if it's genuinely just spare capacity. A quick "Spare" label closes that off as a question.
Can I write my own circuit descriptions or do I need pre-printed labels?
Handwritten is acceptable as long as it's legible and durable -- pre-printed or die-cut labels just make it faster and more consistent, especially on a board with a lot of circuits.
What size labels fit a standard switchboard directory card?
Directory card sizes vary by board brand, so it's worth checking the card dimensions before ordering. A circuit identification die-cut label kit is sized for standard directory card slots on most residential boards.
Do switchboard labels need to meet a specific standard?
As a general rule, AS/NZS 3000 requires switchboards to be clearly and durably marked so each circuit can be identified -- it's not usually about a specific label product, but about the description being legible, durable, and specific enough to isolate the right circuit without guesswork.
Will an inspector fail a job just for missing circuit labels?
It's a common reason for a re-inspection request, particularly on a full board upgrade. If you're short on time before an inspection, cable ID tape is a fast way to get every circuit labelled without waiting on a die-cut kit.
Trade pricing on the full range below, dispatched same day from Kingsgrove NSW.
Find the full switchboard labels range at Schnap -- trade pricing and same-day dispatch from Kingsgrove NSW.
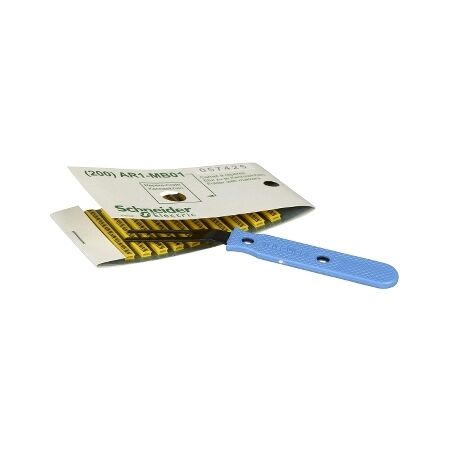
Twelve cores land in the same terminal strip, and by the time you've terminated core nine you've already lost track of which drain wire matched which circuit twenty minutes ago. That's a different problem to getting labelling the switchboard directory itself right — you can nail the door schedule perfectly and still hand the job over with a bundle of unmarked individual conductors that nobody can trace six months from now without pulling the panel apart.
A switchboard directory tells the next person which breaker feeds which circuit. It says nothing about which physical core, inside a multicore cable, connects to which terminal once you're three metres away from the board — in a ceiling space, a floor duct, or a junction box halfway along the run. That's the gap electrical cable tags are built for: identifying individual conductors at the point of termination, not the board as a whole.
It shows up hardest on control and instrumentation work — alarm panels, HVAC control loops, multicore runs feeding a distribution board with a dozen low-voltage circuits bundled through the same gland. Strip back the outer sheath on an untagged bundle a year later and every core looks the same. Cable markers and identification at the core level is what turns a five-minute fault trace back into an afternoon of continuity testing.
For most panel and switchboard work, clip-in cable markers do the job. They're pre-printed PVC clips that snap around the conductor and stay put without tape or adhesive — one clip per core, slid on before or during termination. Numbered end markers running 0-9 cover most core-counting jobs; for anything past nine cores, the standard trade approach is stacking two digits per core (a "1" and a "2" clipped side by side for core twelve) rather than hunting for a marker set with two-digit prints built in.
Letter markers work the same way for phase or function ID rather than sequence — an A-Z end marker set covers that without needing to run a separate numbering convention alongside a written legend. If you're clipping a high volume of markers in one sitting, a positioning tool speeds up placement and keeps clips seated consistently, which matters more than it sounds like once you're forty markers deep on a busy panel.
| Marker Size | Typical Wire Range | Common Use |
|---|---|---|
| 0.75-1mm | Fine-core control wiring | Alarm and instrumentation cores |
| 5-15mm | Standard multicore conductors | General panel and switchboard cores |
| 15-25mm | Heavier gauge single cores | Sub-mains, larger control circuits |
| 25x25mm | Cable, not individual core | Whole-cable ID at gland entry or tray |
Match the marker to the actual conductor diameter rather than the cable's overall size — a clip rated for 15-25mm won't sit properly on a fine 0.75mm control core, and it'll slide or spin once the loom is dressed down.
Clip-in PVC markers are fine indoors, in a dry switchboard or ceiling space, where nobody's expecting UV exposure or repeated handling. Outdoors, in plant rooms with wash-down, or on cable runs that get touched every time someone's doing maintenance, PVC clips crack, fade, or work loose over a few seasons. That's where a brass cable marker earns its place — stamped or engraved metal tag, wired or cable-tied on, built to stay legible well past the point a PVC clip would've given up.
Brass tags are typically reserved for permanent ID points rather than every single core — pit entries, external DB feeds, or cores that genuinely need to survive years of outdoor exposure without a repaint of the whole panel schedule. For everything else inside a dry enclosure, clip-in markers are faster to fit and just as functional for the job's actual lifespan.
Mixing numbering conventions across the same job. Starting a panel with clip-in numbers, then switching to a handwritten tag halfway through because the marker pack ran out, leaves the next person guessing which system applies where.
Tagging at the panel end only. If the far end of a multicore run isn't tagged with the same reference, tracing still means pulling continuity on every core when a fault shows up mid-run.
Using PVC clips outdoors and assuming they'll last. A marker that's fine in a switchboard for a decade can fade to unreadable within a year on an external run exposed to full sun.
Sizing the clip to the cable, not the core. A marker bought to match the overall cable diameter often doesn't grip an individual internal conductor properly once the sheath's stripped back.
No written legend backing up the tags. Numbers and letters on the cores only work if there's a matching reference somewhere — inside the panel door, in the O&M manual, or both — otherwise the tagging system dies with whoever installed it.
what size cable marker fits a 1.5mm control core?
For a 1.5mm control core, a marker in the 0.75-1mm to 5-15mm range typically fits, depending on the exact clip design — check the manufacturer's stated grip range rather than assuming by eye, since a marker that's slightly loose will spin and become unreadable.
can I use the same marker set for numbers and letters on one job?
Yes — most trade suppliers sell matching letter and number marker ranges in the same size and colour family, so you can run numbers for sequence and letters for phase or function without the two systems looking inconsistent side by side.
do clip-in markers work on stranded and solid core the same way?
In practice, clip-in markers grip both, but stranded cores compress slightly more under the clip, so it's worth doing a quick tug test after fitting rather than assuming the clip's seated just because it snapped shut.
is there a requirement to tag individual cores in a switchboard in Australia?
Wiring rules require conductors to be identifiable so circuits can be correctly traced and isolated — the specific method (tags, colour, or a documented legend) is a compliance and safety matter that should be checked against AS/NZS 3000 and confirmed with your licensing body for the job at hand, since requirements can vary by installation type.
will PVC cable markers survive outdoors long-term?
Generally not as well as metal alternatives — standard PVC clip-in markers are commonly rated for indoor or sheltered use, and prolonged UV exposure tends to fade the print well before the physical clip fails, which is why permanent outdoor ID points usually move to brass tags instead.
how do I stop cable tags from being pulled off during future maintenance?
Clip-in markers rely on friction fit, so they can work loose if a core gets handled repeatedly — for points that get touched often during servicing, a wired-on brass tag holds position more reliably than a clip that's only gripping the insulation.
Related Reading
Trade pricing on clip-in and permanent cable markers, dispatched same day from Kingsgrove NSW.
Browse the full electrical cable tags range at Schnap for trade pricing and same-day dispatch from Kingsgrove NSW.
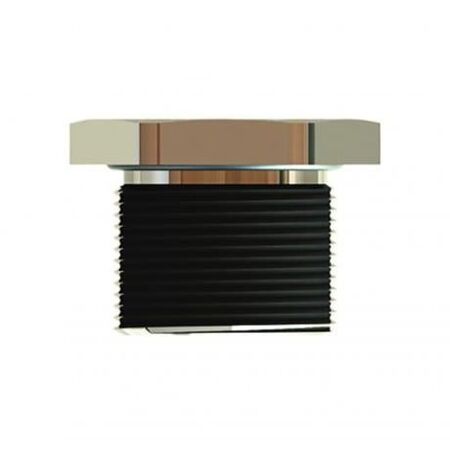
The distribution board on a servo forecourt upgrade has entries tapped M40 — standard for the panel builder who supplied it. The only IECEx-rated cable gland in the van is M32. Nothing about the job changes because of a 8mm thread mismatch, except now there's a decision to make before a single cable goes through that enclosure wall.
Ex-rated enclosures come pre-drilled and tapped by the panel builder, often to whatever thread size suited their layout — not necessarily what's sitting in your gland stock. On retrofit and upgrade work this mismatch shows up constantly: an older Ex d junction box tapped to an imperial or NPT standard, a new switchboard drilled M40 when your glands are M32, or a control panel with M20 entries when the cable you're running needs the larger M25 gland body to seat properly.
The instinct on some jobs is to redrill the entry to match the gland. On a hazardous area enclosure, that's not something to do without thinking it through — redrilling changes the certified entry and can affect the Ex rating of the enclosure itself. A thread adapter that's rated for the same hazardous area classification is, in practice, the more straightforward fix, provided it's sized correctly.
The naming trips people up more than the logic does. A reducer steps a larger enclosure entry down to a smaller gland thread — entry M40, gland M32, reducer bridges the two. An M40 to M32 brass reducer is exactly that case. An enlarger does the opposite — it steps a smaller enclosure entry up to accept a larger gland, useful when the cable itself needs a bigger gland body than the entry was drilled for.
Both are typically nickel-plated brass for corrosion resistance and carry the same IP66/68 sealing rating as the gland they're paired with, so the adapter itself isn't the weak point in the seal — thread engagement and correct tightening are.
| Enclosure Entry | Gland Thread | You Need |
|---|---|---|
| M40 | M32 | Reducer |
| M63 | M50 | Reducer |
| M12 | M16 or M20 | Enlarger |
| 3/4" NPT | M20 | Reducer (thread-standard adapter) |
[!] Compliance note: The reducer or enlarger needs to carry a rating that matches or exceeds the hazardous area classification of the enclosure it's fitted to — typically marked directly on the fitting alongside the IP66/68 rating. As a general rule, mixing an uncertified adapter into an Ex-rated entry undermines the certification of the whole assembly, not just the adapter itself, so it's worth checking the marking against the enclosure's own Ex rating before it goes on the job.
Thread engagement matters more than it looks like it should. A reducer or enlarger that's only partially threaded in — because it's the wrong pitch, or because it's been forced to "make do" — typically won't seal properly even if the gland itself is torqued down correctly afterward. If it doesn't wind in smoothly by hand for the first few turns, it's usually the wrong size or thread standard, not a fitting that needs force.
Once the thread is matched and the gland is seated, the next thing worth checking is whether the seal around the cable itself is holding IP66/68 — particularly on jobs where the gland's been in and out a few times, or the cable diameter is at the edge of the gland's range. cable gland sealant for IP66/68 gaps covers that side of it in more detail.
Ordering by outer diameter instead of thread size. Two glands can look the same size side by side but carry different metric threads. Always confirm the actual thread designation stamped on the gland or enclosure, not a visual guess.
Assuming NPT and metric threads are interchangeable. An M20 and a 3/4" NPT thread look close enough to force together, but the pitch is different — cross-threading it on-site is a common way to compromise the seal without realising it until the job's signed off.
Stacking two adapters to bridge a big size gap. Going from M63 down to M20 by threading a reducer into a reducer isn't a supported configuration for most Ex-rated fittings — it typically voids the certification of the assembly. If the size gap is that large, the enclosure entry itself usually needs review.
Forgetting the adapter needs its own IP66/68 rating. A generic hardware-store thread adapter will physically fit but won't carry the sealing or Ex certification the rest of the assembly relies on — it needs to be rated to the same standard as the gland and enclosure, not just the right thread pitch.
Not checking gland compatibility after resizing. Once the thread's adapted, double check the gland's clamping range still suits the actual cable diameter — resizing the thread doesn't change what cable diameter the gland itself is built to grip.
What size reducer do I need for an M40 entry with an M32 gland?
An M40 to M32 reducer steps the entry down to match the gland thread directly — no redrilling required.
Can I use a reducer instead of drilling a new entry in the enclosure?
Yes, and it's generally the preferred option on a certified Ex enclosure — drilling a new entry changes the certified configuration of the enclosure itself, while a correctly rated reducer or enlarger keeps the original entry intact.
How do I tell if my enclosure entry is metric or NPT thread?
Check the marking stamped near the entry or on the enclosure's data plate — it's usually noted alongside the Ex rating. If there's no marking, a 3/4" NPT to M20 reducer is a common fix for older imperial-threaded enclosures being fitted with metric glands.
Do I need to be a licensed electrician to fit Ex-rated cable gland reducers in NSW?
Work on hazardous area electrical installations in NSW generally requires the appropriate electrical licence, and depending on the site, additional hazardous area competency may apply. As a general rule, confirm site-specific licensing requirements before starting Ex-rated work.
Will fitting a reducer affect the Ex rating of my gland?
Not if the reducer or enlarger carries a matching or higher Ex rating than the gland and enclosure. It's the mismatch between ratings — not the presence of an adapter itself — that typically causes compliance issues.
What's the smallest thread jump these adapters typically cover?
Common jumps range from a single size step (M12 to M16) up to larger transitions like M63 to M50, covering most enclosure-to-gland mismatches encountered on standard switchboards and junction boxes.
Related Reading
Trade pricing on the full range, dispatched same day from Kingsgrove NSW.
Stock up on cable gland reducer and enlarger fittings at Schnap — everything you need in one place, dispatched same day from Kingsgrove.
Last month a compliance audit flagged three Ex db enclosures on a servo drive line at a food processing plant. The cable had been swapped for a slightly smaller OD replacement two years earlier, and nobody went back to reseal the gap left behind at the gland. On paper the fitting was still IP66/68. In practice, water had been finding its way in for months.
A cable gland rated IP66/68 doesn't hold that rating on its own — the seal only works if the compression ring is actually gripping cable of the size it was designed for. Swap in thinner cable, reuse a gland from a decommissioned run, or terminate a multicore where the outer sheath is a couple of millimetres under spec, and you're left with an annular gap the compression cone was never meant to close. Getting the entry thread matched to the enclosure in the first place is its own decision — that's covered in picking the right entry thread — but thread selection doesn't help once the gland's already in and the cable inside it has changed.
In a hazardous area, this isn't just a nuisance leak. A gap at the gland is a gap in the enclosure's protection concept, and depending on the Ex marking, that can mean the difference between a compliant Ex e terminal box and one that's quietly out of scope of its own certificate.
Related Reading
For the OD mismatch scenario above, the fix on site is usually cable gland putty — a two-part epoxy that's mixed by hand, mould-packed around the cable at the gland aperture, and left to cure. Unlike silicone, it's designed to be worked and shaped in place rather than injected, so it fills an irregular gap around a cable properly instead of just sitting on top of it. Working time is typically a few minutes, which is enough to pack the gap and smooth the surface before it starts to set.
The other common failure mode is a bit different: the compression ring itself is still gripping the correct cable size, but the rubber seal has perished from UV or heat over a few years and no longer closes properly. That's not a putty job — it's a seal replacement, and it's worth checking which one you're actually dealing with before reaching for either fix.
| Situation | Use |
|---|---|
| Cable OD smaller than the gland was set up for, ring still intact | Cable gland putty, packed around the gap |
| Rubber seal cracked, brittle, or visibly perished | Replace the seal ring, don't just putty over it |
| Gland body or thread damaged | Neither — replace the gland itself |
[!] Compliance note: Any rework of a gland entry on an Ex-marked enclosure should be recorded against the enclosure's inspection and maintenance log, not just fixed and left. AS/NZS 60079 inspection regimes expect a documented trail for gland and cable entry modifications — in practice, most sites log this as a routine entry rather than a full re-certification, but check your site's inspection procedure before assuming which applies.
Assuming the gland is fine because it "looks sealed." A compression ring can be tightened down hard around a cable that's too small for it and still look neat from the outside — the gap is inside the aperture, not visible without pulling the gland apart or checking with a feeler gauge.
Overpacking the putty. Cramming in more epoxy than the gap needs doesn't improve the seal — it just makes it harder to get a clean, even surface and increases the chance of trapping air pockets that become leak paths later.
Working the putty after it's started to set. Once cure begins, reshaping it breaks the bond that's already forming. If the first pack isn't right, it's usually faster to remove it and start with a fresh mix than to keep working a partially cured batch.
Not checking cable movement or vibration at the entry point. On a servo drive or pump enclosure with real vibration, a putty seal that isn't backed by proper cable support can crack over time even if it was packed correctly on day one.
Skipping the paperwork. The gap gets fixed, the enclosure looks fine, and the modification never makes it into the inspection log — which is exactly the gap an auditor finds two years later.
What size gap is too big for cable gland putty to fix?
As a general rule, a few millimetres of annular gap around the cable is a reasonable job for epoxy putty. If the mismatch is large enough that the compression ring can't grip the cable at all, packing putty around it isn't a substitute for the correct gland size — at that point you need a longer putty run at best, or a proper reducer, not a bigger blob of epoxy.
Can I use epoxy putty on a gland that's already IP66 rated?
Yes — putty is typically used as a remedial fix on an existing IP66/68 gland where the cable-to-gland fit has changed, not as a substitute for the gland's own seal on a correctly sized install. It's addressing a gap that's formed after the fact, not replacing the gland's original rating.
Do I need to replace the whole gland if the seal ring has perished?
Usually not — if the gland body and thread are still in good condition, a replacement seal ring is a much cheaper fix than swapping the entire fitting. Check the gland body for cracking or thread damage first, since that's a different repair entirely.
Is field-applied epoxy putty acceptable for AS/NZS 60079 hazardous area installations?
Two-part epoxy putty is a commonly used remedial sealant on Ex cable entries, but acceptability comes down to the specific enclosure's certificate and your site's inspection procedure rather than a blanket yes. As a general rule, check that the modification is documented in the enclosure's inspection log, and confirm with your site's Ex-competent person if the certificate has specific conditions on gland entries.
How do I know if my outdoor cable gland is still holding its IP66 rating after a few years?
Visual cracking or hardening of the seal is the obvious sign, but a gland can also lose its rating quietly through gradual cable creep or UV breakdown that's harder to spot on inspection. The same ageing pattern shows up in outdoor IP66 fittings more broadly — worth a look if you're checking multiple entry points on the same enclosure.
What's the difference between cable gland putty and standard silicone sealant?
Silicone is applied wet and cures by skinning over, which makes it harder to control around an irregular gap and prone to shrinking away from the cable as it sets. Epoxy gland putty is mixed and worked by hand before it sets, so it can be mould-packed tight against the cable and gland body while it's still workable, then left to cure hard.
Related Reading
Trade pricing and same-day dispatch from Kingsgrove NSW on epoxy putty and replacement seals for cable gland entries.
Stock up on hazardous area ex fittings at Schnap -- everything you need in one place, dispatched same day from Kingsgrove.
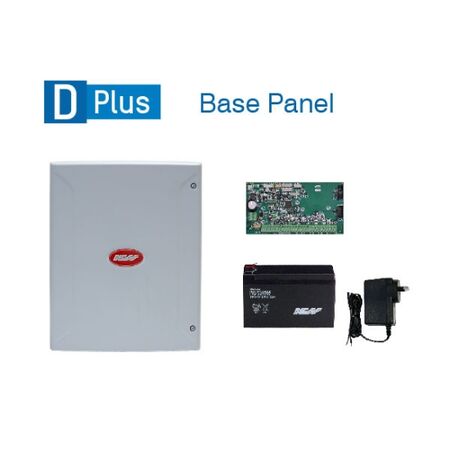
A real estate office fit-out landed on the quote sheet last month — reception, three private offices, a server room, and a storage area out back, eleven points needing coverage on day one. Six weeks later the agency signs a lease on the vacant suite next door and wants it wired in too. If the panel specified maxes out at eight zones, that's a truck roll and a full panel swap, not a quick add-on. Getting zone count right before the quote goes out saves that callback — and it starts with understanding what actually eats into a zone budget beyond the sensor count on the day.
Walk a site and count PIRs and door contacts, and it's tempting to spec a panel that matches that number exactly. In practice, zone budget gets consumed by more than motion sensors and reed switches. Tamper inputs on external sirens, panic buttons at reception, and interface points for future CCTV or access control integration can all draw from the same zone pool depending on how the panel's wired. A client who mentions they're "probably" adding a second tenancy or converting storage into a fourth office isn't giving you a firm number — but it's a signal the panel needs headroom, not just a tally of what's visible today.
As a general rule, it's worth quoting one tier above what today's walkthrough suggests whenever there's any indication of near-term change to the site. The cost difference between an 8-zone and a 16-zone base is usually small next to the labour cost of coming back to swap the panel entirely.
Related Reading
Zone tiers on the shelf generally fall into four practical bands. None of them are exclusive to a particular building type — the deciding factor is how much the site is likely to grow, not just how big it is today.
| Zone Tier | Typical Job Size | Notes |
|---|---|---|
| 8 zone | Small residential, single-tenant office | Fine for a fixed, small point count with no expansion planned |
| 16 zone | Larger home, multi-room office suite | Common middle ground where most quoted jobs land |
| 32 zone (expandable base) | Site with confirmed or likely near-term growth | Same base panel, zones added later without a swap |
| 208 zone | Multi-tenant commercial, warehouse, integrated access control | Different product class entirely, not just a bigger version of a residential panel |
For the real estate office scenario, an 8-zone panel technically covers the eleven points once shared inputs are consolidated — but it leaves nothing for the second suite. An expandable base panel that starts at 8 zones and scales to 32 solves this without a second visit: the enclosure and control board stay the same, additional zone capacity gets added when the second tenancy actually signs. Where the base panel doesn't have enough onboard inputs for a specific expansion, a supervised zone expander PCB adds capacity to select control board families without replacing the panel itself.
This is generally the cheaper path compared to quoting the largest tier "just in case" — the client isn't paying for zone capacity they may never use, and there's a straightforward upgrade path if the growth actually happens.
Not every job has the luxury of chasing cable through open walls. An older tenancy fit-out, a heritage-restricted building, or a client who wants coverage before any construction starts can make a wired zone expansion impractical no matter how good the panel's expansion story is. In that situation, a wireless system built around individually addressable sensors is often the more practical route than trying to force a wired solution through finished walls.
Some jobs outgrow the residential-style tier lineup entirely, even the 32-zone expandable option. A multi-tenant office block, a warehouse with staged access zones, or a site that needs voice reporting and integrated access control isn't just "a bigger version" of a home alarm panel — it calls for a genuinely different product class. If that's the situation on your next quote, sizing a commercial-grade alarm panel walks through when to make that jump and what changes beyond just the zone number.
Sizing to today's sensor count only. A walkthrough shows what's needed right now, not what the client mentioned in passing about future plans. Ask directly about upcoming changes before locking in a tier.
Choosing a non-expandable panel to save a small amount upfront. The saving rarely covers the cost of a return visit and full panel swap once the site grows past its original zone count.
Forgetting that shared inputs eat into the zone budget. Tamper switches, panic buttons, and PA interfaces can consume zones that weren't accounted for when only counting motion sensors and door contacts.
Assuming all panels in a tier report the same way. Zone capacity and notification/dialler capacity aren't always the same spec — check both before assuming a kit covers the monitoring method the client wants.
Trying to force a wired expansion into a site that can't take new cable runs. Heritage buildings and finished-out tenancies are usually better served by a wireless approach than by chasing walls for one or two extra zones.
Can I add zones to an 8-zone panel later, or do I need to swap the whole panel?
It depends on the control board family. Some 8-zone panels are genuinely fixed-capacity, while others accept a supervised zone expander PCB to add capacity without replacing the enclosure or control board. Check the specific panel's expansion support before assuming either way.
How many zones does a typical 3-bedroom house actually need?
As a general rule, most standard 3-bedroom homes land comfortably within 8 zones once entry points, a garage, and one or two internal motion sensors are accounted for — though a client with a large yard, a shed, or a strong preference for zone-by-zone reporting can push that closer to a 16-zone tier.
Do I need a licence to install a security alarm system in NSW?
Yes — installing and servicing security alarm systems in NSW typically requires a security installer licence issued under the relevant state security industry legislation. Licensing requirements can vary between states, so it's worth confirming current requirements for the job's specific location before quoting.
What's the practical difference between an 8-zone panel and an 8-to-32-zone expandable base?
The enclosure and control board are often the same or similar — the difference is in the onboard capacity and expansion header. An 8-zone base panel built for expansion lets you start small and step up in zone blocks as the site grows, rather than starting from a fixed-capacity board with no upgrade path.
Does a higher zone count slow down arming and disarming?
Not directly. Arming speed generally comes down to keypad response and how zones are grouped into areas, not the raw zone count on the panel. A well-configured 32-zone system arms just as quickly as an 8-zone one for the areas actually in use day to day.
For sizing guidance on the CCTV recorder side of a job like this, sizing your NVR channel count covers the same "don't undersize for growth" logic applied to camera channels instead of alarm zones.
Trade pricing across the full zone-tier range, dispatched same day from Kingsgrove NSW.
Find the full alarm panels and kits range at Schnap -- trade pricing and same-day dispatch from Kingsgrove NSW.
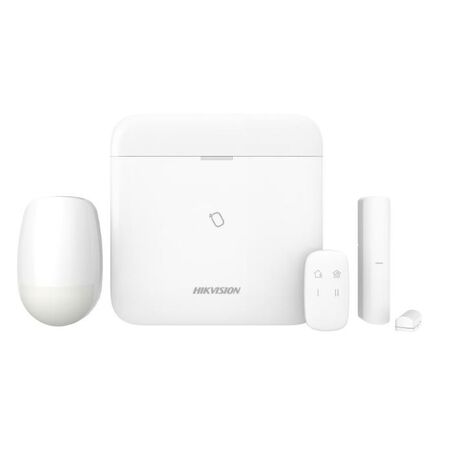
A landlord in Rosebery signed off on a new tenancy fit-out last month with one condition: get an alarm in before the new tenant moves in, and don't touch the plaster. No existing cable runs, no time for a cable puller, and a client who wanted it monitored from day one. That's exactly the job a Hikvision AX Pro wireless kit is built for. Before locking in a hub size for a job like this, it's worth having how many zones you actually need sorted, since that number drives every other decision in the kit.
Wireless isn't always the better option — on a new build with the walls open, running cable is still cheaper per point and gives you a more predictable system. Where wireless earns its keep is exactly the scenario above: occupied premises, finished walls, a tenant changeover window measured in days, or a client who simply doesn't want cable chased through a heritage-listed hallway. In that context, an AX Pro hub with a handful of wireless PIRs and a keypad can go from unopened box to armed system in an afternoon, without a single hole cut for cable.
The trade-off is planning discipline. With hardwired zones you can always add a cable run if the client asks for one more sensor down the track. With a wireless hub, you're working inside a fixed device capacity from day one, so the sizing decisions below matter more than they would on a wired job.
Both AX Pro hubs sit in Schnap's alarm panels and kits range, and the choice usually comes down to what the site already has and what the client wants down the line. The standard TCP/IP Wi-Fi hub connects over the client's existing network — the practical default when there's a router already on site and no plan to add CCTV integration.
| Hub | Best fit |
|---|---|
| AX Pro Hub — TCP/IP Wi-Fi Encryption | Straightforward retrofit, existing network on site, no CCTV tie-in planned |
| AX Pro Hub — Tri-X Cam-X Protocol | Client wants camera-verified alarms, or a CCTV upgrade is likely within the next year or two |
If there's any chance the client asks for camera verification later — insurers are increasingly nudging commercial clients toward it — the Tri-X Cam-X hub is worth the small premium now rather than a hub swap in twelve months.
For a small home or office retrofit, the temptation is to buy exactly enough PIRs to cover the rooms the client mentioned in the first phone call. In practice, it pays to walk the site the same way you would for a wired zone count — count entry points, not just rooms, and leave at least one spare device slot on the hub for whatever the client remembers to ask for once the quote's already signed.
Fob allocation follows the same logic as door codes on a keypad system — decide upfront how many keyholders the client actually has (not how many they think they might hire), and confirm that number against what the hub supports before you're back on site a second time because someone's new cleaner needs access.
This is the decision that's most expensive to get wrong after the fact. The Hybrid Pro LCD keypad with card reader supports one-touch arming and up to 64 fobs, which suits a small office where staff turnover means codes get shared around more than anyone would like. A standalone wireless keypad without the reader is a cheaper unit, but adding card access later usually means a second keypad rather than a simple swap — so it's worth asking the client at quote stage whether card access is likely, not just whether they want it now.
On a tenancy job specifically, card access is often the deciding factor: a new tenant moving into a commercial space is far more likely to want staff cards than a homeowner is, so the calculus shifts even for what's otherwise an identical wireless kit.
Sizing PIRs like a wired zone count. Wired systems make it relatively cheap to add a zone later. Wireless hubs have a fixed device ceiling, so under-buying PIR count on the assumption you'll "just add one later" often means a hub swap instead of a five-minute add-on.
Skipping the walk-test. Mounting the hub in a cupboard or under the stairs because it's tidy, then finding a bedroom PIR drops out intermittently once furniture and finished walls are in place. Test range with the hub in its final position before final PIR placement, not after.
Assuming the client's Wi-Fi is reliable enough for monitoring. A TCP/IP hub is only as dependable as the router it's plugged into. On a tenancy where the landlord controls the internet plan, confirm uptime expectations before committing to a Wi-Fi-only setup.
Deciding on keypad type without asking about future card access. Retrofitting a card reader after a wireless-only keypad is already mounted and commissioned is a second site visit and, on some jobs, a second unit rather than an upgrade.
Not confirming CMS or monitoring compatibility before ordering. Some monitoring providers have preferences around hub firmware or two-way keypad models. A quick check before the order goes in avoids a returns conversation later.
What's the realistic wireless range for an AX Pro PIR sensor?
In practice, expect the manufacturer's quoted open-air range to drop noticeably once internal walls, metal framing or appliances sit between the PIR and the hub — as a general rule, budget for meaningfully less than spec-sheet distance and confirm with a walk-test on site.
Is there a pre-bundled starter kit for a straightforward small retrofit?
Yes — the AX Pro wireless alarm kit with PIR and key fob included covers the common single-hub, single-PIR starting point, which is a fast way to quote a straightforward home or small office job before adding extra devices as needed.
What's actually different between the standard hub and the Tri-X Cam-X version?
The Tri-X Cam-X hub supports camera-verified alarm protocols, which the standard TCP/IP Wi-Fi hub doesn't — worth choosing upfront if camera integration is likely, since swapping hubs later means re-pairing every device.
Can I fit a basic wireless keypad instead of the card-reader version?
Yes — the wireless LCD keypad without card reader is a lower-cost option where the client only needs code-based arming and card access isn't on the table.
Do I need a security licence to install a wireless alarm system in NSW?
Installing and servicing monitored alarm systems in NSW typically requires the installer to hold a security licence under the relevant state licensing scheme — confirm current licence class requirements with NSW Fair Trading before quoting monitored work if you're not already licensed for it.
Do I need to think about door power separately if I'm also fitting access control on the same job?
Yes — an AX Pro alarm kit doesn't power door hardware, so if the same job includes electric strikes or maglocks, that's a separate power budget. See our guide on sizing access control power by door count for working that out alongside the alarm scope.
For the full range of Hikvision AX Pro and related wireless components, see the shop section below.
Trade pricing on the full AX Pro range, with same-day dispatch from Kingsgrove NSW on stocked items.
See the full Hikvision AX Pro range at Schnap and get same-day dispatch from Kingsgrove NSW.
Related Reading
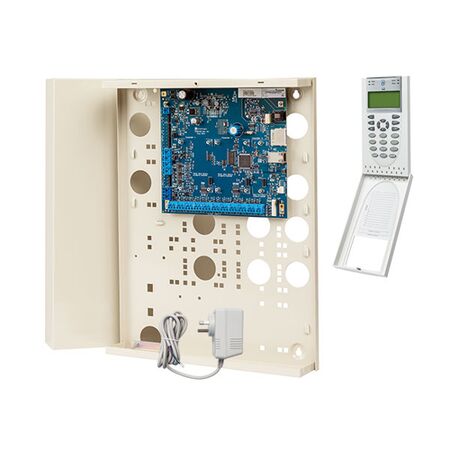
Three tenants sharing one building, one strata manager asking for door access baked into the same system, and a spec sheet that suddenly looks nothing like a house job. That's the point where a straightforward panel swap turns into a real decision about product class -- not just how many zones you actually need, but which tier of panel can actually carry the job.
The brief usually starts simple: fit-out across three floors, a handful of doors, a client who wants "the alarm sorted before the tenants move in." On paper, a residential-grade panel with enough spare zones covers it. Where it starts falling apart is reporting -- three tenancies, one landlord, and everyone wanting their own arm/disarm code and their own event history, not a shared log that lumps every tenant's activity together.
That's usually the first sign the job has moved past residential-class hardware. It's not that the zone count is wrong -- it's that the panel's user management, reporting structure, and expansion path weren't built for multiple stakeholders on one system. Commercial-grade panels like ChallengerPlus are built around exactly that: separate user codes, area partitioning, and reporting that can be split by tenancy rather than treated as one flat site.
It's tempting to treat this purely as a zone-count decision, but the class jump is really about three things: how the panel partitions areas and users, how it reports, and how far it can genuinely expand without a forklift upgrade later. As a general rule, residential panels are built to a ceiling that assumes one household and one reporting path -- commercial panels like ChallengerPlus or M1 Gold are built assuming multiple areas, multiple user tiers, and integration paths that residential hardware typically doesn't offer at all.
| Consideration | Typical Residential Panel | Commercial-Grade (ChallengerPlus / M1 Gold) |
|---|---|---|
| Area partitioning | Usually single-area or basic split | Multiple partitions, tenancy-level separation |
| User/code management | Handful of shared codes | Per-user codes, typically with scheduling and access tiers |
| Reporting | Single event log | Splittable by area, generally suited to multi-tenant reporting |
| Access control path | Rarely native, often needs a separate system | Integration path available, or fully native on integrated panels |
[!] Compliance note: Commercial security installation and monitoring work typically sits under separate security industry licensing on top of your electrical licence -- requirements vary by state, so check with your local security licensing authority before quoting a monitored commercial job.
The strata manager wanting fob access on the front door isn't an edge case -- on multi-tenant commercial jobs it's close to the default ask now. This is where the panel class decision really pays off or bites you later. A ChallengerPlus kit with RAS gives you the partitioning and reporting to run the alarm side properly, but if access control is a day-one requirement rather than a maybe-later addition, an integrated panel like the Tecom Discovery is worth pricing from the start -- it handles alarm and access control natively rather than needing a bolt-on system down the track.
If you're pulling from the alarm panels and kits range with an access control tender attached, it's worth sizing the power side of that integration properly too -- undersized supplies on access-controlled doors are a common callback, and it's a separate calculation from the alarm panel itself.
Related Reading
Sizing by zone count alone. A panel with plenty of spare zones can still be the wrong choice if it can't partition areas or split reporting by tenancy -- zone headroom doesn't fix a single-area design.
Treating access control as a later add-on. Retrofitting access control onto a panel that wasn't speced for it usually means a second system running alongside the first, with none of the integration benefits and double the maintenance calls.
Underestimating RAS and keypad requirements. Multi-tenant sites often need more than one remote arming station -- one per tenancy is common -- and that changes which kit configuration actually fits the job.
Not confirming licensing before quoting. Commercial monitored alarm work commonly falls under security industry licensing separate from an electrical licence -- finding this out mid-job is a bad place to be.
Mixing brands without checking the integration path. Pairing an alarm panel from one range with an access control system from another can work, but it's worth confirming the integration is genuinely supported rather than assumed.
Is ChallengerPlus overkill for a 3-tenant office job?
Not usually -- area partitioning and separate reporting per tenancy are exactly the problem a 3-tenant job creates, and that's what ChallengerPlus is built to handle rather than work around.
What's the practical difference between M1 Gold and ChallengerPlus for a commercial fit-out?
Both sit in the commercial-grade tier -- the right pick generally comes down to expansion needs and which kit configuration (voice dialler, navigator keypad, zone count at install) matches the specific site rather than one being universally "better."
Can I start with a ChallengerPlus panel alone and add the RAS later?
Yes -- the panel and RAS are separable, though pricing the kit together upfront is usually more straightforward than adding a keypad after the initial install is signed off.
Do I need a security licence to install a commercial alarm panel in NSW?
In most states, commercial alarm installation and monitoring work requires a security licence in addition to your electrical licence -- check with your state's security licensing authority before quoting, as requirements and exemptions vary by jurisdiction.
Can a Tecom Discovery panel genuinely replace a separate access control system?
For sites where alarm and access control needs are aligned from the start, an integrated panel typically covers both without needing a second standalone system -- worth confirming door count and reader type against the panel's specs before committing.
Does a commercial alarm panel need its own backup power sizing separate from the building's main supply?
Yes -- commercial panels typically need battery backup sized to the site's reporting and access control load, which is a separate calculation from the building's general power supply.
Trade pricing across the commercial panel range, dispatched same day from Kingsgrove NSW.
Find the full commercial alarm panel range at Schnap -- trade pricing and same-day dispatch from Kingsgrove NSW.
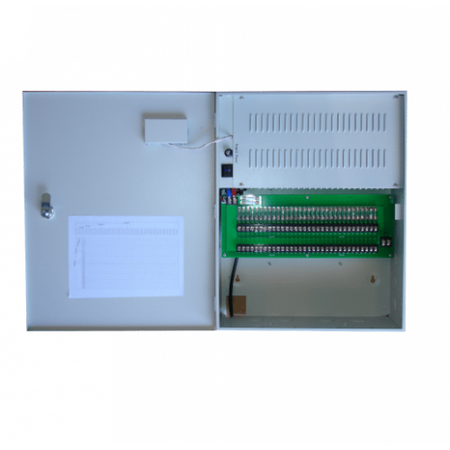
A retail fitout lands on your desk: eight cameras across a warehouse and loading dock, all tied back to one NVR in the site office, with camera runs ranging from 15 to 60 metres. Before you can quote the cable, you need to know which power supply actually covers that load without tripping a fuse or starving the camera furthest from the rack. Get the amp rating wrong and you're back on site swapping units after the client's already signed off. If you haven't locked in your camera or channel count yet, it's worth starting with our guide to sizing an NVR by channel count before you spec the PSU around it.
Most installers start by adding up camera draw and stop there — but that only gets you part way. The NVR itself pulls current too, and so does anything else sharing the rail, like an IR illuminator on a long-range camera. As a general rule, tally every device that'll draw from the one supply, add headroom rather than sizing to the exact total, and factor in voltage drop on the longest run separately.
Cable run length matters more than most installers expect. A camera rated at 500mA close to the PSU behaves very differently to the same camera on the end of a 60-metre run, where voltage drop eats into what actually reaches the lens. In practice, runs over 30-40 metres are where undersized PSUs start showing symptoms on site — flickering IR, intermittent dropouts — well before the total current draw looks like it should be a problem on paper.
| Camera Count | Typical PSU Size | Notes |
|---|---|---|
| 1-2 cameras | 1.5A plug pack | Fine for short runs under 20m |
| 3-4 cameras | 2.5A-5A | Step up if any run exceeds 30m |
| 5-8 cameras | 8A wall-mount or rack | Multi-fused output recommended |
| 9+ cameras | 24A multi-output | Individually fused outputs matter at this scale |
Most analogue and IP CCTV cameras run on 12V DC, which covers the bulk of standard installs. Some systems — particularly ones standardised around alarm-grade battery-backed gear — are built around a 13.8V float voltage instead, which keeps the battery topped up without overcharging it. It's worth checking what the rest of the system expects before you order, rather than assuming every job is a straight 12V swap.
[!] Voltage drop and compliance: Long cable runs at low DC voltage are more susceptible to voltage drop than mains-voltage circuits. As a general rule, AS/NZS 3000 wiring principles around voltage drop still apply in spirit even on extra-low-voltage security runs — if a camera sits right at the edge of its rated voltage, drop on a long run can push it out of spec before the current draw itself becomes an issue.
For a one or two-camera job, a compact plug pack does the job without adding anything to the wall. Once you're past four or five cameras, a wall-mount unit with individually fused outputs and an LCD display earns its keep — you can see at a glance which output has tripped instead of chasing a dead camera blind. For cabinet installs feeding a rack alongside other gear, a 1RU rack-mount PSU keeps everything tidy and serviceable from the front panel. On larger sites pushing 20-30+ devices off one supply, a high-output unit with dozens of individually fused outputs and battery backup becomes the practical choice — though once you're at that scale, it's also worth looking at whether a dedicated distribution setup makes more sense than one large PSU carrying everything.
A handful of PSUs in this range carry AC-fail and low-battery outputs — dry contacts that report back to a monitored panel if mains power drops or the backup battery is running low. This matters when the CCTV system is tied into a monitored alarm setup and the client expects to know about an outage before the battery dies, not after. For a standalone CCTV install with no monitoring back-end, it's a feature you're paying for without using — a standard PSU without the reporting outputs does the same job for less.
How many amps do I need for a 4 camera CCTV system?
For four standard cameras with runs under 30 metres, a 5A PSU typically gives enough headroom to cover camera draw plus the NVR. If any run pushes past 40-50 metres, size up rather than relying on the total-current figure alone.
Will a 12V 1.5A power supply run an 8 channel NVR?
Not reliably on its own if it's also feeding cameras off the same rail. A 1.5A plug pack suits one or two low-draw cameras at most — an 8-channel setup with the NVR included needs a multi-amp, multi-output unit.
Do I need a licensed electrician to install security power supplies in NSW?
Extra-low-voltage CCTV wiring itself typically falls outside standard electrical licensing requirements, but any 240V mains connection point for the PSU — including a new GPO — generally does require a licensed electrician. As a general rule, check current NSW Fair Trading requirements for the specific scope of your job before quoting.
Can I run a CCTV power supply off the same circuit as my alarm panel?
You can, but it's worth checking the combined draw doesn't push the circuit close to its rating, particularly if the alarm panel already has its own backup battery load. A wall-mount unit with short-circuit protection adds a layer of safety if you do decide to share the circuit.
What's the difference between a plug-pack and a rack-mount PSU for CCTV?
A plug-pack is a single-output unit suited to one or two cameras with no fusing per output. A rack-mount PSU gives multiple individually fused outputs in a form factor that mounts cleanly alongside your NVR and other cabinet gear.
How many outputs does an 8 amp rack PSU actually give you?
It depends on the specific unit and how the load is split — an 8A rating is the total the supply can deliver across however many outputs it has, not the rating per output. Check the individual output fusing on the datasheet before assuming each port can carry the full 8A on its own.
Trade pricing on the full CCTV power supply range, with same-day dispatch from our Kingsgrove NSW warehouse on in-stock orders.
Find the full cctv power supply range at Schnap -- trade pricing and same-day dispatch from Kingsgrove NSW.
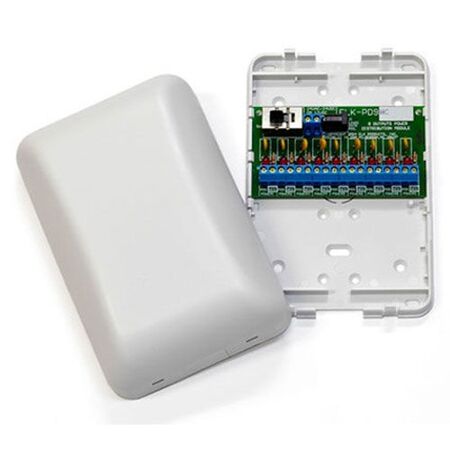
Eight camera positions on the plan, eight 12V plug packs queued up next to them — that's the default a lot of installers fall into on a multi-camera retail or warehouse job, right up until the power board runs out of GPOs and the client asks why there's a nest of wall warts behind the counter. There's a cleaner way to run a bank of cameras off a single power source, and picking the right piece of gear for it comes down to how many devices you're feeding and at what voltage.
Running a separate plug pack per camera works fine for a two or three camera resi job. Past that, it starts costing you time and reliability. Every plug pack is another point of failure, another GPO you need free near the camera run, and another thing to troubleshoot when a client calls to say one camera's gone dark. Centralising the power — one PSU feeding a distribution module or splitter, with individual fused outputs running out to each camera — means one supply to size properly, one place to check when something trips, and a much tidier enclosure at the head end.
Before locking in the distribution setup, it's worth confirming how many outputs the recorder actually needs — the channel count on the NVR is usually what determines how many camera outputs your distribution board has to carry, so it's a good idea to size the recorder side of the job first.
There are three ways to go about this, and the right one depends mostly on device count and how much you value being able to isolate a single camera without killing the whole bank.
A basic splitter takes one 12V input and breaks it into multiple unfused outputs. It's cheap and fine for two or three low-draw devices, but there's no individual protection — a fault on one camera can pull the whole splitter down, and you've got no way to isolate it without unplugging everything to find the culprit.
A DIN-rail distribution module is the more common choice on a proper install. Each output is individually fused, so a shorted camera cable trips its own fuse rather than taking the rest of the bank offline. Most come in 8-way, 9-way or 10-way configurations, and some support mixed voltage outputs on the same board, which matters if you've got a mix of 12VDC cameras and 24VAC devices on the same job.
A high-output PSU with built-in fused outputs combines the supply and the distribution in one enclosure — useful when you want fewer boxes in the cabinet and enough headroom for a larger install with battery backup thrown in.
[!] Fuse ratings matter more than they get credit for. A distribution module rated for 1A per output won't cover a PTZ camera or a heated dome drawing closer to 2A — check the current draw on the datasheet for every device on the run, not just the standard fixed cameras, before you lock in which module to use.
Take the eight-camera retail job as the working example. Standard fixed IR cameras typically draw somewhere in the 200-400mA range at 12V, so eight cameras land you around 2-3.2A total — well within what an 8-way module can handle, provided the input PSU itself is sized with some headroom rather than run flat out. As a general rule, add 20-30% headroom to your total calculated draw when picking the input PSU, since inrush current on power-up and any IR illuminators kicking in at night will push the momentary draw higher than the steady-state number.
| Camera Count | Typical Total Draw @ 12V | Suggested Module |
|---|---|---|
| Up to 8 | ~2-3A | 8-way DIN-rail module |
| Up to 10 | ~3-4A | 10-way selectable module |
| 10+ or mixed devices with backup | Varies — check datasheets | High-output fused PSU with battery backup |
If the job includes battery backup — common on jobs where the client wants recording to keep running through a power outage — a wall-mount PSU with fused outputs and built-in battery charging saves you adding a separate UPS into the cabinet. Once you've settled on the module and worked out how many outputs you actually need, that same channel count feeds back into confirming the NVR sizing, so it's worth double-checking the two against each other before ordering.
Related Reading
Sizing the module to today's camera count, not tomorrow's. An 8-way module feeding exactly 8 cameras leaves nothing spare for the client who asks for two more cameras six months later. Going up one size on the module rarely costs much more and saves a return visit.
Ignoring PTZ and heated housing draw. A distribution board sized around standard fixed camera draw can get caught out the moment a PTZ dome or heated external housing goes on the same run — those devices commonly pull well above what a fixed camera draws, and undersizing here trips fuses on cold mornings.
Mixing voltages without checking the module supports it. Not every distribution module handles 12VDC and 24VAC outputs on the same board — running a mixed-voltage system through a single-voltage module means either bodging in a second supply or frying a device.
Skipping the input PSU headroom calculation. Sizing the PSU to exactly match calculated draw, with nothing spare, is how installs end up tripping intermittently — usually blamed on the cameras rather than the power budget that caused it.
Daisy-chaining cameras off a single fused output. It's tempting to save an output by running two cameras off one fuse point, but that defeats the point of individual fusing — one faulty camera takes both down, and troubleshooting gets harder, not easier.
how many cameras can I run off one 8-way distribution module?
Up to eight devices, one per output, provided the combined draw stays within the module's total input rating and each individual output's fuse rating covers that device's current draw — check both numbers, not just the port count.
can I mix 12VDC cameras and a 24VAC gate motor on the same distribution board?
Only if the module is specifically rated for selectable or mixed voltage outputs — a 10-way selectable 12VDC/24VAC module handles that combination, whereas a fixed-voltage board doesn't.
what happens if one camera's cable shorts out on a distribution board?
On a properly fused distribution module, only that camera's output fuse trips — the rest of the cameras on the board keep running. This is the main reason to avoid unfused splitters on anything beyond a couple of devices.
do I need a licence to wire a CCTV power distribution board in NSW?
Extra-low voltage CCTV wiring itself typically sits outside standard electrical licensing requirements, but if the install involves connecting to mains for the PSU or working within a switchboard, that part of the job does require a licensed electrician. Check current NSW Fair Trading requirements if you're unsure where the line sits for a specific job.
how do I know if my distribution module is overloaded?
A module with per-output LED status indicators makes this easy to spot at a glance — a dark LED usually means that output's fuse has tripped, which is a quicker diagnostic than pulling cameras offline one at a time to test.
what's the point of battery backup on a CCTV power distribution setup?
It keeps cameras and the recorder running through short mains outages, which matters most for clients who need continuous footage regardless of power interruptions. A wall-mount PSU with fused outputs and built-in battery backup covers this without needing a separate UPS in the cabinet.
Access control installs on the same site raise a related but separate sizing question — choosing an access control PSU comes down to door count and battery-backup needs rather than camera count, so it's worth treating as its own decision rather than an extension of the CCTV power budget.
Related Reading
Trade pricing and same-day dispatch from Kingsgrove NSW on the full range of distribution modules and multi-output PSUs below.
Browse the full security power supplies range at Schnap for trade pricing and same-day dispatch from Kingsgrove NSW.
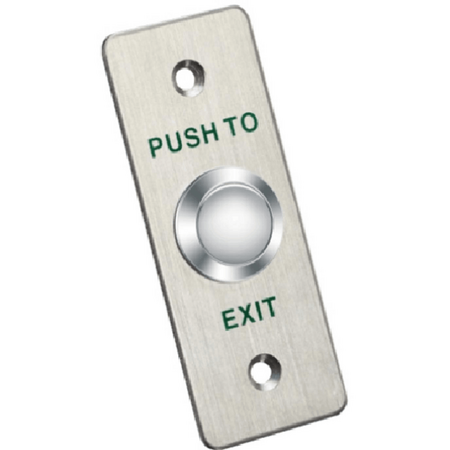
Four doors on one job, and the client wants battery backup on every reader in case the power drops mid-shift. That's the moment a PSU stops being a line item and becomes a decision: how many channels, how many amps, and whether one box covers the lot or you're running two. Access control draws current differently to CCTV -- strikes and maglocks pull hard for short bursts, readers sit on a steady low draw, and battery backup adds its own charging load on top.
Nameplate max ratings on a strike or maglock tell you the worst case, not the steady state. In practice, a mag-lock typically draws in the 300-500mA range continuously once energised, while a fail-secure strike draws more but only for the brief moment it's released. Readers sit low, usually under 200mA each, but they're always on. The logic is the same amp-budgeting approach we use for how many amps you need, just with different load types on each channel.
Where access control gets trickier than CCTV is the inrush. If a fire panel triggers a mass door release, every strike on that PSU energises at once -- and that peak, not the steady-state total, is usually what trips an undersized supply. Battery backup adds a third load on top: the charging current the PSU pulls to keep the SLA battery topped up, which as a general rule runs a few hundred mA extra depending on battery size.
For one or two doors on the same board, a single-channel PSU with a dedicated battery charger circuit is usually enough, provided the readers and lock aren't sharing the channel with anything else. Once you're past two doors, or the doors need to fail independently (one fail-safe for fire egress, one fail-secure for a plant room), a dual-channel unit earns its keep -- it isolates the loads so a fault or a fire-trigger on one channel doesn't drag the other down.
| Door count | Recommended setup | Typical output |
|---|---|---|
| 1-2 doors, shared fail mode | Single-channel PSU with battery charger | ~2.5-3A, 13.5-13.8V |
| 2-4 doors, mixed fail-safe/fail-secure | Dual-channel PSU, isolated outputs | 24V, 3A per channel |
| 4+ doors, high inrush loads | Higher-current dual-channel PSU | 24V, 6A per channel |
Treat this table as a starting point, not a substitute for adding up the actual loads on the job -- a site with three maglocks and heavy readers can outgrow a 3A channel faster than the door count alone suggests.
Related Reading
Battery backup on an access control PSU isn't just about keeping the doors working through a blackout -- on fail-safe egress doors, it's usually what keeps the door unlocked long enough for occupants to exit safely before backup runs out. As a general rule, sizing the battery for runtime (not just charge current) is the part that gets skipped when a PSU is chosen on amps alone.
[!] Compliance note: Fire egress and fail-safe/fail-secure door requirements are set by the building's fire safety engineer and local regulations, not by the PSU spec sheet. Confirm required runtime and fail mode with the fire engineer or building certifier before locking in a PSU and battery size.
How much current does a mag-lock actually draw compared to a strike?
A mag-lock typically draws a steady 300-500mA while energised, while a fail-secure strike draws more but only briefly on release -- so a mag-lock is usually the bigger continuous load, while a strike is the bigger inrush spike.
Can one PSU run four door strikes and readers?
It depends on the total continuous draw and whether the doors need independent fail modes. A higher-current dual-channel unit like the Ness POW246 24V 6A dual-channel PSU can cover four doors on many sites, but confirm the actual load first.
What's the difference between a dedicated access control PSU and a generic 24V supply?
A dedicated unit like the Hikvision DS-K7P02 access control power supply integrates the battery charger, AC-fail monitoring, and isolated outputs designed for lock loads -- a generic 24V supply usually leaves you sourcing those functions separately.
Do I need a licence to wire battery-backed access control into a fire egress door release circuit in NSW?
Yes -- wiring into a fire egress or door release circuit is electrical work and needs to be carried out by a licensed electrician, and any interface with the fire system typically also needs sign-off from the fire contractor or certifier.
How long should battery backup run an access control PSU during an outage?
Required runtime is set by the building's fire egress requirements, not a fixed industry number -- confirm the figure with the fire engineer or certifier before sizing the battery.
What happens to fail-safe locks if the PSU battery backup fails silently?
On a fail-safe door, a dead battery combined with a mains outage means the lock releases -- which is the intended safety behaviour, but it also means a failing battery you didn't know about leaves the door unsecured well before an actual outage. A PSU with an AC-fail and low-battery output, like the Ness POW240, lets you monitor that condition instead of finding out the hard way.
Related Reading
Trade pricing across dedicated and generic PSU options, dispatched same day from Kingsgrove NSW.
See the full access control power supply range at Schnap and get same-day dispatch from Kingsgrove NSW.

SCHNAP Electrical Wholesaler - clear, upfront pricing that professional electricians trust

Get what you need in seconds. SCHNAP electrical wholesaler makes ordering quick and simple

Fast delivery anywhere - that's guaranteed. SCHNAP electrical wholesalers ship nationwide with same-day dispatch

Track your order every step of the way. SCHNAP electrical wholesale keeps you updated from click to delivery

SCHNAP is Australia's premier electrical wholesaler and electrical supplies, marketing thousands of quality products from leading brands. Trusted for nearly two decades by licensed electricians, contractors, and engineers, our range covers everything from basic electrical components to complex industrial electrical equipment
Our key categories include: LED lighting, designer switches, commercial switchboards, circuit protection, security systems & CCTV, and smart home automation
All products are certified to Australian standards (AS/NZS), backed by our 30-day, no-questions-asked return policy. Our expert technical team helps you quickly source the right solution for any residential, commercial, or industrial project, with daily dispatch from our Sydney electrical warehouse delivering Australia-wide
SCHNAP offers the most comprehensive electrical product range, with full technical specifications, application details, installation requirements, compliance standards, and warranties — giving professionals total confidence in every purchase


