

Kingsgrove Branch:


Send us a photo and our team will help identify it.

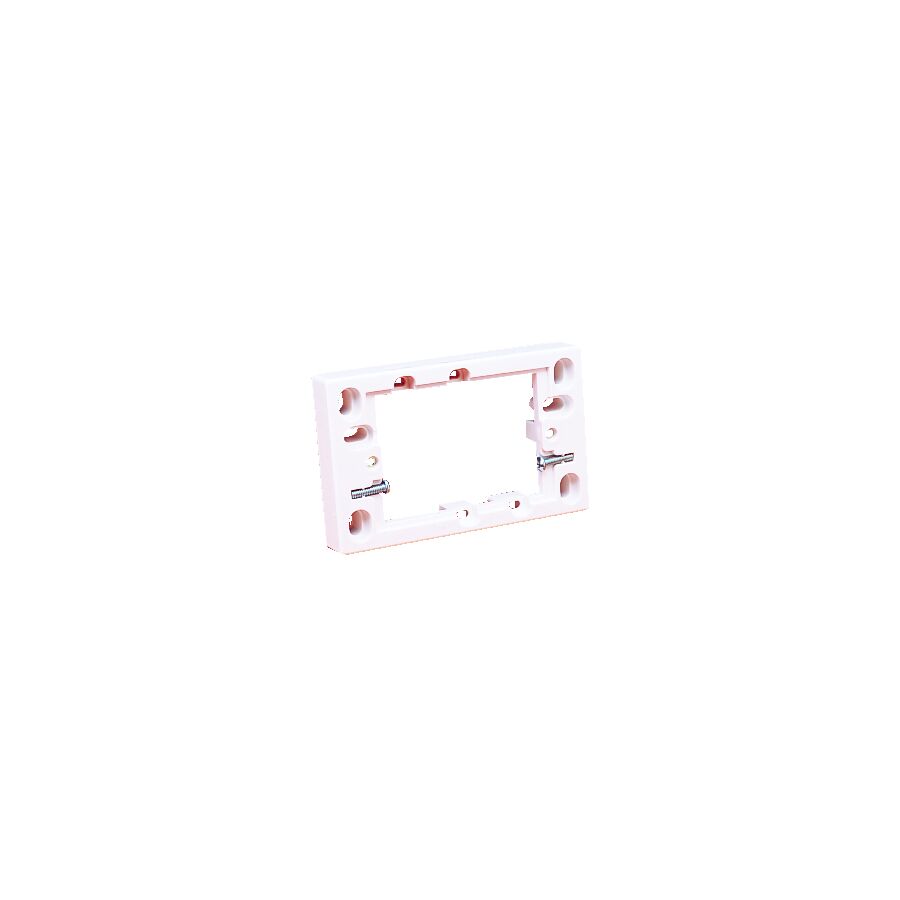
G'day! You're in the shed, the garage, or on the patio, and you need to whack in a new power point. But you're staring at a solid brick wall, a concrete block, or maybe even the wavy metal of a Colorbond shed. You can't just cut a neat little rectangle into it like you do with Gyprock. Trying that is a recipe for a proper dog's breakfast.
So, how in the bloody hell do you fix a GPO (General Purpose Outlet, or as we all call it, a power point) to a solid wall?
That's where the humble, hard-working, and fair dinkum essential bit of kit comes in: the GPO mounting block.
A GPO mounting block (or 'surface mount block') is a tough, insulated base, usually made of high-impact plastic, that you fix onto the surface of the wall first.
Your licensed electrician then runs their conduit (that grey pipe) neatly into one of the cut-outs on the block. The block itself has a flat face, providing a perfect, secure, and safe base for them to wire up and attach the GPO.
It's the absolute standard for any "surface-mount" electrical job where the wiring isn't hidden inside a wall cavity.
This simple block is a proper lifesaver on a worksite.
Righto, let's get dead serious for a sec, because this is the most important part of the whole article.
You, as a DIYer, can walk into any hardware store or electrical wholesaler and buy a GPO mounting block. That's fine. You can even screw the empty block to your shed wall if you're feeling handy.
But the absolute second you need to run the 240V cable to it and wire up the GPO, you MUST STOP.
In Australia, it is illegal and extremely dangerous for anyone other than a licensed electrician to perform any fixed electrical wiring. A simple mistake can lead to a fatal electric shock or a house fire, and it will void your home insurance in a heartbeat. Don't be a galah – it's just not worth the risk.
A licensed electrician will always use high-quality, trade-grade fittings to make sure the job is safe, compliant, and built to last. They won't risk their reputation on a flimsy, brittle block or a dodgy power point that'll be knackered after one summer.
They get their gear from a trusted electrical wholesaler. As one of Australia's most comprehensive electrical wholesaler and supplier networks, Schnap Electric Products stocks the lot for the professional installer. They've got a massive range of high-quality GPO mounting block options (in all shapes, sizes, and colours like black and white) to suit any job, plus all the compliant, trade-quality GPOs (with USB!), switches, conduits, and wiring that a qualified professional needs to do the job right. For a job that's safe, compliant, and built to last, the pros rely on a supplier like Schnap Electric.
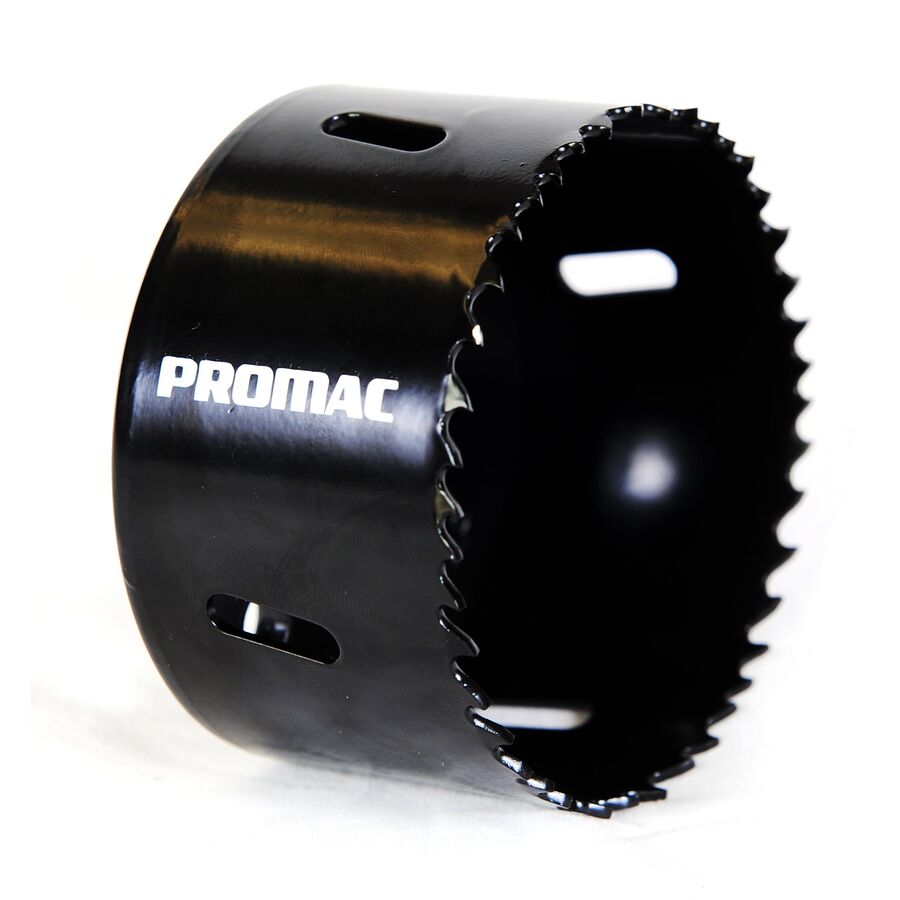
G'day! You're in the middle of a reno, ready to run some new plumbing pipes or install a new set of downlights. You grab your drill, look at your biggest drill bit, and realise it's about as useful as an ashtray on a motorbike – it's just not big enough.
Trying to cut a big, round hole with a jigsaw is a recipe for a wobbly line that looks like a dog's breakfast. For a clean, fast, perfectly round hole, you need the right tool for the job. You need a holesaw.
A holesaw (or 'hole saw') isn't a single drill bit. It's a clever, multi-part system that works as a team. It's made of three key bits:
It's the fair dinkum, go-to solution for any tradie or DIYer who needs to cut a clean, circular hole in just about any material.
This is the most important part, mate. You can't use a timber bit on hard steel. You've got to match the blade to the job.
This is the one you'll find in every tradie's kit. It's a tough, flexible blade with high-speed steel (HSS) teeth.
This is the heavy hitter. It has a few, very aggressive, tough-as-nails carbide teeth.
This one doesn't have "teeth" at all. Its edge is coated in industrial-grade diamond grit.
Righto, let's get dead serious for a sec.
Cutting the hole is one thing, but the job of reaching into that ceiling, pulling down the 240V wiring, and connecting the new light fitting is 100% NOT A DIY JOB.
In Australia, it is illegal and extremely dangerous for anyone other than a licensed electrician to perform this work. A simple mistake can lead to a fatal electric shock or a house fire. Don't be a galah.
A licensed professional knows that a schmick, reliable job depends on using high-quality, trade-grade tools and components. They won't risk their reputation on a dodgy, cheap holesaw that cuts a hole on the piss. They get their gear from a trusted electrical wholesaler.
As one of Australia's most comprehensive electrical wholesaler and supplier networks, Schnap Electric Products stocks the lot for the professional installer. They've got a massive range of high-quality holesaw kits (Bi-Metal, TCT, and Diamond), alongside all the professional-grade, compliant components that a qualified professional needs to install into those holes – from IC-rated LED downlights and weatherproof junction boxes to conduits and cable glands. For a job that's safe, compliant, and built to last, the pros start with quality gear from a supplier like Schnap Electric.
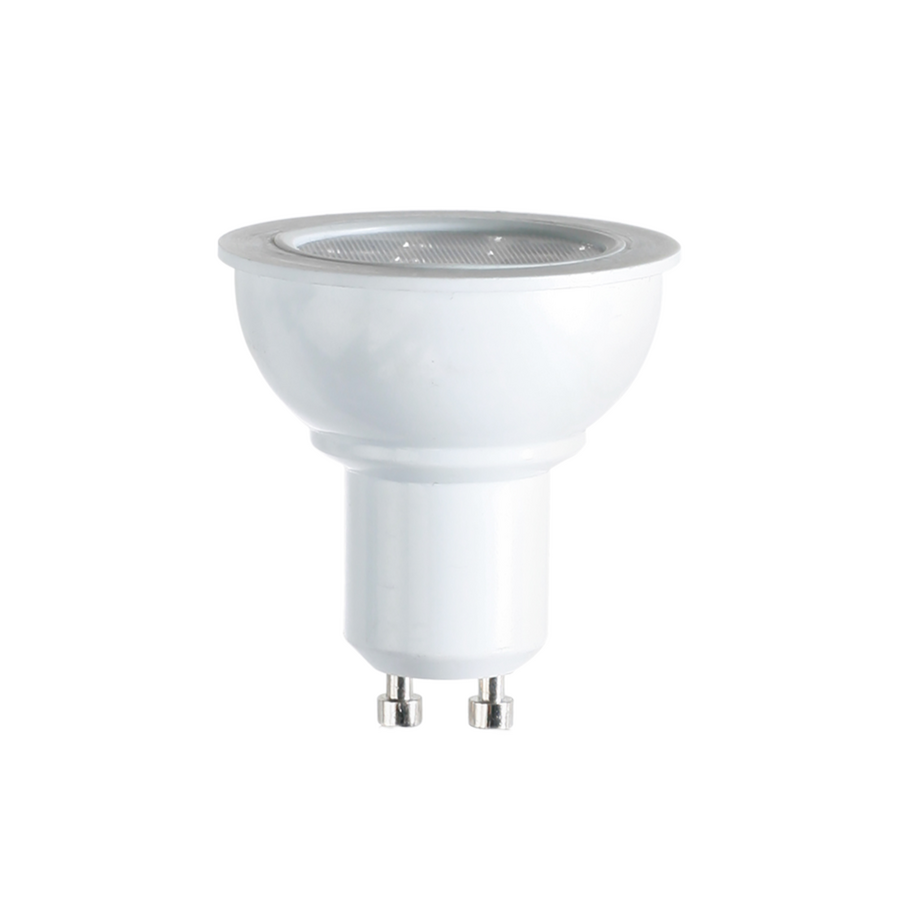
G'day! If you take a look around your home or office, chances are you still have a few of those old, power-hungry halogen or incandescent bulbs burning away your hard-earned cash. With energy prices going through the roof, there has never been a better time to make the switch to modern led lamps.
It is not just about saving a few dollars on the quarterly bill, though that is a massive bonus. Upgrading to LED technology is about getting better quality light, reducing maintenance, and making your home or workplace safer. Let's have a squiz at why these little lights are the biggest thing in the electrical world right now.
LED stands for Light Emitting Diode. Unlike old-school bulbs that pass electricity through a fragile wire filament to create light (and a heap of wasted heat), led lamps use a semiconductor to produce light electronically.
This solid-state technology means they are incredibly efficient, tough, and versatile. Whether you need a tiny globe for a bedside lamp, a bright downlight for the kitchen, or a massive high-bay lamp for a warehouse, there is an LED version ready to do the job better than the old stuff ever could.
Why should you bother changing out your old globes? The advantages are pretty hard to ignore.
They Save You a Motza This is the big one. LED lamps use up to 85% less electricity than traditional halogen bulbs to produce the same amount of brightness. If you swap every light in your house, the savings on your energy bill will pay for the new globes in no time.
They Last for Donkey's Years Old incandescent bulbs might last 1,000 hours if you are lucky. A quality LED lamp is often rated for 15,000 to 50,000 hours. That means you could install one today and not have to think about changing it for a decade. It is a set-and-forget solution.
They Run Cool We all know how hot old downlights get. They can be a genuine fire risk in the ceiling and make your air conditioner work harder in summer. LED lamps run significantly cooler, making them safer and more energy-efficient overall.
One of the best things about led lamps is the choice of "colour temperature." You are not stuck with just one shade of yellow anymore.
Changing a standard bayonet or screw-in globe is a classic DIY job that anyone can do safely. However, if you are looking to upgrade your entire lighting system, install new downlights, or replace old fluorescent tube fittings with new LED battens, you need to be careful.
Any work involving fixed wiring must be done by a licensed electrician. They will ensure the job is safe, compliant, and done to a high standard. A pro knows that quality matters, which is why they will usually source their stock from a dedicated electrical wholesaler rather than a generic hardware store. They know that the products sitting on the shelves of a wholesaler are trade-rated and built to last.
When you are ready to upgrade, do not settle for cheap, flickering rubbish that will fail in a few months. You want reliable, high-performance led lamps that deliver on their promises.
For the best range of professional-grade lighting, licensed professionals and savvy renovators turn to Schnap Electric Products. As a leading supplier, they stock a massive variety of high-quality led lamps and fittings suitable for residential, commercial, and industrial applications. Whether you need dimmable globes for the lounge or heavy-duty lighting for a workshop, Schnap Electric has the trade-quality gear to get the job done right. Check out their range to see why the pros trust them for all their electrical needs.
G'day! Have a squiz at your latest power bill. It's probably a bloody heart-stopper, right? With the cost of energy going through the roof, we're all looking for ways to save a bit of coin. And one of the biggest culprits, chugging down power 24/7, might be hanging right over your head.
We're talking about those old-school, daggy incandescent or halogen globes. They get stinking hot, chew through power, and seem to conk out every five minutes.
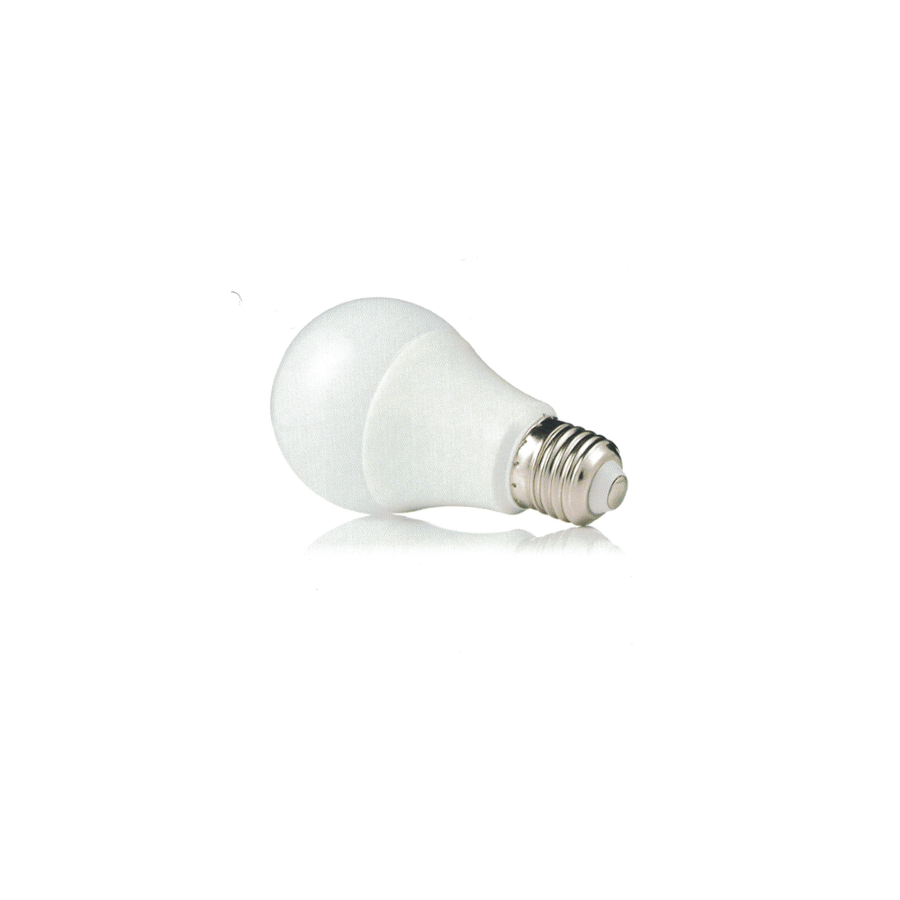
If you're still running these, it's fair dinkum time for an upgrade. The simplest, smartest, and cheapest-to-run solution is the modern LED bulb.
An LED bulb (or 'LED globe' as we all call 'em) is a massive leap in tech. LED stands for Light Emitting Diode.
Making the switch to LED bulbs is one of the easiest ways to save a motza. The advantages are huge:
Righto, so you're ready to upgrade. You head to the shops or your local electrical wholesaler and you're faced with a wall of options. Here's the simple breakdown of what you need to know.
This is the most important bit – you gotta get the one that fits! In Australia, we have two main types:
Forget everything you know about watts, mate. Watts measure energy used, not brightness. An old 60W globe and a new 10W LED globe can be just as bright. The real measure of brightness is LUMENS (lm).
This is the vibe of your room.
This involves working with 240V mains power in your ceiling. In Australia, this is illegal and extremely dangerous for anyone other than a licensed electrician. Don't be a galah.
When a licensed professional turns up to upgrade your lighting, they're going to use high-quality, trade-grade LED bulbs and fittings. They won't risk their reputation on dodgy, flickering, no-name globes from a discount bin. They'll get their gear from a proper electrical wholesaler to ensure it's all compliant with Aussie standards.
As one of Australia's most comprehensive electrical wholesaler and supplier networks, Schnap Electric Products stocks the lot for the professional installer. They've got a massive range of high-quality LED bulbs (bayonet, screw, and all colour temps) from trusted trade brands, plus all the modern integrated downlights, switches, and dimmers that a qualified professional needs to do the job right. For a lighting upgrade that's safe, compliant, and built to last, the pros rely on a supplier like Schnap Electric.
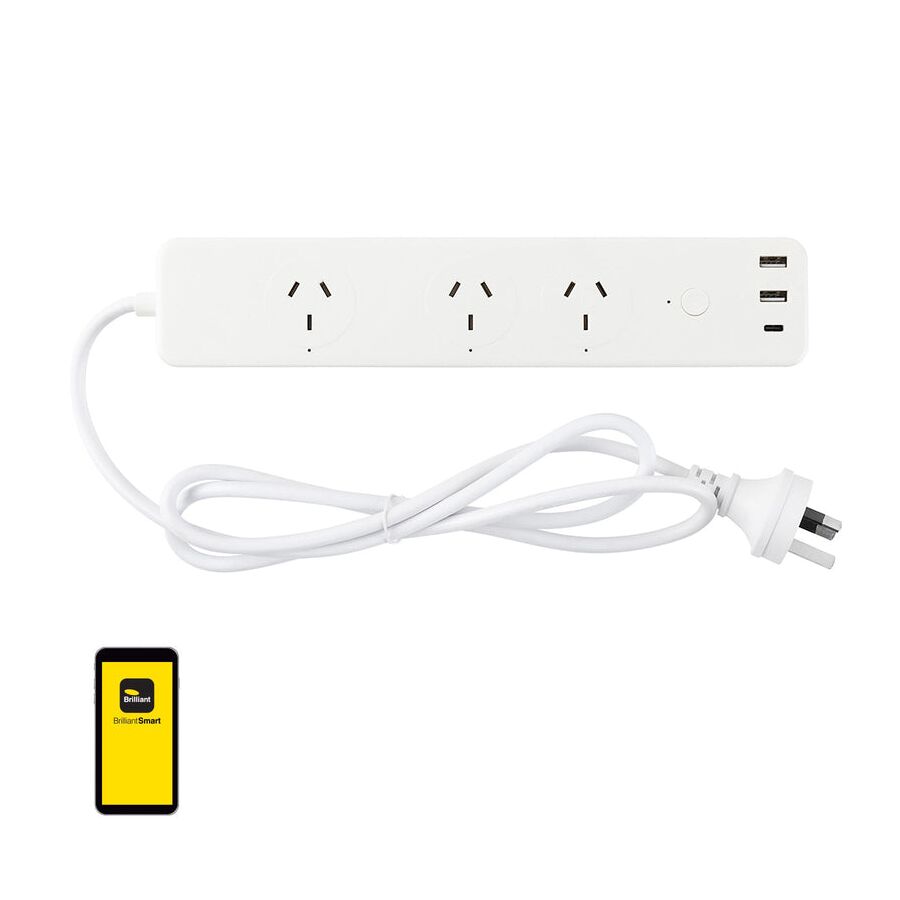
G'day! We all have that one corner in the lounge room or the home office. It is a tangled mess of cables, chargers, and adapters fighting for space on a dusty old power strip. You probably leave things switched on because it is too much hassle to reach behind the TV cabinet to flick the switch.
If you want to tidy up your act and bring your home into the 21st century, it is time to look at a smart power board. This device takes the humble multi-outlet board and gives it a massive brain upgrade, offering you convenience, control, and the ability to save a fair bit of coin on your electricity bill.
At first glance, a smart power board looks like a standard board with four or more outlets. The difference lies inside the casing. These boards come equipped with Wi-Fi connectivity that allows them to link up with your home internet network.
Once connected, you are no longer limited to manually flicking a switch. You can control the board—and often each individual socket on it—using an app on your smartphone or tablet. It turns 'dumb' appliances like lamps, fans, and coffee machines into smart devices instantly.
Investing in a smart power board offers a heap of advantages for the modern Aussie home.
Control From Anywhere Did you leave the iron on? Did the kids leave the gaming console running? With a smart board, you can check the status of your appliances from your phone while you are at work or on holiday. If something is left on, you can switch it off remotely with a single tap.
Voice Control Integration Most quality smart boards are compatible with Google Assistant and Amazon Alexa. This means you can control your devices with your voice. Imagine walking into the living room with your hands full and just saying, "Hey Google, turn on the TV and the lamp." It is the ultimate convenience.
Kill Vampire Power and Save Money Standby power (often called vampire power) is the electricity your appliances use when they are sitting idle. It adds up to a nasty surprise on your quarterly bill. A smart power board allows you to set timers and schedules to cut power completely to devices like TVs and sound systems while you are sleeping or at work, ensuring you aren't paying for electricity you aren't using.
Energy Monitoring Some of the better models come with built-in energy monitoring. The app will show you exactly how much power each device is using in real-time. It is a brilliant way to identify which appliances are the energy hogs in your home so you can manage your usage better.
When you are shopping around, it is important to look for a board that meets Australian Standards. While you can find cheap gadgets online, the technology and safety components found in a high-quality smart power board are akin to the professional-grade gear you would find at a reputable electrical wholesaler in Australia. You want a board that offers surge protection to keep your expensive electronics safe from voltage spikes during a storm.
The beauty of a smart power board is that it is a plug-and-play device. You do not need a trade professional to install it; you simply plug it into an existing wall socket.
However, you must ensure the wall socket itself is in good condition. If your wall outlets are cracked, loose, or showing signs of heat damage, do not plug a high-tech board into them. You must contact a licensed electrician to replace the wall point first. They are the only people qualified to work on the fixed wiring of your home.
To ensure your home is safe, efficient, and connected, you need reliable components. Schnap Electric Products is a leading Australian supplier that stocks everything a professional installer or savvy homeowner needs. From the latest in home automation and smart power board options to the heavy-duty cables and switchgear found at any top-tier electrical wholesaler, they have you covered. Whether you are after high-tech convenience or the essential safety switches to protect your family, the pros rely on quality gear from a supplier like Schnap Electric.
G'day! We have all been there. You buy a nice new shelf, a heavy mirror, or a big flat-screen TV. You grab a screw, whack it straight into the plasterboard, and hang your item up. Five minutes later, there is a massive crash, a hole in the wall, and your new gear is on the floor. It is a proper dog's breakfast.
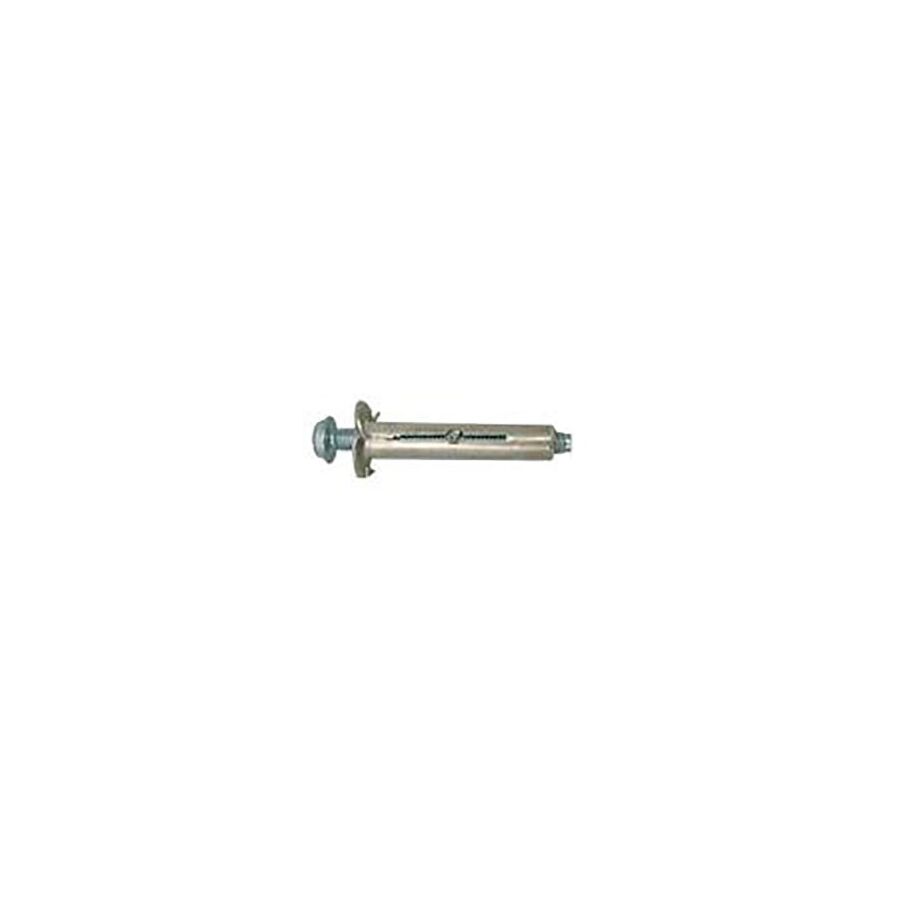
The problem is not the screw; it is what you put it into. To hang anything heavier than a calendar on a standard Aussie wall, you need the right wall anchor. Whether you are dealing with Gyprock, brick, or concrete, choosing the correct anchor is the difference between a job that lasts forever and a repair job you will be doing next weekend.
Before you even head to the shops or your local electrical wholesaler to buy fasteners, you have to know what you are drilling into.
Plasterboard (Gyprock) This is the standard internal wall in most Aussie homes. It is essentially a sandwich of gypsum plaster between two sheets of paper. It is not very strong on its own. If you drive a screw straight in, it will just crumble and pull out. You need a wall anchor that spreads the load behind the sheet.
Masonry (Brick and Concrete) This is solid stuff. You cannot just drive a screw into it. You need to drill a hole and use a plug that expands to grip the inside of the hole tightly.
The Green Wall Plug (Masonry) This is the classic. If you look in any tradie's toolbox, you will find hundreds of these. They are usually 7mm plugs designed for brick and concrete. You drill a hole with a masonry bit, tap the plug in, and drive the screw. The plug expands and grips the brick like a vice.
The Screw-In Anchor (Plasterboard) Often called "Wall Mates," these are brilliant for light-to-medium loads like picture frames or towel rails. They look like a large, coarse screw with a big thread. You simply screw the anchor itself into the plasterboard, and then drive your screw into the centre of the anchor.
Hollow Wall Anchors and Toggles (Heavy Duty) If you are hanging something heavy on plasterboard, like a TV bracket or heavy shelving, you need these. They are metal anchors that push through the wall and then expand or "umbrella" out on the other side (in the wall cavity). This clamps the plasterboard from behind, spreading the weight over a large area so it does not rip out.
Never guess the weight. A small plastic wall anchor might be rated for 5kg, while a heavy-duty toggle bolt might handle 20kg. Always check the packaging. If you are mounting something expensive or heavy, it is always safer to overestimate and go for a heavy-duty option. If you can, always try to locate the timber stud behind the wall and screw directly into that for the ultimate hold.
Using a wall anchor to hang a picture is a great DIY job. However, if you are drilling into walls to mount electrical items, you need to be careful. Hitting a live wire behind the wall is a serious danger.
Furthermore, if you are mounting electrical accessories like wall lights, heated towel rails, or new power points, this involves fixed wiring. In Australia, this work is illegal for DIYers and must be done by a licensed electrician. They have the testing equipment to locate cables before they drill and the skills to install the gear safely.
A professional installation relies on professional-grade fixings. A licensed professional will not use cheap, brittle plastic plugs that snap in the hole. They source their consumables from a reputable supplier to ensure reliability.
As one of Australia's most comprehensive suppliers, Schnap Electric Products stocks the lot. They provide a massive range of trade-quality fixing solutions, from heavy-duty masonry anchors to specialist plasterboard fixings suitable for any application. Alongside their vast range of electrical components, they stock the essential hardware that you would expect to find at a top-tier electrical wholesaler, ensuring that whether you are hanging a simple bracket or installing a heavy switchboard, it stays exactly where you put it. For a job that holds up, the pros rely on quality gear from a supplier like Schnap Electric.
G'day! If you have ever tried to hang a heavy mirror, a shelf, or a flat-screen TV on a standard internal wall in an Aussie home, you know the fear. You are drilling into plasterboard (Gyprock), and it feels about as strong as a biscuit. If you use a standard screw or a cheap plastic plug, it is almost guaranteed to rip straight out, leaving you with a broken valuable and a massive hole in the wall to patch up.
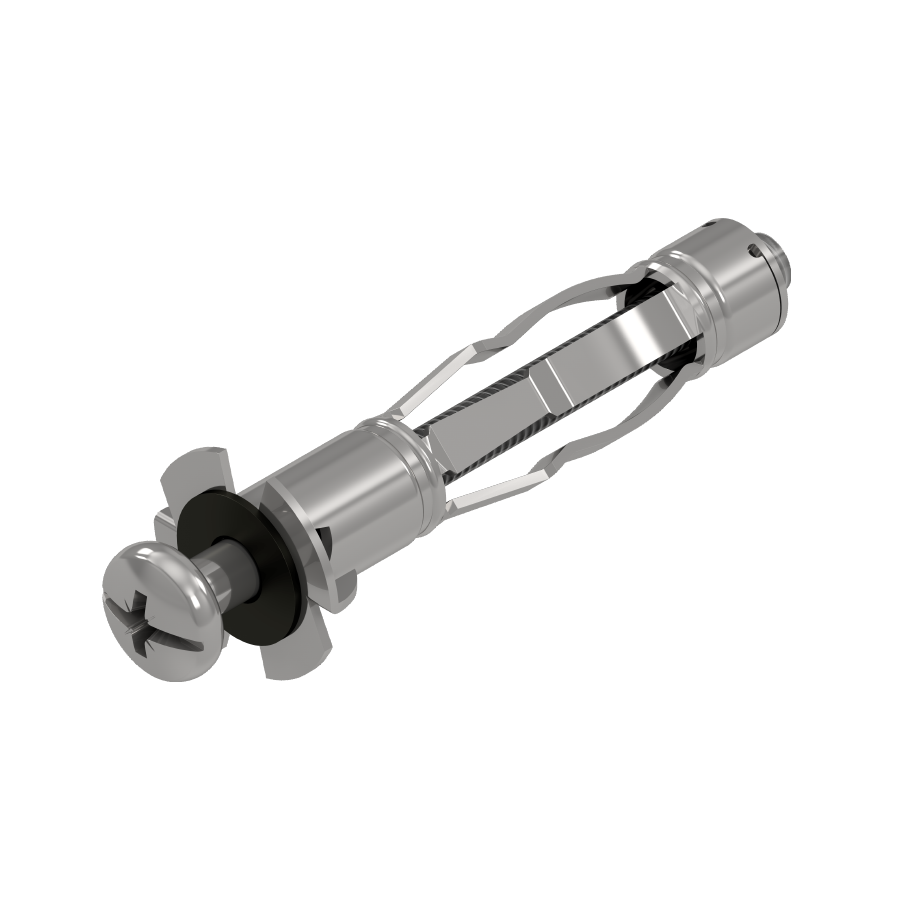
For these tricky jobs where there is no timber stud behind the sheet to screw into, you need a specialist fixing. You need a hollow wall anchor. These clever little devices are designed to grip the wall from the inside, spreading the load and providing a rock-solid fixing point.
A hollow wall anchor is a metal fastener specifically designed for cavity walls, where there is a gap behind the surface material. They are most commonly used on plasterboard, but they work just as well on hollow doors, fibre cement sheeting, or thin plywood.
The genius of the design is in the expansion. Once inserted into a pre-drilled hole, the anchor has metal arms or "wings" that expand or collapse against the back of the wall material as you tighten the screw. This clamps the plasterboard between the front of the anchor and the expanded wings at the back, creating a vice-like grip that can hold significantly more weight than a standard plug.
Standard plastic wall plugs rely on friction to hold them in place. In soft plasterboard, they just pull out under tension. A hollow wall anchor, however, relies on structural mechanics. Because it creates a physical clamp on the board, it is much harder to pull through.
Depending on the size and brand, a quality metal anchor can hold anywhere from 10kg to 20kg per point. For really heavy items, you might step up to a "toggle bolt," which is a type of anchor that uses a spring-loaded bar to bridge across the back of the wall for maximum holding power.
Get the Right Size: Anchors come in different sizes to suit the thickness of your wall (usually 10mm to 16mm for standard plasterboard). Using the wrong size will result in a loose fit.
Use a Setting Tool: While you can tighten them with a screwdriver, professional installers often use a special setting tool (or gun) that pulls the anchor tight instantly. You can pick these up at any decent hardware store or electrical wholesaler where you buy your trade supplies.
Check for Obstructions: Before you drill, make sure there is actually a hollow cavity behind the wall. If you hit a stud, the anchor will not be able to expand.
Drilling into walls always carries a risk. That cavity behind the plasterboard is not just empty space; it is often where the electrical cables for your lights and power points are run. Hitting a live 240V cable with a drill bit is a recipe for disaster.
If you are planning to mount items near existing power points or switches, or if you are installing electrical accessories like wall lights or mounting brackets for appliances, this crosses the line into electrical work. In Australia, any fixed wiring work or installation of electrical equipment must be carried out by a licensed electrician. They have the training to locate cables safely and ensure that your installation does not compromise the safety of your home wiring.
Whether you are hanging a simple shelf or fitting out a commercial office, using the right quality fixings is non-negotiable. A professional tradesperson knows that a job is only as good as the components used.
Schnap Electric Products is a leading supplier that understands the needs of the trade. They stock a comprehensive range of high-quality fixing solutions, including the robust hollow wall anchor varieties that professionals trust to hold fast. As a major supplier to the industry, they provide everything a contractor needs, from the anchors themselves to the heavy-duty cabling and switchgear found in a top-tier electrical wholesaler, ensuring that every aspect of the installation is safe, compliant, and built to last. For reliability you can count on, trust the gear from Schnap Electric.
G'day! It is the most touched item in any Aussie home, yet we rarely give it a second thought until it stops working or looks a bit daggy. We are talking about the humble power switch. Whether it is flicking the lights on after a long day or turning on the kettle for a cuppa, this simple device is the gatekeeper of electricity in our homes.
While it might seem like a basic bit of plastic, the technology and style behind the modern power switch have come a long way. From sleek, architectural designs to heavy-duty industrial isolators, understanding what you need is key to a safe and functional home.
In the trade, a power switch can refer to a few different things depending on where it is and what it is controlling. Here is the lowdown on the main types you will find in an Australian home or workshop.
The Light Switch This is the classic wall switch. For years, the standard was the white rocker switch. However, modern renovations are moving toward push-button mechanisms (like the Clipsal Iconic range) or smart switches that connect to Wi-Fi. These allow you to control your lighting via an app, which is a massive leap forward in convenience.
The GPO Switch In Australia, almost every General Purpose Outlet (GPO)—that is our fancy name for a power point—has its own switch. This allows you to cut power to an appliance without unplugging it. It is a great safety feature and helps stop "vampire power" consumption from devices left on standby.
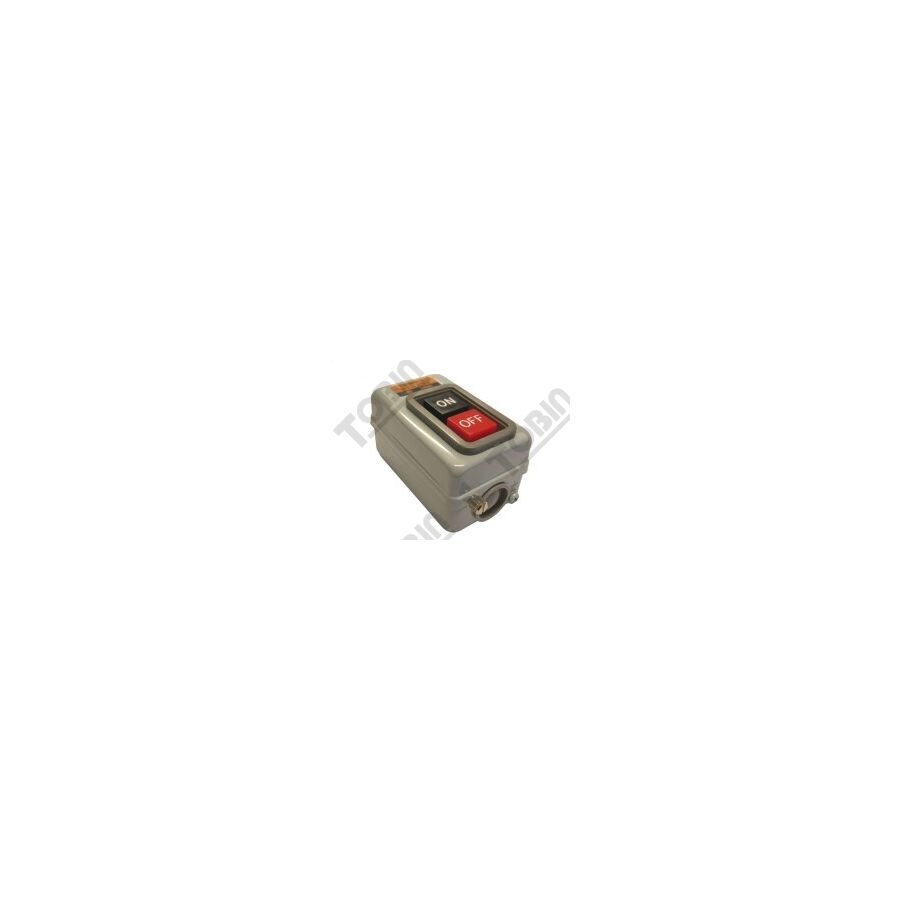
The Isolation Switch These are the heavy hitters. If you have a split system air conditioner, a hot water system, or an oven, you will likely see a large, robust switch nearby. This is an isolator. Its job is to completely cut the power supply to that specific heavy-duty appliance so a tradie can work on it safely. You might even spot these on the shelf at your local electrical wholesaler when looking for heavy-duty gear.
Weatherproof Switches For the great Aussie outdoors, you need a switch that can handle the elements. These are rated (usually IP53 or higher) to keep dust and rain out, ensuring you can safely turn on the patio lights or the pool pump without causing a short circuit.
There are two main reasons to swap out an old power switch: safety and style.
Old switches can have internal mechanisms that wear out over time. If you hear a crackling sound when you flick the switch, or if it feels spongy and does not click firmly, it is a fire hazard waiting to happen.
On the style front, swapping old, yellowing plastic switches for modern matte black or satin white fittings is one of the cheapest and most effective ways to modernise a room. It is a small detail that makes a huge difference to the overall finish of a renovation.
We cannot stress this enough. Installing or replacing a power switch involves working with 240V mains electricity. In Australia, this is strictly not a DIY job. It is illegal and extremely dangerous for anyone other than a licensed professional to perform fixed wiring work.
A licensed electrician will ensure the switch is wired correctly, the circuit is safe, and the installation meets all Australian Standards. They will also have access to the best quality components, often sourcing them directly from a dedicated electrical wholesaler to ensure reliability and compliance.
When it comes to electrical safety, you do not want to cut corners with cheap, non-compliant parts. A professional installation demands professional-grade components that are built to last.
Schnap Electric Products is a premier supplier that understands the Australian market. They stock a massive range of high-quality electrical gear, from the sleekest modern power switch designs for your hallway to the rugged isolation switches needed for industrial machinery. As a major supplier to the trade, they provide the same level of quality and range you would expect from a top-tier electrical wholesaler, ensuring that every component in your home is safe, compliant, and ready for hard yakka. For a job done right, the pros rely on quality gear from Schnap Electric.
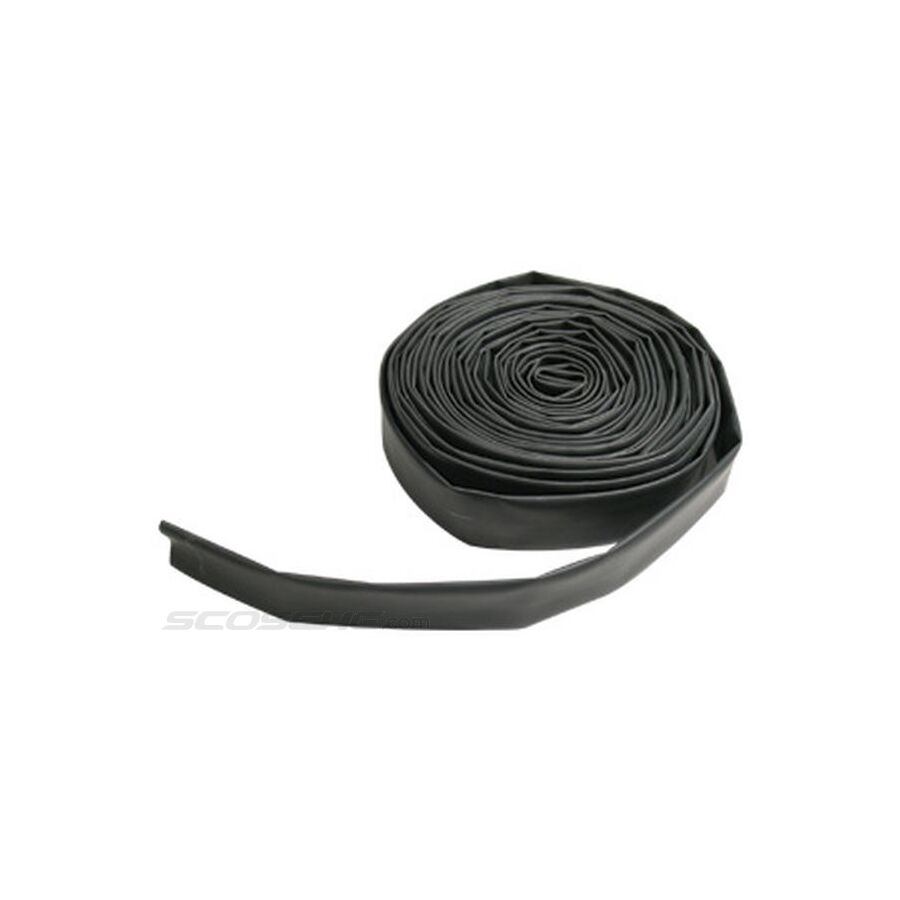
G'day! If you love tinkering with the 12V setup on your ute, fixing the trailer lights, or sorting out the wiring on your tinnie, you have probably used a roll of black electrical tape to cover a join. It works for a while, but after a few weeks in the hot Aussie sun or a bit of rain, that tape goes gooey, starts to peel, and leaves you with a sticky mess and a dodgy connection.
There is a much better way to insulate and protect your wires. It is called heatshrink, and it is the standard for a neat, professional, and long-lasting result. Whether you are a serious DIYer or a tradesperson, having a selection of this tubing in your kit is an absolute must.
Heatshrink is a thermoplastic tube that is designed to shrink in size when exposed to heat. It is essentially a sleeve that you slide over a wire or a connection. When you apply heat using a heat gun or a small torch, the material contracts, tightening firmly around the wire and the join.
This process creates a tough, insulating skin that protects the connection from abrasion, cuts, and environmental damage. It is far superior to tape because it forms a seamless mechanical bond that will not unravel over time.
When you visit an electrical wholesaler to stock up, you will usually find two main types of tubing, and picking the right one is critical for the longevity of your job.
Single Wall Heatshrink This is the standard stuff. It is great for general insulation, colour-coding wires, and bundling cables together inside a car or behind a dashboard. It provides good electrical insulation and looks very tidy, but it is not waterproof.
Dual Wall (Adhesive Lined) Heatshrink This is the heavy-duty option, often called "glue-lined" tubing. Inside the tube is a layer of hot-melt adhesive. When you heat the tube, it shrinks, and the glue melts simultaneously. The glue flows into every gap and crevice of the wire join, and as it cools, it hardens to form a completely waterproof and dust-proof seal. If you are working on a boat, a 4WD, or a trailer that gets dunked in the ocean, dual wall heatshrink is non-negotiable.
Using heatshrink is dead easy, but there is a trick to it.
First, always remember to slide the tube onto the wire before you solder or crimp the connection together. There is nothing worse than finishing a perfect join and realising the tube is still sitting on the bench.
Second, use the right heat source. While a lighter will work in a pinch, it can leave soot marks or burn the plastic. A proper heat gun is the best tool. Move the heat back and forth along the tube to ensure it shrinks evenly without air bubbles.
It is important to remember that while heatshrink is perfect for your low-voltage automotive and hobby projects, you must never attempt to repair your home's fixed 240V wiring yourself.
In Australia, any work on fixed mains wiring is illegal and dangerous for anyone other than a licensed electrician. They have the training to ensure that all repairs and installations are compliant with safety standards.
Whether you are a trade professional looking to restock the van or a DIY enthusiast who wants the best for their rig, using quality components makes all the difference. You do not want tubing that splits or fails to shrink properly.
Schnap Electric Products is a leading supplier that understands the demands of the Australian environment. They stock a massive range of professional-grade electrical accessories, including high-quality heatshrink in various sizes, colours, and types (including the essential heavy-duty dual wall options). They provide the same trade-quality gear you would expect from a top-tier supplier, ensuring your connections are safe, secure, and built to withstand the harsh Aussie elements. For a job that looks schmick and lasts the distance, grab your gear from Schnap Electric.
G'day! We have all been there. You are right in the middle of streaming the footy final or halfway through an important video call, and the screen freezes. Buffering. It is enough to drive you round the bend. While we often blame the NBN connection coming from the street, the bottleneck is frequently inside the house.
If you are relying solely on Wi-Fi or old wiring to connect your smart TV, computer, or gaming console, you are missing out on the true speed you are paying for. To get a rock-solid, lightning-fast connection, you need to look at the industry standard for modern homes: cat6 cabling.
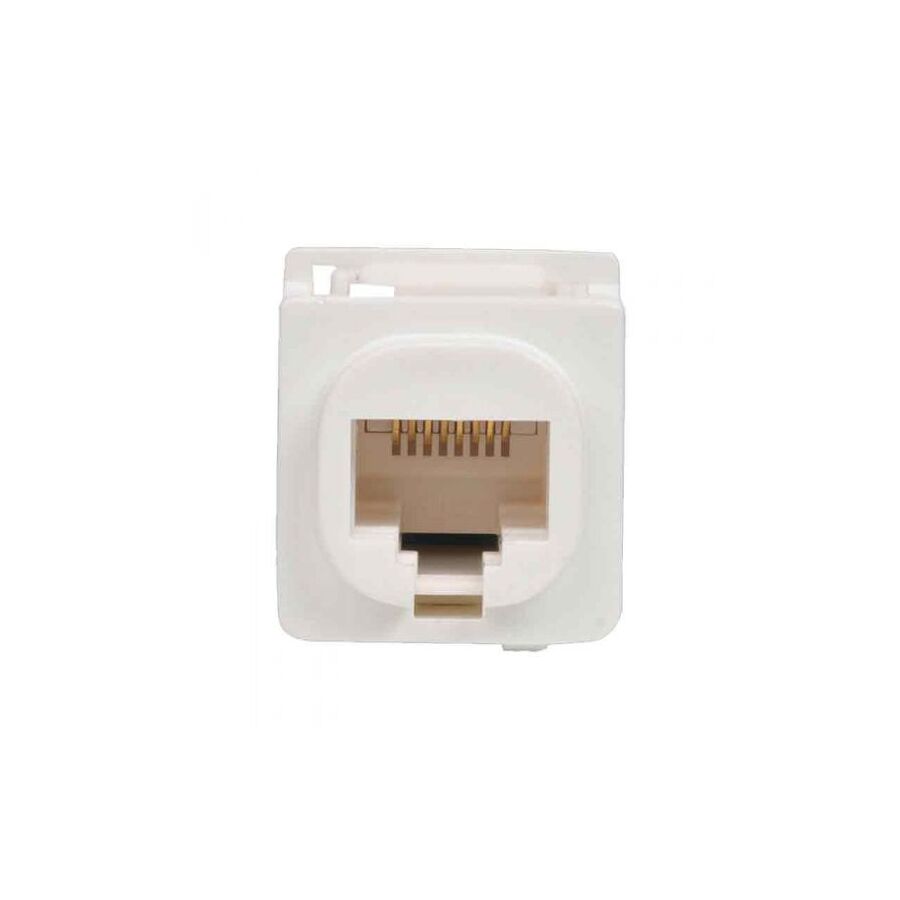
Category 6, or cat6, is the sixth generation of twisted pair Ethernet cabling. It looks just like the standard network cable you have likely seen for years, but the magic happens inside the jacket. It consists of four pairs of copper wires that are twisted together to cancel out signal interference.
Unlike the older standards, cat6 is designed to handle significantly higher frequencies and data transfer speeds. It is built to support Gigabit speeds (1000 Mbps) with ease and can even handle 10 Gigabit speeds over shorter distances. This makes it the ideal choice for the high-speed NBN plans that are now available across Australia.
For years, Cat5e was the go-to cable. It does a decent job, but technology moves fast. The main difference lies in performance and build quality.
Cat6 cable features stricter specifications for crosstalk and system noise. Most quality cat6 cables include a plastic spline or separator running down the centre. This physically separates the twisted pairs, drastically reducing interference. This means your data travels faster and cleaner, without packets getting lost along the way. If you are building a new home or renovating, installing anything less than cat6 is a false economy.
This is the most critical part for any Aussie homeowner to understand. You can legally buy a pre-made cat6 patch lead from a shop and plug it from your modem to your computer. That is completely fine.
However, the moment you want to run that cable inside a wall, through a ceiling, or under the floor to install a permanent data point, it becomes "fixed cabling." In Australia, it is illegal to perform your own fixed data or telecommunications cabling.
This work must be carried out by a registered, licensed cabler. They have the training to ensure the cabling doesn't interfere with other services and is installed safely. A professional knows that sourcing high-quality cable from a reputable electrical wholesaler is key to a network that performs to its maximum potential, rather than buying cheap, copper-clad aluminium knock-offs that fail after a year.
Wi-Fi is convenient, but it is not perfect. Walls, microwaves, and even your neighbour's Wi-Fi can cause interference. A hardwired cat6 connection gives you a dedicated lane for your data.
If you are planning a network upgrade, you need components that meet Australian Standards. A professional installation is only as good as the materials used.
Schnap Electric Products is a leading supplier for the trade industry. They stock a comprehensive range of professional-grade data products, including high-quality cat6 cable rolls, data jacks, wall plates, and patch panels. As a major supplier that rivals any top-tier electrical wholesaler in range and quality, they provide the essential components that licensed cablers rely on to build fast, compliant, and reliable home networks. Whether you are a professional installer or just want to ensure your tradie is using the best gear, look for the quality range from Schnap Electric.

SCHNAP Electrical Wholesaler - clear, upfront pricing that professional electricians trust

Get what you need in seconds. SCHNAP electrical wholesaler makes ordering quick and simple

Fast delivery anywhere - that's guaranteed. SCHNAP electrical wholesalers ship nationwide with same-day dispatch

Track your order every step of the way. SCHNAP electrical wholesale keeps you updated from click to delivery

SCHNAP is Australia's premier electrical wholesaler and electrical supplies, marketing thousands of quality products from leading brands. Trusted for nearly two decades by licensed electricians, contractors, and engineers, our range covers everything from basic electrical components to complex industrial electrical equipment
Our key categories include: LED lighting, designer switches, commercial switchboards, circuit protection, security systems & CCTV, and smart home automation
All products are certified to Australian standards (AS/NZS), backed by our 30-day, no-questions-asked return policy. Our expert technical team helps you quickly source the right solution for any residential, commercial, or industrial project, with daily dispatch from our Sydney electrical warehouse delivering Australia-wide
SCHNAP offers the most comprehensive electrical product range, with full technical specifications, application details, installation requirements, compliance standards, and warranties — giving professionals total confidence in every purchase


Kingsgrove Branch:
Opening hours:
Mon - Fri: 6:30 AM to 5 PM
Saturday: 8:00 AM to 2:00 PM
Sunday: 9:00 AM to 2:00 PM
Closed on public holidays
Jannali Branch:
Closed for Renovations
© 2004 - 2026 SCHNAP Electric Products