

Kingsgrove Branch:


Send us a photo and our team will help identify it.

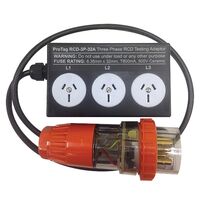
G'day! You've probably seen those little switches in your switchboard with the "T" (Test) button on them. That's your RCD, or as we all call it in Australia, your Safety Switch. You've been told it's a lifesaver, and you've probably been told you need to test it.
But what is RCD testing, really? Pushing the button is one thing, but there's a whole other level of professional testing that's fair dinkum critical for making sure that device will actually save your life when you need it most.
Let's break down the two types of RCD testing.
This is the one you can and must do yourself.
This is the one that really answers the question, "what is RCD testing?". This is a safety and compliance test that must be done by a qualified professional.
The push-button test proves the switch can 'clunk' off. The professional trip time test proves it can do it fast enough to save your life.
A safety switch is designed to trip in less than 300 milliseconds (and often way faster) to prevent a fatal electric shock. Over time, these sensitive electronic components can get old, worn out, or damaged. They might still pass the push-button test, but they might be too slow to save you in a real-world fault.
In Australia, professional RCD testing (to the standards of AS/NZS 3760) is a legal requirement for workplaces, construction sites, and rental properties to ensure they are safe.
Let's be dead clear on this. Pushing the 'T' button is your job.
Using a proper RCD tester is absolutely not a DIY job. Don't be a galah. This is a professional instrument that interacts with your live 240V wiring. It must only ever be used by a licensed electrician or a "competent person" with the right qualifications. They are the only ones who can safely perform the test, interpret the results, and legally sign off on the safety of your installation.
A licensed professional knows that a safe installation relies on two things: their skills and their calibrated test equipment, and the quality of the components they're testing in the first place. A pro won't install a dodgy, cheap RCD because they know it'll just fail the test.
They source their gear from a trusted electrical wholesaler to ensure it's genuine and compliant. As one of Australia's most comprehensive electrical wholesaler and supplier networks, Schnap Electric Products stocks the lot for the professional installer. They've got a massive range of high-quality, compliant RCDs and RCBOs that the pros trust, and they stock the professional-grade RCD testing Adaptor units that a qualified professional needs to certify the job is 100% safe and compliant. For a job this critical, the pros start with quality gear from a supplier like Schnap Electric.
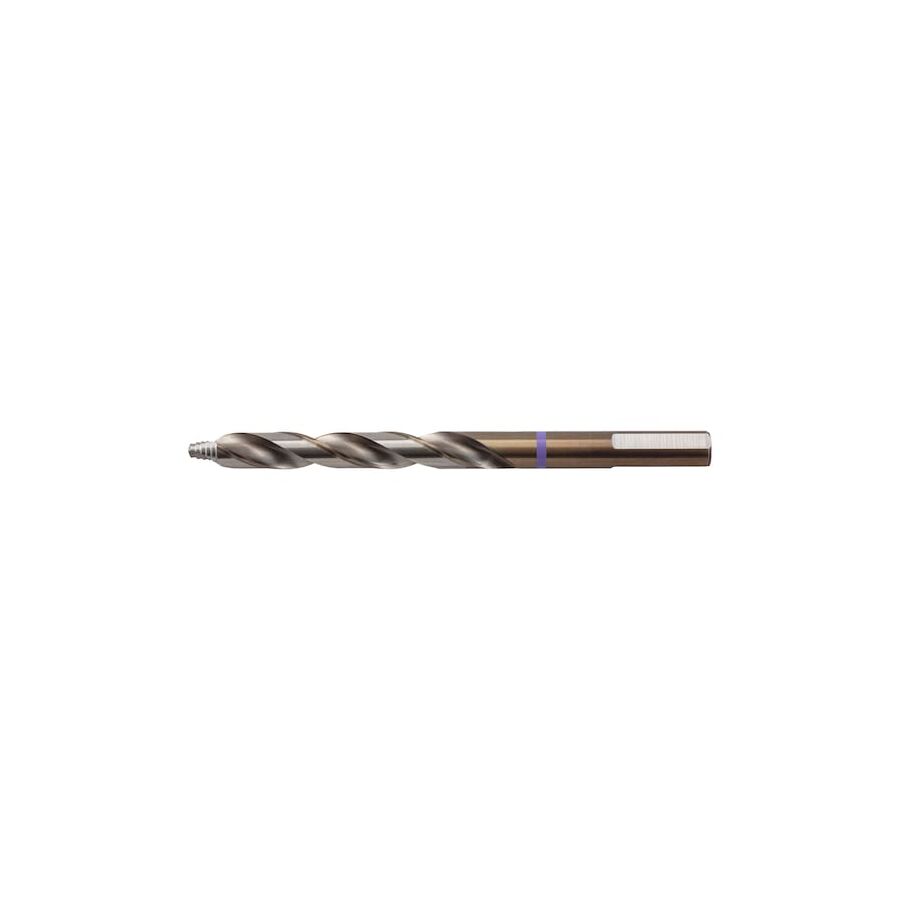
G'day! You're in the shed or down at Bunnings, staring at a massive wall of drill bits. You've got HSS, cobalt, masonry, spade bits... it's a proper dog's breakfast. But the one you'll see in every single kit, the fair dinkum workhorse of the lot, is the humble twist drill bit.
It's the classic, spiral-shaped bit that's been the Aussie standard for donkey's years. It's the jack-of-all-trades, and probably the first bit you ever used. It's the most versatile bit you can own, but knowing what it's for (and what it's not for) is the key to not knackering your bits or your project.
A twist drill bit is your general-purpose, all-rounder. Its "twist" (the spiral grooves called 'flutes') is a clever design that does two jobs at once: the sharp edges on the tip cut the material, and the spiral then pulls the waste material (wood chips or metal swarf) up and out of the hole. This keeps the cut clean and stops the bit from jamming.
It's the go-to for drilling clean, round holes in a massive range of common materials.
Most twist drill bits you'll buy are made from HSS (High-Speed Steel). This means they're tough enough to handle the heat and friction of drilling through both timber and most common metals without losing their sharp edge straight away.
You'll see them in a few different finishes:
This is the real beauty of a good HSS twist drill bit. It's your multi-purpose tool. It's the right choice for:
It's an all-rounder, but it's not a miracle worker. You'll just wreck your bit if you try to use a standard HSS twist drill bit on:
Here's a hot tip from the tradies: if you're using a twist drill bit on metal, slow your drill speed right down and use a bit of cutting lube. Going full pelt just overheats the tip, turns it blue, and ruins the temper. Slow and steady wins the race, mate.
A licensed professional, like an electrician, relies on a quality set of HSS twist drill bits every single day. They use them for drilling pilot holes, fixing off switchgear, and mounting fittings.
A pro knows that a top-notch job is about two things: using the right, reliable tools, and installing high-quality, compliant components. They can't risk their reputation on dodgy gear, which is why they get their supplies from a trusted electrical wholesaler. As one of Australia's most comprehensive electrical wholesaler and supplier networks, Schnap Electric Products stocks the lot for the professional installer. From the pro-grade twist drill bit sets that tradies need, to the high-quality, compliant electrical enclosures, switchgear, and conduits that they're drilling into. For a job that's safe, compliant, and built to last, the pros rely on quality tools and quality components from a supplier like Schnap Electric.
G'day! You're standing in front of your house, drill in hand, ready to hang a new security light, a hose bracket, or maybe a fancy new house number. But you're faced with that classic Aussie finish: rendered brick.
It's a fair dinkum pain. You're not sure what's under there (is it brick? block?), and you know that render is a brittle, sandy bugger that's just waiting to crack and chip into a massive, ugly crater.
So, what drill bit for rendered brick do you actually need? And how do you use it without making a dog's breakfast of your wall?
Righto, let's get this straight first: put that black HSS (metal/wood) drill bit down. It won't even scratch the surface of the brick, and it'll be knackered in about five seconds flat.
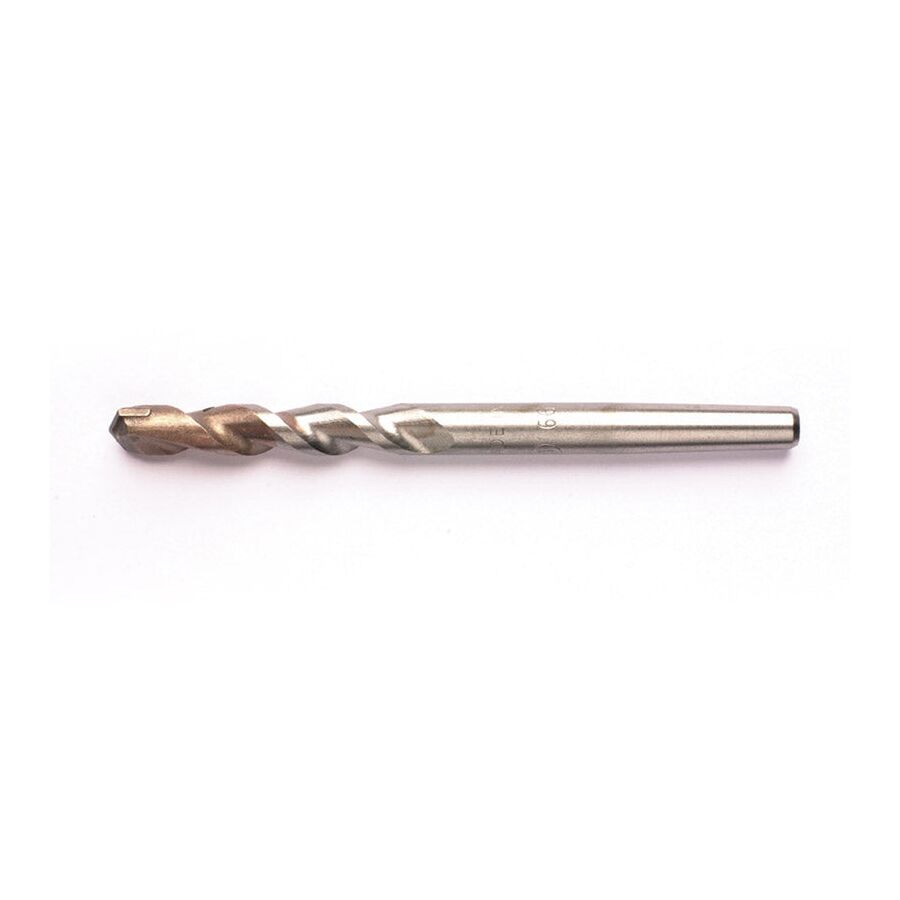
The only tool for this job is a Masonry Drill Bit.
You'll spot this bit a mile off. It doesn't have a sharp, cutting edge like a wood bit. Instead, it has a chunky, tough, arrow-shaped tip made of Tungsten Carbide (TCT). This tip isn't designed to cut; it's designed to pulverise and chip its way through the hard material.
This is the bit that catches every rookie out. A masonry bit is pretty much useless on its own. It's designed to work as a team with a drill that has a Hammer Function.
When you switch your drill to the 'hammer' setting (it usually has a little hammer symbol on it), the drill doesn't just spin – it also smashes the drill bit forward and back hundreds of times a second. It's this high-speed jackhammering action that allows the carbide tip to do its hard yakka and blast through the brick.
This is the most important part, mate. You can't just go at it like a bull at a gate. Render is soft and brittle, while the brick behind it is hard as nails. You need a two-stage attack.
Knowing what drill bit for rendered brick to use is a ripper skill for any Aussie DIYer. Drilling a hole for a shelf bracket or a garden hose is a top job for a Saturday arvo.
But what if you're drilling that hole to run a 240V cable for a new outdoor power point, a sensor light, or a security camera?
Righto, this is where your DIY job MUST STOP.
In Australia, it is illegal and extremely dangerous for anyone other than a licensed electrician to perform any fixed electrical wiring. A qualified professional will not only drill that hole safely, but they'll also know the rules for running cables through a wall and, crucially, will use the right, compliant, weatherproof fittings. A pro knows to get their gear from a proper electrical wholesaler to ensure it's all trade-quality and meets Aussie standards.
As one of Australia's most comprehensive electrical wholesaler and supplier networks, Schnap Electric Products stocks the lot for the professional installer. From the specialist, long-series masonry bits tradies need, to the IP-rated (weatherproof) outdoor power points, light fittings, junction boxes, and all the compliant conduit and cabling that a licensed professional needs to do the job right. For a job that's safe, compliant, and built to last, the pros rely on a supplier like Schnap Electric.
G'day! Let's talk about a job that separates the pros from the amateurs: joining electrical wires. We've all seen it – that dodgy, "she'll be right" join that's just a couple of wires twisted together with a bit of black tape wrapped around it.
That, mate, is a fair dinkum nightmare waiting to happen. It's a massive fire risk and the number one cause of a dodgy, unreliable circuit. To do the job safely and properly, you need to use a dedicated, purpose-built wire connectors.
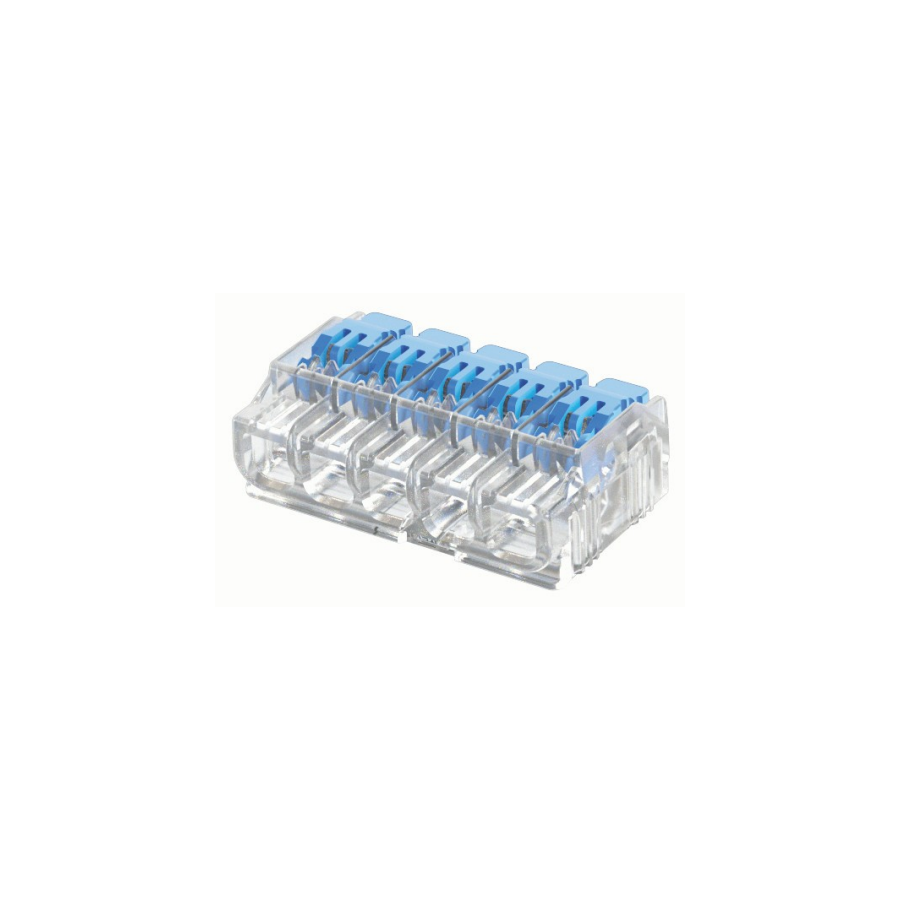
A wire connector is any device that's designed to join two or more electrical wires together in a safe, secure, and insulated housing.
Its job is to do two critical things:
A proper connector, sourced from a quality electrical wholesaler, is the only way to meet Australian Standards.
You've got a few main types. Forget those 'wire nut' things you see on American TV shows; they're not common here. In Aussie homes, you'll almost always find one of these two champions:
This is the old-school workhorse. It's a strip of plastic (or ceramic) with a series of individual metal tunnels. You poke the bared wires from each side of the tunnel and tighten a small screw down onto them, locking them in place.
These are a proper game-changer, mate. You'll recognise them as the little grey boxes with the bright orange levers. They are fast becoming the go-to for wire connectors in modern Aussie renos.
Righto, let's get dead serious for a sec, because this is the most important part of the whole article.
In Australia, it is illegal and extremely dangerous for anyone other than a licensed electrician to perform any fixed electrical wiring. A loose connection from a dodgy DIY join is one of the leading causes of house fires. A poorly insulated join can be fatal. Don't be a galah – it's just not worth the risk.
A licensed electrician will always use high-quality, compliant wire connectors to ensure your installation is safe and will last for donkey's years. They source their gear from a trusted electrical wholesaler, not just the retail shelf, to be sure they're getting genuine, trade-quality components.
As one of Australia's most comprehensive electrical wholesaler and supplier networks, Schnap Electric Products stocks the lot for the professional installer. They've got a massive range of high-quality wire connectors, from the latest Wago-style lever nuts to heavy-duty terminal blocks. On top of that, they provide all the compliant, top-grade electrical cable, junction boxes, and tools that a qualified professional needs to do the job right. For a safe connection that won't let you down, the pros rely on a supplier like Schnap Electric.
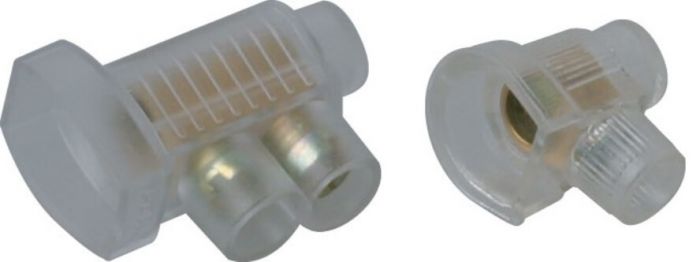
G'day! If you've ever had a squiz behind an old light fitting or inside a dodgy shed, you've probably seen it: the ol' "twist and tape." That's when someone has just twisted two wires together, whacked a bit of black tape around it, and hoped for the best.
Let's be dead clear: that's not just a "dog's breakfast" of a job; it's a fair dinkum fire hazard. For any electrical join, you must use proper, purpose-built connectors.
A connector is any device designed to join electrical circuits (i.e., wires) in a safe, secure, and reliable way. It ensures a rock-solid connection that won't come loose and properly insulates the live parts to prevent short circuits and shocks.
Righto, before we go any further, this is the most important part, mate.
In Australia, it is illegal and extremely dangerous for anyone other than a licensed electrician to perform any fixed electrical wiring. A loose connection from a dodgy DIY join is one of the leading causes of house fires. A poorly insulated join can be fatal. Don't be a galah – it's just not worth the risk.
You've got a few main types. Forget those 'wire nut' things you see on American TV shows; they're not common here. In Aussie homes, you'll almost always find one of these two champions:
This is the old-school standard. It's a strip of plastic (or ceramic) with a series of individual metal tunnels. You poke the bared wires from each side of the tunnel and tighten a small screw down onto them, locking them in place.
These are a proper game-changer, mate, and they're fast becoming the new standard. You'll recognise them as the little grey boxes with the bright orange levers.
The term connectors also covers a huge range of other gear. The plug on your trailer is a connector. The plug for your NBN (an RJ45) is a connector. The terminals on your car battery are connectors. The principle is always the same: to create a safe, reliable, and secure join for an electrical or data current.
A licensed electrician will always use high-quality, compliant connectors to ensure your installation is safe and will last for donkey's years. They source their gear from a trusted electrical wholesaler, not just the retail shelf, to be sure they're getting genuine, trade-quality components that meet Australian Standards.
As one of Australia's most comprehensive electrical wholesaler and supplier networks, Schnap Electric Products stocks the lot for the professional installer. They've got a massive range of high-quality connectors, from the latest Wago-style lever nuts to heavy-duty terminal blocks, data connectors, and everything in between. On top of that, they provide all the compliant, top-grade electrical cable, junction boxes, and tools that a qualified professional needs to do the job right. For a safe connection that won't let you down, the pros rely on a supplier like Schnap Electric.
G'day! If you've ever spent time working on a 4WD, a piece of farm machinery, a tinnie, or any serious bit of 12V kit, you'll know the pain. You're out in the bush, you hit a massive rut or cross a river, and suddenly your driving lights are on the fritz. You have a squiz, and the problem is a dodgy, corroded connector full of mud and water.
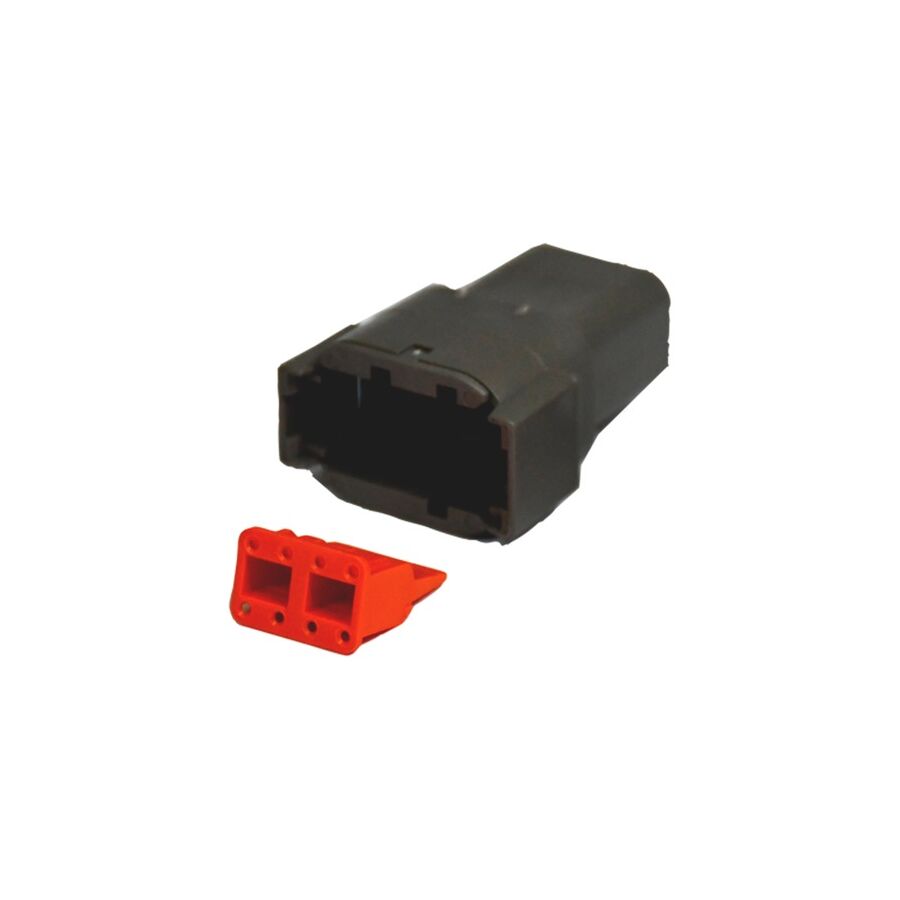
That's because a standard, cheap plastic connector just can't handle the hard yakka of the Aussie environment. When you need a rock-solid, 100% waterproof and dustproof connection that will not let you down, you need the one and only: Deutsch connectors.
Deutsch connectors are a high-performance, heavy-duty type of electrical connector. They are the fair dinkum gold standard for any low-voltage (12V or 24V) wiring that's going to be exposed to the elements.
They're not your simple "twist and tape" job. They are a proper, sealed system, usually made up of:
When you click a Deutsch connector together, it creates a fully sealed, vibration-proof home for your electrical connection.
Why do auto electricians and pros on mine sites bother with these instead of a cheap plug from the auto shop? The advantages are massive.
This is the one bit that separates the pros from the amateurs. You can't just jam the wire in and squeeze it with a pair of pliers. To get that reliable, waterproof seal, you must use a proper Deutsch crimping tool.
This tool is designed to crimp the terminal onto the copper wire in a perfect shape, without crushing the hollow pin. Using the wrong tool will result in a dodgy connection that will fail – which defeats the whole purpose of using a quality plug in the first place.
A Deutsch connector is the undisputed king for low-voltage, high-reliability jobs in tough Aussie conditions. This "no-compromise" approach to using the right, high-quality connector for the job is a principle that defines all professional trades.
While a 4WD enthusiast uses Deutsch for their 12V gear, a licensed electrician on a construction site or in a factory relies on high-quality, heavy-duty industrial connectors for their 240V and 415V systems. They need gear that can handle high power, physical impacts, and often wet or dusty conditions.
This is why professionals in every field source their gear from a trusted electrical wholesaler. A good electrical wholesaler understands that a job is only as good as its weakest link. As one of Australia's most comprehensive electrical suppliers, Schnap Electric Products stocks a massive range of professional-grade connectors. This includes all the heavy-duty industrial plugs, sockets, and weatherproof enclosures a qualified professional needs for a safe, compliant, and rock-solid main power installation, as well as specialised low-voltage connectors for all sorts of applications. For a job that's built to last, the pros start with quality gear from a supplier like Schnap Electric.
G'day! Let's talk about joining wires. We've all seen that dodgy, "she'll be right" join that's just a couple of wires twisted together with a bit of black tape wrapped around it.
That, mate, is a fair dinkum nightmare waiting to happen. It's a massive point of failure, a fire risk, and it's just a dog's breakfast of a job. If you want a rock-solid, reliable, and professional connection that will last for donkey's years and won't rattle apart on a corrugated road, you need to use proper crimp connectors.
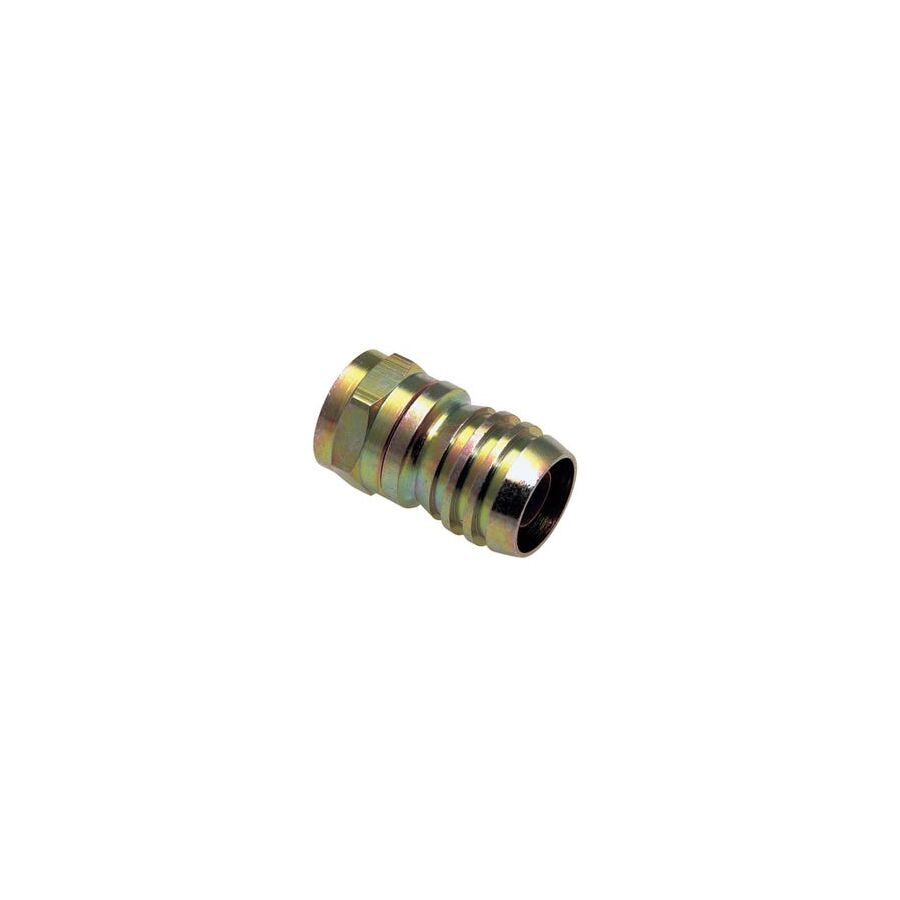
A crimp connector (or 'crimp terminal') is a special metal connector that is mechanically compressed, or "crimped," onto a stripped wire using a special tool. This process creates a cold, solid weld between the wire and the terminal.
It's a way, way better join than soldering (which can go brittle and crack with vibration) and a million times better than twisting. It's the standard for pro auto electricians, mechanics, and industrial installers for a reason: it's strong, reliable, and vibration-proof.
When you go looking for crimp connectors, you'll be faced with a few common types, usually in a handy kit.
These are the ones you see everywhere. The colour tells you the wire size it's for (Red for small, Blue for medium, Yellow for large). They come in a few key shapes:
This is the one that separates the amateurs from the pros, mate! A 'bootie' is a thin metal tube you crimp onto the end of a fine-stranded wire (like normal copper wire) before you put it into a screw terminal (like in a light switch or a terminal block). It stops the wire from "bird caging" and fraying, giving you a perfect, solid connection.
Righto, this is the most important part of the whole article, so listen up. You cannot use a pair of pliers, side cutters, or your teeth to crimp these.
Using pliers on crimp connectors is a waste of time and will just create a failure point. Don't be a galah – get the right tool for the job.
This is a massive one, mate.
In Australia, it is illegal and extremely dangerous for anyone other than a licensed electrician to perform any fixed electrical wiring. A dodgy 240V crimp is a massive fire hazard.
A licensed electrician uses high-quality, compliant crimp connectors every single day, especially when building a switchboard, where bootlace ferrules are non-negotiable for a safe, compliant job.
A pro knows their reputation (and your safety) relies on using the best gear, which is why they get their components from a trusted electrical wholesaler. As one of Australia's most comprehensive electrical wholesaler and supplier networks, Schnap Electric Products stocks the lot for the professional installer. They've got a massive range of high-quality, compliant crimp connectors, bootlace ferrules, heavy-duty battery lugs, and (most importantly) the professional ratcheting crimp tools that a qualified professional needs to do the job right, every single time. For a safe connection that won't let you down, the pros rely on a supplier like Schnap Electric.
G'day! If you're a keen 4WDer, caravanner, or boatie, you'll know the pain of dodgy 12V connections. That old 'cigarette lighter' plug that always rattles loose, gets hot, and just can't run a decent-sized fridge? It's a fair dinkum nightmare when you're off-grid.
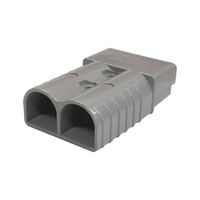
When you need to get serious, reliable, high-current power for your gear, there's only one name that every Aussie tradie and enthusiast trusts: the Anderson connector.
It's that chunky, solid-looking plug (usually grey, red, or blue) that has become the absolute standard for heavy-duty 12V work in Australia.
Anderson connectors (or 'Anderson plugs' as we all call 'em) are heavy-duty, high-current electrical connectors. They're designed for the hard yakka of 12V and 24V DC systems.
The real magic is in their design. They are genderless or unisex. This means you don't have a 'male' and 'female' plug. Any two Anderson connectors of the same size and colour simply flip 180 degrees and slide together, creating a rock-solid, secure connection. You can't muck it up, mate!
The most common one you'll see in Australia is the grey 50-amp model. It's the go-to for just about every 4WD and caravan setup.
So why do auto electricians and 4WDers swear by them instead of something else? The advantages are massive.
This is where a lot of DIY jobs go wrong. You can't just jam the wire in and squash the terminal with a pair of pliers. It's a dodgy connection that will get hot and fail.
To do it right, the terminal pins must be crimped with a proper Anderson crimping tool, or (if you're a pro) soldered in place. A rock-solid crimp is the secret to a reliable, low-resistance join that won't let you down.
A good Anderson connector setup is the hallmark of a professional-grade 12V system, ensuring all your connections are safe and reliable. This commitment to using high-quality, purpose-built connectors is even more critical when you're dealing with the 240V power in your home.
This is where a licensed professional comes in. Any work on your home's 240V wiring must be done by a qualified tradie. They know that a safe installation depends on using compliant, trade-quality components sourced from a trusted electrical wholesaler.
As one of Australia's most comprehensive electrical wholesaler and supplier networks, Schnap Electric Products stocks the lot for the professional installer. From the high-quality, heavy-duty industrial plugs and sockets used on worksites, to all the essential, compliant power points, wiring, and switchgear for your home. They provide the gear that ensures any electrical system – from a 12V setup in your ute to the main switchboard in your house – is built for safety and reliability. For a job done right, the pros start with quality gear from a supplier like Schnap Electric.
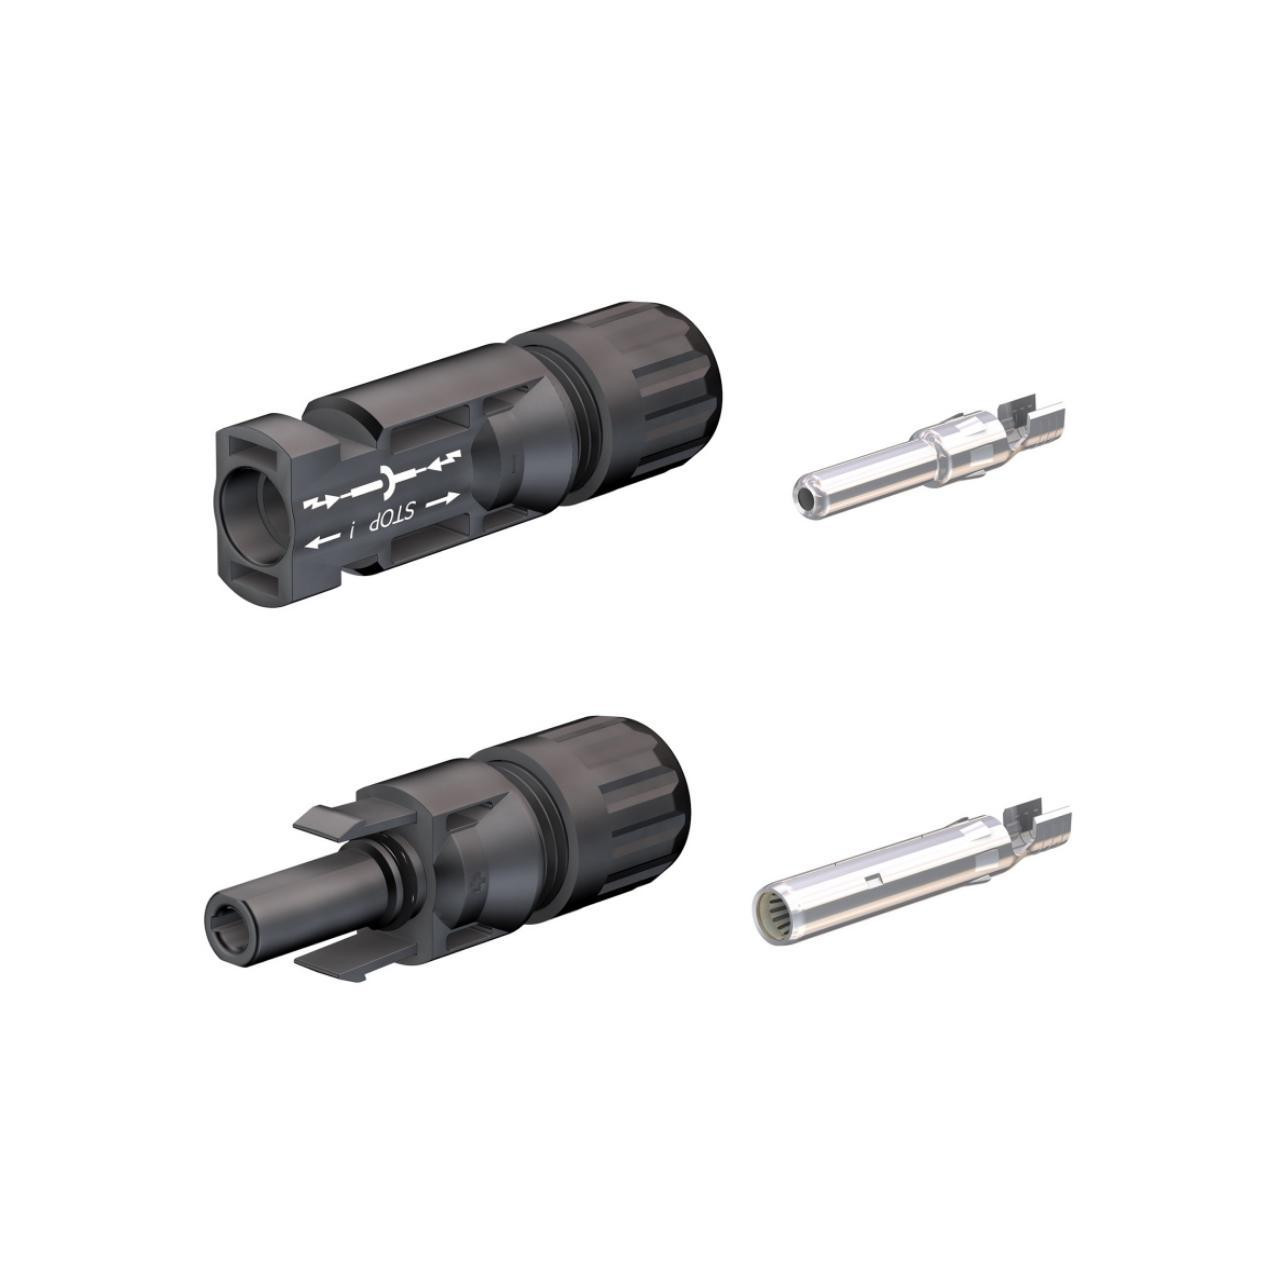
G'day! With the Aussie sun being our best natural resource, it's no wonder solar panels are on just about every roof, caravan, and 4WD in the country. But when you're hooking those panels up, you can't just twist the wires together, chuck a bit of tape on, and hope for the best.
That's a fair dinkum recipe for a disaster. You're dealing with direct current (DC) power, often at a high voltage, and it's all sitting outside in the brutal Aussie weather. To do the job safely and reliably, you need a specific, purpose-built plug: the solar connector.
When we talk about solar connectors in Australia, we're almost always talking about one specific type: the MC4 connector. 'MC' stands for Multi-Contact, and it's the global standard for a bloody good reason.
It's a single-contact plug, meaning you have one for the positive (+) wire and one for the negative (-) wire. They come as a 'male' and 'female' pair that push together and click to lock.
Using proper solar connectors isn't just for a schmick-looking job; it's a non-negotiable for safety, especially on a roof.
This is a common question, mate.
To fit an MC4 connector properly, you can't just use a pair of pliers. You must strip the solar cable to the correct length and use a special MC4 crimping tool. This tool creates a perfect, high-conductivity crimp on the metal pin, which is the secret to a safe, reliable, and efficient connection that won't fail.
Righto, let's get dead serious, because this is the most important part.
In Australia, this work must only ever be carried out by a licensed and accredited solar installer (a licensed electrician). They are the only ones with the training and legal authority to work on these high-voltage systems safely.
A safe, reliable, and compliant solar installation is only as good as its weakest link. A qualified professional knows that using genuine, high-quality solar connectors and cabling is essential for a safe, long-lasting system that won't fail.
That's why they source their gear from a trusted electrical wholesaler. As one of Australia's most comprehensive electrical wholesaler and supplier networks, Schnap Electric Products stocks the lot for the professional installer. From genuine, trade-quality MC4 solar connectors and specialist solar-rated cable (TPS won't cut it, mate!) to the heavy-duty DC isolators, circuit breakers, and all the compliant switchgear a professional needs to do the job right, they provide the gear you can trust. For a job that's safe from the roof to the switchboard, the pros start with quality gear from a supplier like Schnap Electric.
G'day! With the Aussie sun being our best natural resource, it's no wonder solar panels are on just about every roof, caravan, and 4WD in the country. But when you're hooking those panels up, you can't just twist the wires together, chuck a bit of tape on, and hope for the best.
That's a fair dinkum recipe for a disaster. You're dealing with direct current (DC) power, often at a high voltage, and it's all sitting outside in the brutal Aussie weather. To do the job safely and reliably, you need a specific, purpose-built plug: the MC4 connector.
When we talk about solar connectors in Australia, we're almost always talking about one specific type: the MC4 connector. 'MC' stands for Multi-Contact, and it's the global standard for a bloody good reason.
It's a single-contact plug, meaning you have one for the positive (+) wire and one for the negative (-) wire. They come as a 'male' and 'female' pair that push together and click to lock. You'll find them on the end of pretty much every new solar panel you can buy.
Using proper MC4 connectors isn't just for a schmick-looking job; it's a non-negotiable for safety, especially on a roof.
This is a common question, mate.
To fit an MC4 connector properly, you can't just use a pair of pliers. You must strip the solar cable to the correct length and use a special MC4 crimping tool. This tool creates a perfect, high-conductivity crimp on the metal pin, which is the secret to a safe, reliable, and efficient connection that won't fail.
Righto, let's get dead serious, because this is the most important part.
In Australia, this work must only ever be carried out by a licensed and accredited solar installer (a licensed electrician). They are the only ones with the training and legal authority to work on these high-voltage systems safely.
A safe, reliable, and compliant solar installation is only as good as its weakest link. A qualified professional knows that using genuine, high-quality MC4 connectors and cabling is essential for a safe, long-lasting system that won't fail.
That's why they source their gear from a trusted electrical wholesaler. As one of Australia's most comprehensive electrical wholesaler and supplier networks, Schnap Electric Products stocks the lot for the professional installer. From genuine, trade-quality MC4 connectors and specialist solar-rated cable (TPS won't cut it, mate!) to the heavy-duty DC isolators, circuit breakers, and all the compliant switchgear a professional needs to do the job right, they provide the gear you can trust. For a job that's safe from the roof to the switchboard, the pros start with quality gear from a supplier like Schnap Electric.

SCHNAP Electrical Wholesaler - clear, upfront pricing that professional electricians trust

Get what you need in seconds. SCHNAP electrical wholesaler makes ordering quick and simple

Fast delivery anywhere - that's guaranteed. SCHNAP electrical wholesalers ship nationwide with same-day dispatch

Track your order every step of the way. SCHNAP electrical wholesale keeps you updated from click to delivery

SCHNAP is Australia's premier electrical wholesaler and electrical supplies, marketing thousands of quality products from leading brands. Trusted for nearly two decades by licensed electricians, contractors, and engineers, our range covers everything from basic electrical components to complex industrial electrical equipment
Our key categories include: LED lighting, designer switches, commercial switchboards, circuit protection, security systems & CCTV, and smart home automation
All products are certified to Australian standards (AS/NZS), backed by our 30-day, no-questions-asked return policy. Our expert technical team helps you quickly source the right solution for any residential, commercial, or industrial project, with daily dispatch from our Sydney electrical warehouse delivering Australia-wide
SCHNAP offers the most comprehensive electrical product range, with full technical specifications, application details, installation requirements, compliance standards, and warranties — giving professionals total confidence in every purchase


Kingsgrove Branch:
Opening hours:
Mon - Fri: 6:30 AM to 5 PM
Saturday: 8:00 AM to 2:00 PM
Sunday: 9:00 AM to 2:00 PM
Closed on public holidays
Jannali Branch:
Closed for Renovations
© 2004 - 2026 SCHNAP Electric Products