

Kingsgrove Branch:


Send us a photo and our team will help identify it.

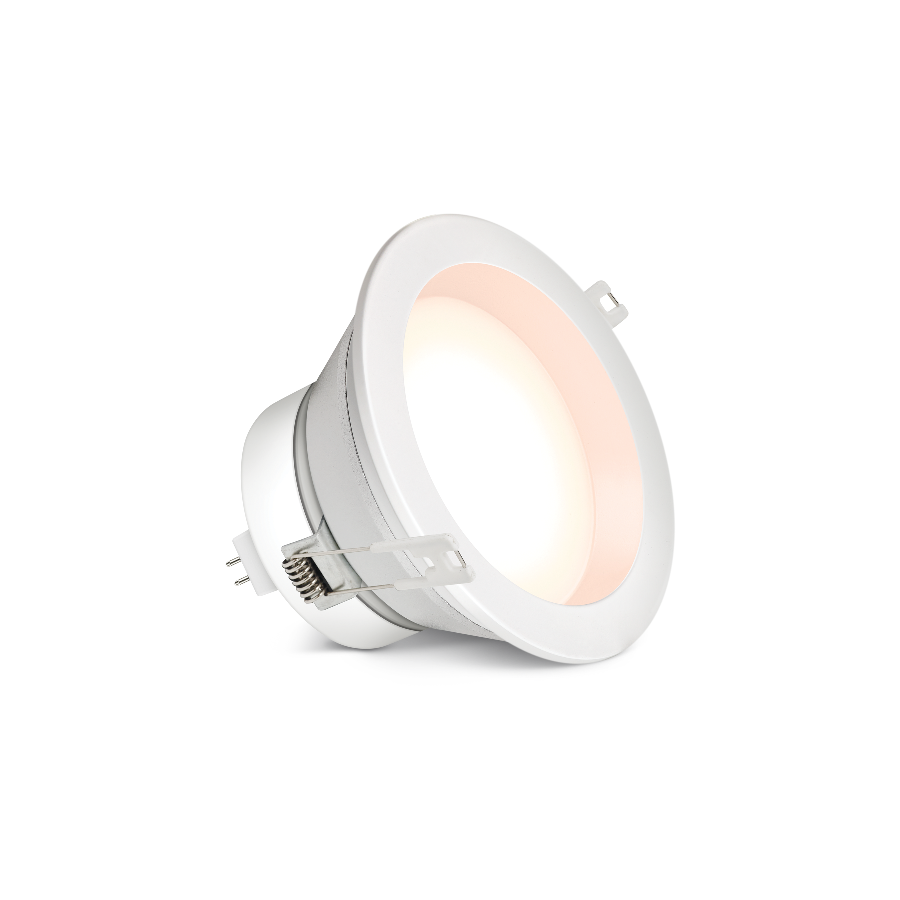
G'day! When we talk about downlights, most of us think of the ones in our house, hooked up to the 240V mains power. But there's a whole different world of lighting out there, and it's the one that powers our Aussie lifestyle. We're talking about the lighting you need for your 4WD canopy, your caravan, your tinnie, or your off-grid shed.
This is the world of 12-volt power, and for that, you need a special, purpose-built fitting: the 12V LED downlight.
A 12V LED downlight is a light fitting that's designed to run directly off a 12-volt DC battery system. It's the go-to for any mobile or off-grid setup.
It looks a lot like a modern, slimline version of the downlights in your house, but its internal electronics are completely different. It's built to handle the low-voltage DC power from a car battery or a deep-cycle battery bank, rather than the high-voltage AC from your wall sockets.
For any 12V setup, a 12V LED downlight is a fair dinkum no-brainer. The advantages are massive.
Righto, let's get dead serious for a sec, because this is the most important part.
Installing this driver and connecting it to the 240V mains power is absolutely not a DIY job. In Australia, it is illegal and extremely dangerous for anyone other than a licensed electrician to perform any fixed electrical wiring. Don't be a galah – it's just not worth the risk.
A licensed professional knows that a safe, reliable lighting job (whether it's 12V or 240V) relies on quality, compliant gear. They won't risk their reputation on dodgy fittings that will fail in six months. They source their components from a trusted electrical wholesaler.
As one of Australia's most comprehensive electrical wholesaler and supplier networks, Schnap Electric Products stocks the lot for the professional installer and the serious DIYer. They've got a massive range of high-quality, trade-grade 12V LED downlight fittings for 4WD and marine use, as well as all the high-quality 240V downlights, LED drivers, switches, and wiring that a qualified professional needs to do a job in your home safely. For a job that's bright, safe, and built to last, the pros start with quality gear from a supplier like Schnap Electric.
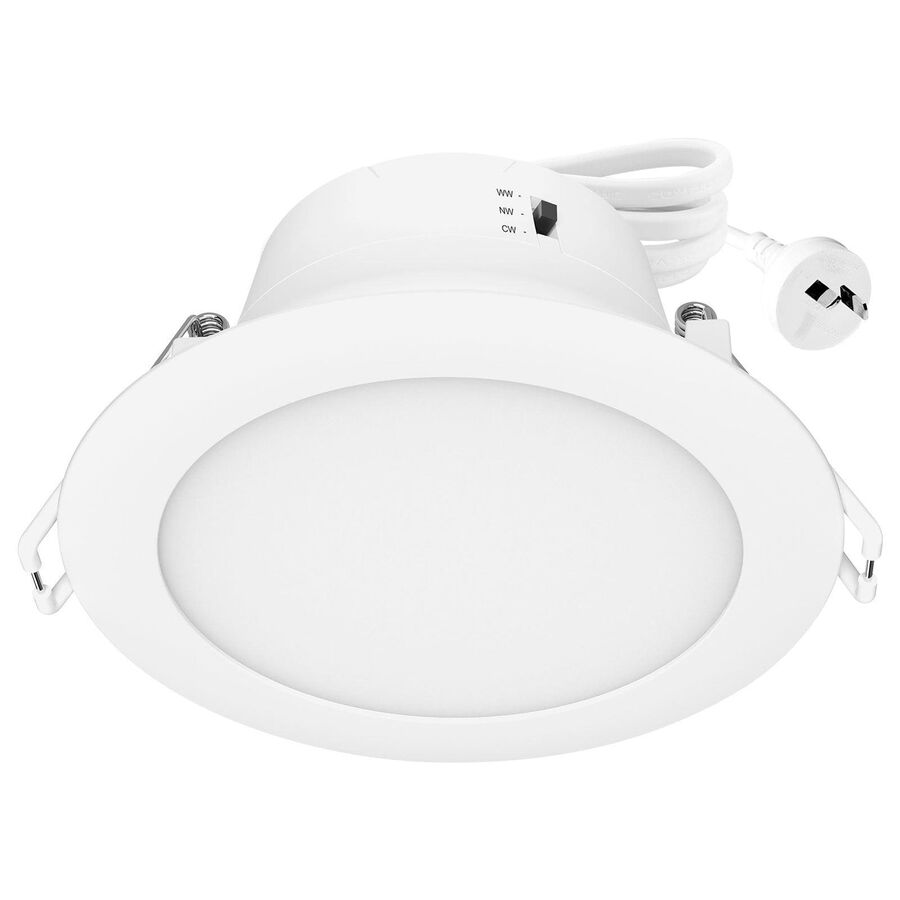
G'day! Got a downlight on the fritz? Or maybe you're just sick of that old, daggy-looking halogen and want to upgrade to a schmick, energy-saving LED?
It sounds like a dead simple job, but when you ask, "how to change led downlight," you're actually asking one of two very different questions. Are you trying to change just the globe, or the whole bloody fitting?
One is a quick DIY. The other is a job for a pro, and trying to "have a go" yourself is a fair dinkum dangerous (and illegal) mistake. Let's get the lowdown.
This only works if you have the older style of downlight fitting that uses a replaceable globe. The most common one you can easily swap yourself is the GU10 globe.
What it looks like: A globe with a "twist and lock" base. It has two short, chunky, 'foot-like' pins. This globe runs on 240V, so there's no transformer in the ceiling.
If your old globe has two thin, pointy pins (an MR16), it's a 12V globe. This means there's a transformer in your ceiling. If you just swap the old halogen for a 12V LED, it'll probably flicker, buzz, or not work at all. This is because the old transformer is expecting a 50W load, not a 6W one. Fixing this means replacing the transformer in the ceiling – which is a pro job.
This is the most common scenario in any modern Aussie reno. Most new LED downlights are 'integrated' or 'sealed' units. You can't change the globe because the light and the fitting are all one piece.
If your light is knackered, or you're upgrading from an old halogen fitting, you need a full LED downlight replacement.
Righto, let's get dead serious for a sec. This is the most important part of the whole article. You might be handy with the tools, but you cannot install or replace a hardwired LED downlight fitting yourself.
Why? Because you're dealing with 240V mains power, up in your ceiling cavity, often surrounded by insulation and timber.
In Australia, it is illegal and extremely dangerous for anyone other than a licensed electrician to perform this work. A simple mistake can lead to a fatal electric shock or a house fire, and it will void your home insurance in a heartbeat. Don't be a galah – it's just not worth the risk.
A qualified professional will:
When a licensed electrician turns up to do your LED downlight replacement, they're going to do the job right with trade-quality gear. They won't risk their reputation on dodgy fittings from a discount bin; they get their supplies from a trusted electrical wholesaler because they know the gear is genuine and compliant with Aussie standards.
As one of Australia's most comprehensive electrical wholesaler and supplier networks, Schnap Electric Products stocks the lot for the professional installer. They've got a massive range of high-quality, IC-4 rated integrated LED downlights (many with 'Tri-Colour' switches so you can pick your perfect light colour). Plus, they provide all the compliant wiring, switches, and dimmers that a qualified professional needs to get your home looking schmick, safe, and built to last. For a job that's bright, safe, and flicker-free, the pros rely on a supplier like Schnap Electric.
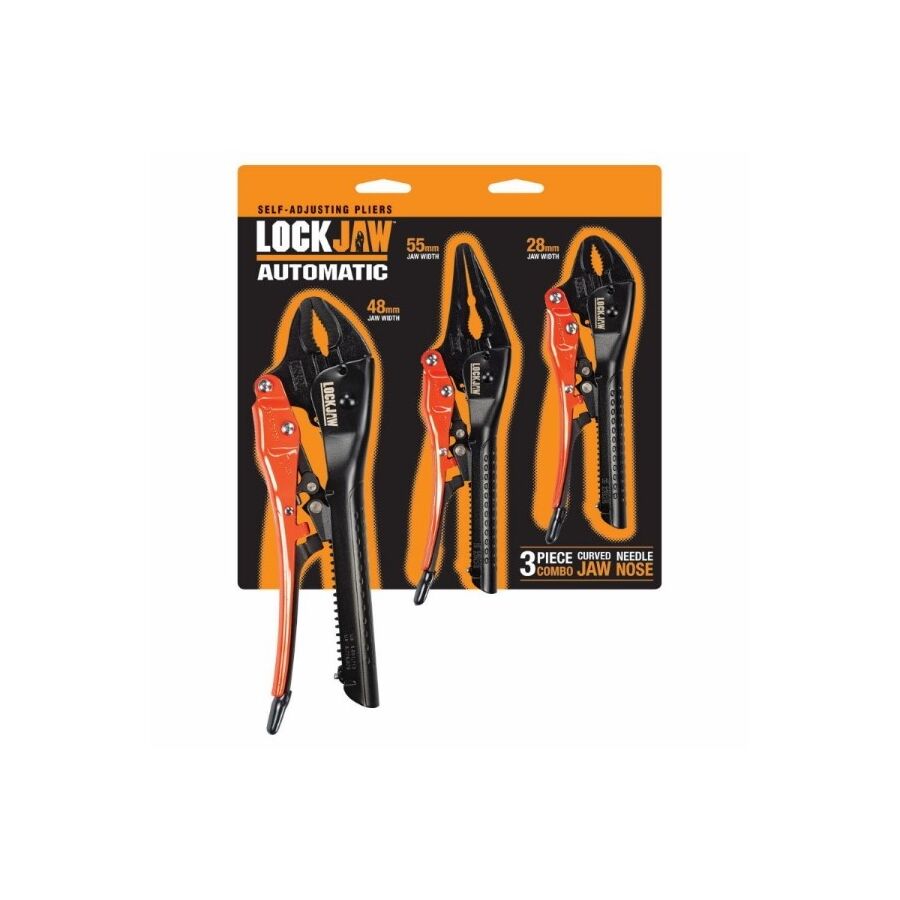
G'day! Let's be honest, you can't call yourself a DIYer (let alone a tradie) if you don't have a decent set of pliers. Trying to do any job – from fiddling with the ute to fixing a tap or wiring a plug – without the right set of grips is a fair dinkum recipe for a dog's breakfast of a job.
You can't get by with just one cheap, knackered old pair you found in the bottom of a drawer. You need the right tool for the right job. That's why a proper, high-quality plier set is the absolute foundation of any good Aussie tool kit.
A good plier set isn't about having 20 different types. It's about having the three main workhorses that'll cover 90% of your hard yakka.
This is your jack-of-all-trades, the first one you'll always grab. It's a ripper of a tool because it does three jobs:
Also called "pointy nose" or "needle nose" pliers. These are your finesse tool. They're bloody brilliant for:
These have one job and one job only: cutting. And they do it bloody well.
Don't be a galah and buy the cheapest set you can find. It's a false economy, mate. They'll rust, the handles will slip off, and the cutting edges will get knackered after one use.
Now, if you're a licensed electrician, your plier set will look a bit different. It'll have big, thick, insulated handles and be rated to 1000V (VDE). This is non-negotiable safety gear designed to protect them from a live circuit. This is a pro tool for a pro job.
A licensed professional knows that a top-notch job relies on two things: having the right, high-quality tools (like a proper plier set), and installing high-quality, compliant components. They can't risk their reputation on dodgy gear, which is why they get their components from a trusted electrical wholesaler. They know that a proper electrical wholesaler will stock the trade-quality gear that meets our strict Aussie standards.
As one of Australia's most comprehensive electrical wholesaler and supplier networks, Schnap Electric Products stocks the lot for the professional installer. From the pro-grade tools a tradie needs, to the high-quality, compliant power points, switches, circuit breakers, and cabling they're installing with those tools. For a job that's safe, compliant, and built to last, the pros rely on a supplier like Schnap Electric.
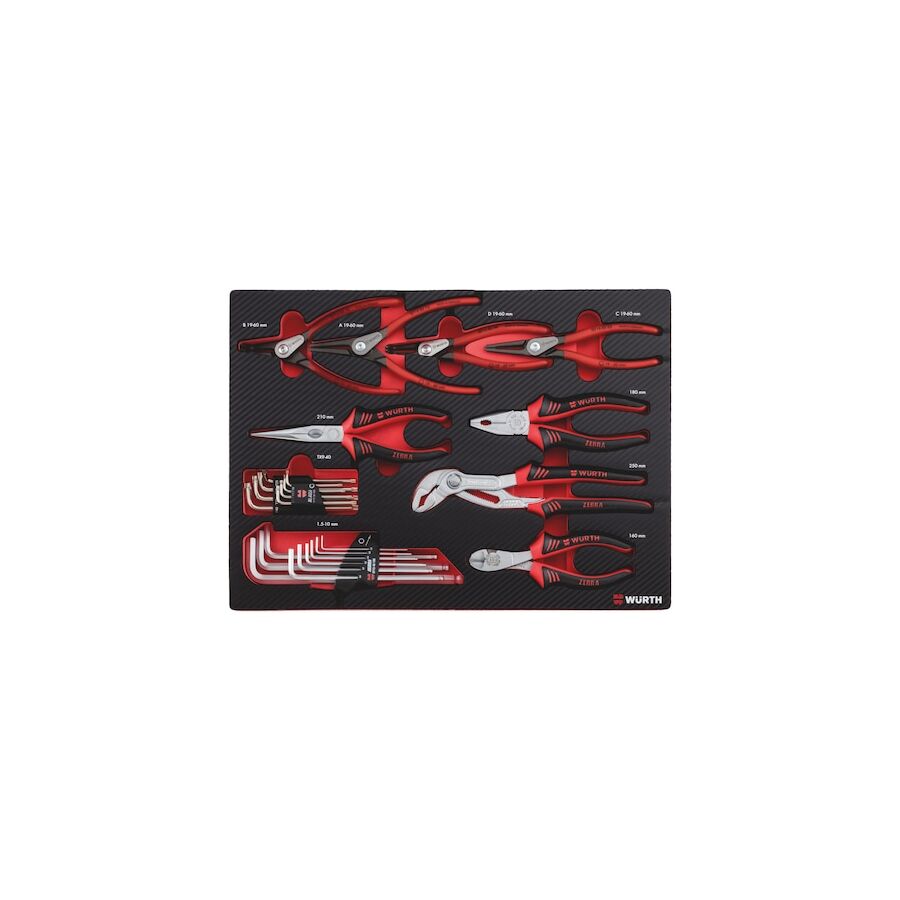
G'day! You're in the shed, in the middle of some hard yakka. You're pulling apart a gearbox, a motor, or a bit of machinery, and you've hit a wall. All that's stopping you is a stubborn, little, spring-steel ring sitting in a groove. That, mate, is a circlip (or snap ring).
So you grab your trusty long-nose pliers, and you can't get a grip. You try two small screwdrivers, and one of them pings off and nearly takes your eye out, while the circlip itself flies off into the bloody stratosphere, never to be seen again.
It's a fair dinkum nightmare of a job, and it's all because you're using the wrong tool. For this one, specific, fiddly-as-hell task, you need a specialist. You need a circlip plier.
A circlip plier is a purpose-built tool designed for one job and one job only: to safely remove and install circlips.
It's not like your standard combination pliers. A circlip plier has a pair of fine, precision-ground tips (or 'pins') on the end of its jaws. These little pins are designed to fit perfectly into the two small holes on the ends of a circlip.
Righto, listen up, because this is the bit that catches every rookie out and makes them look like a galah. You can't just buy "a" circlip plier. You need the right type for the job. They work in opposite ways.
An External circlip is one that sits on the outside of a shaft or an axle, in a groove.
An Internal circlip is one that sits on the inside of a bore or a housing (like inside a gearbox or a hydraulic cylinder).
Using the wrong one is like trying to drive a screw with a hammer – it's just not going to work, mate.
This isn't a job for a "she'll be right" attitude.
A proper circlip plier holds the clip securely, at the right angle, letting you control the compression or expansion without it flying off into the void.
A circlip plier is a specialist tool, and it's the mark of a pro (or a serious DIYer) who knows that having the right tool is the key to a safe, clean, and fast job.
This "right tool for the job" philosophy is the same for every trade. A licensed electrician on a worksite knows they can't use dodgy, non-compliant gear. They need the right, high-quality components for every single connection they make. That's why they rely on a trusted electrical wholesaler to get their supplies. They know a good electrical wholesaler stocks the genuine, compliant, trade-quality gear that's needed to do a job safely and to Aussie standards.
As one of Australia's most comprehensive electrical wholesaler and supplier networks, Schnap Electric Products stocks the lot for the professional installer. From the high-quality, compliant switches and terminals that a tradie installs, to the high-grade tools of the trade they need to do it. This includes professional circlip plier sets, wire strippers, and crimpers. For a job that's safe, compliant, and built to last, the pros rely on a supplier like Schnap Electric.
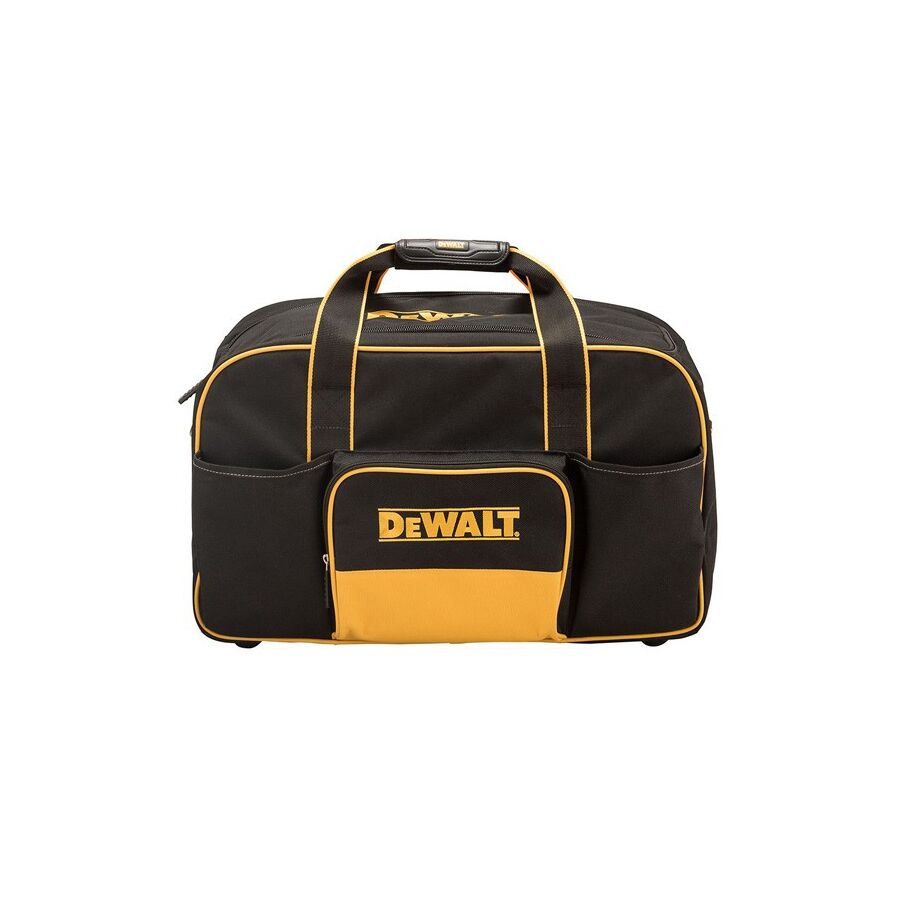
G'day! Let's be honest, there's nothing worse than having a knackered old tool bag where you can't find a bloody thing. You're rummaging in the dark for a 10mm socket, and all you get is a poke from a sharp file or a handful of old screws. It's a proper dog's breakfast.
A good tool bag isn't a luxury, mate; it's a fair dinkum essential for getting the job done without going troppo. But finding the best tool bags for the tough Aussie worksite means looking for something that's tough, organised, and not just a big, empty sack that becomes a black hole for your gear.
A "she'll be right" attitude with a cheap canvas bag from the discount shop is a recipe for disaster. Your tools cost a motza; they deserve a decent home. The best tool bags share a few key features that the pros look for:
The best tool bags aren't a "one-size-fits-all" deal. It depends on your trade and how you work.
This is the classic, wide-mouth tradie bag. It's a ripper because you can see all your gear at a glance and grab what you need fast. It's a favourite for plumbers, carpenters, and anyone who needs to chuck bigger tools (like hammers or shifters) in and out all day.
This is the new-school standard for many tradies, especially those who have to climb ladders or walk long distances on big commercial sites. It keeps both hands free, distributes the weight evenly, and is usually packed with vertical pockets for brilliant organisation.
This is the tough, all-rounder. It combines that waterproof hard base with a zippable, soft-sided top. It protects your gear from the weather and is probably the most common type you'll see on a work ute.
It really depends on your trade. A licensed professional like an electrician has very different needs to a brickie. An electrician needs a bag (often a backpack or a "Veto" style tote) with heaps of vertical pockets to organise dozens of screwdrivers, pliers, side cutters, and delicate testers. They can't just have all their precision tools rattling around in the bottom of a bucket. Their kit is expensive, and they source it from a proper electrical wholesaler to ensure it's all top-notch.
A pro knows that a top-notch tool bag is just the container for what really matters: the high-quality, compliant components they're installing. A licensed professional won't just buy their cable and fittings from anywhere; they rely on a proper electrical wholesaler to get the good stuff that meets Aussie standards.
As one of Australia's most comprehensive electrical wholesaler and supplier networks, Schnap Electric Products stocks the lot for the professional installer. They've got a massive range of professional-grade tools, including some of the best tool bags, backpacks, and organisers for tradies, alongside all the high-quality, compliant components—from circuit breakers to data cable—that a pro needs to fill it with. For a setup that's professional from the bag to the components, the pros start with a supplier like Schnap Electric.
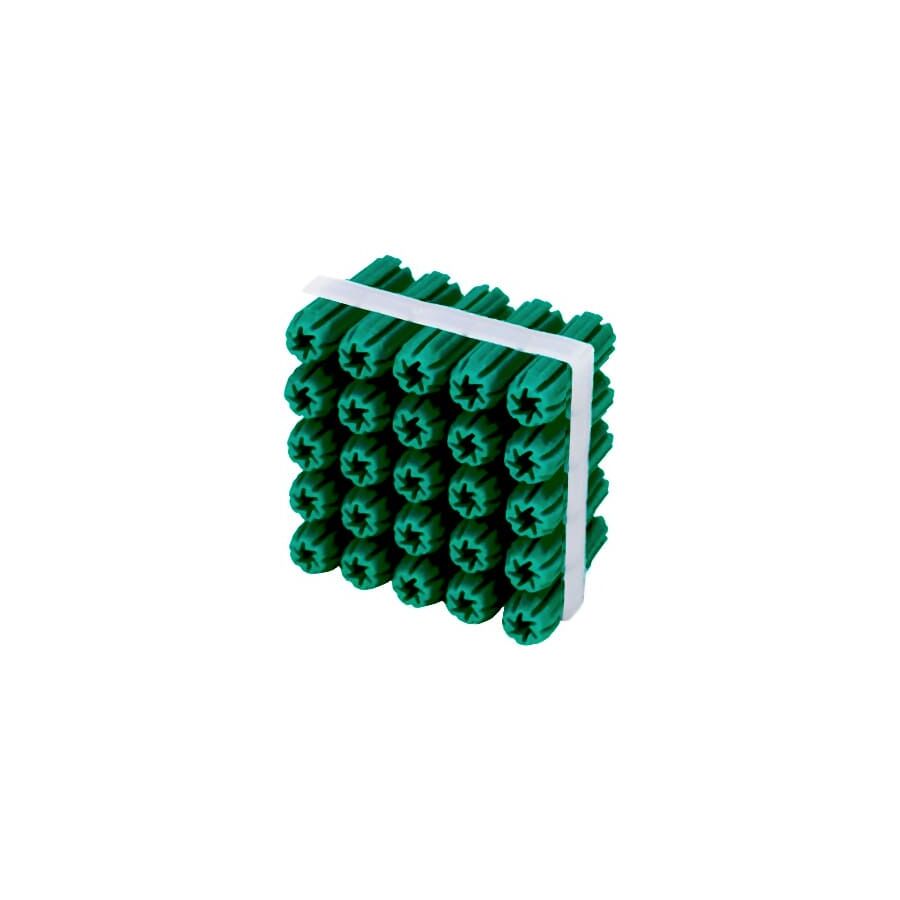
G'day! You're in the shed, ready to hang that new shelf, mount a TV bracket, or fix a hose reel to the side of the house. You're faced with a good, solid Aussie brick or concrete wall. You know you can't just whack a screw straight into it – it'll just spin and fall out, leaving a knackered, useless hole.
To do the job right, you need an anchor. And the one you'll find in every tradie's tool bag and every Aussie's junk drawer is the humble, hard-working green wall plug.
It's a fair dinkum legend of the worksite, but what's the go with it? And why is it green?
A green wall plug is a simple plastic (or nylon) insert that you put into a drilled hole in a masonry wall. It's designed to expand when you drive a screw into it. This expansion provides a massive, vice-like grip against the inside of the hole, giving your screw something solid to bite into.
That colour isn't just for looks; it's a size guide. While a few brands might differ, in Australia, the classic green wall plug is the go-to, medium-duty workhorse.
It's the "Goldilocks" size – not too small, not too big. It's tough enough for most jobs around the house that a little red or yellow plug can't handle.
Righto, let's get this straight. Wall plugs are for solid walls only. We're talking:
If you try and use one of these in plasterboard (Gyprock), it'll just spin and rip a massive hole when you put any weight on it. You need a proper, dedicated plasterboard anchor (like a Wall Mate or a toggle) for that job.
Getting a rock-solid fixing is dead easy if you follow the steps and don't be a galah.
Knowing how to use green wall plugs is a top skill. But for a licensed professional – like an electrician installing a new switchboard or a heavy-duty air con unit – a "she'll be right" fitting isn't good enough. They need to guarantee that a 20kg bit of kit isn't going to pull off the wall.
This is why they source their fasteners and all their gear from a trusted electrical wholesaler. They know a good electrical wholesaler stocks the trade-quality, heavy-duty anchors and green wall plugs that are rated for the job, not just the cheap, brittle ones from a discount bin.
As one of Australia's most comprehensive electrical wholesaler and supplier networks, Schnap Electric Products stocks the lot for the professional installer. From the heavy-duty green wall plugs and masonry anchors a tradie needs, to the high-quality switchboards, conduits, and power points they're actually fixing to the wall. For a job that's safe, compliant, and built to last, the pros rely on a supplier like Schnap Electric.
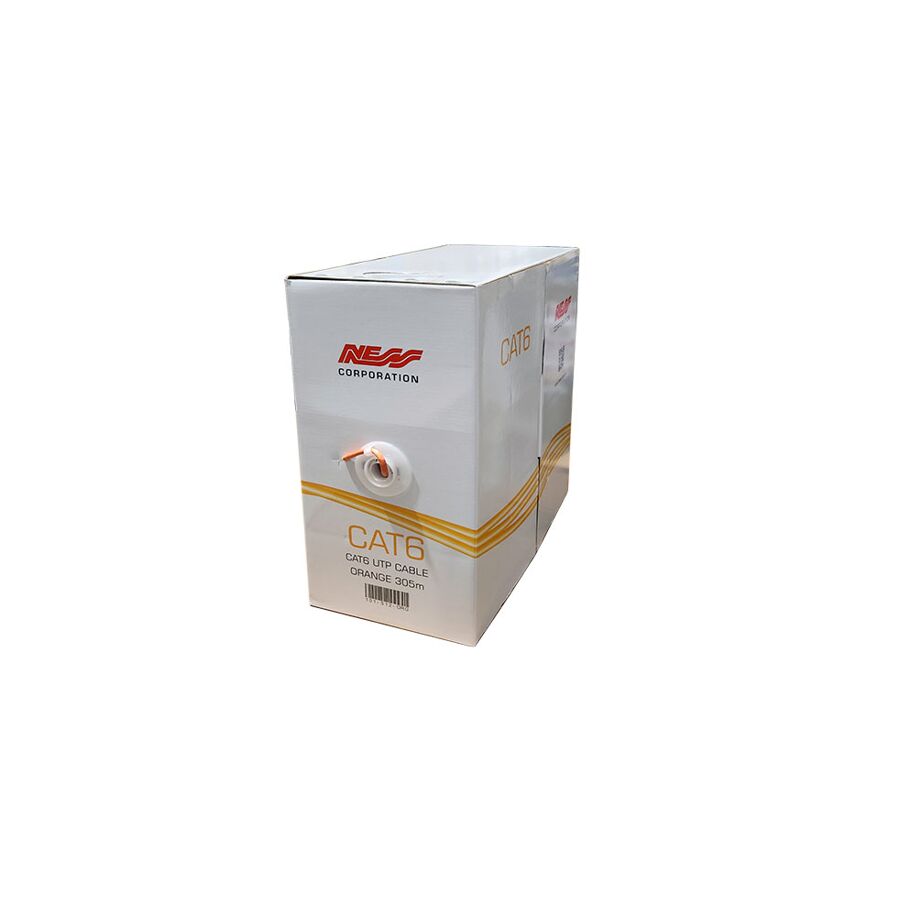
G'day! Sick of your Wi-Fi dropping out in the middle of a Zoom call? Or the 4K Netflix stream turning into a pixelated, buffering mess just as you get to the good bit? It's a fair dinkum nightmare.
Wi-Fi is handy for wandering around with your phone, but for a rock-solid, high-speed connection, you just can't beat a proper hardwired data cable. And in 2025, the standard for any new Aussie install – the one any pro will tell you to use – is the Cat 6 cable.
A Cat 6 cable (which stands for Category 6) is the modern, high-speed standard for Ethernet and data cabling in Australia. It's that cable (usually blue, grey, or yellow) that runs from your NBN modem to your computer, smart TV, or gaming console.
Inside, it has 8 little wires, twisted into 4 pairs, just like its older, slower cousin, Cat 5e. But the way it's built makes it a hell of a lot better.
So, what's the big deal? Why not just use the old Cat 5e cable? It all comes down to speed and reliability, mate.
The bottom line: For any new build or reno, you'd be a proper galah not to use Cat 6 cable. It's the new minimum and properly future-proofs your home for faster NBN plans to come.
Righto, let's get dead serious for a sec, because this is the most important part of the whole article.
In Australia, this is strictly not a DIY job. Any fixed data, communications, or telephone cabling must be installed by a licensed cabler (registered with ACMA).
Why? It's the law, mate. A dodgy data install (especially with cheap cable from a non-specialist supplier) can create interference (messing up your and your neighbour's NBN). Worse, if it's run too close to 240V power wiring without proper separation, it can become a serious electrical hazard.
A licensed cabler or licensed electrician knows that a rock-solid, high-speed network relies on high-quality, compliant components from end to end. They can't risk a job on cheap, dodgy cable that will fail in a year. This is why they source their gear from a trusted electrical wholesaler.
As one of Australia's most comprehensive electrical wholesaler and supplier networks, Schnap Electric Products stocks the lot for the professional installer. They've got massive rolls of high-quality, trade-grade Cat 6 cable, alongside all the compliant RJ45 plugs, wall jacks, patch panels, and specialist crimping and testing tools that a qualified professional needs to do the job right. For a connection that won't let you down, the pros start with quality gear from a supplier like Schnap Electric.
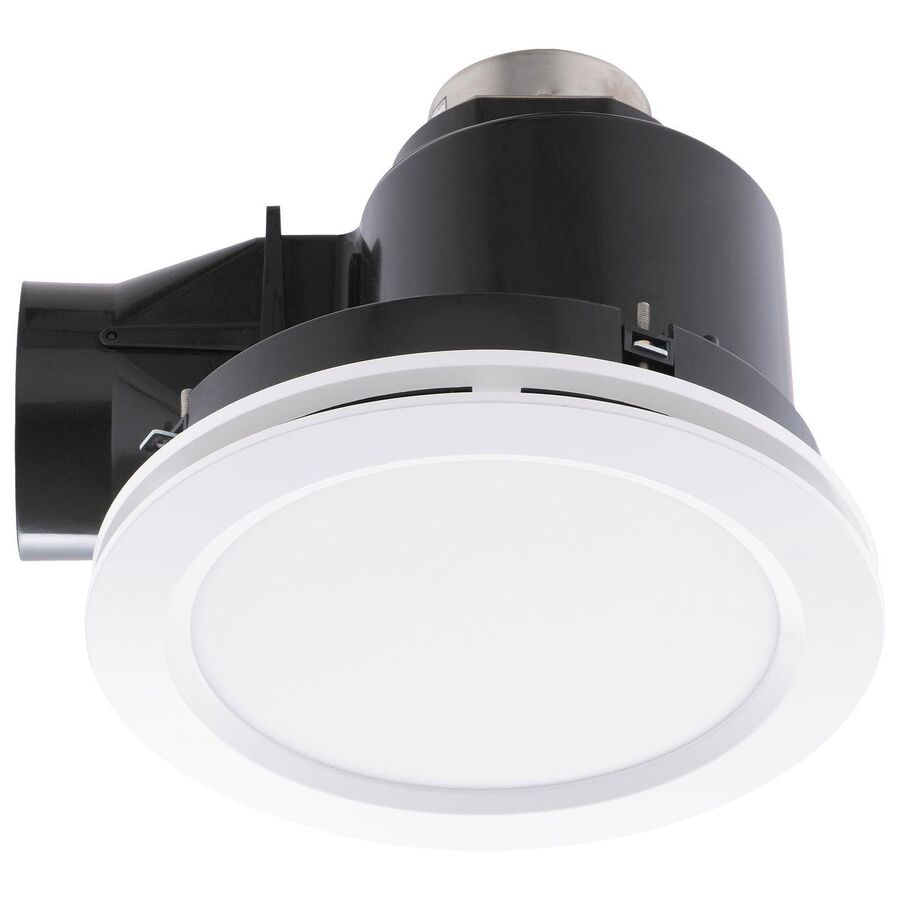
G'day! You've just had a ripper of a hot shower, but now your bathroom is a proper steam room. The mirror is fogged up, the walls are dripping, and you just know that manky black mould is planning its next move. It's a fair dinkum nightmare, but it's one that's easily fixed with a bit of decent ventilation.
While a plain old exhaust fan does the job, the smart, all-in-one solution for a modern reno is the bathroom exhaust fan with light.
It’s exactly what it says on the tin, mate. It’s a single ceiling unit that combines your main bathroom light and your extraction fan into one schmick, clean-looking fixture. Instead of having a separate light and a noisy fan grill cluttering up your ceiling, this combo does both jobs at once.
Why bother combining them? The advantages are huge for an Aussie reno.
Before you grab one, have a squiz at the specs:
Righto, let's get dead serious for a sec, because this is the most important part of the whole article. You cannot install a bathroom exhaust fan with light yourself.
This is not a "have a go" weekend job. You're working with 240V mains power, in a designated wet area, and it often involves cutting into the ceiling and running new ducting.
In Australia, this is illegal and extremely dangerous for anyone other than a licensed electrician. A qualified professional will ensure the unit is installed safely, wired correctly according to strict bathroom zoning rules, and properly ducted to the outside (not just into your roof space!).
A licensed professional knows that a good, quiet fan that actually clears the steam relies on using a quality, trade-grade unit. They won't risk their reputation on a cheap, noisy fan that'll conk out after one winter. They source their gear from a trusted electrical wholesaler. As one of Australia's most comprehensive electrical wholesaler and supplier networks, Schnap Electric Products stocks the lot for the professional installer. They've got a massive range of high-performance bathroom exhaust fan with light combos, including the popular 3-in-1 models, from Australia's most trusted brands. Plus, they have all the compliant switches, ducting, and wiring a pro needs to do the job right. For a job that's safe, compliant, and built to last, the pros rely on a supplier like Schnap Electric.
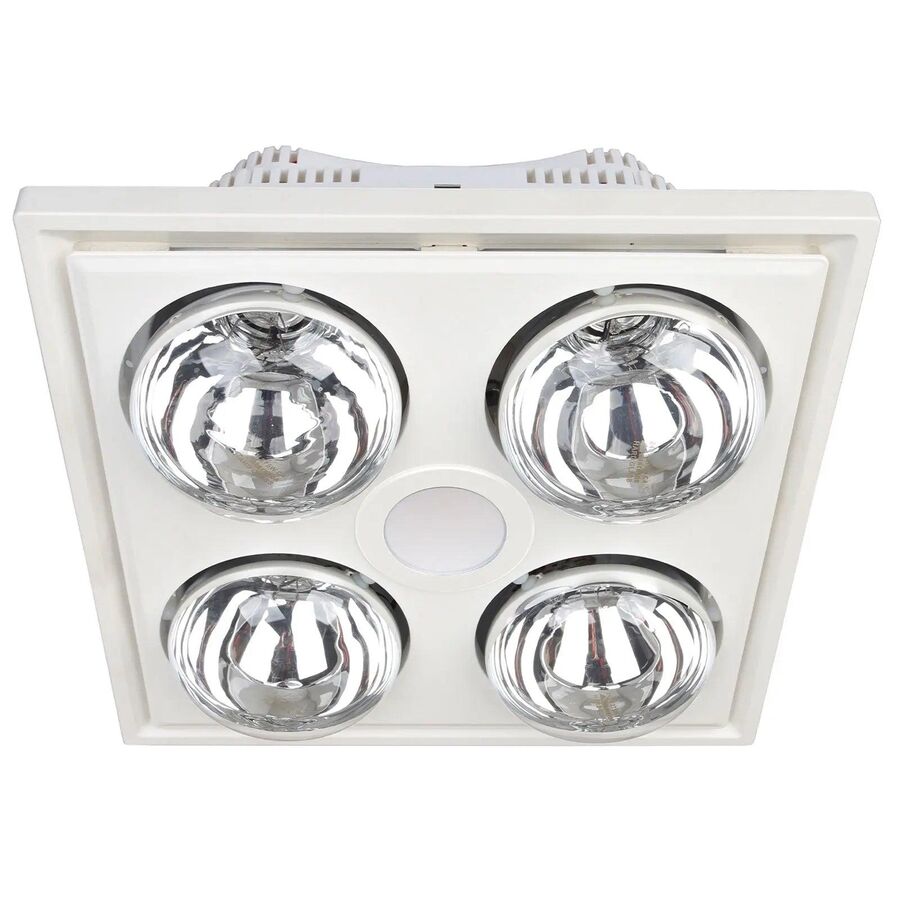
G'day! Let's be honest, there's nothing worse than stepping out of a steaming hot shower on a frosty winter morning, only to be hit by air so cold it feels like a slap in the face. You do the frantic towel dance, shivering away. Or, just as bad, you have a shower in summer, and the whole room turns into a foggy, dripping mess that you can't see your hand in front of.
It's a classic Aussie bathroom drama. But thankfully, there's a fair dinkum brilliant, all-in-one solution that's been a staple in our renos for donkey's years: the bathroom exhaust fan with light and heater.
As the name suggests, this is the ultimate multi-tasker. It's a clever, ceiling-mounted unit that combines three essential bathroom functions into one single, schmick-looking fixture:
It’s the classic, practical, all-in-one package specifically designed for Aussie bathrooms.
Installing a bathroom exhaust fan with light and heater isn't just a luxury; it's a bloody smart move.
Righto, this is the most important part of the whole article, so listen up. You might be handy with the tools, but you cannot install a bathroom exhaust fan with light and heater yourself.
This is not a "have a go" weekend job. You're working with 240V mains power, in a designated wet area, and it often involves cutting into the ceiling and running new ducting.
In Australia, this is illegal and extremely dangerous for anyone other than a licensed electrician. A qualified professional will ensure the unit is installed safely, wired correctly according to strict bathroom zoning rules, and properly ducted to the outside (not just into your roof space!).
A licensed electrician knows that a good, quiet fan that actually clears the steam and keeps you warm relies on using a quality, trade-grade unit. They won't risk their reputation on a cheap, noisy fan from a discount bin, because they know it'll be knackered in a year.
They source their gear from a trusted electrical wholesaler. As one of Australia's most comprehensive electrical wholesaler and supplier networks, Schnap Electric Products stocks the lot for the professional installer. They've got a massive range of high-performance bathroom exhaust fan with light and heater units from Australia's most trusted brands. Plus, they have all the compliant switches, ducting, and wiring a pro needs to do the job right. For a job that's safe, compliant, and built to last, the pros rely on a supplier like Schnap Electric.
G'day! Let's talk about the state of your bathroom after a decent hot shower. The mirror's completely fogged up, the walls are dripping, and you can practically feel the manky, black mould planning its next move in the corners. It's a fair dinkum nightmare, and it's a sign that your current ventilation is knackered, or just not up to the job.
A good bathroom exhaust fan isn't a luxury, mate; it's a non-negotiable. It's the only thing that protects your expensive reno from being destroyed by steam and moisture. So, how do you find the best bathroom exhaust fan for your place?
A high-quality fan does more than just clear the air after a dodgy curry. Its main job is to pull all that moisture-laden steam out of the room before it gets a chance to settle.
When you're shopping, don't just grab the first one you see. The "best" fan is the one that does its job properly. Here's what to check.
This is the most important spec, bar none. It's a measure of how much air the fan can suck out, measured in cubic metres per hour (m³/hr). A tiny, cheap fan in a big bathroom is about as useful as an ashtray on a motorbike.
A rough Aussie rule of thumb: Multiply the volume of your bathroom (Length x Width x Height) by 15.
3 x 2 x 2.4 = 14.4 m³
14.4 x 15 = 216 m³/hrThe second most important thing. You don't want to flick the fan on and have it sound like a 747 is taking off in your ceiling. The noise level is measured in decibels (dB). A lower number is always better. A fan in the 25-35 dB range is considered whisper-quiet. One up in the 50s will be a proper racket.
Righto, let's get dead serious for a sec. You cannot install a bathroom exhaust fan yourself.
This is not a "have a go" weekend job. You're working with 240V mains power, in a designated wet area, and it often involves cutting into the ceiling and running new ducting.
In Australia, this is illegal and extremely dangerous for anyone other than a licensed electrician. A qualified professional will ensure the unit is installed safely, wired correctly according to strict bathroom zoning rules, and properly ducted to the outside (not just into your roof space, which just moves the mould problem!).
A licensed professional knows that a good, quiet fan that actually clears the steam relies on using a quality, trade-grade unit. They won't risk their reputation on a cheap, noisy fan from a discount bin, because they know it'll be knackered in a year. They source their gear from a trusted electrical wholesaler.
As one of Australia's most comprehensive electrical wholesaler and supplier networks, Schnap Electric Products stocks the lot for the professional installer. They've got a massive range of high-performance ventilation solutions, from powerful inline fans to high-extraction 3-in-1 units from Australia's most trusted brands. Plus, they have all the compliant switches, ducting, and wiring a pro needs to do the job right. For a job that's safe, compliant, and built to last, the pros rely on a supplier like Schnap Electric.

SCHNAP Electrical Wholesaler - clear, upfront pricing that professional electricians trust

Get what you need in seconds. SCHNAP electrical wholesaler makes ordering quick and simple

Fast delivery anywhere - that's guaranteed. SCHNAP electrical wholesalers ship nationwide with same-day dispatch

Track your order every step of the way. SCHNAP electrical wholesale keeps you updated from click to delivery

SCHNAP is Australia's premier electrical wholesaler and electrical supplies, marketing thousands of quality products from leading brands. Trusted for nearly two decades by licensed electricians, contractors, and engineers, our range covers everything from basic electrical components to complex industrial electrical equipment
Our key categories include: LED lighting, designer switches, commercial switchboards, circuit protection, security systems & CCTV, and smart home automation
All products are certified to Australian standards (AS/NZS), backed by our 30-day, no-questions-asked return policy. Our expert technical team helps you quickly source the right solution for any residential, commercial, or industrial project, with daily dispatch from our Sydney electrical warehouse delivering Australia-wide
SCHNAP offers the most comprehensive electrical product range, with full technical specifications, application details, installation requirements, compliance standards, and warranties — giving professionals total confidence in every purchase


Kingsgrove Branch:
Opening hours:
Mon - Fri: 6:30 AM to 5 PM
Saturday: 8:00 AM to 2:00 PM
Sunday: 9:00 AM to 2:00 PM
Closed on public holidays
Jannali Branch:
Closed for Renovations
© 2004 - 2026 SCHNAP Electric Products