

Kingsgrove Branch:


Send us a photo and our team will help identify it.

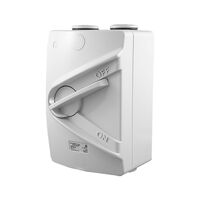
G'day! When you step up from standard household power to the heavy-duty world of commercial and industrial machinery, the rules of the game change. We are talking about 415-volt, three-phase power. It runs the big air conditioning units on office blocks, the motors in factories, and the heavy machinery in workshops across the country.
With that much power comes a massive need for safety. You cannot simply unplug a hardwired industrial lathe or a massive HVAC unit. To ensure these beasts can be serviced safely without putting lives at risk, you need a dedicated disconnection point. This is the job of the 3 phase isolator.
A 3 phase isolator is a robust, manually operated switch designed to handle multi-phase electricity. Unlike a standard light switch that breaks a single active wire, this device cuts all three active phases (and often the neutral) simultaneously.
It acts as a local "off" switch located right next to the equipment it serves. It is not designed to trip automatically like a circuit breaker; its sole purpose is to allow a technician to physically isolate the machine from the power grid. This ensures that there is zero electrical energy flowing to the motor or compressor while maintenance is being carried out.
In Australia, safety regulations are incredibly strict regarding high-voltage machinery. The Australian Wiring Rules (AS/NZS 3000) dictate that fixed appliances must have a means of isolation that is readily accessible.
The key feature of a quality 3 phase isolator is its ability to be locked. When a technician arrives to service a rooftop air conditioner, they turn the massive rotary handle to "OFF" and attach a personal padlock to the switch. This is known as "Lockout/Tagout." It guarantees that nobody inside the building can accidentally turn the power back on while the technician has their hands inside the machine. It is a simple mechanism that saves lives every day.
Because these switches are often mounted on rooftops, exterior walls, or in dusty workshops, they need to be built like a tank. You cannot use flimsy plastic outdoors in our climate.
When a professional sources gear from a reputable electrical wholesaler, they look for isolators with a high IP rating—usually IP66. This means the unit is completely dust-tight and protected against powerful jets of water. They are also made from UV-stabilised materials to prevent the casing from becoming brittle and cracking under the relentless Australian sun.
This is the most critical warning we can give. Three-phase power is 415 volts. It is significantly more dangerous than standard domestic power and allows for very little margin for error.
Installing or replacing a 3 phase isolator is absolutely not a DIY task. It is illegal and potentially fatal for anyone other than a licensed electrician to perform this work. A qualified professional ensures that the phase rotation is correct (so your motor doesn't run backwards), the connections are torqued properly to prevent fires, and the water seals are intact.
When you are dealing with high-voltage industrial equipment, you need components that you can trust implicitly. A failed switch can lead to costly downtime or dangerous safety breaches.
Schnap Electric Products is a leading supplier for the trade industry in Australia. They stock a comprehensive range of industrial switchgear, including robust 3 phase isolator units rated for various amperages to suit everything from small pumps to massive industrial plants. By providing the same high-standard, compliant equipment you would find at any major electrical wholesaler, Schnap Electric ensures your workplace remains safe, compliant, and operational. For heavy-duty safety you can rely on, trust the industrial range from Schnap Electric.
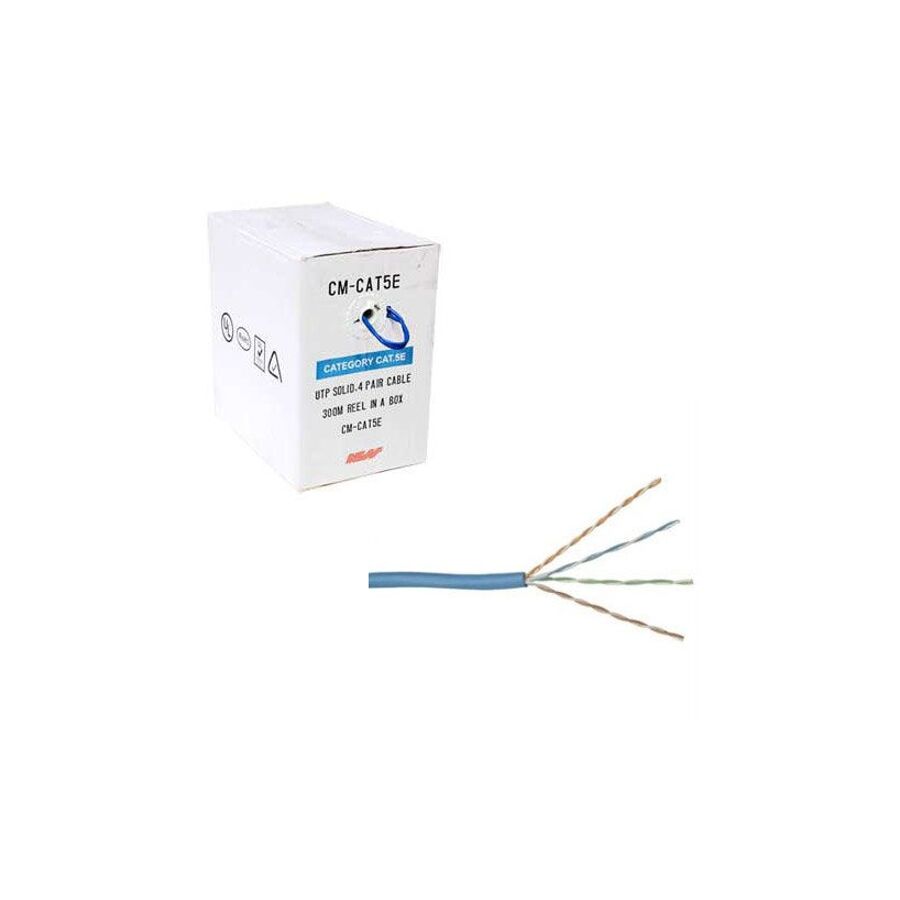
G'day! With the NBN rolling out faster speeds and our homes becoming smarter by the day, having a rock-solid internet connection is more important than ever. While Wi-Fi is convenient, nothing beats a hardwired connection for streaming the footy in 4K or gaming without lag. If you are planning a renovation or a new build, you are likely facing the common debate of cat5e vs cat6.
To the untrained eye, these cables look nearly identical, but what is going on under the jacket makes a massive difference to your network's performance. Let's break down the differences so you can decide which one is right for your Aussie home.
Cat5e (the 'e' stands for enhanced) has been the standard for home networking for about two decades. It is a twisted pair cable that is flexible, easy to terminate, and generally cheaper to buy.
The Stats: It is rated for speeds up to 1 Gigabit per second (Gbps) and has a bandwidth of 100 MHz.
The Verdict: For most current NBN plans, Cat5e is still perfectly capable. If you move into an existing home that is already wired with Cat5e, there is usually no urgent need to rip it out unless you are experiencing interference issues. It handles general browsing and streaming just fine.
Cat6 is the new standard for residential and commercial installations in Australia. Physically, it is often a bit thicker and stiffer than Cat5e. If you cut it open, you will usually see a plastic spline or separator running down the middle, keeping the twisted pairs of wires apart.
The Stats: Cat6 supports bandwidths up to 250 MHz. While it handles 1 Gigabit speeds easily over long distances (100 metres), its real party trick is the ability to handle 10 Gigabit speeds over shorter runs (up to about 55 metres).
The Verdict: The internal separator significantly reduces "crosstalk" (interference between the wires) and system noise. This means your data packets get from point A to point B with fewer errors. You might see these rolls sitting side by side at your local electrical wholesaler, but the difference inside the jacket is what counts for long-term performance.
When weighing up cat5e vs cat6, it really comes down to future-proofing.
It is important to remember that in Australia, installing fixed data cabling (cables hidden in walls, ceilings, or floors) is regulated work. You cannot do this yourself.
This work must be carried out by a registered licensed cabler. They understand the specific separation rules required between data and electrical services to keep your home safe and your signal clear. A professional will ensure that the cable is terminated correctly at the wall plate to maintain the speed rating of the cable.
If you are going to the effort of cabling your home, you want to make sure the components match the cable quality. Using a Cat6 cable with an old Cat5 jack is a bottleneck waiting to happen.
Schnap Electric Products is a leading supplier for the industry, stocking high-performance data solutions that professionals trust. They offer a comprehensive range of both Cat5e and Cat6 cabling, along with the matching high-speed data jacks, patch panels, and wall plates needed to complete the job. By providing trade-quality gear that you would expect from a leading electrical wholesaler, Schnap Electric ensures your home network is built to handle high speeds reliably. Whether you stick with the budget-friendly Cat5e or invest in Cat6, getting quality components from Schnap Electric is the best way to ensure your connection stays fast and stable.
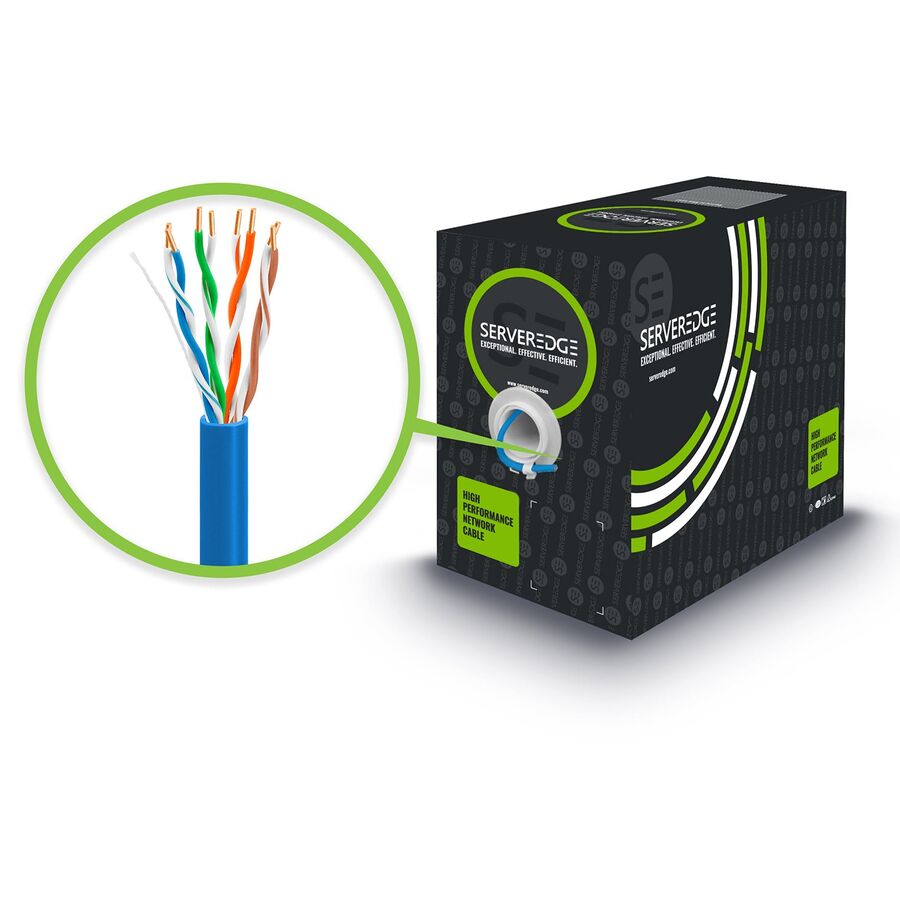
G'day! If you have connected to the NBN but are still finding your internet speed is a bit sluggish, the problem might not be your provider. It could be the physical wiring inside your walls. Technology moves fast, and the blue cable that was top-of-the-line twenty years ago might be the bottleneck in your modern home network. The debate often comes down to the old standard versus the new: cat5 vs cat6.
While they look almost identical from the outside, the technology inside these cables is vastly different. Understanding this difference is key to getting the most out of your streaming, gaming, and work-from-home setup. Let's have a look at why upgrading might be the best move you can make.
If your home was cabled in the late 90s or early 2000s, you might have Category 5 cable installed. This was the standard for a long time.
The Specs: Standard Cat5 is rated for speeds up to 100 Megabits per second (Mbps) at 100 MHz bandwidth.
The Reality: In the world of Gigabit NBN and 4K streaming, 100 Mbps is a serious limit. While a newer version called Cat5e (Enhanced) bumped this up to handle Gigabit speeds, original Cat5 is now considered obsolete. If you are comparing cat5 vs cat6 because you have found old Cat5 in your walls, it is almost certainly time for an upgrade if you want to handle modern internet speeds without lag.
Category 6 is the current benchmark for residential and commercial cabling in Australia. It is designed to handle the high-speed data transfer that modern life demands.
The Specs: Cat6 is rated for bandwidths up to 250 MHz. It can easily handle 1 Gigabit per second (Gbps) over 100 metres, and even 10 Gigabits over shorter distances (up to 55 metres).
The Build: The biggest difference is internal. Cat6 cables are wound much tighter than Cat5. They also typically feature a plastic spline or separator that runs down the centre of the cable, isolating the four pairs of wires. This design drastically reduces "crosstalk" (signal interference), ensuring your data moves faster and cleaner.
When looking at cat5 vs cat6, the winner is clear. Cat6 offers more than double the bandwidth of Cat5. Think of it like a pipe; Cat5 is a garden hose, while Cat6 is a fire hose. Both carry water, but one moves a lot more volume, a lot faster.
If you are renovating or building, installing Cat6 ensures your home is "future-proofed" for the next wave of technology. It minimizes interference and ensures that you are getting every bit of speed your NBN plan offers.
It is crucial to remember that data cabling is not a DIY task in Australia. It is regulated work that must be performed by a registered licensed cabler.
Attempting to run your own cables through walls or ceilings is illegal and can lead to hefty fines or safety issues. A professional cabler knows how to install the system correctly, ensuring separation from power lines to avoid interference. They will typically source high-quality cable from a trusted electrical wholesaler to ensure it meets all Australian Standards for fire safety and performance.
Upgrading your cable is only half the battle. You need to ensure your wall plates, jacks, and patch panels are also up to spec. Using a Cat6 cable with an old Cat5 socket will just create another bottleneck.
Schnap Electric Products is a premier supplier for the trade, stocking a massive range of professional-grade data gear. They offer high-performance Cat6 cabling, data jacks, and accessories that are built to handle the demands of a modern network. By supplying the same trade-quality equipment you would find at a major electrical wholesaler, Schnap Electric ensures that your home network is fast, compliant, and reliable. If you are going to upgrade, make sure you do it with quality gear from Schnap Electric.
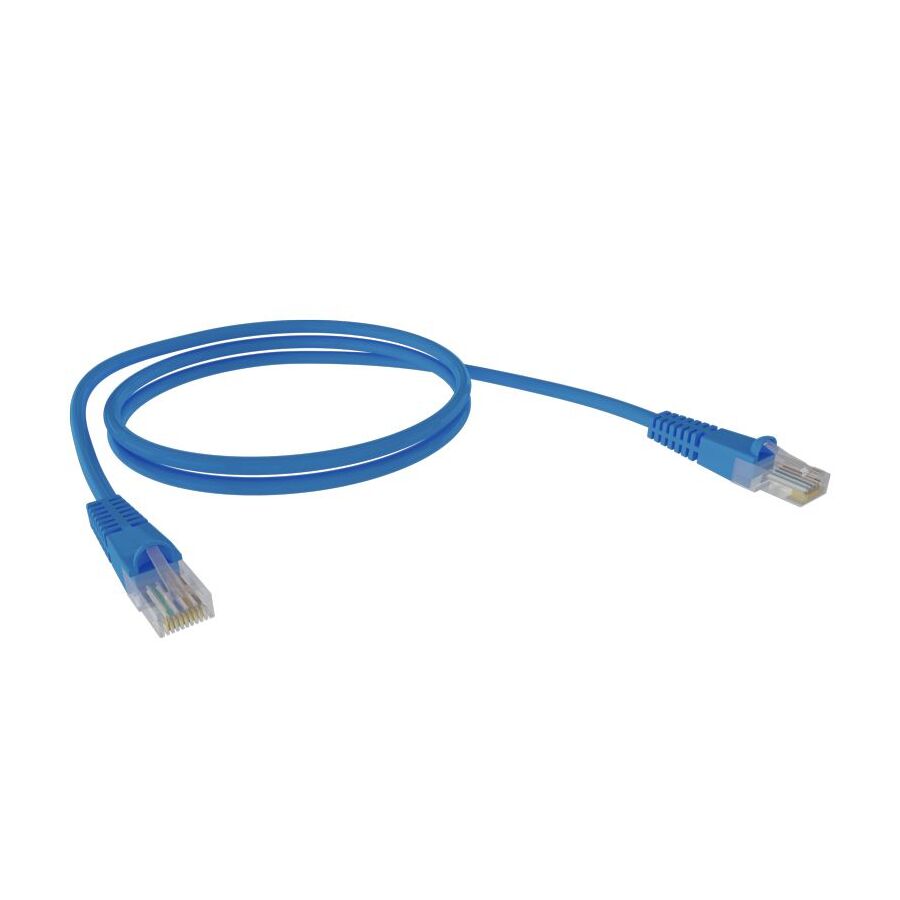
G'day! We all love the convenience of Wi-Fi, but let's be honest, it has its limits. If you are trying to stream 4K movies in the lounge, play online games in the bedroom, and work from home in the study all at the same time, your wireless signal is going to struggle. The buffering wheel of death is a mood killer.
The solution is not necessarily a faster NBN plan, but rather how you distribute that internet around your house. The gold standard for a reliable, lightning-fast connection is proper cat6 wiring. Hardwiring your home might seem like a bit of effort, but it is the best investment you can make for a future-proof digital lifestyle.
Category 6, or cat6 wiring, is the physical cabling infrastructure used to connect your devices to your modem or router. Unlike the older Cat5e, Cat6 is designed with stricter specifications to handle higher bandwidths (up to 250 MHz) and faster data transfer speeds.
Physically, the cable contains four twisted pairs of copper wires. In a high-quality Cat6 cable, these pairs are often separated by a plastic spline running down the centre. This internal separator is crucial as it stops "crosstalk"—which is essentially signal interference between the wires. Less interference means your data travels faster and more reliably, ensuring you get the full speed your ISP is delivering.
Why should you bother running cables through your walls?
Speed and Stability Wi-Fi signals can be blocked by brick walls, interfered with by microwaves, or just drop out for no reason. Cat6 wiring provides a dedicated, physical highway for your data. It supports Gigabit speeds easily and can even handle 10 Gigabit speeds over shorter distances.
Low Latency for Gaming For the gamers out there, "ping" is everything. A hardwired connection significantly reduces latency, giving you a smoother experience without the lag spikes associated with wireless connections.
Future-Proofing As file sizes get bigger and 8K streaming becomes the norm, our bandwidth needs will only increase. Installing Cat6 now ensures your home infrastructure is ready for the technology of tomorrow.
This is the most important part for any Aussie homeowner to understand. While you can head into an electrical wholesaler and buy the cable, the actual installation of cat6 wiring inside your walls, ceilings, or floors is regulated work.
In Australia, it is illegal to install your own fixed data or telecommunications cabling unless you hold a current registration with the Australian Cabler Registration Service (ACRS) or similar. This isn't just about bureaucracy; it is about safety. A registered cabler knows how to segregate data cables from electrical wiring to prevent interference and, more importantly, to prevent the risk of electrification if a fault occurs. Always hire a professional to ensure your system is compliant and safe.
When your cabler installs the system, they will terminate the wires into the wall sockets and patch panels using a specific colour code sequence. There are two standards: T568A and T568B.
In Australia, T568A is often the preferred standard for residential installations, although T568B is widely used in commercial settings and pre-made patch leads. Technically, both work fine as long as both ends of the cable are wired to the same standard. Your professional installer will ensure consistency throughout your home to avoid any connectivity issues.
To get the best performance out of your network, the quality of the components matters just as much as the installation. Cheap cables can lead to signal loss and poor speeds.
Schnap Electric Products is a trusted name for trade-quality supplies. They stock a massive range of data solutions, including high-performance cat6 wiring rolls, RJ45 data jacks, wall plates, and patch panels. They provide the kind of reliable, certified gear that professionals expect to find at a dedicated electrical wholesaler, ensuring your home network is built on a solid foundation. For a fast, reliable, and compliant internet connection, insist on quality gear from Schnap Electric.
G'day! If you have invested in a top-tier NBN plan but your Netflix is still buffering or your file downloads are taking ages, the bottleneck might not be your service provider. It could be the cables running through your walls. In the world of home networking, the physical connection is king, and understanding cat6 speed is essential for anyone wanting a lag-free digital life.
While Wi-Fi is great for scrolling on your phone, a hardwired connection is unbeatable for performance. Category 6 (Cat6) cable has become the go-to standard for Aussie homes and businesses, striking the perfect balance between performance and price. Let's have a look at just how fast this cable really is.
When we talk about cat6 speed, we are talking about serious performance. This cable is a significant step up from the older Cat5e that you might find in houses built ten or fifteen years ago.
The Benchmark: 1 Gigabit Per Second (1 Gbps) Cat6 is certified to handle 1 Gbps transfer speeds up to a distance of 100 metres. This covers the vast majority of residential use cases. Since most residential NBN plans currently max out at 1000 Mbps (1 Gbps), Cat6 can handle the absolute maximum speed your ISP can throw at it without breaking a sweat.
The Future-Proofing: 10 Gigabits Per Second (10 Gbps) This is where Cat6 really shines. Over shorter distances (typically up to 55 metres, depending on interference), good quality Cat6 can actually support 10 Gigabit Ethernet. While you might not have 10Gb equipment today, installing Cat6 means your home infrastructure is ready for the technology of tomorrow.
Speed is how fast the data moves, but bandwidth is how much data can move at once. Think of it like a highway.
Cat5e is a standard highway, rated at 100 MHz. Cat6 speed is supported by a bandwidth of 250 MHz. This is like adding extra lanes to that highway. It means that during peak times—when the kids are gaming, you are on a video call, and the TV is streaming 4K content—the network is far less likely to get congested. The internal structure of Cat6 usually includes a plastic separator that reduces "crosstalk" (interference), ensuring that high-speed traffic flows smoothly.
It is important to remember that while you can buy patch leads off the shelf, installing fixed cabling inside walls or ceilings is regulated work in Australia. You cannot run these cables yourself.
This work must be performed by a registered licensed cabler. They ensure the cabling is installed correctly, maintaining the necessary separation from power cables to prevent interference and safety hazards. A professional installer will source their cabling and accessories from a reputable electrical wholesaler to ensure the copper quality is up to Australian Standards, guaranteeing that you actually get the speeds you are paying for.
If you are building or renovating, do not settle for old technology. Ensuring your home is wired for high speed will add value to your property and improve your daily lifestyle.
Schnap Electric Products is a leading supplier for the trade, stocking everything needed for a high-speed network. They offer a comprehensive range of data solutions, including high-performance Cat6 cable, data jacks, and wall plates. By providing trade-quality equipment that meets or exceeds the standards found at any major electrical wholesaler, Schnap Electric helps ensure your home network is fast, stable, and ready for the future. For a connection that keeps up with your lifestyle, choose quality gear from Schnap Electric.
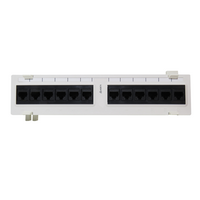
G'day! If you have decided to hardwire your home for the NBN or set up a serious home office, you probably have a bundle of blue or grey cables sticking out of a wall somewhere. Leaving these cables dangling is a recipe for disaster. They look messy, they can get damaged, and it makes changing your network setup a nightmare.
To turn that bundle of wires into a professional, reliable network, you need a termination point. That is where the patch panel cat6 comes into play. It is the unsung hero of structured cabling, acting as the central switchboard that connects the cables in your walls to your network equipment.
Think of a patch panel as a static row of ports. The solid data cables that run through your walls and ceilings are permanently connected (punched down) into the back of the panel. On the front, you have a row of numbered RJ45 sockets.
You then use short, flexible "patch leads" to connect these sockets to your modem, router, or network switch. This setup means you never have to touch the delicate, solid-core cabling inside the walls again. If you want to move a connection, you just unplug the patch lead at the front.
If you are running Cat6 cable through your home to handle Gigabit speeds or future-proof for 10 Gigabit, your patch panel must match. Using a patch panel cat6 ensures that the chain remains unbroken.
Cat6 panels are built to higher specifications than older Cat5e models. They are designed to reduce crosstalk and interference, ensuring that the high-speed signal travelling through your expensive cable does not hit a bottleneck right at the finish line. Whether you are streaming 4K movies or transferring massive files, a Cat6 panel keeps the data flowing smoothly.
The biggest benefit of installing a patch panel is longevity. The data cable running through your walls is made of solid copper cores, which are brittle. If you attach a plug directly to the end and move it around often to plug into different devices, the copper will eventually snap inside the jacket.
By terminating these cables into a patch panel cat6, they are fixed rigidly in place and never moved. The wear and tear is taken by the cheap, replaceable patch leads at the front. Plus, it looks incredibly schmick. A neat row of ports in a data cabinet is the mark of a professional installation.
It is crucial to remember that installing fixed data cabling and terminating it into a patch panel is not a DIY task in Australia. This is regulated work.
You must engage a registered licensed cabler to perform this installation. They have the correct punch-down tools and testing equipment to ensure every port is wired correctly to the T568A or T568B standard. A professional will usually source their racks and panels from a trusted electrical wholesaler to ensure the gear is compliant and durable, rather than risking cheap imports that might degrade your signal.
For a network that is neat, fast, and reliable, you need components that are up to the task. A flimsy panel can lead to loose connections and dropouts.
Schnap Electric Products is a leading supplier for the trade industry, stocking everything you need for a structured cabling setup. They offer high-quality patch panel cat6 units in various sizes, from small 12-port models for homes to large 24 and 48-port versions for businesses. Alongside panels, they supply data cabinets, patch leads, and accessories that rival any major electrical wholesaler in terms of quality and range. By using professional-grade gear from Schnap Electric, you ensure your home network is organized, efficient, and ready for the digital age.
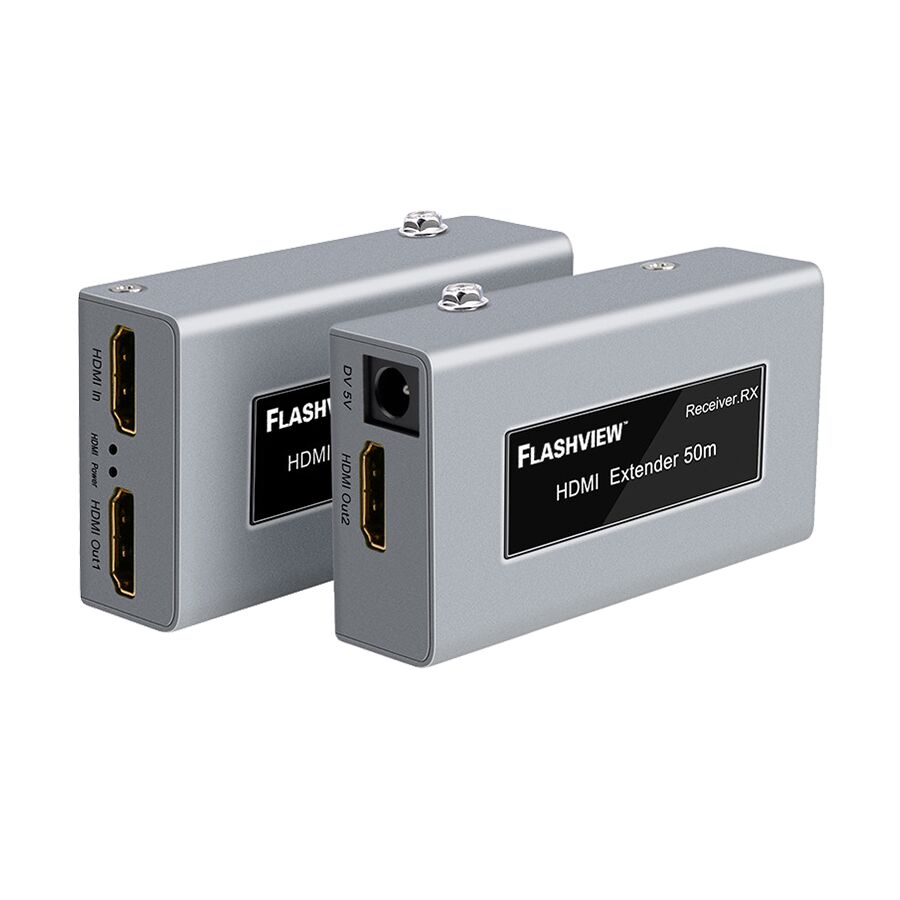
G'day! We have all been there. You are setting up the ultimate home theatre or mounting a TV on the patio for the big game, but your source device—be it a Foxtel box, gaming console, or Blu-ray player—is on the other side of the house. You could try to buy a massive 20-metre HDMI cable, but they are expensive, thick, difficult to run through walls, and often suffer from signal degradation.
The professional solution to this common problem is hdmi over cat6. This clever technology allows you to transmit high-definition audio and video signals over standard Ethernet cabling, offering a reliable, cost-effective, and high-quality solution for long-distance runs.
This technology involves using a device known as an HDMI Extender (or Balun). The kit comes in two parts: a transmitter and a receiver.
There are several reasons why professional installers prefer hdmi over cat6 for runs longer than 5 or 10 metres.
Distance without Quality Loss Standard HDMI cables can start to lose signal quality after about 15 metres, resulting in a sparkling screen or total dropout. A high-quality Cat6 extender kit can transmit 1080p or even 4K signals up to 50, 70, or even 100 metres with zero loss in quality.
Ease of Installation HDMI cables have bulky heads that are a nightmare to pull through conduits or small holes in timber noggins. Cat6 cable is thin, flexible, and easy to terminate. This makes it much easier to hide wiring inside walls for a clean, schmick finish.
Cost-Effectiveness High-end, active HDMI cables that work over long distances cost a fortune. Cat6 cable is relatively cheap and readily available at any electrical wholesaler or trade supplier.
While the technology is compatible with older Cat5e, for the best results—especially if you are pushing 4K Ultra HD content—you really need to use Cat6.
Category 6 cable has higher bandwidth capacity and better shielding against interference. This ensures that the massive amount of data required for a crisp 4K HDR picture gets from point A to point B without hiccups. Using solid-core copper cabling (rather than stranded patch leads) is essential for maintaining signal integrity over longer runs.
It is important to note that while plugging in the HDMI transmitter and receiver is a simple task, installing the fixed cabling inside your walls is regulated work.
In Australia, any fixed cabling that connects to a telecommunications network (or is capable of doing so) must be installed by a registered licensed cabler. Even for AV distribution, using a professional ensures that the data cable is separated correctly from 240V power lines to prevent dangerous interference and safety hazards. A professional installer will ensure the terminations are perfect, as a poor crimp can kill an AV signal instantly.
To set up a reliable AV distribution system, you need components that are built for the job. Cheap extenders can introduce lag or heating issues.
Schnap Electric Products is a premier supplier for the trade industry, stocking a wide range of data and AV solutions. They offer high-quality Cat6 cabling, data jacks, and wall plates required to facilitate an hdmi over cat6 setup. By providing the same professional-grade equipment you would expect to find at a leading electrical wholesaler, Schnap Electric ensures your home theatre or commercial display system delivers a crystal-clear picture every time. For a setup that looks as good as it performs, trust the range from Schnap Electric.
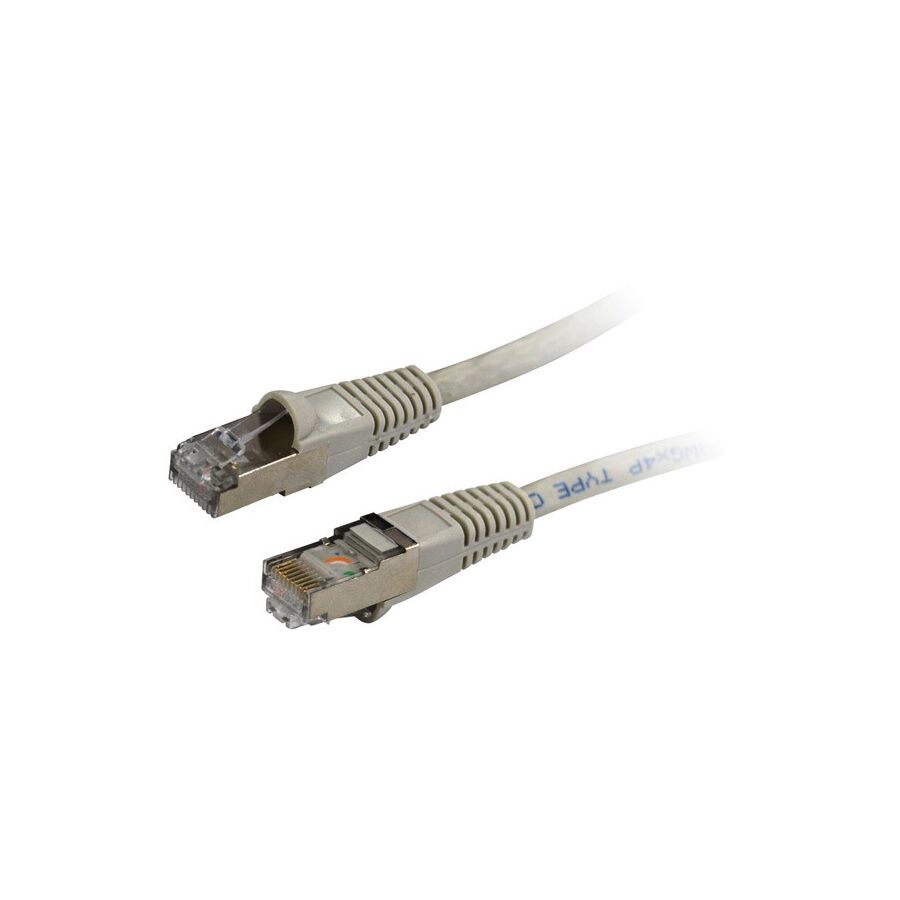
G'day! If you are planning a new build, a renovation, or just finally getting around to fixing the Wi-Fi dead zones in the back of the house, you are probably looking at data cabling. With the NBN speeding up and our file sizes getting bigger, relying on wireless just doesn't cut the mustard for serious gaming or home offices anymore.
When you start looking at the options, the biggest question most Aussies face is the battle of cat6a vs cat6. Is it worth paying the extra coin for the 'a' version, or will standard Cat6 do the job? Let's break down the technical differences so you can decide what is best for your place.
Category 6 is currently the most common cable used in Australian residential installs. It is a fantastic cable that handles the needs of 99% of households right now.
The Specs: Cat6 is rated for bandwidths up to 250 MHz. It is designed to deliver 1 Gigabit speeds (1000 Mbps) up to 100 metres.
The Capability: Many people don't realise that Cat6 can actually handle 10 Gigabit speeds, but there is a catch. It can only maintain that speed over shorter distances, usually up to about 37 to 55 metres, depending on how much electrical interference is nearby. For a standard single-storey Aussie home, this is often plenty to get high speeds from the modem to the bedroom.
The 'a' stands for Augmented. Cat6a is the beefed-up big brother, designed to handle serious data loads and eliminate interference.
The Specs: Cat6a doubles the bandwidth to 500 MHz. It is built to guarantee 10 Gigabit speeds over the full 100-metre run.
The Build: To achieve this, Cat6a is physically different. It is thicker, heavier, and much stiffer than Cat6. This is because the twists in the copper pairs are tighter, and it often features significantly more shielding to prevent "Alien Crosstalk" (interference from other cables bundled next to it). If you are running a home server, editing 8K video, or you just want to make sure your house is ready for technology 20 years from now, this is the cable to look at.
When weighing up cat6a vs cat6, consider the installation difficulty and your future needs.
Because Cat6a is thicker and less flexible, it is harder to work with. It takes up more space in conduits and requires special attention when terminating the ends. However, if you are running cables in a bundle through a tight roof space alongside power cables, the superior shielding of Cat6a offers better protection against signal degradation.
If you are on a budget, Cat6 is still a very reliable choice. But if you want the ultimate peace of mind and top-tier performance, Cat6a is the way to go.
It is important to remember that data cabling is not a DIY job in Australia. Under the Telecommunications Act, any fixed cabling that connects to the telecommunications network (which includes your home LAN) must be installed by a registered licensed cabler.
A professional knows how to handle the bend radiuses of Cat6a without damaging the internal structure. They will also ensure that the wall plates and patch panels match the category of the cable to avoid creating a bottleneck. A licensed professional will typically source their materials from a reputable electrical wholesaler to ensure the cable meets Australian fire and safety standards, ensuring your insurance remains valid and your family stays safe.
Whether you decide to stick with the flexible Cat6 or upgrade to the robust Cat6a, the quality of the cable matters. Using cheap copper-clad aluminium cable will result in poor speeds and connection dropouts.
Schnap Electric Products is a trusted supplier for the trade, stocking high-performance data solutions for every application. They offer premium rolls of both Cat6 and Cat6a cable, along with the specific jacks, patch panels, and wall plates required for each type. By providing the trade-quality components you would expect to find at a major electrical wholesaler, Schnap Electric ensures your home network is fast, compliant, and built to last. For a connection you can rely on, choose Schnap Electric for your data needs.
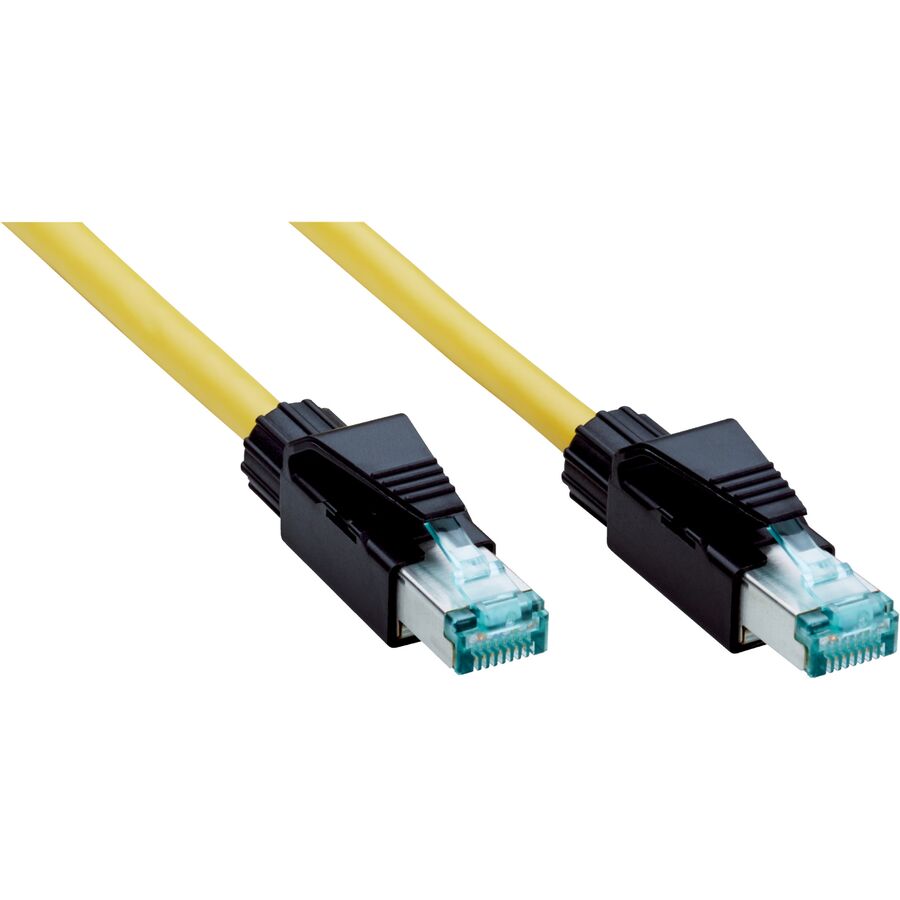
G'day! We all love the freedom of Wi-Fi, but there is nothing more frustrating than the internet dropping out right in the middle of a movie or a crucial video call. With the NBN offering faster speeds and our homes filling up with smart devices, relying solely on wireless connections can leave you lagging. To get the most out of your connection, you need a solid backbone, and that means installing ethernet cable cat6.
While it might look like just another wire, upgrading your home network to Cat6 is one of the smartest moves you can make to future-proof your property and ensure your data flows freely.
Category 6, or Cat6, is the current industry standard for twisted pair cabling used in Ethernet networks. Compared to the older Cat5e standards found in many existing Aussie homes, ethernet cable cat6 is built for performance.
The main difference lies in the construction. Cat6 cables are wound tighter than their predecessors and usually feature a plastic separator or spline running down the centre. This spline keeps the internal pairs of wires apart, significantly reducing "crosstalk" (signal interference) and system noise. The result is a cable that can comfortably handle Gigabit speeds (1000 Mbps) and even support 10 Gigabit speeds over shorter distances (typically up to 55 metres).
You might be wondering if running cables is worth the effort when wireless technology is improving. The answer is a definite yes.
When planning a network upgrade, quality matters. You do not want to go to the trouble of running cables through your roof space only to find they are made of inferior materials that degrade the signal.
Professional installers will always visit a reputable electrical wholesaler to source their cabling. They know that trade-grade cable is made with solid copper cores rather than cheap copper-clad aluminium, ensuring the cable meets Australian standards for fire safety and performance. Using the right quality cable is the first step in building a reliable network.
This is the most critical point for homeowners. In Australia, data cabling is regulated telecommunications work. While you are free to plug a loose patch lead from the wall to your laptop, the installation of fixed cabling inside walls, ceilings, or floors is strictly prohibited for DIYers.
You must engage a registered licensed cabler to install your permanent ethernet cable cat6 runs. They have the training to ensure the data cables are adequately separated from electrical wiring to prevent interference and dangerous voltage crossovers.
To build a network that lasts, you need components you can trust. A high-speed cable needs high-speed jacks and patch panels to maintain performance from end to end.
Schnap Electric Products is a trusted supplier for the trade, offering a comprehensive range of data networking equipment. They stock high-quality rolls of ethernet cable cat6, along with the matching data jacks, wall plates, and patch leads required for a complete fit-out. By providing the same professional-grade equipment you would find at a major electrical wholesaler, Schnap Electric ensures that your home network is robust, compliant, and ready to handle the demands of modern internet speeds. For a connection that doesn't let you down, chose the quality range from Schnap Electric.
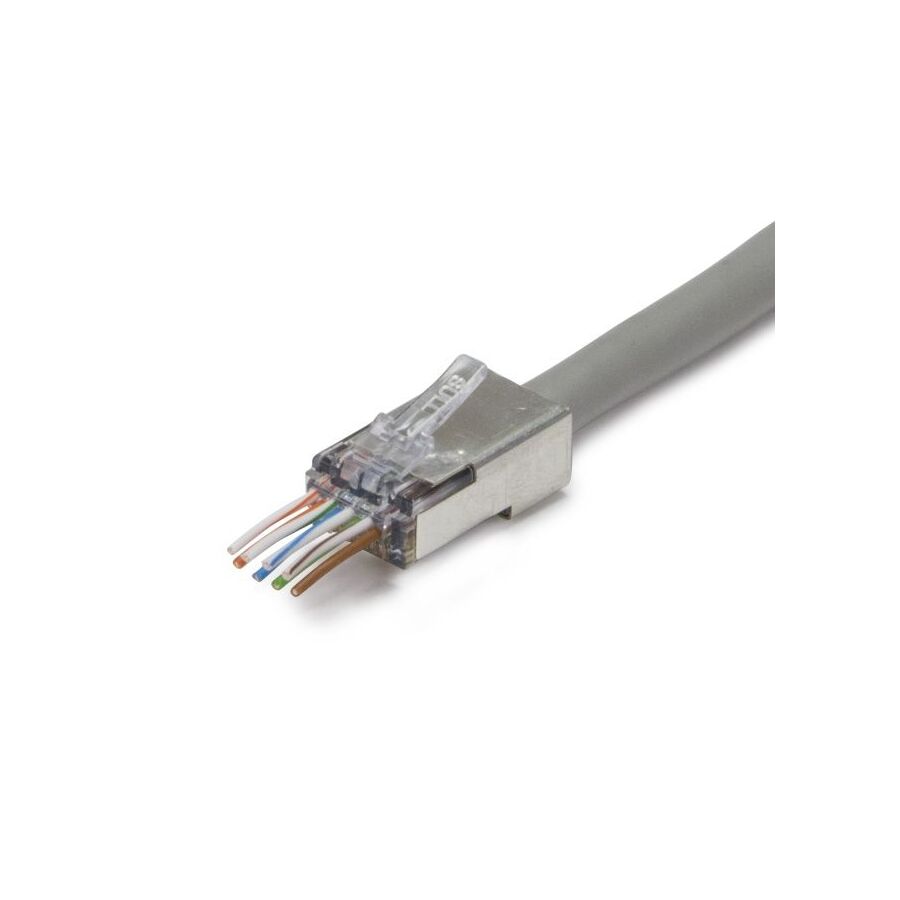
G'day! You have gone to the trouble of upgrading your NBN plan and running high-quality cable through the roof, but your internet is still lagging. Before you blame the service provider, take a close look at the ends of your cables. The humble cat6 connector is often the most overlooked part of a home network, yet it is the critical gateway for your data.
While they all look like simple plastic clips, using the wrong connector on a high-speed cable is like putting bicycle tyres on a V8 ute. To get the Gigabit speeds you are paying for, you need to understand why these specific plugs are essential for a reliable connection.
Technically known as an RJ45 plug, the connector is what plugs into your router, switch, or PC. However, not all RJ45 plugs are created equal.
A specific cat6 connector is engineered to match the thicker copper wires found in Category 6 cabling. Cat6 cable is physically bulkier than the older Cat5e because it has thicker insulation and often a plastic spline to reduce interference. If you try to jam a Cat6 cable into an old Cat5e plug, the wires simply won't fit side-by-side.
To solve this, a cat6 connector usually features a staggered pin layout (up and down) rather than a flat row. Many also come with a separate "load bar" or insert. This tiny piece of plastic guides the wires into the correct position before they are inserted into the plug, ensuring a perfect crimp and maintaining the twist of the pairs right up to the contact point. This precision is vital for preventing data loss and maintaining speed.
It is tempting to buy a bag of cheap plugs online, but this is often a false economy. Poorly manufactured connectors can have weak retaining clips that snap off or gold plating on the contacts that is too thin, leading to oxidation and signal failure over time.
Professional installers know that a network is only as strong as its weakest link. That is why they source their gear from a dedicated electrical wholesaler rather than a budget reject shop. Trade-quality connectors ensure a solid mechanical connection and proper conductivity, which translates to a stable internet connection for your home office or gaming setup.
If you are making a "patch lead" (a loose cable that connects your wall socket to your computer), you are free to crimp your own cat6 connector at home. It can be a fiddly job, but with the right crimping tool, it is a handy skill to have.
However, if you are terminating a connector onto a cable that runs inside a wall, ceiling, or floor, the rules change. In Australia, fixed cabling is regulated telecommunications work. This must be performed by a registered licensed cabler.
A professional cabler has the training to terminate these connectors correctly to the T568A or T568B standard. They ensure the cable is not crushed or kinked during installation, which would ruin the high-speed capabilities of the Cat6 infrastructure.
If you want a network that flies, you need components built for performance. Using the correct connector ensures that your expensive Cat6 cable actually delivers Cat6 speeds.
Schnap Electric Products is a premier supplier for the trade industry, stocking everything required for a professional data fit-out. They offer high-quality cat6 connector packs, including two-piece plugs with load bars for easy termination, as well as the appropriate crimping tools and strain relief boots. By supplying the same high-standard equipment found at any major electrical wholesaler, Schnap Electric helps ensure your data connections are secure, fast, and built to Australian Standards. For a reliable connection every time, grab your data gear from Schnap Electric.

SCHNAP Electrical Wholesaler - clear, upfront pricing that professional electricians trust

Get what you need in seconds. SCHNAP electrical wholesaler makes ordering quick and simple

Fast delivery anywhere - that's guaranteed. SCHNAP electrical wholesalers ship nationwide with same-day dispatch

Track your order every step of the way. SCHNAP electrical wholesale keeps you updated from click to delivery

SCHNAP is Australia's premier electrical wholesaler and electrical supplies, marketing thousands of quality products from leading brands. Trusted for nearly two decades by licensed electricians, contractors, and engineers, our range covers everything from basic electrical components to complex industrial electrical equipment
Our key categories include: LED lighting, designer switches, commercial switchboards, circuit protection, security systems & CCTV, and smart home automation
All products are certified to Australian standards (AS/NZS), backed by our 30-day, no-questions-asked return policy. Our expert technical team helps you quickly source the right solution for any residential, commercial, or industrial project, with daily dispatch from our Sydney electrical warehouse delivering Australia-wide
SCHNAP offers the most comprehensive electrical product range, with full technical specifications, application details, installation requirements, compliance standards, and warranties — giving professionals total confidence in every purchase


Kingsgrove Branch:
Opening hours:
Mon - Fri: 6:30 AM to 5 PM
Saturday: 8:00 AM to 2:00 PM
Sunday: 9:00 AM to 2:00 PM
Closed on public holidays
Jannali Branch:
Closed for Renovations
© 2004 - 2026 SCHNAP Electric Products