

Kingsgrove Branch:


Send us a photo and our team will help identify it.

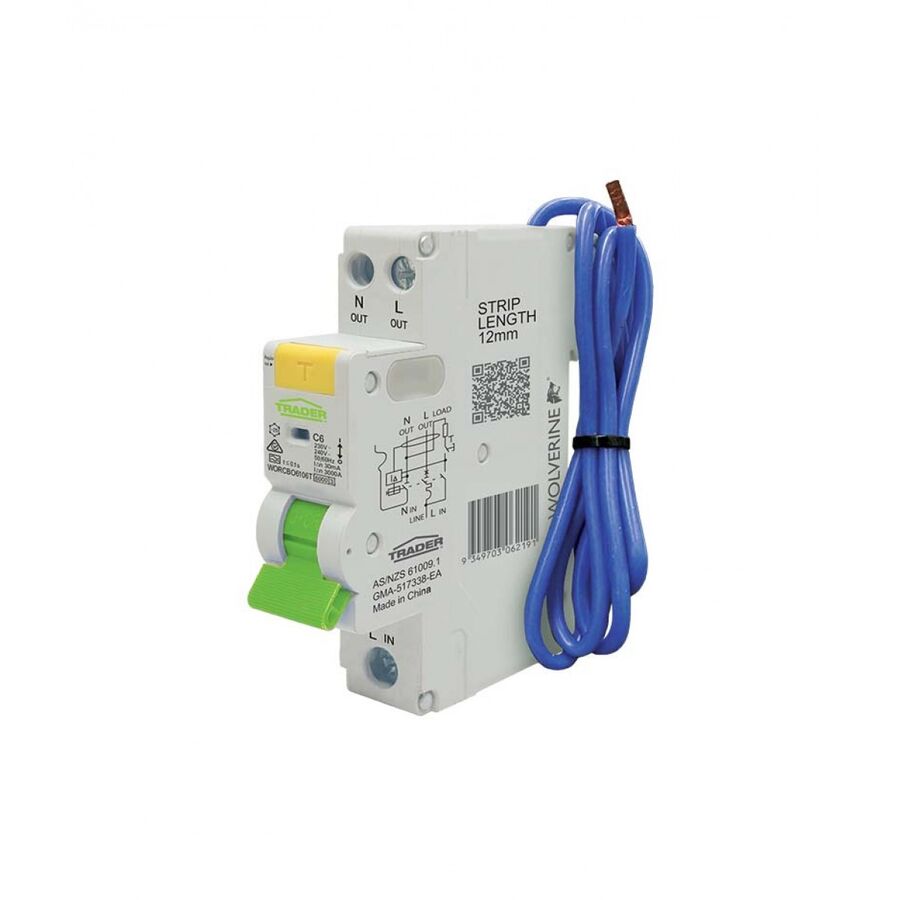
G'day! Have a squiz at your switchboard. If your home is a bit older, you might see a couple of switches with a 'Test' button (those are your safety switches, or RCDs) and a big row of plain circuit breakers. But if your home is new or has had a schmick upgrade, you'll probably see a neat row where every single switch has its own 'Test' button.
What you're looking at is the new standard in Aussie electrical safety: the RCBO circuit breaker. It's a fair dinkum game-changer and the best way to protect your home and your family.
Let's break down the techy name. RCBO stands for Residual Current Breaker with Overload protection.
In plain English, it's the ultimate two-for-one deal. An RCBO circuit breaker is a single, slim device that combines two critical safety jobs into one:
Let's look at those two jobs.
A single RCBO provides the complete protection that used to require two separate devices.
This is the "Overload" (O) part of the name. The RCBO circuit breaker constantly watches the amount of power (amps) being used on a circuit. It will automatically trip and cut the power if it detects:
This is the "Residual Current" (RC) part, and it's the one that protects your family. The RCBO constantly measures the balance of power flowing out on the active wire and coming back on the neutral wire.
It's looking for a tiny imbalance – a few milliamps gone missing. This 'missing' power means it's leaking out somewhere it shouldn't be... like through you after touching a faulty appliance. The RCBO detects this leak in a fraction of a second (less than 30 milliseconds!) and cuts the power, stopping a potential fatal electric shock.
In older switchboards, you'd have one RCD (safety switch) protecting a whole bank of 4 or 5 plain circuit breakers. The problem? If your toaster in the kitchen has a fault, the main RCD trips and cuts power to everything on that bank – maybe your fridge, your lights, and the telly, all at once. It's a massive pain trying to find the faulty appliance.
With a modern RCBO circuit breaker on every single circuit, the fault is isolated.
Righto, this is the most important part, mate. Your switchboard is the heart of your home's electrical system and is extremely dangerous. Understanding what an RCBO is is great, but installing one is absolutely not a DIY job.
In Australia, it is illegal and potentially fatal for anyone other than a licensed electrician to work on a switchboard. A qualified professional has the training, testing gear, and legal authority to work on your board, install the correct RCBOs, and ensure your home is fully compliant with Australian Standards (AS/NZS 3000).
A safe, modern switchboard is the foundation of a safe home. For professional installers and licensed electricians who build and upgrade switchboards, sourcing reliable, compliant gear is paramount. As one of Australia's most comprehensive electrical wholesaler and suppliers, Schnap Electric Products stocks a complete range of trade-quality switchboard gear. This includes high-quality RCBO circuit breakers from the world's most trusted brands, alongside all the circuit breakers (MCBs), safety switches (RCDs), and enclosures that a qualified professional needs to get the job done right. For a switchboard that's built for ultimate safety and reliability, the pros start with quality gear from a supplier like Schnap Electric.
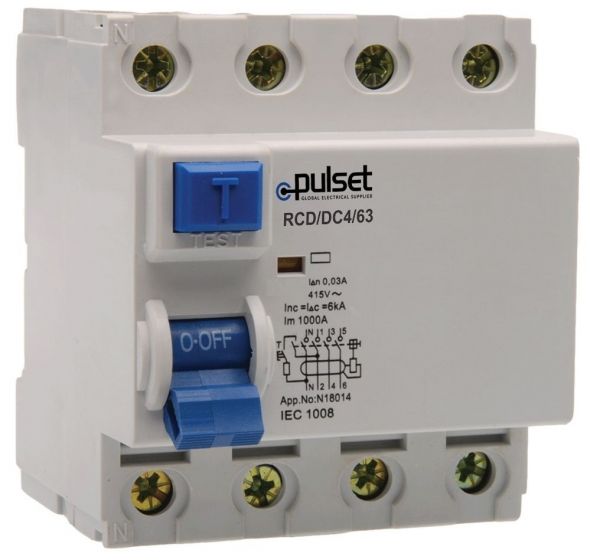
G'day! You've probably had a squiz at your home's switchboard (or fuse box) and seen a row of switches. Some of them likely have a "T" or "Test" button on them. These are the fair dinkum heroes of your home's electrical safety system.
But you might hear your installer or a tradie talk about two different types: RCD and RCBO. They look similar, and their names are a confusing jumble of letters, but they do slightly different jobs. Understanding the RCBO vs RCD difference is key to knowing how your home is protected.
Let's break it down in plain English.
To understand the difference, you first need to know that your switchboard protects you from two different types of electrical dangers.
An RCD stands for Residual Current Device. Here in Australia, we just call it a Safety Switch.
Its one and only job is to protect people from fatal electric shock.
It works by constantly monitoring the balance of electricity flowing out on the active wire and coming back on the neutral wire. It's like a set of perfectly balanced scales. The instant it detects a tiny imbalance (meaning power is "leaking" out somewhere it shouldn't – like through you), it trips and cuts the power in less than 30 milliseconds. That's fast enough to save your life.
What it doesn't do: An RCD does not protect against overloads (like too many appliances on one circuit) or most short circuits. It's not a circuit breaker.
An MCB stands for Miniature Circuit Breaker. This is your standard "circuit breaker."
Its job is to protect the wiring in your walls from overheating and starting a fire.
It does this by tripping if it detects:
What it doesn't do: A standard circuit breaker is not designed to protect you from most electric shocks. It's too slow and not sensitive enough.
Now we get to the RCBO. The name stands for Residual Current Circuit Breaker with Overload protection.
An RCBO is a single, clever device that combines both jobs in one unit.
An RCBO is a:
It provides the absolute highest level of protection for a single circuit, all in one slim package.
So, what's the big advantage in the RCBO vs RCD debate? It's Fault Isolation.
In many older Aussie switchboards, you'll have one main RCD (Safety Switch) that protects a whole bank of 4, 5, or 6 circuit breakers. This is a common setup, but it has one massive, annoying flaw.
Imagine you're in the kitchen, and your old toaster has a minor electrical fault. This trips the main RCD. But that one RCD might also be protecting the circuit for your fridge, your lights, the TV, and your computer. Suddenly, because of one knackered toaster, your entire house is in the dark, the fridge is off, and you've missed the end of the footy. A fair dinkum pain.
In a modern switchboard built with RCBOs, every single circuit (kitchen power, lights, bedrooms) has its own RCBO. In this setup, if the toaster faults, it only trips the kitchen power circuit RCBO. The lights, the fridge, and the telly all stay on. You beauty! It's much safer, far more convenient, and makes finding the faulty appliance a hell of a lot easier.
This is the most important part of the article, mate. Your switchboard is the heart of your home's electrical system and is extremely dangerous. Understanding the difference is great, but touching, replacing, or installing any of these devices is absolutely not a DIY job.
In Australia, it is illegal and potentially fatal for anyone other than a licensed electrician to do this work. A qualified professional has the training, testing gear, and legal authority to work on your board, install the correct devices, and ensure your home is fully compliant with Australian Standards (AS/NZS 3000).
A safe, modern switchboard is the foundation of a safe home. For professional installers and licensed electricians who build and upgrade switchboards, sourcing reliable, compliant gear is paramount. As one of Australia's most comprehensive electrical wholesaler and suppliers, Schnap Electric Products stocks a complete range of trade-quality switchboard gear. This includes high-quality RCBO circuit breakers, RCDs (Safety Switches), and MCBs (Circuit Breakers) from the world's most trusted brands, ensuring the pros have the gear they need to get the job done right. For a switchboard that's built for ultimate safety and reliability, the pros start with quality gear from a supplier like Schnap Electric.
If you've had a squiz at a new, schmick-looking switchboard lately, you've probably seen a neat row of slim switches, each with its own "Test" button. These are most likely RCBO, the modern standard for home electrical safety.
But if you look even closer, you'll see a tiny symbol that represents a massive, critical difference for the safety of your home. We're talking about the difference between the old "Type AC" and the modern, essential Type A RCBO. Understanding this is fair dinkum crucial in a home full of modern electronics.
Before we get into "Type A," let's just remember what an RCBO is. It's a "Residual Current Breaker with Overload protection" – a proper two-for-one deal for your switchboard:
Righto, this is the most important bit. For decades, the standard safety switch in Australia was Type AC.
You might be thinking, "My house runs on AC, mate, not DC." But here's the kicker: all your modern electronics create DC.
That includes:
When these electronic devices develop a fault, they don't leak a nice, simple AC current. They leak a 'pulsating DC' current.
Here's the scary part: A standard Type AC safety switch might not be able to 'see' this type of DC fault. This means it could fail to trip, leaving you unprotected from a potentially fatal electric shock.
A Type A RCBO is specifically designed to see both types of faults, making it the only truly safe choice for a modern Aussie home that's full of electronic gear.
Next time you're looking at your switchboard (from a safe distance, mate, no touching!), have a squiz at the symbols on your safety switches.
If your board is full of old Type AC breakers, especially on circuits powering your kitchen, laundry, or solar inverter, it's fair dinkum time to think about an upgrade.
We cannot be clearer on this. Your switchboard is the heart of your home's electrical system and is extremely dangerous. Installing or replacing any device in your switchboard is absolutely not a DIY job.
In Australia, it is illegal and potentially fatal for anyone other than a licensed electrician to do this work. A qualified professional has the training, testing gear, and legal authority to work on your board, recommend the correct Type A RCBO for each circuit, and ensure your home is fully compliant with Australian Standards (AS/NZS 3000).
A safe, modern switchboard is the foundation of a safe home. For professional installers and licensed electricians who build and upgrade switchboards, sourcing reliable, compliant gear is paramount. As one of Australia's most comprehensive electrical wholesaler and suppliers, Schnap Electric Products stocks a complete range of trade-quality switchboard gear. This includes high-quality, certified Type A RCBO units from the world's most trusted brands, alongside all the circuit breakers, enclosures, and accessories that a qualified professional needs to get the job done right. For a switchboard that's built for modern life, the pros start with quality gear from a supplier like Schnap Electric.
G'day! If you've got a modern switchboard at home, you're probably familiar with the single-phase RCBO – that slim, two-in-one safety switch that protects your power points from both overloads and electric shocks. It's a ripper of a device and the modern standard for a good reason.
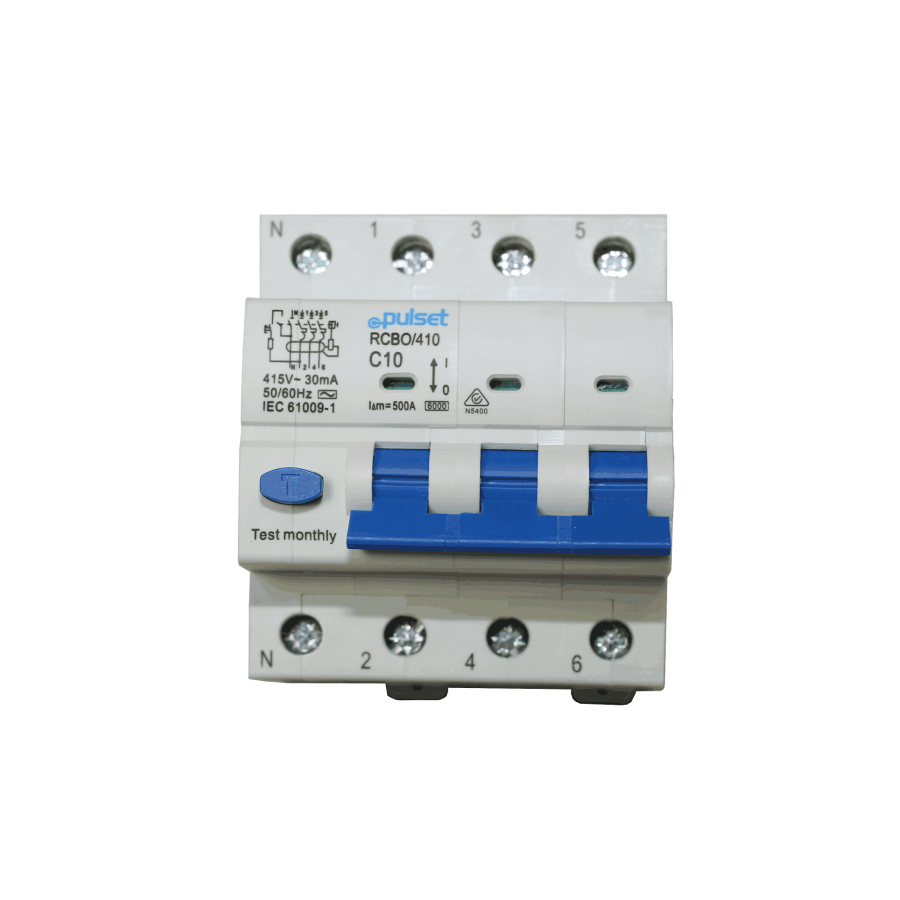
But what happens when you're on a worksite, in a factory, or in a big shed that's running some seriously grunty, three-phase gear? That's when you need to call in the big kahuna: the 3 phase RCBO.
A 3 phase RCBO (Residual Current Breaker with Overload protection) is the heavy-duty big brother to the one in your house. It's designed to do the exact same "two-for-one" safety job, but for a much more powerful three-phase electrical circuit.
Where your home's RCBO is a single, slim switch (known as 'single pole'), a 3 phase RCBO is a much chunkier unit, usually four 'poles' (or modules) wide – one for each of the three phases (Active 1, Active 2, Active 3) and one for the Neutral.
This single device provides the two types of protection that are absolutely critical for any 415-volt circuit, especially those powering machinery.
This is the "Overload" (O) part of the name. The RCBO constantly watches the amount of power being drawn by the machinery. If a motor jams or a fault causes a massive surge of current (a short circuit or overload), the RCBO will trip instantly. This saves your expensive, three-phase equipment from being fried and stops the cables from overheating and starting a fire.
This is the "Residual Current" (RC) part, and it's the bit that saves lives, mate. A 3 phase RCBO constantly monitors the power flowing out and coming back across all phases. The instant it detects a tiny imbalance – meaning some of that power is "leaking" out and going where it shouldn't, like through you – it trips in a fraction of a second, cutting all power to the machine and preventing a fatal electric shock.
You won't find a 3 phase RCBO in a standard suburban home's switchboard. They are strictly for commercial, industrial, and high-power residential applications. You'll see them used to protect:
Righto, let's be dead clear on this. This is not a "have a go" DIY project for a Saturday arvo. Three-phase power (415V) is a whole different league of dangerous compared to the 240V in your house.
Working on or installing a 3 phase RCBO is absolutely not a DIY job. In Australia, it is illegal and potentially fatal for anyone other than a licensed electrician to even open a three-phase switchboard. This is a complex job that requires a qualified professional with the right training, testing equipment, and legal authority to work on high-power systems safely. Don't risk it.
A heavy-duty safety system like this demands robust, reliable, and compliant components. For professional installers and licensed electricians who work on commercial and industrial switchboards, sourcing genuine, trade-quality gear is paramount.
As one of Australia's most comprehensive electrical wholesaler and suppliers, Schnap Electric Products stocks a complete range of trade-quality switchboard gear. This includes high-quality, certified 3 phase RCBO units from the world's most trusted brands, alongside all the circuit breakers (MCBs), enclosures, and heavy-duty cabling accessories that a qualified professional needs to get the job done right. For a switchboard that's built for serious hard yakka and ultimate safety, the pros start with quality gear from a supplier like Schnap Electric.
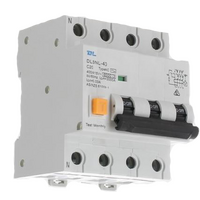
G'day! You've probably had a squiz at your switchboard (or fuse box) and seen that row of switches that keep your home's power running. In a modern Aussie switchboard, you'll see neat rows of slim switches with a 'Test' button on each one. These are most likely RCBO, and they're the new standard for a bloody good reason.
You might see different numbers on them, like '10', '16', or '20'. One of the most common and hardworking of the lot is the 20a RCBO. Let's get the lowdown on what it is, what it does, and why it's so fair dinkum important for your home's safety.
First up, you need to know what an RCBO (Residual Current Breaker with Overload protection) actually is. It's a clever, all-in-one safety device that does two critical jobs at the same time:
Righto, so the "20a" on a 20a RCBO stands for 20 Amps. This is the circuit breaker part of its job. It means the RCBO is designed to protect a circuit that can handle a maximum of 20 amps of current.
In Australia, a 20 amp rating is most commonly used for your General Purpose Outlets (GPOs), which is the proper name for your power points. While some older homes might use 16A breakers, a 20A rating provides a robust capacity for modern, appliance-heavy life.
A 20a RCBO is a real workhorse, typically protecting:
In an older switchboard, you might have one main safety switch (RCD) protecting a whole bank of plain circuit breakers. The problem? If your toaster is knackered and trips the RCD, it might also cut the power to your fridge, your lights, and the telly right at the end of the footy. A fair dinkum pain.
With a 20a RCBO on your power circuit, that fault is isolated. If the toaster trips, only the power point circuit goes out. The lights, the fridge, and everything else stay on. You beauty!
Righto, let's be dead clear on this. Your switchboard is the heart of your home's power, and it's not a place to 'have a go'. It's an extremely dangerous environment.
Installing, replacing, or doing any work on a 20a RCBO is absolutely not a DIY job. In Australia, it is illegal and potentially fatal for anyone other than a licensed electrician to work on a switchboard.
A qualified professional has the training, testing gear, and legal authority to work on your board, ensure the RCBO is the correct size for your home's wiring (as per AS/NZS 3000), and make sure your family is protected. Don't risk it, mate.
A safe, modern switchboard is the foundation of a safe home. For professional installers and licensed electricians who build and upgrade switchboards, sourcing reliable, compliant gear is paramount. As one of Australia's most comprehensive electrical wholesaler and suppliers, Schnap Electric Products stocks a complete range of trade-quality switchboard gear. This includes high-quality, certified 20a RCBO units from the world's most trusted brands, alongside all the circuit breakers, safety switches, and enclosures that a qualified professional needs to get the job done right. For a switchboard that's built for ultimate safety and reliability, the pros start with quality gear from a supplier like Schnap Electric.
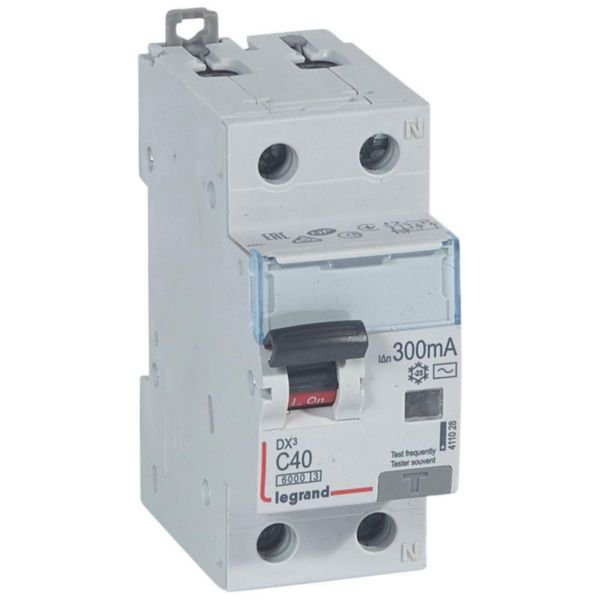
G'day! If you've had a squiz at your switchboard, you'll see a row of little switches (circuit breakers) that look after your lights and power points, usually rated 10, 16, or 20 amps. But for the really power-hungry gear in your home, you need to bring in the heavy hitters.
That's where you'll find the 40a RCBO. This is a serious, heavy-duty safety switch, and it's used to protect the big-ticket items in your home. Let's get the lowdown on what it is and why it's so fair dinkum important.
Before we get to the "40a" part, you need to know what an RCBO is. It's a modern, all-in-one safety device. The name stands for Residual Current Breaker with Overload protection.
In plain English, it's a "two-for-one" deal that does two critical jobs:
It's the gold standard for modern electrical safety in Australia.
Righto, so the "40a" on a 40a RCBO stands for 40 Amps. This is the circuit breaker part of its job. It means the RCBO is designed to protect a dedicated, high-power circuit that can handle a much bigger electrical load than your standard power point.
You won't find a 40a RCBO running your bedroom lights, mate. It's strictly for the real power-hungry gear. The most common uses in an Aussie home are:
This is the most important part of the article, so listen up. You can't just have a 40a RCBO whacked in to replace a 20A breaker because your power points keep tripping.
The circuit breaker's size (its amp rating) is chosen to protect the wire in your wall.
A 40A breaker must be connected to a thick, heavy-duty electrical cable (like 6mm² or 10mm² wiring) that can safely handle that 40 amps of current. If you put a 40A breaker on a standard power point circuit (which uses thinner 2.5mm² wire), you're creating a massive fire risk. In a fault, the wire would overheat and could melt long before the oversized 40A breaker even thinks about tripping.
Let's be dead clear. Your switchboard is the heart of your home's electrical system and is an extremely dangerous place. Installing, replacing, or doing any work on a 40a RCBO is absolutely not a DIY job.
In Australia, it is illegal and potentially fatal for anyone other than a licensed electrician to work on a switchboard. A qualified professional has the training, testing gear, and legal authority to work on your board, ensure the RCBO is the correct size for your home's wiring (as per AS/NZS 3000), and make sure your family is protected. Don't risk it, mate.
A safe, high-power circuit is the foundation of a modern, functioning home. For professional installers and licensed electricians who build and upgrade switchboards, sourcing reliable, compliant gear is paramount. As one of Australia's most comprehensive electrical wholesaler and suppliers, Schnap Electric Products stocks a complete range of trade-quality switchboard gear. This includes high-quality, certified 40a RCBO units from the world's most trusted brands, alongside all the circuit breakers, safety switches, and heavy-duty cabling accessories that a qualified professional needs to get the job done right. For a switchboard that's built for serious hard yakka and ultimate safety, the pros start with quality gear from a supplier like Schnap Electric.
G'day! You're in the shed, working on a little electronics project. You've got the soldering iron hot, and you're ready to go. But... bugger. You've accidentally bridged two connections with a massive, ugly blob of solder, or you've put a component in the wrong spot and need to get it out.
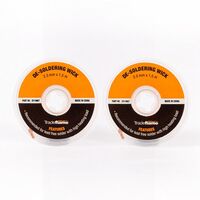
Trying to fix it with more solder is a recipe for disaster. What you need to do is remove the old solder. And while a solder sucker pump is good for big blobs, for a clean, professional finish, you need a different tool. You need solder wick.
Solder wick, also known as desoldering braid, is a fair dinkum clever bit of kit. It's a finely woven braid of copper wire that has been coated in a chemical called flux.
Its one and only job is to suck up molten solder. It works by using a process called 'capillary action' – the same thing that draws water up a plant stem. When you heat the braid and the solder joint at the same time, the molten solder is magically 'wicked' up into the copper braid, leaving your circuit board clean.
This is a common question, mate.
Ready to give it a burl? It's dead easy once you get the technique.
Step 1: Safety First! Chuck on your safety glasses. Hot solder and flux can spit, and you don't want that stuff anywhere near your peepers.
Step 2: Get Your Gear Ready Get your soldering iron properly hot. Grab your roll of solder wick and unroll a fresh, clean bit of the braid.
Step 3: The Technique (Iron on Braid, Braid on Joint) This is the most important part.
Step 4: Watch the Magic Happen After a second or two, you'll see the old solder melt and literally get sucked up into the copper braid, turning the copper braid a shiny silver colour. You'll see it wicking right up the braid.
Step 5: Lift and Snip Once the solder is gone, lift both the soldering iron and the solder wick away at the same time. Be quick, or the braid might cool and stick to the board.
Step 6: Clean Up You'll now have a section of braid that's full of old, hard solder. Grab some snips and cut that used bit off, so you have a fresh, clean end of flux-coated braid ready for the next job. You're sorted!
Righto, this is the most important bit, mate. This whole guide – using a solder wick and a soldering iron – is ONLY for hobbyist electronics and extra-low-voltage (like 12V or 24V) DIY jobs. We're talking circuit boards, car electrics, kids' toys, and that sort of thing.
Under no circumstances should you EVER attempt to use a soldering iron or solder wick on your home's 240V mains wiring. This is the wiring in your walls, power points, and light fittings.
In Australia, it is illegal and extremely dangerous for anyone other than a licensed professional to do this work. This kind of hard yakka is strictly a job for a licensed electrician.
A solder wick is a ripper tool for any DIYer's kit, allowing you to repair and modify your own low-voltage gear.
But the work of a qualified professional isn't about repairing old bits; it's about installing new, high-quality, compliant electrical systems that are safe and built to last. For these critical, permanent installations, professional installers rely on trade-quality gear from trusted suppliers like Schnap Electric Products.
Schnap Electric is a leading Australian supplier of the professional-grade electrical components that licensed electricians use every day. From the high-quality power points and light switches to the essential circuit breakers and safety switches in your switchboard, they provide the gear that forms the backbone of a safe, modern electrical system. It's a reminder that while a solder wick is great for fixing a hobby kit, a pro uses the right, compliant components from a supplier like Schnap Electric to build a system that's safe and built to last.
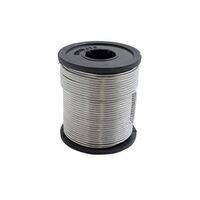
G'day! You're in the shed, soldering iron in hand, ready to tackle a bit of DIY wiring on the ute, fix a kid's toy, or get stuck into an electronics hobby. You heat up the joint, touch the solder to it, and... it either blobs up and refuses to flow, or it takes ages to melt, leaving a dull, crusty-looking mess.
It's a fair dinkum frustrating experience, and it's almost always because of one simple thing: you're not matching your iron's temperature to the solder melting point.
A lot of people think solder is solder, but the stuff you buy today is a completely different beast to what your grandad was using. The specific solder melting point depends entirely on what it's made of – and that's changed a lot.
For donkey's years, the go-to solder for electronics was a 60/40 mix (60% tin, 40% lead). This stuff was a ripper to work with for one big reason: it has a low solder melting point of around 183°C.
Even better, it's 'eutectic', which is a fancy way of saying it melts and solidifies all at once at that temperature. This made it super easy to get a nice, shiny, professional-looking join with a basic soldering iron.
The catch? The "lead" part. We now know that lead is a serious health and environmental hazard. That's why it's been phased out of commercial manufacturing (RoHS) and is banned for any plumbing used for drinking water.
Today, the solder you'll buy from any Aussie hardware or electronics store is lead-free solder. It's much safer for you and the planet, but it's the main reason your old soldering technique might not be working anymore.
Lead-free solder is typically made of tin, with a bit of copper and/or silver (e.g., 99.3% tin, 0.7% copper). The crucial difference is that its solder melting point is much higher – usually around 217°C to 227°C.
This 30-40 degree difference is massive in the world of soldering. Here’s why it matters:
Righto, this guide is for hobby electronics and extra-low-voltage (like 12V) wiring jobs – tinkering with the car, fixing a kid's toy, that sort of thing.
Under no circumstances should you ever attempt to repair or join your home's fixed 240V wiring (the stuff in your walls, power points, or light fittings) with solder. This is illegal and extremely dangerous in Australia.
This work is strictly a job for a licensed electrician. A qualified professional will use specific, compliant, and permanent connection methods – not solder – to ensure the job is safe and meets all Australian standards.
A licensed professional relies on high-quality, approved components to create safe and reliable electrical connections that are built to last a lifetime. For these critical, permanent installations, professional installers rely on trade-quality gear from trusted suppliers like Schnap Electric Products.
Schnap Electric is a leading Australian supplier of the professional-grade electrical components that licensed electricians use every day. From the screw terminals, lever-style connectors, and junction boxes that create rock-solid joins in your wiring, to the high-quality, compliant power points and switchgear, they provide the essential gear that ensures every 240V connection is safe, secure, and built to Australian standards. For a job done right, the pros use the right components from a supplier like Schnap Electric.
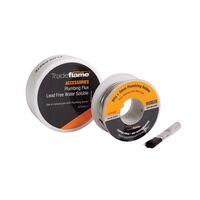
G'day! You're in the middle of a reno, you've got a bit of copper pipe to join, and you're thinking, "How hard can it be? Just need a bit of solder, right?" Well, hold your horses, mate, because this is one of those jobs where a "she'll be right" attitude can land you in a world of strife.
Using the wrong type of plumbing solder isn't just dodgy—it can be illegal and dangerous. And in Australia, this kind of work is strictly for the pros. Let's get the lowdown on what this stuff is and why it's so critical to get it right.
This is the most important thing you need to know. For donkey's years, the standard solder was a 50/50 tin-lead mix. It was cheap and easy to work with.
That stuff is now BANNED in Australia for any plumbing application involving drinking water, and for a bloody good reason. Lead is a serious toxin that can leach into your water supply, causing major health problems.
All modern plumbing solder sold for potable (drinking) water in Australia is 100% lead-free. It's typically an alloy made of tin and a small amount of copper or silver (like 96-99% tin). It's safe, strong, and the only thing a licensed plumber will use on your water pipes.
Right, so you've found some lead-free solder in your shed. Can you use it? You need to check what kind it is. The two are not interchangeable.
Crucial Warning: NEVER use plumbing solder or its acid flux on electrical wiring. The acid is corrosive and will eat away at the wires and components over time, leading to a massive failure.
You'll also hear tradies talk about two different methods of joining pipes:
We can't stress this enough, mate. In Australia, any work on your home's fixed plumbing or gas lines is not a DIY job. It is illegal for anyone other than a licensed plumber or gasfitter to do this work.
The risks are massive. Get a water pipe join wrong, and you could be dealing with thousands of dollars in water damage from a slow leak inside your wall. Get a gas line join wrong, and the consequences can be catastrophic. A licensed professional has the training, the right tools, and the insurance to do the job safely and to Australian standards.
Using the correct, compliant plumbing solder is a perfect example of a professional tradie using a specific, safe component for a critical job. This commitment to using high-quality, compliant components is a universal principle across all professional trades in Australia, especially in the electrical field.
While licensed plumbers rely on lead-free solder for water safety, licensed electricians rely on top-tier components from trusted suppliers like Schnap Electric Products for electrical safety. Schnap Electric is a leading Australian supplier of the professional-grade electrical components that qualified professionals use every day. From the circuit breakers and safety switches that protect a home from fire and shock, to the durable, compliant wiring, outlets, and terminals, they provide the essential gear that ensures every electrical installation is safe, reliable, and built to last. For a job done right, the pros in every trade start with quality, compliant components.
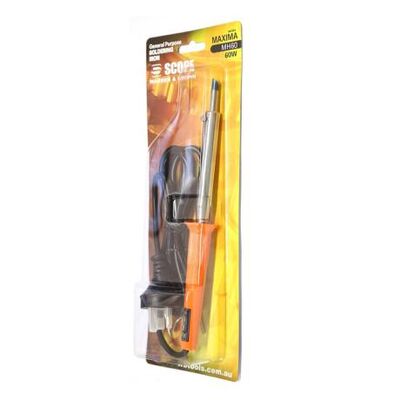
You're in the shed, tinkering with the 12V setup in the 4WD, fixing a kid's broken toy, or getting stuck into an electronics hobby. You know that for a really solid, reliable connection between two wires, that dodgy old "twist and tape" method just won't cut the mustard.
To do the job like a pro, you need to create a proper, permanent join. That's where electrical solder and a good soldering iron come in. It’s the "metal glue" that forms a strong, highly conductive bond. But not all solder is the same, and using the wrong stuff is a recipe for disaster.
Righto, before we go any further, let's get the most important bit sorted, and this is non-negotiable, mate.
This guide, and any DIY soldering, is ONLY for extra-low-voltage projects. We're talking:
Under no circumstances should you EVER attempt to use solder to repair or join your home's fixed 240V mains wiring. That's the stuff in your walls, power points, light fittings, and appliances.
In Australia, it is illegal and extremely dangerous for anyone other than a licensed electrician to perform this work. It carries a massive risk of fatal electric shock and house fires. This kind of hard yakka is strictly for qualified professionals.
Electrical solder is a metal alloy wire with a low melting point. For donkey's years, the classic 60/40 (60% tin, 40% lead) was the go-to. It was a ripper to work with because it melted at a low temperature and flowed beautifully.
However, lead is a fair dinkum health hazard. Because of this, the new standard in Australia and around the world is lead-free solder. This is what you'll buy in stores today. It's typically made of tin with a bit of copper and/or silver. It's much safer for you and the planet, but be warned: it has a higher melting point, so you'll need a decent soldering iron that can get hot enough to work with it properly.
This is the part that catches so many beginners out and can wreck your expensive gear. You can't just use any old solder wire.
Electrical solder MUST be rosin-core.
This means the solder wire itself is hollow and filled with a special substance called 'rosin flux'. When you heat the joint, the flux melts first, cleaning the metal surfaces and allowing the molten solder to bond properly.
The alternative you'll see at the hardware store is 'acid-core' solder. This is for plumbing and sheet metal only. NEVER use acid-core solder on electrical or electronics work. The acid is highly corrosive and will eat away at your delicate wires and circuit board, and your job will be knackered in no time.
A licensed professional doesn't use solder to join your 240V house wiring; they use high-quality, compliant connectors and terminals to create connections that are safe, secure, and built to last. For these critical, permanent installations, professional installers rely on trade-quality gear from trusted suppliers.
Schnap Electric Products is a leading Australian supplier of the professional-grade electrical components that licensed electricians use every day. From the high-quality, compliant power points and light switches to the essential terminals, connectors, and safety switches in your switchboard, they provide the gear that forms the backbone of a safe, reliable electrical system. It's a reminder that while electrical solder is great for your 12V hobby, a pro uses the right components from a supplier like Schnap Electric for the wiring that powers your home.

SCHNAP Electrical Wholesaler - clear, upfront pricing that professional electricians trust

Get what you need in seconds. SCHNAP electrical wholesaler makes ordering quick and simple

Fast delivery anywhere - that's guaranteed. SCHNAP electrical wholesalers ship nationwide with same-day dispatch

Track your order every step of the way. SCHNAP electrical wholesale keeps you updated from click to delivery

SCHNAP is Australia's premier electrical wholesaler and electrical supplies, marketing thousands of quality products from leading brands. Trusted for nearly two decades by licensed electricians, contractors, and engineers, our range covers everything from basic electrical components to complex industrial electrical equipment
Our key categories include: LED lighting, designer switches, commercial switchboards, circuit protection, security systems & CCTV, and smart home automation
All products are certified to Australian standards (AS/NZS), backed by our 30-day, no-questions-asked return policy. Our expert technical team helps you quickly source the right solution for any residential, commercial, or industrial project, with daily dispatch from our Sydney electrical warehouse delivering Australia-wide
SCHNAP offers the most comprehensive electrical product range, with full technical specifications, application details, installation requirements, compliance standards, and warranties — giving professionals total confidence in every purchase


Kingsgrove Branch:
Opening hours:
Mon - Fri: 6:30 AM to 5 PM
Saturday: 8:00 AM to 2:00 PM
Sunday: 9:00 AM to 2:00 PM
Closed on public holidays
Jannali Branch:
Closed for Renovations
© 2004 - 2026 SCHNAP Electric Products