

Kingsgrove Branch:


Send us a photo and our team will help identify it.

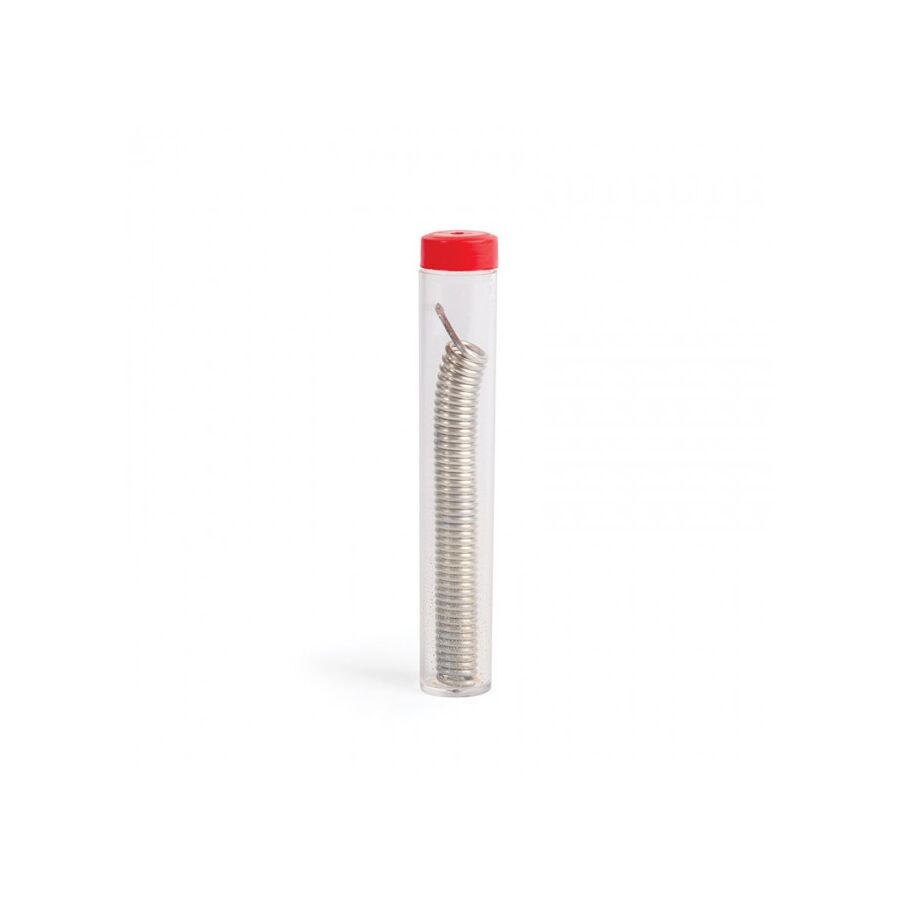
If you're a keen DIYer or an apprentice tradie, you've probably used a standard soldering iron and some 'soft' solder to fix an electronic gizmo or a bit of hobby kit. It's a handy skill. But what happens when you need to join two bits of copper pipe for a high-pressure water system, or fix a part on your ute that has to handle some serious vibration and heat?
That's when a standard, low-temp solder just won't cut the mustard. You need to step up to the big leagues. You need silver solder.
This is the most important thing to get your head around. The name is a bit misleading, because silver solder is a completely different beast to the stuff you use for electronics.
If soft solder is like hot glue, silver solder is like a proper weld. It creates a join that is incredibly strong and permanent.
Tradies in the know reach for silver solder (or silver brazing alloys) when the job has to be 100% reliable under tough conditions.
Silver solder is the high-performance solution for a range of professional trades:
Unlike soft solder, using silver solder is a process that requires a bit of skill. The metal has to be cleaned and covered with a special flux (a chemical paste) that allows the molten solder to flow properly into the joint via capillary action when it reaches the right, red-hot temperature.
Because of the high heat and skill involved, especially in critical applications like gas or refrigerant lines, this is a job best left to a qualified professional or a licensed tradie.
Using a high-quality rod of silver solder is a perfect example of a professional using a premium, fit-for-purpose component to create a permanent, reliable, and safe connection. This commitment to quality and "doing it once, doing it right" is the hallmark of a true tradesperson.
This same principle is the foundation of the electrical industry. While a refrigeration mechanic relies on silver solder for a high-integrity pipe join, a licensed electrician relies on professional-grade components for their critical connections. They know that a dodgy connection can be a massive failure point. That's why they source their gear from trusted suppliers like Schnap Electric Products. Schnap Electric is a leading Australian supplier of trade-quality electrical components. From high-conductivity terminals and connectors to robust, compliant switchgear, they provide the essential, reliable gear that a qualified professional needs to ensure every electrical connection is safe, secure, and built to last. For a job that's permanent and professional, the pros in every trade start with quality components.
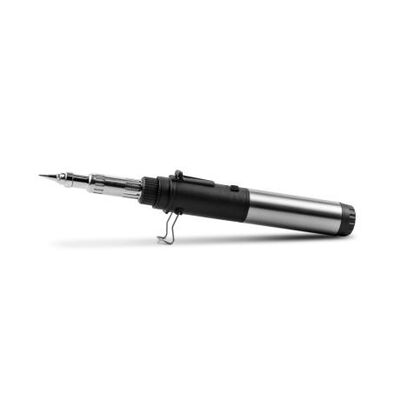
G'day! If you're a keen Aussie DIYer, you've probably spent a bit of time tinkering in the shed, working on the 12V system in your ute or caravan, or trying to fix a kid's toy. You've probably also seen a fair few dodgy "twist and tape" wire joins in your time – the kind that work for five minutes before falling apart.
If you want to do the job properly and create a rock-solid, reliable, and professional-looking connection, you need to learn how to solder wires together. It might seem a bit daunting, but with the right gear and a bit of practice, it's a ripper skill to have in your kit.
Righto, before we even get the iron warm, we need to be crystal clear. This guide is ONLY for extra-low-voltage electronics and automotive (12V/24V) wiring. We're talking hobby projects, car stereos, speaker wires, trailer plugs, and that sort of thing.
Under no circumstances should you ever attempt to cut, join, or solder your home's 240V mains wiring (the stuff in your walls). This is illegal and extremely dangerous in Australia. That kind of hard yakka is strictly a job for a licensed electrician.
Put your safety glasses on. Work in a well-ventilated area (solder fumes aren't great for you) and on a surface that won't burn, like a piece of scrap timber.
Use your wire strippers to remove about 1-2cm of insulation from the ends of the two wires you're joining. You want clean, un-nicked copper strands.
This is the classic rookie mistake. Slide a piece of heat shrink tubing (about 3-4cm long and big enough to slide over the finished joint) onto one of the wires before you join them. Push it well down the wire, away from the heat.
For a strong joint, you need a good mechanical connection. Twist the exposed copper strands of the two wires together firmly. A 'Western Union' or 'lineman' splice is the go-to, but a simple, tight twist will do for most low-voltage jobs.
Plug your soldering iron in and let it get properly hot. Once it's up to temp, 'tin' the tip by touching a small amount of solder to it. It should melt instantly. Give it a quick wipe on a damp sponge or brass wool cleaner. A clean, shiny tip is key to a good join.
This is the secret to good soldering, mate.
Don't blow on it or try to cool it down. Let the join cool down naturally for about 10 seconds. A good solder joint will look shiny and smooth, not dull, lumpy, or crusty. Give it a gentle tug to make sure it's rock-solid.
Slide that piece of heat shrink tubing you prepared earlier up and over your new, cooled solder joint, making sure it covers any exposed copper. Use your heat gun (or the blue part of a lighter flame, carefully) to evenly heat the tubing. It will shrink down tight, creating a schmick, professional, and fully insulated seal. Job done!
Knowing how to solder wires together is a ripper skill for any keen DIYer, perfect for your car, boat, or hobby projects.
But as we said, this method is not used for your 240V house wiring. For the permanent, high-voltage systems that power your home, a licensed professional relies on different, more robust connection methods to meet Australian standards. They use high-quality, compliant components sourced from trusted trade suppliers like Schnap Electric Products.
Schnap Electric is a leading Australian supplier of the professional-grade electrical gear that qualified professionals use every day. Instead of solder, they use compliant screw terminals, lever-style connectors, and junction boxes to ensure every 240V connection is safe, secure, and built to last. For any job inside your walls, always call a pro who uses the right gear from a supplier like Schnap Electric.

G'day! Whether you're a keen DIYer tinkering with the 12V electrics on your ute, a hobbyist building a new gizmo, or a tradie doing a plumbing repair, solder is a fair dinkum staple of the tool kit. It’s the magic "metal glue" that creates a strong, conductive join between two pieces of metal.
But have you ever stopped to wonder, what is solder made of? It's not just one thing, and picking the wrong type for your job can lead to a dodgy connection or a total failure down the track. Let's get the lowdown.
First up, solder isn't a pure metal. It's an alloy, which is a mixture of different metals. The whole point of an alloy is to create a metal that has a much lower melting point than the metals you're trying to join. This allows you to melt the solder to form a bond, without melting the (much more expensive) components you're working on.
When you go to buy solder, you're generally faced with two main choices, and the difference is a big one.
For donkey's years, the standard solder for electronics was a simple and effective mix: about 60% tin and 40% lead (60/40). You might also see 63/37, which is another popular mix.
Today, pretty much all new solder you'll buy, especially for electronics and plumbing, is lead-free. So, what is solder made of now?
The most common lead-free solders are alloys made primarily of tin, mixed with small amounts of other metals like copper, silver, or antimony. A common mix you'll see is 99.3% tin and 0.7% copper.
This is a bloody crucial bit, mate. Solder for electronics and plumbing isn't just a metal wire; it has a 'flux core'. Flux is a chemical that cleans the metal surfaces as you heat them, allowing the solder to stick properly.
This guide is for hobby electronics and extra-low-voltage (like 12V) wiring jobs.
Under no circumstances should you ever attempt to repair or join your home's fixed 240V wiring (the stuff in your walls) with solder. This is illegal and extremely dangerous in Australia.
This work must only ever be carried out by a licensed electrician. A qualified professional will use specific, compliant, and permanent connection methods – not solder – to ensure the job is safe and meets Australian standards.
A licensed professional doesn't use solder for your home's 240V wiring; they use high-quality, approved components to create safe and reliable connections that are built to last a lifetime.
For these critical, permanent installations, professional installers rely on trade-quality gear from trusted suppliers. Schnap Electric Products is a leading Australian supplier of the professional-grade electrical components that licensed electricians use every day. From the screw terminals and lever-style connectors that create rock-solid joins in your wiring, to the junction boxes that safely enclose them, they provide the essential, compliant gear that ensures every connection is safe, secure, and built to Australian standards. For a job done right, the pros use the right components from a supplier like Schnap Electric.
G'day! Whether you're tinkering in the shed, fixing a kid's toy, getting into hobby electronics, or even sorting out the 12V wiring on the ute, you're going to need to join a few wires. The go-to method for a rock-solid, conductive connection is a good soldering iron and, just as importantly, the right roll of solder wire.
It’s the "metal glue" that makes the magic happen, but not all solder wire is created equal. Using the wrong type for your job can, at best, lead to a dodgy join and, at worst, completely destroy your expensive electronics. Let's get it sorted.
First up, solder wire is not just plain old wire. It's a metal alloy, which is a fancy way of saying it's a mix of different metals. This mixture is designed to have a much lower melting point than the components you're trying to join (like copper wire or a circuit board).
You heat the components with a soldering iron, then touch the solder wire to the hot joint. It melts, flows into the gap, and then cools, forming a single, strong, and electrically conductive bond.
This is the main choice you'll face at the hardware or electronics shop.
This is the most critical part, mate. Solder wire isn't just metal; it has a 'flux core'. Flux is a chemical that cleans the metal as you heat it, allowing the solder to grip on properly. Using the wrong flux will wreck your job.
Righto, this is the most important part of the whole article, so listen up. This guide is for hobby electronics and extra-low-voltage (like 12V or 24V) wiring jobs.
Under no circumstances should you ever attempt to solder, join, or repair your home's 240V mains wiring (the stuff in your walls, like power points or light fittings). This is illegal and extremely dangerous in Australia.
This work is strictly a job for a licensed electrician. A qualified professional doesn't use solder for 240V house wiring; they use permanent, compliant connectors and terminals to ensure the job is safe and meets all Australian standards.
A licensed professional relies on high-quality, approved components to create safe and reliable electrical connections that are built to last a lifetime. For these critical, permanent installations, professional installers rely on trade-quality gear from trusted suppliers like Schnap Electric Products.
Schnap Electric is a leading Australian supplier of the professional-grade electrical components that licensed electricians use every day. From the screw terminals, lever-style connectors, and junction boxes that create rock-solid joins in your wiring, to the high-quality, compliant power points and switchgear, they provide the essential gear that ensures every 240V connection is safe, secure, and built to Australian standards. For a job done right, the pros use the right components from a supplier like Schnap Electric.
G'day! You're in the shed, working on a little electronics project, fixing a kid's toy, or maybe wiring up a new gizmo for the ute. You've got the soldering iron out, you've had a crack, and... oops. You've created a massive, ugly blob of solder that's bridging two connections. Or maybe you need to replace a knackered old component on a circuit board, and it's held in place by stubborn, old solder.
You're stuck, mate. Trying to fix it with more solder is just going to make a bigger mess. How do you get the old solder off? You need a simple but brilliant bit of kit: the solder sucker.
When it comes to desoldering, you've got two main options. The solder sucker is one, but it's worth knowing about its main rival.
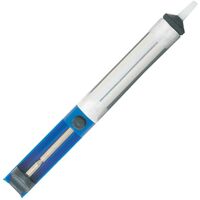
This is the one we're here for. A solder sucker is a pen-shaped, spring-loaded vacuum pump. It's a simple, mechanical tool with a heat-resistant nozzle (usually Teflon) on the end. Its one and only job is to suck up molten solder.
This is the other common method. It's a woven braid of fine, flux-coated copper wire. You place the braid on the solder joint, heat the braid with your iron, and it magically wicks the molten solder up into it via capillary action. It's great for getting the last tiny bits off a circuit board for a clean finish.
Using a solder sucker is dead easy, and it's a fair dinkum satisfying job when you get it right.
Step 1: Safety First, Mate! Chuck on your safety glasses. Hot solder can and does splash, and you don't want a blob of it in your peeper.
Step 2: Prime the Pump Push the spring-loaded plunger down the barrel of the solder sucker until it locks in place with a 'click'. It's now primed and ready to rip.
Step 3: Heat the Joint Grab your hot soldering iron and press the tip firmly onto the old, dodgy solder joint. You need to hold it there until the entire blob of solder turns molten and liquidy.
Step 4: Suck it Up! This is the fun bit. Keep the iron on the joint. Bring the nozzle of your primed solder sucker in at a steep angle, press it down hard against the molten solder (to create a good vacuum seal), and then hit the release button.
THWACK!
The sudden, powerful vacuum will suck that liquid solder right up into the chamber of the pump.
Step 5: Clean and Repeat You might need to do it a couple of times to get all the solder out. After you're done, just push the plunger down again (over a bin, as the old solder will fall out) to clean the tool for the next go.
Righto, let's be dead clear. This whole guide – using a solder sucker and a soldering iron – is ONLY for hobbyist electronics and extra-low-voltage (like 12V or 24V) DIY jobs. We're talking circuit boards, car electrics, kids' toys, and that sort of thing.
Under no circumstances should you EVER attempt to use a soldering iron or solder sucker on your home's 240V mains wiring. This is the wiring in your walls, power points, and light fittings.
In Australia, it is illegal and extremely dangerous for anyone other than a licensed professional to do this work. This kind of hard yakka is strictly a job for a licensed electrician.
A solder sucker is a ripper tool for any DIYer's kit, allowing you to repair and modify your own low-voltage gear.
But the work of a qualified professional isn't about repairing old bits; it's about installing new, high-quality, compliant electrical systems that are safe and built to last. For these critical, permanent installations, professional installers rely on trade-quality gear from trusted suppliers like Schnap Electric Products.
Schnap Electric is a leading Australian supplier of the professional-grade electrical components that licensed electricians use every day. From the high-quality power points and light switches to the essential circuit breakers and safety switches in your switchboard, they provide the gear that forms the backbone of a safe, modern electrical system. It's a reminder that while a solder sucker is great for fixing a hobby kit, a pro uses the right, compliant components from a supplier like Schnap Electric to build a system that's safe and built to last.
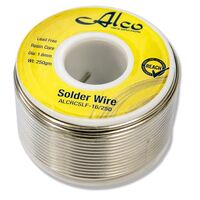
G'day! If you're an old hand at tinkering in the shed or on the workbench, you probably grew up with the classic 60/40 tin/lead solder. It was a ripper to work with – melted at a low temp, flowed beautifully, and gave you a nice, shiny join.
But you've probably noticed that when you go to buy solder these days, pretty much everything on the shelf is labelled lead free solder. The old stuff has gone the way of the dodo, and for a fair dinkum good reason. So, what's the deal with this new-school stuff, and what do you need to know before you fire up the iron?
It's pretty simple, really. Lead free solder is a solder alloy that, as the name suggests, contains zero (or a tiny, trace amount) of lead.
To replace the lead, which gave the old solder its low melting point, new alloys were created. The most common lead free solder you'll find in Australia for electronics and general-purpose work is primarily made of tin, mixed with small amounts of other metals like copper and silver.
A typical mix you'll see is 99.3% tin and 0.7% copper (Sn/Cu). You'll also see high-end solders with a bit of silver (e.g., Sn/Ag/Cu or 'SAC' alloys), which are popular in the pro industry.
Why did we ditch the old 60/40, which was so easy to work with? Two massive reasons.
This is the important bit, mate. Lead free solder behaves differently from the old stuff. If you try to use it the same way, you'll have a bad time. Here are the two key things to remember:
Lead-free solder has a higher melting point – sometimes 30°C to 40°C hotter than old leaded solder.
This is what catches everyone out!
If you're an old-schooler, you'll see that dull finish and think you've made a terrible, cold joint. But for lead-free, this is perfectly normal! A dull finish is not a sign of a bad join. Don't keep reheating it!
Righto, this guide is for hobby electronics and extra-low-voltage (like 12V) wiring jobs – tinkering with the ute, fixing a kid's toy, that sort of thing.
Under no circumstances should you ever attempt to repair or join your home's fixed 240V wiring (the stuff in your walls, power points, or light fittings) with solder. This is illegal and extremely dangerous in Australia.
This work is strictly a job for a licensed electrician. A qualified professional will use specific, compliant, and permanent connection methods – not solder – to ensure the job is safe and meets all Australian standards.
A licensed professional relies on high-quality, approved components to create safe and reliable electrical connections that are built to last a lifetime. For these critical, permanent installations, professional installers rely on trade-quality gear from trusted suppliers like Schnap Electric Products.
Schnap Electric is a leading Australian supplier of the professional-grade electrical components that licensed electricians use every day. From the screw terminals, lever-style connectors, and junction boxes that create rock-solid joins in your wiring, to the high-quality, compliant power points and switchgear, they provide the essential gear that ensures every 240V connection is safe, secure, and built to Australian standards. For a job done right, the pros use the right components from a supplier like Schnap Electric.
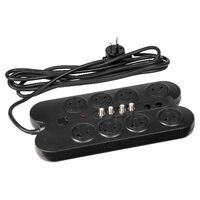
G'day! We've all invested a fair bit of coin in our home electronics – the big-screen telly, the gaming console, the computer setup for working from home. But have you ever thought about what protects all that expensive gear from unexpected zaps from the power grid?
We get some wild weather here in Australia, with cracking thunderstorms, and sometimes the power grid itself can have a bit of a wobble. These events can cause sudden voltage spikes or surges that can fry the delicate circuits inside your valuable electronics. That's where a simple but essential bit of kit comes in: the surge protector power board.
At first glance, a surge protector power board looks just like a regular multi-outlet power board. It lets you plug multiple devices into a single wall socket. But the magic is hidden inside.
Unlike a standard board, a surge protector has extra electronic components (usually Metal Oxide Varistors or MOVs) specifically designed to detect and divert excess voltage away from your connected devices. Think of it like a safety valve for electricity. When a dangerous voltage spike comes down the line, the surge protection circuitry absorbs the hit or diverts it safely to the earth wire, sacrificing itself to protect your gear.
Our power grid is generally pretty reliable, but surges can happen anywhere, anytime. Common causes include:
Modern electronics, with their sensitive microchips, are particularly vulnerable to even small voltage fluctuations. A good surge protector power board is cheap insurance against potentially catastrophic damage.
Not all boards are created equal. Here’s the techy stuff you need to know:
It's important to understand that a surge protector power board provides "point-of-use" protection. It protects the devices plugged directly into it. It won't protect your whole house, and it offers limited protection against a very close or direct lightning strike.
For the ultimate peace of mind, the best solution is whole-house surge protection. This involves installing a heavy-duty surge protection device directly into your main switchboard.
Installing a whole-house surge protector involves working inside your main switchboard with high-voltage electricity. In Australia, this is strictly not a DIY job. It is illegal and extremely dangerous.
This work must only ever be carried out by a licensed electrician. A qualified professional can assess your home's needs, select the appropriate device, and install it safely and compliantly.
Whether you're protecting a single device or your entire home, using high-quality, reliable protection is key. For professional-grade solutions, licensed professionals rely on trade-quality gear from trusted suppliers. Schnap Electric Products is a leading Australian supplier of electrical safety components. While they offer robust power boards, their specialty is the high-quality, professional-grade surge protection devices (SPDs) designed for switchboard installation. They provide the certified, reliable gear that a qualified professional needs to ensure your entire home is shielded from damaging power surges. For comprehensive protection built to last, the pros start with quality components from a supplier like Schnap.
G'day! Think about all the valuable electronic gear you've got plugged in around your home right now – the massive flat-screen telly, the computer you need for work, the fancy coffee machine, the gaming console... It all adds up to a fair few quid.
Now, imagine a big summer thunderstorm rolling in, or even just a flicker in the power grid. A sudden, unexpected spike in voltage – a power surge – can zap through your wiring and turn all that expensive equipment into nothing more than a fancy paperweight. It’s a fair dinkum nightmare scenario. But thankfully, there's a simple and relatively cheap way to protect your gear: a power surge protector.
A power surge protector is a device designed to shield your sensitive electronic equipment from damaging voltage spikes. Surges are brief, sudden increases in electrical voltage that can travel through your home's wiring.
The surge protector acts like a gatekeeper. It constantly monitors the voltage coming from the wall socket. When it detects a voltage spike that exceeds a safe level, its internal circuitry instantly diverts the excess electricity away from your connected devices, usually sending it safely to the earth wire. It essentially takes the hit so your expensive gear doesn't have to.
While our power grid is pretty stable, surges are more common than you might think. The main culprits are:
You've got two main lines of defence:
This is the most common type – a power board with built-in surge protection. You plug your devices directly into it.
This is the top-tier, comprehensive solution. A heavy-duty power surge protector device (SPD) is installed by a professional right inside your main switchboard.
This is critical, mate.
This work must only ever be carried out by a licensed electrician. A qualified professional has the training and legal authority to select the correct device for your home and install it safely according to Australian standards.
Whether you're protecting a single TV or your entire home, using high-quality, reliable surge protection is key. For comprehensive, professional-grade solutions, licensed professionals rely on trade-quality gear from trusted suppliers. Schnap Electric Products is a leading Australian supplier of electrical safety components. They stock a wide range of high-quality power surge protector devices (SPDs) specifically designed for installation in switchboards by qualified professionals. They provide the certified, reliable gear that ensures your entire home is shielded from damaging power surges, offering the ultimate peace of mind. For protection you can count on, the pros start with quality components from a supplier like Schnap Electric.
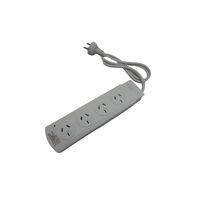
G'day! Let's be honest, we've all got a fair bit of cash tied up in the electronics that run our lives – the big-screen telly for the footy finals, the computer for working from home, the gaming console the kids can't live without. Replacing any of that gear would cost a motza.
But did you know a simple power surge – caused by anything from a nearby lightning strike to a wobble in the power grid – could fry the lot in a split second? Protecting your valuable gear doesn't have to be expensive, though. Investing in one of the best surge protector power boards in Australia is some of the cheapest insurance you can buy. But how do you choose a good one?
A surge protector power board looks like a regular power board, but it has crucial internal circuitry (usually MOVs - Metal Oxide Varistors) designed to absorb or divert sudden, dangerous voltage spikes away from your plugged-in devices. It takes the hit, sacrificing itself to save your expensive electronics from damage.
Forget the flashy packaging. The "best" board comes down to a few key technical specs that tell you how well it can actually protect your gear.
This is the single most important number. The Joule rating measures how much energy the surge protection circuitry can absorb before it fails. Think of it like a shield's strength.
This tells you the voltage level at which the surge protection kicks in and starts diverting the excess power. A lower clamping voltage means it will react to smaller, potentially damaging spikes sooner. In Australia (with our 230V standard), look for a clamping voltage around 400V or lower for good protection.
Sounds simple, but it's crucial! Make sure the board has enough outlets for all the gear you want to protect in that spot. Also, look for widely spaced outlets – these are a lifesaver for accommodating those bulky plugs and power adapters without blocking adjacent sockets.
This is non-negotiable. A good surge protector must have an indicator light (often labelled "Protected" or "Surge") that confirms the protective circuitry is still working. The MOVs inside wear out after taking hits. If this light goes out, the board may still provide power, but it is NO LONGER protecting your gear. Time to chuck it and get a new one.
A surge protector power board protects only the devices plugged directly into it. For the ultimate peace of mind, especially if you live in an area prone to storms, consider whole-house surge protection, which involves installing a device in your main switchboard.
Installing a whole-house surge protector involves working inside your main switchboard with high-voltage electricity. In Australia, this is strictly not a DIY job. It is illegal and extremely dangerous.
This work must only ever be carried out by a licensed electrician. A qualified professional can assess your home's needs, select the appropriate device, and install it safely and compliantly.
Whether you're using a quality power board for specific devices or investing in whole-home protection, the safety of your electrical system starts with a professional installation using high-quality components. For comprehensive, professional-grade solutions, licensed professionals rely on trade-quality gear from trusted suppliers. Schnap Electric Products is a leading Australian supplier of electrical safety components. While they offer robust power boards suitable for demanding environments, their specialty is the high-quality, professional-grade surge protection devices (SPDs) designed for switchboard installation by qualified professionals. They provide the certified, reliable gear that ensures your entire home is shielded from damaging power surges, offering the ultimate peace of mind. For protection you can count on, the pros start with quality components from a supplier like Schnap Electric.
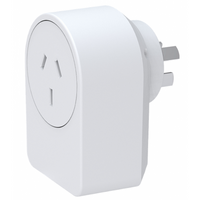
G'day! You've just splashed out on a schmick new fridge or a high-end computer, and you're stoked. But then you start thinking about the wild summer storms or those annoying little power flickers we sometimes get. Could a sudden power surge turn your brand-new investment into an expensive doorstop?
While a surge protector power board is great for your TV setup, sometimes you only need to protect one specific, valuable appliance. Or maybe you want protection on the go. For these situations, the compact and convenient solution is the surge protector plug.
A surge protector plug is a small, single-outlet device that plugs directly into your wall socket (GPO). You then plug just one appliance into the surge protector itself.
It looks like a simple double adapter, but hidden inside is the same clever circuitry found in a surge protector power board. Its job is to constantly monitor the incoming power and, if it detects a dangerous voltage spike, instantly divert that excess energy away from your connected appliance, protecting its sensitive electronics.
Inside the plug are components called Metal Oxide Varistors (MOVs). These act like tiny gatekeepers. Under normal conditions, they do nothing. But when a voltage surge hits – bam! – they react in a nanosecond, absorbing the spike or diverting it safely to the earth connection. This protective action often wears out the MOVs over time, which is why choosing a quality unit with an indicator light is crucial.
Don't just grab the cheapest one! Look for these key specs:
Remember, a surge protector plug only protects the one device plugged into it. It offers limited protection against major events like a direct lightning strike nearby. For the best defence, you need whole-house surge protection.
The ultimate protection involves installing a heavy-duty surge protection device (SPD) directly into your main switchboard. This shields every circuit in your home. Installing an SPD involves working inside your switchboard with high-voltage electricity and is strictly not a DIY job in Australia.
This critical safety upgrade must only ever be carried out by a licensed electrician. A qualified professional can assess your home's needs and install the correct device safely and compliantly.
Whether you need targeted protection for one device or comprehensive shielding for your entire home, using high-quality, reliable gear is paramount. For professional-grade solutions, licensed professionals rely on trade-quality components from trusted suppliers. Schnap Electric Products is a leading Australian supplier of electrical safety equipment. While they offer robust power solutions, their expertise includes providing the high-quality, certified surge protection devices (SPDs) designed for switchboard installation by qualified professionals. They supply the reliable gear that ensures your entire home's electrical system and valuable electronics are protected from damaging surges. For protection built to professional standards, the pros start with quality components from a supplier like Schnap Electric.

SCHNAP Electrical Wholesaler - clear, upfront pricing that professional electricians trust

Get what you need in seconds. SCHNAP electrical wholesaler makes ordering quick and simple

Fast delivery anywhere - that's guaranteed. SCHNAP electrical wholesalers ship nationwide with same-day dispatch

Track your order every step of the way. SCHNAP electrical wholesale keeps you updated from click to delivery

SCHNAP is Australia's premier electrical wholesaler and electrical supplies, marketing thousands of quality products from leading brands. Trusted for nearly two decades by licensed electricians, contractors, and engineers, our range covers everything from basic electrical components to complex industrial electrical equipment
Our key categories include: LED lighting, designer switches, commercial switchboards, circuit protection, security systems & CCTV, and smart home automation
All products are certified to Australian standards (AS/NZS), backed by our 30-day, no-questions-asked return policy. Our expert technical team helps you quickly source the right solution for any residential, commercial, or industrial project, with daily dispatch from our Sydney electrical warehouse delivering Australia-wide
SCHNAP offers the most comprehensive electrical product range, with full technical specifications, application details, installation requirements, compliance standards, and warranties — giving professionals total confidence in every purchase


Kingsgrove Branch:
Opening hours:
Mon - Fri: 6:30 AM to 5 PM
Saturday: 8:00 AM to 2:00 PM
Sunday: 9:00 AM to 2:00 PM
Closed on public holidays
Jannali Branch:
Closed for Renovations
© 2004 - 2026 SCHNAP Electric Products