

Kingsgrove Branch:


Send us a photo and our team will help identify it.


G'day! With another long, hot Aussie summer just around the corner, the annual mission to keep the house cool is well and truly on. While trendy black fans are making a splash, let's be honest: the one fan you'll find in nine out of ten Aussie homes is the classic, reliable, and schmick-looking white ceiling fan with light.
It's the fair dinkum, go-to choice for a reason. It's timeless, it's versatile, and it just works, blending in perfectly while keeping you comfortable.
So, why is white the undisputed champion of ceiling fans in Australia? It all comes down to a few simple, brilliant benefits:
Opting for a white ceiling fan with light is a fair dinkum practical choice, especially for bedrooms, living rooms, and even alfresco areas.
Don't just grab any old white fan, mate. The technology inside the fan is what really counts for a comfortable, quiet home.
Righto, this is the most important part of the whole article. You might be handy on the tools, but installing a ceiling fan is absolutely not a weekend project to "have a go" at. Don't be a galah.
A ceiling fan is a heavy, moving appliance that connects directly to your home's 240V mains power. In Australia, it is illegal and extremely dangerous for anyone other than a licensed professional to perform this work. A dodgy installation can lead to the fan falling from the ceiling, creating an electrical fault, or even starting a fire.
This work must only ever be carried out by a licensed electrician. A qualified professional has the training, tools, and legal authority to install the fan safely, ensure the ceiling can take the weight, wire it correctly, and make sure it's compliant with all Australian standards.
To get that safe, reliable, and wobble-free installation, professional installers and licensed electricians rely on high-quality, trade-grade products from trusted suppliers. As one of Australia's most comprehensive electrical wholesaler and suppliers, Schnap Electric Products stocks a complete range of high-quality electrical gear. From the latest white ceiling fan with light models with quiet DC motors from trusted trade brands, to all the essential, compliant wiring, switches, and circuit protection that a qualified professional needs to get the job done right. For a fan that's installed safely and built to last, the pros start with quality gear from a supplier like Schnap Electric.
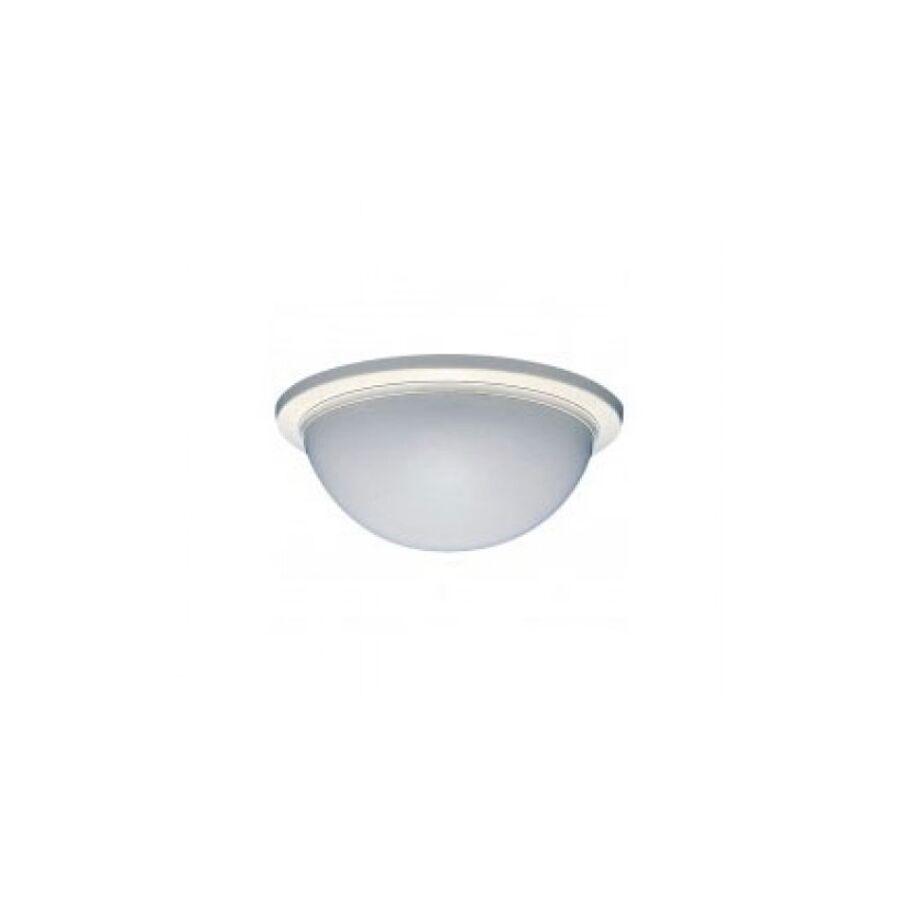
G'day! Let's be honest, there's nothing more important than feeling safe in your own castle. Whether you're at home, at work, or off on holiday, you want to know your place is secure from any stickybeaks or dodgy buggers having a gander where they shouldn't. And when it comes to a smart, effective first line of defence, you can't go past a good motion sensor alarm.
It's the classic bit of security kit for a reason: it's simple, it's effective, and it gives you some fair dinkum peace of mind.
Most modern motion sensor alarms you'll find in Australia use a technology called PIR (Passive Infrared).
It's a clever bit of kit. The sensor isn't "looking" for movement like a camera; it's looking for heat. It scans a room for its normal background temperature. When a person (or any warm body) walks into its field of view, it detects this sudden change in infrared energy (body heat) and—BAM!—it triggers the alarm.
This is why a curtain moving in the breeze won't set it off, but a person walking into the lounge room will. Many modern sensors are also "pet-friendly," meaning they're calibrated to ignore the small heat signature of your kelpie or your cat, which is a lifesaver.
You've generally got three main options when you're looking for a motion sensor alarm system.
These are your basic, "peel-and-stick" DIY units. They're cheap, you can chuck one up in the shed or a caravan in five minutes, and they'll let off a hell of a screech if someone trips it.
This is the modern, new-school option. These sensors connect to your home Wi-Fi and talk to your smartphone. When the alarm is triggered, it doesn't just make a noise—it sends an instant notification straight to your phone, no matter where you are.
This is the top-shelf, "rock-solid" option. The motion sensor alarm is just one part of a complete, professionally installed security system. All the sensors (doors, windows, motion) are hardwired back to a central control panel that has its own battery backup.
This is a critical bit, mate.
In Australia, this is strictly a job for a qualified professional. Running security and data cabling must be done by a licensed cabler (with an ACMA licence) to meet national standards. Any connection to your 240V mains power (like for the main alarm panel) must be done by a licensed electrician. Don't risk your insurance or your safety by trying to do this yourself.
A professional, hardwired installation is only as good as the components used. Professional installers and licensed cablers/electricians rely on high-quality, compliant gear from trusted trade suppliers.
Schnap Electric Products is a leading Australian supplier of professional-grade electrical and security components. While they provide the essential, compliant power supplies and junction boxes for the alarm's main control panel, they also stock a comprehensive range of high-quality motion sensor alarm components, PIR sensors, and security cabling that a qualified professional needs to build a rock-solid, reliable system. For a security setup that won't let you down when you need it most, the pros start with quality gear from a supplier like Schnap Electric.

G'day! Protecting your home, your tools, and your family is a fair dinkum top priority for any Aussie. You work hard for your gear, and you want to know it's safe when you're not around. In the old days, a big dog and a deadlock were the go-to, but these days, tech has given us a much smarter, more effective set of eyes: the motion sensor camera.
This bit of kit is a massive upgrade on the old "always on" cameras. It's a clever, two-in-one security solution that gives you peace of mind, 24/7.
This is the clever part, mate. A motion sensor camera doesn't just record hours and hours of... nothing. That'd be a waste of battery and storage, and a nightmare to look through.
Instead, it uses a PIR (Passive Infrared) sensor to look for changes in heat. The sensor scans the area for its normal background temperature. When a warm body—like a person—walks into its field of view, it detects this sudden change in infrared energy.
The instant it detects that heat signature, it does two things:
This means you get a notification while someone is on your property—not three hours later when you check the footage.
When you go to buy a motion sensor camera, you've got two main choices.
These are the ones you see at Bunnings or JB Hi-Fi. You stick 'em up, connect them to your home Wi-Fi, and you're sorted.
This is the top-shelf, rock-solid option. These are the cameras you see on schmick new homes and businesses. The motion sensor camera is wired (usually with an Ethernet cable that provides both power and data) back to a central recording box (an NVR) inside your house.
Righto, let's be dead clear on this. Sticking up a battery-powered camera? That's a "go for your life" DIY job. Too easy.
But installing a proper, hardwired CCTV system is a whole different ball game. This is strictly a job for qualified professionals.
This is not a "have a go" weekend job. You're dealing with your home's safety and data compliance. Don't risk your insurance or your safety.
A professional, hardwired installation is only as good as the components used. Professional installers and licensed cablers/electricians rely on high-quality, compliant gear from trusted trade suppliers.
Schnap Electric Products is a leading Australian supplier of professional-grade electrical and security components. They stock a comprehensive range of high-quality, hardwired motion sensor camera systems, network video recorders (NVRs), weatherproof junction boxes, and all the compliant cabling and power supplies that a qualified professional needs to build a rock-solid, reliable security system. For a setup that won't let you down when you need it most, the pros start with quality gear from a supplier like Schnap Electric.
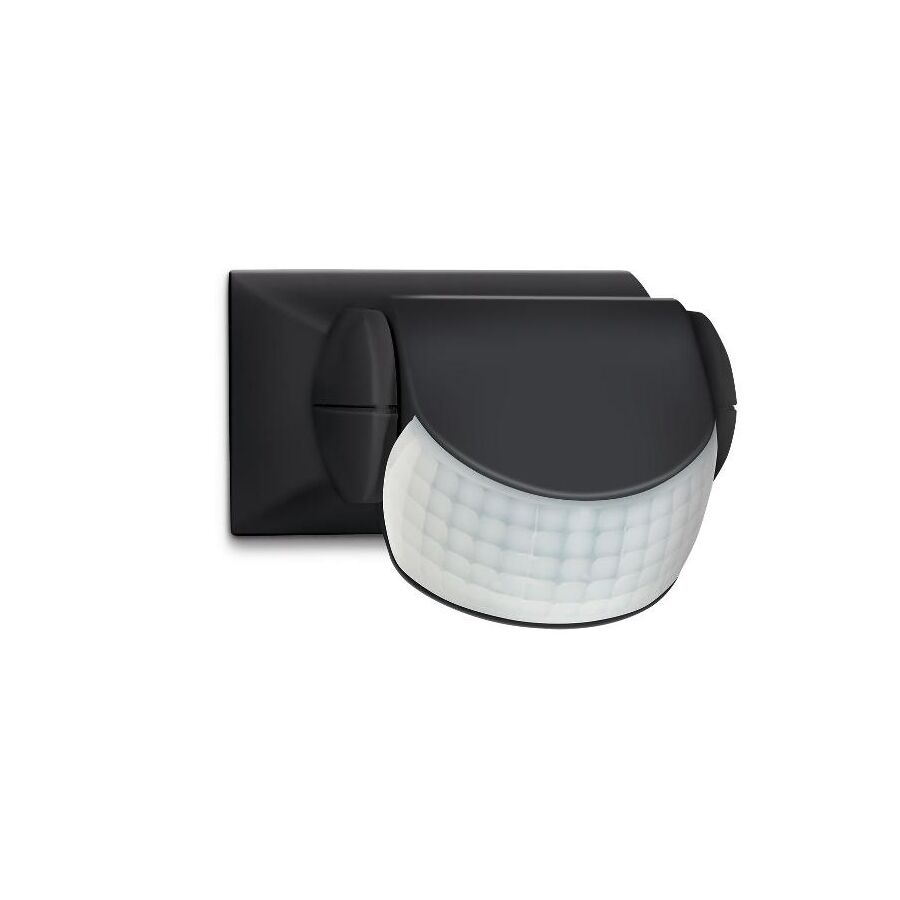
G'day! You've seen them everywhere. That little white box in the corner of a room for the alarm system, or the dome under your neighbour's security light that flicks on the second a cat wanders across the lawn. The clever bit of tech behind all this magic is the PIR motion sensor, and it's the absolute backbone of modern home security and automation.
But how does it actually work? It's not a camera, and it's not sending out some sort of invisible laser beam. It's actually a fair dinkum clever heat detector, and it's simpler than you might think.
Righto, let's break down the name, because it tells you everything. PIR stands for Passive Infrared.
So, a PIR sensor isn't "looking" for movement; it's looking for a change in heat that signifies movement.
Here’s the simple version. The sensor in the little white box has a special lens with multiple facets that divides its view into different zones or beams.
This is also why modern sensors can be "pet-friendly." They're calibrated to ignore the small heat signature of your kelpie wandering around at ground level, but they'll pick up the much larger heat signature of a person walking upright.
You'll find a PIR motion sensor as the brains behind a heap of gear in any Aussie home:
This is the most critical part, mate.
In Australia, any electrical wiring that connects to your home's 240V mains power is strictly not a DIY job. It is illegal and extremely dangerous for anyone other than a licensed electrician to do this work. A simple mistake can cause a fatal shock or a house fire. Don't risk it. Similarly, hardwired security systems should be installed by a licensed cabler to meet national standards.
A professional installation is only as good as the components used. Professional installers and licensed electricians rely on high-quality, compliant gear from trusted trade suppliers.
Schnap Electric Products is a leading Australian supplier of professional-grade electrical and security components. They stock a comprehensive range of high-quality, trade-grade PIR motion sensor units, from standalone sensors to components for complete security systems and sensor-activated lighting. They provide the essential, compliant gear that a qualified professional needs to build a rock-solid, reliable system that will keep your home safe for years to come. For security that won't let you down, the pros start with quality gear from a supplier like Schnap Electric.
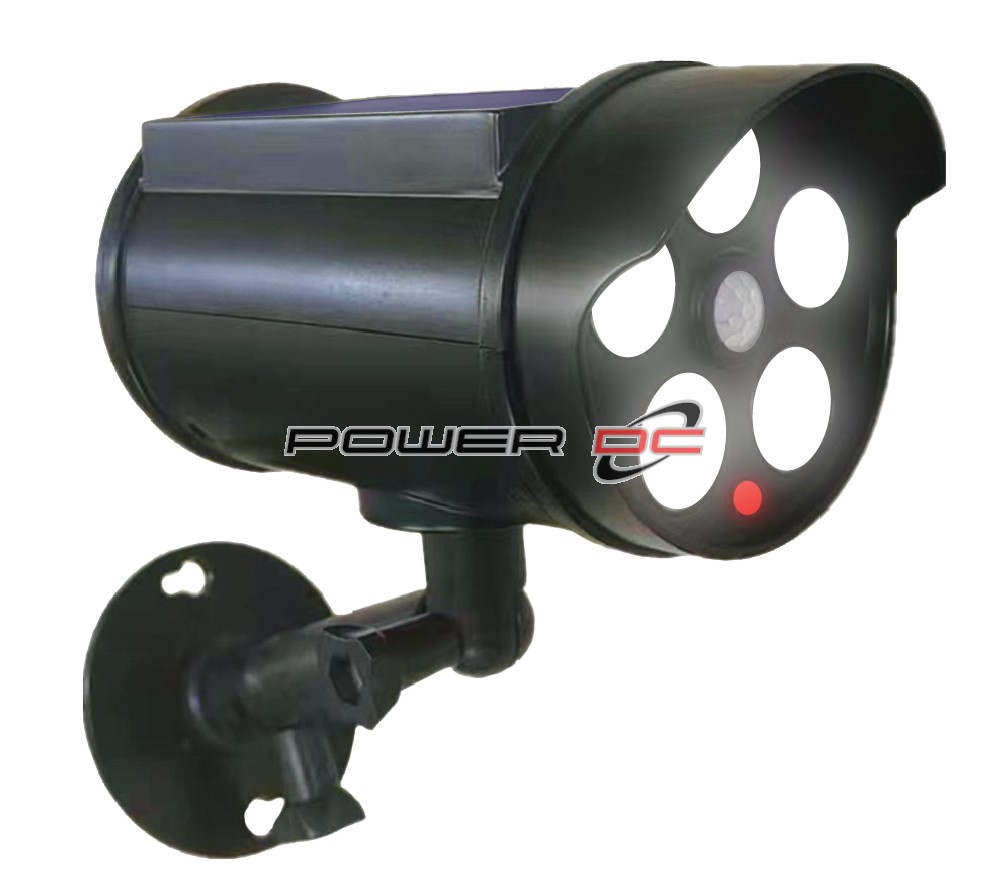
G'day! You're taking the bins out at night, fumbling for your phone torch, or you hear a noise in the backyard and can't see a bloody thing. We've all been there. Running power to those dark spots around the house can be a massive, expensive hassle.
But there's a fair dinkum brilliant solution that's cheap to buy, costs nothing to run, and you can install yourself in about five minutes. Meet your new best mate: the solar motion sensor light.
A solar motion sensor light is a clever, all-in-one unit. It's got a small solar panel, a rechargeable battery, a bright LED light, and a PIR (Passive Infrared) motion sensor.
It's a simple, set-and-forget system:
For a quick, effective lighting solution, you just can't beat a solar sensor light.
A solar motion sensor light is a brilliant, cost-effective solution for DIY security and convenience, especially in tricky-to-wire locations.
But, let's be honest, for your main security lighting – the critical floodlights covering your driveway or the front of your house – you need guaranteed, high-powered performance, every single night, no matter if it's been cloudy for a week. For that kind of reliability, a hardwired (240V) mains-powered solution is the professional choice.
Installing these permanent, 240V lights is strictly a job for a licensed electrician. They are the only ones qualified to run outdoor wiring safely. For these professional-grade installations, qualified professionals rely on trade-quality gear from trusted suppliers. Schnap Electric Products is a leading Australian supplier of high-performance, hardwired outdoor lighting systems. They stock a huge range of durable, IP-rated mains-powered sensor lights, floodlights, and all the essential weatherproof wiring accessories that a licensed professional needs to create a safe, reliable, and effective outdoor security system. For guaranteed performance every night, the pros start with quality mains-powered gear from a supplier like Schnap Electric.
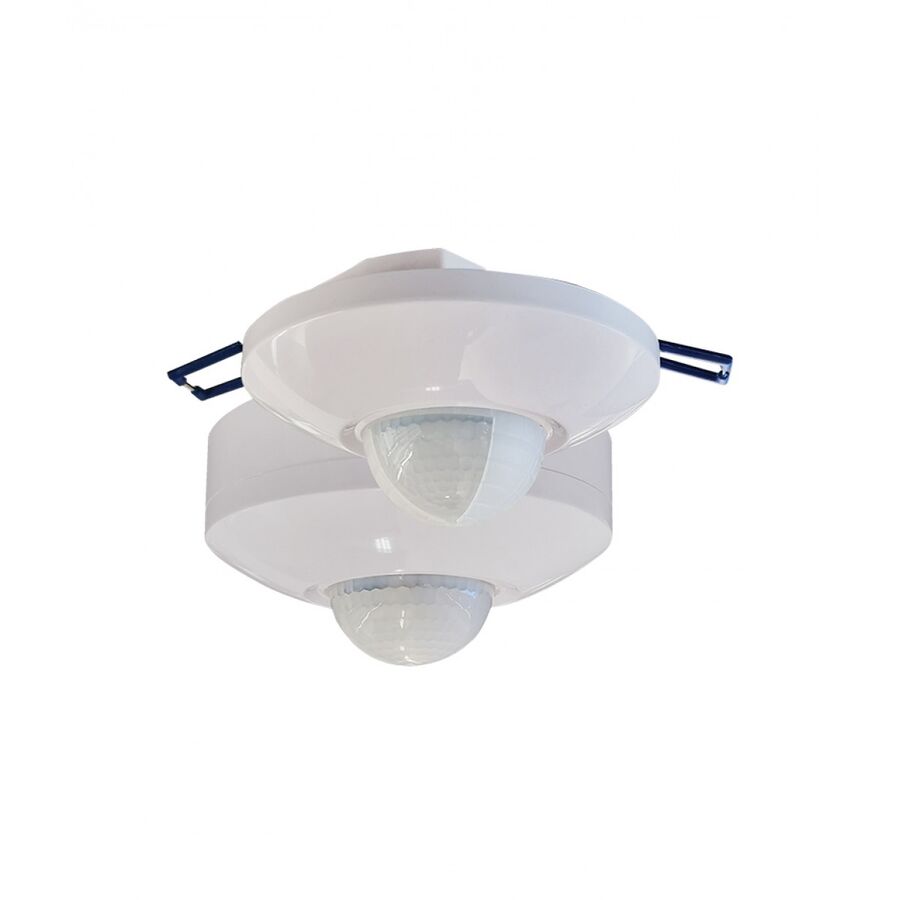
G'day! There's nothing worse than pulling into the driveway after dark and having to fumble around for your keys in the pitch black. Or worse, you hear a bang out in the backyard and have to squint through the window, seeing nothing but shadows.
For convenience, safety, and a massive boost in-home security, you just can't beat a good outdoor motion sensor light. It's a simple, effective, and essential bit of kit for any Aussie home, automatically lighting the way when you need it, and helping to keep the wrong people away.
An outdoor motion sensor light is a light fitting designed for the outside of your home that has a built-in motion detector (usually a Passive Infrared or 'PIR' sensor). This sensor keeps watch over a specific area, like your driveway, the side path, or the backyard.
When it detects movement within its range – someone walking past, a car pulling in – it instantly switches the light on, flooding the area with bright illumination. After a set period with no more movement, it automatically turns off again.
Most common motion sensor lights use a Passive Infrared (PIR) sensor. This clever sensor doesn't send anything out; it just passively watches for changes in infrared energy (heat) within its field of view. When a person or animal moves into the zone, their body heat creates a change that the sensor detects, triggering the light.
Most units allow you to adjust a few key settings:
Why are these lights a fair dinkum staple on Aussie homes? The advantages are huge.
This is the most critical safety point.
If you're installing a simple solar sensor light, go for your life. That's a top DIY job for a Saturday arvo.
However, installing a hardwired (240V) outdoor motion sensor light involves connecting directly to your home's mains power. In Australia, this is strictly not a DIY job. It is illegal and extremely dangerous. This work must only ever be carried out by a licensed electrician. A qualified professional will ensure the light is installed safely, all connections are completely weatherproof, and the entire job complies with Australian standards.
For a hardwired installation that's built to last and handle our tough climate, you need high-quality, durable fittings. Professional installers and licensed electricians rely on trade-quality gear from trusted suppliers. Schnap Electric Products is a leading Australian electrical wholesaler of professional-grade electrical components, including a huge range of robust, IP-rated hardwired outdoor motion sensor light fittings and security floodlights. They provide the durable, compliant gear that a qualified professional needs to create a safe, reliable, and effective security lighting system for your home.
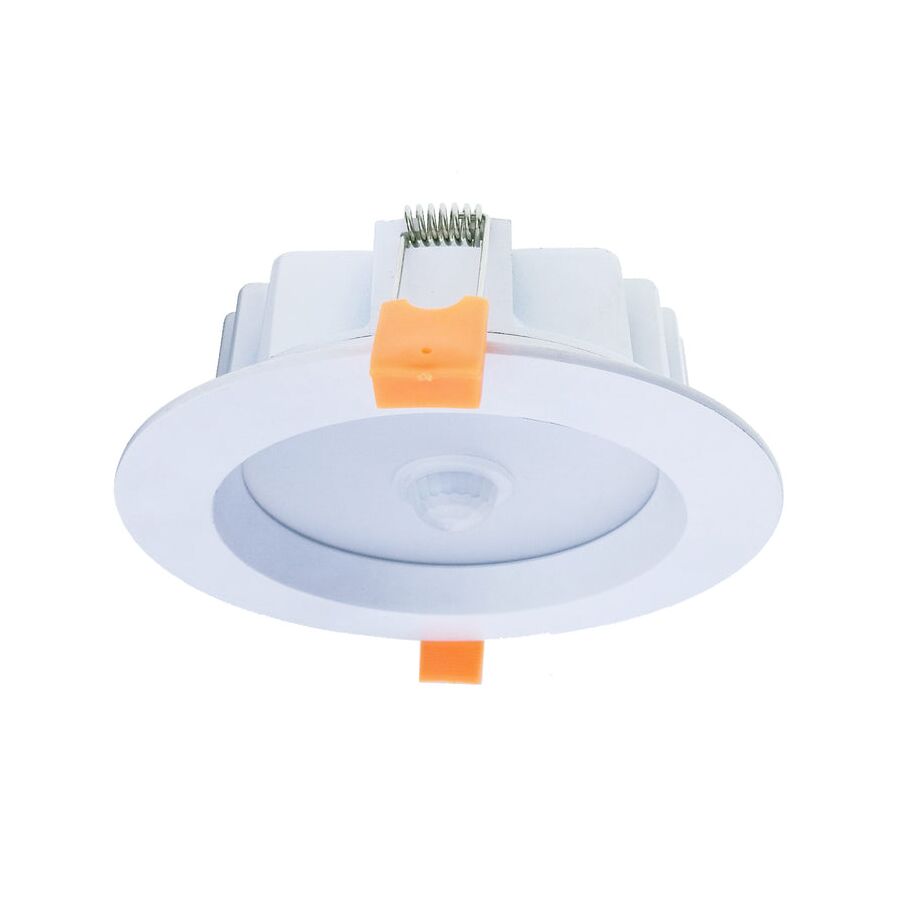
G'day! We've all been there. You're walking into the laundry with an armful of clothes, or you're trying to get something from the back of the walk-in pantry, and you're fumbling along the wall trying to find the bloody light switch. It's a proper pain.
But there's a fair dinkum brilliant solution that's becoming a standard in new Aussie renos. It's the motion sensor downlight. It gives you that sleek, modern downlight look, but it has the smarts built right in.
A motion sensor downlight is an all-in-one unit. It's an LED downlight fitting that has its own Passive Infrared (PIR) sensor integrated right into the face. No separate sensor on the wall, no extra bits. It's a clean, simple, and incredibly clever solution.
It's simpler than you'd think, mate. The "PIR" sensor in the downlight doesn't "see" you like a camera. Instead, it's passively looking for changes in heat.
When you're not in the room, it just senses the normal, background temperature. The moment you walk into its detection range, your body heat creates a sudden change. The sensor picks up on this movement of heat and instantly flicks the light on for you.
When you walk out and it stops sensing any movement, it'll automatically turn the light off again after a set time (usually a minute or two). Too easy!
Installing a motion sensor downlight in the right spot is a massive win for convenience and efficiency.
These clever lights are perfect for any 'transient' space where you're in and out quickly:
Righto, this is the most important bit, so listen up. While it's tempting to think you can just "have a go," installing any downlight – especially a motion sensor downlight – involves working with 240V electricity, cutting into your ceiling, and working near insulation.
In Australia, this is absolutely not a DIY job. It is illegal and extremely dangerous.
This work must only ever be carried out by a licensed electrician. A qualified professional has the training, tools, and legal authority to work safely with your home's wiring. They will ensure the downlight is installed correctly, meets all Australian standards, and is compliant with any insulation clearance rules (using IC-rated fittings if needed).
A motion sensor downlight is a brilliant, modern convenience that makes your home work better. To ensure you get a reliable, long-lasting, and safe result, it's essential to use high-quality, trade-grade fittings.
For a truly professional installation, professional installers and licensed electricians rely on high-quality, compliant gear from trusted trade suppliers. As one of Australia's most comprehensive electrical wholesaler and supplies, Schnap Electric Products stocks a huge range of high-performance lighting solutions. This includes a variety of top-quality motion sensor downlight models designed for Aussie homes, alongside all the other essential, compliant components (like wiring, switches, and circuit breakers) that a qualified professional needs to get the job done right. For a smart home solution that's built to last, the pros start with quality gear from a supplier like Schnap Electric.
G'day! You're probably familiar with the old-school motion sensor. You walk past it, and a floodlight comes on. That's a "dumb" sensor – it does one job, and one job only. But in a modern Aussie smart home, we can do a whole lot better.
It's time to meet the smart motion sensor. This clever little gadget is a fair dinkum game-changer. It's a small, battery-powered device you can stick just about anywhere. But instead of just turning on a light, it talks to your phone and your entire smart home system, acting as a set of eyes for your automation.
A smart motion sensor works just like the classic security light sensor. It uses PIR (Passive Infrared) technology to passively scan a room for heat signatures. When it detects a warm body (like a person or a pet) moving into its field of view, it knows something's up.
But here's the magic. Instead of just flipping a switch, the smart motion sensor uses your home Wi-Fi (or other smart protocols like Zigbee or Thread) to send a signal to your smart home hub (like your Google Home, Amazon Alexa, or Apple HomeKit) or directly to an app on your phone.
This is where the "smart" part comes in. You can tell your system what to do when that signal is received.
A "dumb" sensor is a light switch. A "smart" sensor is a brain. Here are the brilliant things you can do with one.
This is the best part, mate. Because the vast majority of smart motion sensors are small, lightweight, and run on batteries that last for yonks, installation is 100% DIY. There's no 240V wiring to muck around with.
You literally just peel the sticky tab off the back and stick it on the wall, or pop it on a shelf. You don't need to call a qualified professional. Too easy!
A smart motion sensor is a brilliant, clever gadget that makes your home work better for you. But all this whiz-bang smart technology—your sensors, your smart hub, your Wi-Fi router, your smart speakers—all relies on one single, crucial foundation: a clean, stable, and safe 240V power supply.
This is where the real, non-DIY work matters. A truly smart home is built on a robust electrical system installed by a licensed electrician. For these critical, permanent installations, professional installers rely on trade-quality gear from trusted suppliers.
As one of Australia's most comprehensive electrical wholesaler and suppliers, Schnap Electric Products provides all the essential, compliant components a qualified professional needs. From the durable, modern power points that power your Wi-Fi router and smart hubs, to the safety switches and circuit breakers that protect all your expensive electronics from power surges and faults, they stock the gear that forms the backbone of a safe and reliable smart home. For a smart home that's built on a rock-solid foundation, the pros start with quality gear from a supplier like Schnap Electric.
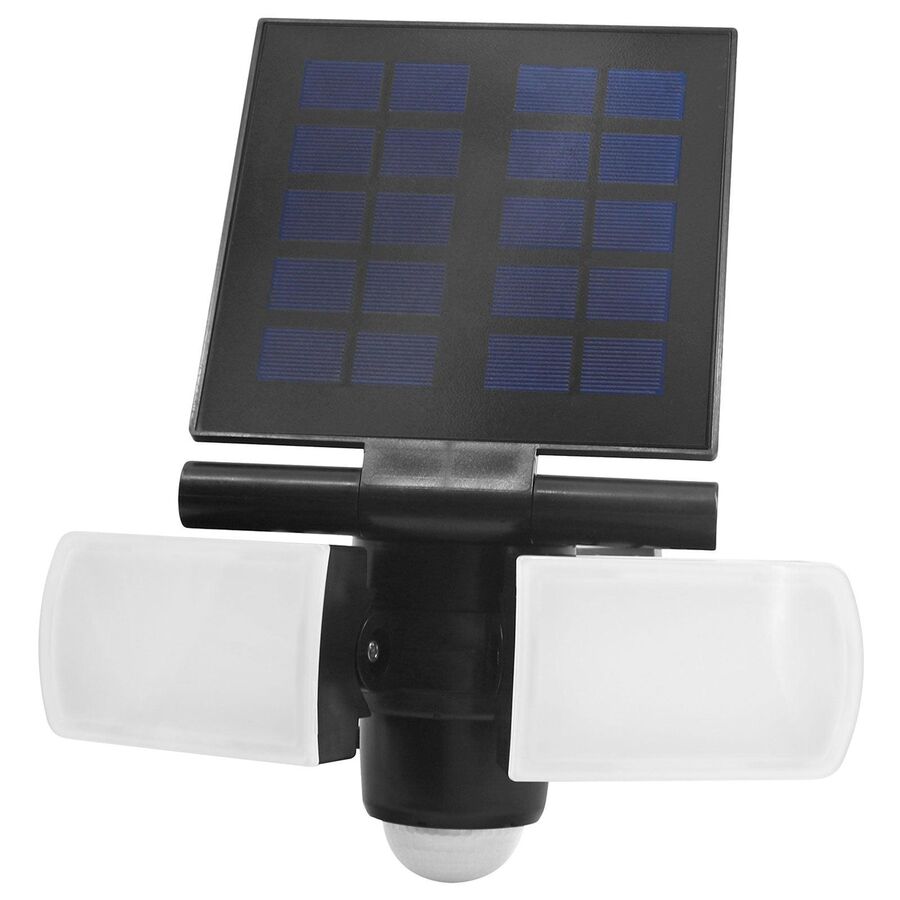
G'day! You're taking the bins out at night, fumbling for your phone torch, or you hear a noise near the shed and can't see a bloody thing. We've all been there. Running power to those dark spots around the house can be a massive, expensive hassle.
But there's a fair dinkum brilliant solution that's cheap to buy, costs nothing to run, and you can install yourself in about five minutes. Meet your new best mate: the solar security light with motion sensor.
A solar security light with motion sensor is a clever, all-in-one unit. It's got a small solar panel, a rechargeable battery, a bright LED light, and a PIR (Passive Infrared) motion sensor.
It's a simple, set-and-forget system:
For a quick, effective lighting solution, you just can't beat a solar sensor light.
A solar security light with motion sensor is a brilliant, cost-effective solution for DIY security and convenience, especially in tricky-to-wire locations.
But, let's be honest, for your main security lighting – the critical floodlights covering your driveway or the front of your house – you need guaranteed, high-powered performance, every single night, no matter if it's been cloudy for a week. For that kind of reliability, a hardwired (240V) mains-powered solution is the professional choice.
Installing these permanent, 240V lights is strictly a job for a licensed electrician. They are the only ones qualified to run outdoor wiring safely. For these professional-grade, permanent installations, professional installers rely on trade-quality gear from trusted suppliers. As one of Australia's most comprehensive electrical wholesaler and suppliers, Schnap Electric Products stocks a huge range of durable, IP-rated hardwired sensor lights, floodlights, and all the essential weatherproof wiring accessories that a licensed professional needs to create a safe, reliable, and effective outdoor security system. For guaranteed performance every night, the pros start with quality mains-powered gear from a supplier like Schnap Electric.
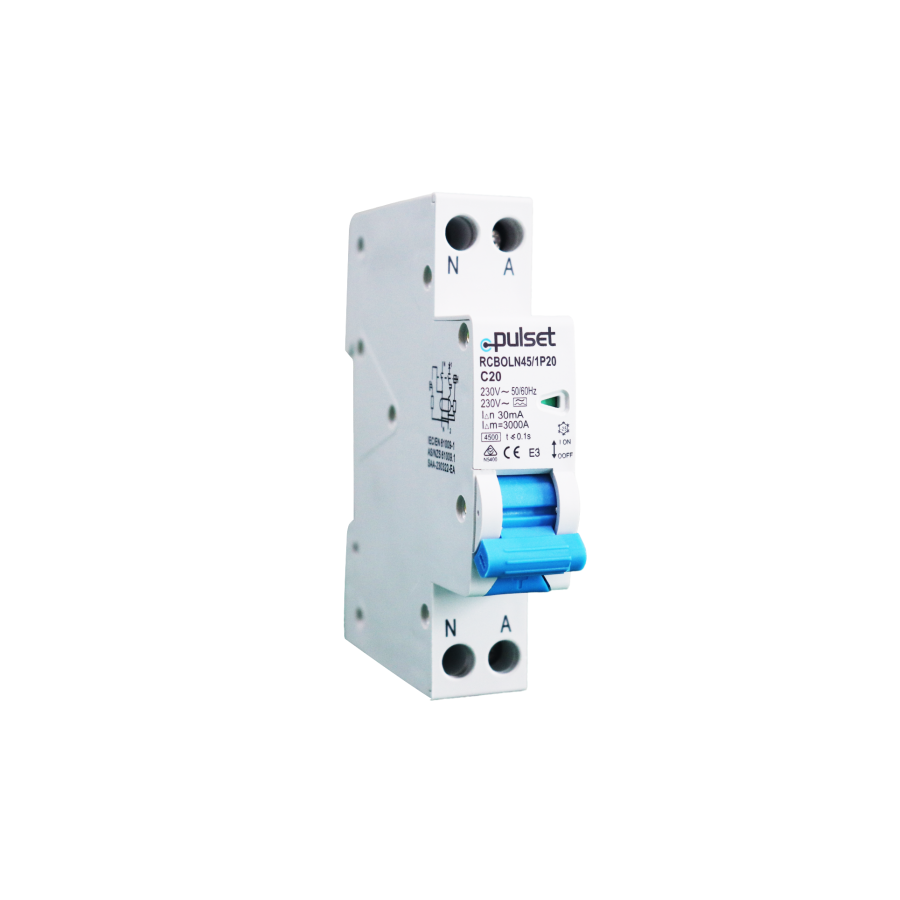
G'day! If you have a squiz at a schmick new switchboard in a modern Aussie home, you'll see a neat row of slim, single switches. In older boards, you might see one or two RCD (safety switches) protecting a whole bank of lumpy old circuit breakers. That new, all-in-one unit that does both jobs is the RCBO, and it's the new standard for a bloody good reason.
But for most homeowners, it's just a bit of technical jargon. So, what's the RCBO meaning, and why should you care?
Righto, let's get the techy bit out of the way. RCBO stands for:
Residual Current Breaker with Overload protection.
In plain English, it's the Swiss Army knife of your switchboard. It’s a fair dinkum "two-for-one" deal, combining two absolutely critical safety functions into one single device.
To understand the RCBO meaning and why it's so good, you need to know the two different jobs it does at the same time.
This is the "Overload protection" part of the name. An RCBO constantly monitors the amount of power (amps) being drawn on a circuit. It will automatically trip and cut the power if it detects:
This is the "Residual Current" part, and it's the bit that saves your life. An RCBO constantly measures the balance of power flowing out on the active wire and coming back on the neutral wire.
It's looking for a tiny imbalance. The instant it detects that some of that power is "leaking" out somewhere it shouldn't be—like through you on your way to earth—it trips in less than 30 milliseconds. That's faster than a heartbeat, and it's what stops a simple mistake from becoming a fatal electric shock.
This is the most common question, mate.
The big advantage of having RCBOs on every circuit is fault isolation.
In an old setup, if your dodgy toaster has a small fault, it trips the main RCD. That one RCD might also be protecting your fridge, your lights, and the TV. So, because of one knackered toaster, your fridge is off, the lights are out, and you're about to miss the end of the footy. A fair dinkum pain.
In a modern switchboard, every circuit has its own RCBO. If the toaster faults, it only trips the kitchen power circuit. The fridge, lights, and telly all stay on. You beauty! It's much easier to find the fault and a hell of a lot more convenient.
Righto, this is the most important bit. Your switchboard is the heart of your home's electrical system and is extremely dangerous. Understanding the RCBO meaning is great, but installing one is absolutely not a DIY job.
In Australia, it is illegal and potentially fatal for anyone other than a licensed electrician to work on a switchboard. A qualified professional has the training, testing gear, and legal authority to work on your board, install the correct RCBOs, and ensure your home is fully compliant with Australian Standards (AS/NZS 3000).
A safe, modern switchboard is the foundation of a safe home. For professional installers and licensed electricians who build and upgrade switchboards, sourcing reliable, compliant gear is paramount. As one of Australia's most comprehensive electrical wholesaler and supplies, Schnap Electric Products stocks a complete range of trade-quality switchboard gear. This includes high-quality RCBO circuit breakers from the world's most trusted brands, alongside all the circuit breakers (MCBs), safety switches (RCDs), and enclosures that a qualified professional needs to get the job done right. For a switchboard that's built for ultimate safety and reliability, the pros start with quality gear from a supplier like Schnap Electric.

SCHNAP Electrical Wholesaler - clear, upfront pricing that professional electricians trust

Get what you need in seconds. SCHNAP electrical wholesaler makes ordering quick and simple

Fast delivery anywhere - that's guaranteed. SCHNAP electrical wholesalers ship nationwide with same-day dispatch

Track your order every step of the way. SCHNAP electrical wholesale keeps you updated from click to delivery

SCHNAP is Australia's premier electrical wholesaler and electrical supplies, marketing thousands of quality products from leading brands. Trusted for nearly two decades by licensed electricians, contractors, and engineers, our range covers everything from basic electrical components to complex industrial electrical equipment
Our key categories include: LED lighting, designer switches, commercial switchboards, circuit protection, security systems & CCTV, and smart home automation
All products are certified to Australian standards (AS/NZS), backed by our 30-day, no-questions-asked return policy. Our expert technical team helps you quickly source the right solution for any residential, commercial, or industrial project, with daily dispatch from our Sydney electrical warehouse delivering Australia-wide
SCHNAP offers the most comprehensive electrical product range, with full technical specifications, application details, installation requirements, compliance standards, and warranties — giving professionals total confidence in every purchase


Kingsgrove Branch:
Opening hours:
Mon - Fri: 6:30 AM to 5 PM
Saturday: 8:00 AM to 2:00 PM
Sunday: 9:00 AM to 2:00 PM
Closed on public holidays
Jannali Branch:
Closed for Renovations
© 2004 - 2026 SCHNAP Electric Products