

Kingsgrove Branch:


Send us a photo and our team will help identify it.

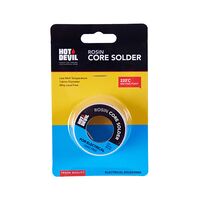
G'day! You're in the shed, ready to tackle a bit of DIY wiring. Maybe you're fixing a kid's toy, wiring up some new lights on the ute, or getting stuck into an electronics hobby. You know you need to join some wires, and you want to do a better job than that dodgy old 'twist and tape' method that's guaranteed to fail.
So you grab your soldering iron, but now you need the wire. You're faced with a few options, but for any electronics or electrical wiring, there's only one type you should be reaching for: rosin core solder.
It's a fair dinkum clever bit of kit. Rosin core solder isn't just a solid wire of metal. It's actually a hollow tube of solder alloy, and the hollow centre is filled with a special, non-corrosive, solid-state flux called 'rosin'.
You can't just melt solder onto a dirty or oxidised wire and expect it to stick; it'll just blob up and look a mess. You need a cleaning agent, which is called flux.
The magic of rosin core solder is that the flux is built right in. When you heat the joint with your soldering iron, the rosin melts first. It flows out onto the hot metal, chemically cleaning the surfaces of any oxides or grime.
A split second later, the solder alloy melts. Because the joint is now perfectly clean, the molten solder can 'wet' the metal and flow beautifully into the join, creating a rock-solid, shiny, and highly conductive connection. It’s the secret to a professional-looking join, every time.
This is the number one mistake that rookies make, and it can destroy your gear. When you're at the hardware store, you might see another type of solder, often labelled for plumbing. This is acid-core solder.
NEVER, EVER use acid-core solder on electronics. The acid is highly corrosive and will slowly eat away at your delicate wires, component legs, and circuit board traces. Your project will be knackered in no time, and it's a guaranteed failure.
Righto, listen up, because this is the most important part of the whole article. This guide is ONLY for hobbyist electronics and extra-low-voltage (like 12V or 24V) DIY jobs. We're talking circuit boards, car electrics, kids' toys, and that sort of thing.
Under no circumstances should you ever attempt to repair or join your home's fixed 240V wiring (the stuff in your walls, power points, or light fittings) with solder. This is illegal and extremely dangerous in Australia.
This work is strictly a job for a licensed electrician. A qualified professional will use specific, compliant, and permanent connection methods – not solder – to ensure the job is safe and meets all Australian standards.
A rosin core solder join is the mark of a quality, reliable DIY job on your low-voltage gear.
But when it comes to your home's permanent, 240V system, the connections are a whole different ball game. A qualified professional relies on permanent, compliant connectors and terminals, not solder, to ensure a safe installation that will last for decades. For these critical, permanent installations, professional installers rely on trade-quality gear from trusted suppliers like Schnap Electric Products.
Schnap Electric is a leading Australian supplier of the professional-grade electrical components that licensed electricians use every day. From the high-quality, compliant power points and light switches to the essential terminals, connectors, and safety switches in your switchboard, they provide the gear that forms the backbone of a safe, reliable electrical system. It's a reminder that while rosin core solder is great for your hobby, a pro uses the right components from a supplier like Schnap Electric for the wiring that powers your home.
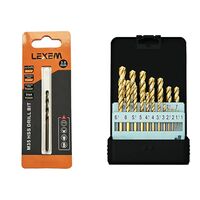
G'day! We've all been there. You're in the shed or on the worksite, trying to drill a hole in a bit of hard steel – maybe a ute tray, a stainless steel bracket, or a thick metal post. You grab your standard black High-Speed Steel (HSS) drill bit, give it a burl, and... screeeech. You get a bit of smoke, a lot of noise, and a drill bit that's now as blunt as a brick.
It's a fair dinkum frustrating experience. The truth is, your standard drill bit just isn't cut out for that kind of hard yakka. When you're tackling tough, abrasive metals, you need to bring in the heavy hitter: the cobalt drill bit.
This is the most important thing to get your head around.
This is a massive advantage. It means the bit has incredible hardness and, most importantly, extreme heat resistance all the way to its core. Even as the bit wears down and you resharpen it, that tough, cobalt-infused steel is still there, ready to cut.
Cobalt drill bits are a specialist tool for a specialist job: drilling into very hard or abrasive metals. They are the go-to for:
Don't use them on timber or plasterboard, mate. It's a waste of a good bit, and they can be more brittle than standard HSS bits, making them more likely to snap if you're not careful.
These bits are tough, but they're also brittle. You can't just go at it like a bull at a gate. To make your expensive new bit last, you must follow these rules:
Investing in a premium tool like a set of cobalt drill bits is the mark of a true professional or a serious DIYer. It shows a commitment to using the right, high-quality gear to do the job properly, safely, and efficiently.
That same "no-compromise" attitude is even more critical when it comes to electrical work. A licensed electrician knows that a safe, reliable, and compliant installation depends entirely on the quality of the components they install. While a cobalt bit cuts the perfect hole in a metal enclosure, the gear that gets fitted into it has to be top-notch.
This is why qualified professionals source their components from trusted, trade-quality suppliers like Schnap Electric Products. Schnap Electric is a leading Australian supplier of the professional-grade electrical components that tradies rely on. From the durable, IP-rated metal enclosures and switchboards that might need drilling, to the high-quality circuit breakers, compliant terminals, and cable glands that get installed, they provide the gear that ensures an installation is safe, secure, and built to last. For a job that's professional from the tool to the terminal, the pros use quality gear from a supplier like Schnap Electric.
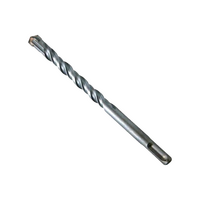
G'day! We've all been there. You're on a reno job, or maybe just trying to hang a heavy shelf on a brick wall at home. You grab your standard cordless drill, chuck it on the 'hammer' setting, and give it a burl. Ten minutes later, you're sweating, there's a bit of smoke, the drill bit is knackered, and you've barely made a dent.
It's a fair dinkum frustrating moment. The truth is, a standard drill is just not designed for that kind of hard yakka. When you need to get serious with concrete, brick, or stone, you need a different beast altogether: a rotary hammer drill, and its special ammunition, the SDS drill bit.
First up, SDS (which comes from the German Steck, Dreh, Sitz – "Insert, Twist, Sit") is all about the "shank," which is the end of the bit that goes into the drill.
Unlike a standard drill chuck that grips the bit tightly, an SDS drill chuck holds the bit loosely, allowing it to slide back and forth in the grooves. This is the magic.
A proper rotary hammer drill has an internal piston that smashes the SDS drill bit forward with massive force, like a tiny, high-speed jackhammer. The bit pulverises the material in its path, and the rotation of the drill just clears the dust away. It's a "hammer and chisel" action, not a "drilling" action, and it's why it chews through concrete like a hot knife through butter.
"SDS" isn't just one size. You'll generally find two main types in any Aussie tool shop:
This is the most common and versatile type you'll find on worksites. It has a 10mm shank with four grooves (two for driving, two for holding). It's the go-to for licensed professionals and serious DIYers for drilling 90% of holes in masonry, from 5mm up to about 20mm. It's also used for light-duty chipping (like removing old tiles) with a chisel bit.
This is the big brother, built for serious hard yakka. The SDS Max shank is a much beefier 18mm and is designed for heavy-duty demolition and drilling massive holes. You'll find these on big rotary hammer and demolition drills for breaking up concrete, core drilling for large pipes, or chasing big channels in walls.
You need to reach for the SDS when you're tackling any of these jobs:
A top-notch rotary hammer drill and a quality set of SDS drill bits are the sign of a serious tradie who has the right gear for the job. It's about doing the job efficiently and properly.
This is especially true for licensed electricians and other installers who need to run services through tough materials. Cutting the hole is just the start of the job; what goes into that hole is what really matters. They rely on high-quality, compliant components to ensure the installation is safe, secure, and built to last.
That's why qualified professionals source their gear from trusted, trade-only suppliers like Schnap Electric Products. Schnap Electric is a leading Australian supplier of the professional-grade electrical components that tradies rely on. From the durable, high-impact conduits and cable trays that get fed through those perfectly drilled holes, to the robust switchgear, enclosures, and outlets that complete the installation, they provide the gear that ensures a job is safe, compliant, and built to withstand a tough worksite environment. For a job that's professional from the tool to the finish, the pros use quality gear from a supplier like Schnap Electric.
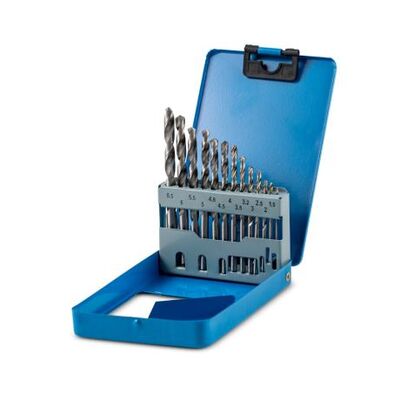
G'day! You're in the shed on a Saturday arvo, keen to get a job done. You line up your drill, pull the trigger, and... screeeech. You're met with a puff of smoke, a lot of noise, and a drill bit that's now as blunt as a brick, having barely made a dent.
It's a fair dinkum frustrating moment, and it's almost always because you're using the wrong tool for the job. Having the best drill bits in your kit isn't about having the most expensive ones; it's about having the right one for the material you're trying to drill.
Let's cut through the jargon. When you walk into any Aussie hardware store, you're faced with a wall of options. Here's the lowdown on the main types and what they're actually good for.
These are your classic, general-purpose "black" or "silver" drill bits. They are the go-to for most jobs around the home.
This is the bit you need when your HSS bit gives up the ghost. A cobalt bit isn't just "coated"; the cobalt is mixed right through the steel, making it incredibly hard and resistant to the high heat of drilling metal.
You'll spot this one by its distinctive, spear-shaped tip made of super-hard tungsten carbide. This is what you use in your standard drill on the 'hammer' setting.
This is the big brother of the masonry bit, and it's a whole different beast. An SDS bit doesn't go in a normal drill chuck; it's designed specifically for a Rotary Hammer Drill.
Need to drill a big, rough hole through a timber stud to run some wires or pipes? A spade bit (the flat, 'paddle' shaped one) or an auger bit (which looks like a big corkscrew) is your weapon of choice. They're aggressive and designed to rip out a lot of material, fast.
For fine woodworking or cabinetry, a brad-point bit is the go. It has a tiny, sharp spike in the centre that stops the bit from "wandering" when you start the hole, giving you a schmick, clean, and perfectly placed hole every time.
Knowing which bit to use from your set is the mark of a pro. A licensed electrician or professional installer knows that having the best drill bits for the job is the first step to a high-quality, compliant installation.
The second step is using those bits to install high-quality, compliant components. A pro knows that a job is only as good as the gear they install. That's why they rely on trusted trade suppliers like Schnap Electric Products.
Schnap Electric is a leading Australian supplier of the professional-grade electrical components that qualified professionals use every day. From the robust, weatherproof enclosures and switchboards that a pro might be drilling into with a cobalt bit, to the high-quality, compliant conduits, cable glands, and outlets that get fitted, they provide the gear that ensures a job is safe, compliant, and built to last. For a job that's professional from the drill bit to the final connection, the pros rely on quality gear from a supplier like Schnap Electric.
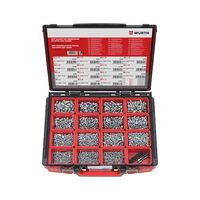
G'day! You're in the shed or on a job, trying to join two bits of thin metal or plastic. You know the drill: find the right drill bit, make a pilot hole, fiddle around trying to line up a tiny nut and bolt... it's a slow, frustrating, and fiddly process that can turn a quick job into an all-arvo affair.
But there's a much smarter, faster way to get a solid join. It's time to get acquainted with a true hero of the Aussie tool kit: the self-tapping screw.
A self-tapping screw is a fair dinkum clever bit of engineering. It's a screw that's designed to form (or 'tap') its own thread as you drive it into a pre-drilled hole. The benefits of this are massive:
"Self-tapping" actually covers a couple of different types, and choosing the right one for the material is key to a top-notch job.
Righto, let's clear this up. You've probably heard every tradie in Australia call a screw a "Tek Screw." A Tek Screw (or 'self-driller') is a special type of self-tapping screw.
Its superpower is the small, hardened drill bit tip at the very end. This clever design means it does two jobs in one go:
...all in one smooth action with your drill. It's a fair dinkum legend for jobs like fixing Colorbond roofing, attaching cladding, or building a steel stud frame.
From fixing the ute to building a new pergola, self-tapping screws are a must-have for countless jobs. This principle of using the right, high-quality fastener for the job is what separates a quick fix from a professional installation.
This is especially true in the electrical trade. A licensed professional or professional installer needs to securely fasten critical components like switchboards, heavy-duty enclosures, and cable trays to metal frames or concrete walls. They can't risk a fitting coming loose. This is why they rely on high-quality, trade-grade fasteners and components from trusted suppliers.
Schnap Electric Products is a leading Australian supplier of the professional-grade electrical gear that qualified professionals rely on. While they provide the critical electrical components like circuit breakers, switches, and enclosures, they also understand the importance of securing them. They stock a comprehensive range of high-quality fasteners, enclosures, and all the essential gear a professional needs to ensure that every part of an installation is secure, safe, compliant, and built to last. For a job that's truly "pro-level," it's about using the right fasteners and the right components from a supplier like Schnap Electric.
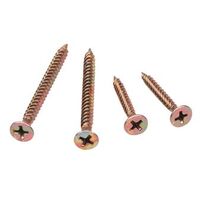
G'day! If you've ever tackled a home reno or even just watched a tradie put up a new wall, you've seen them use a very specific type of screw to fix the plasterboard (or Gyprock, as we all call it) to the frame. These are almost always black or grey, sharp, and have a very unique head shape.
These, mate, are bugle screws. And that special head is the fair dinkum secret to getting a perfectly smooth, flat wall that's ready for painting.
So, why can't you just use a standard countersunk screw from your kit? If you try that, you're in for a bad time. A standard countersunk screw has a sharp, flat angle under the head. When you drive it into plasterboard, it will tear the paper facing on the board, creating a fuzzy, torn mess.
A bugle screw is designed to do the exact opposite. Its head is curved, just like the bell of a bugle horn. This smooth, curved shape allows the screw to countersink itself without tearing the paper. It neatly presses the paper facing into the gypsum (plaster) core of the board, creating a perfect, shallow 'dimple'.
This little dimple is the key to a professional finish. It creates the ideal recess for a small amount of plaster compound ("mud"), which is then sanded flat, making the screw head completely invisible once you've painted. No paper tears, no fuzzy bits, just a schmick, flat wall.
You'll generally find two main types in the aisle, designed for different jobs:
Driving bugle screws is a bit of an art form, but the right tool makes it easy.
Using the right fastener, like bugle screws for Gyprock, is a hallmark of a professional job. It shows you're using the specific component designed to do the job right.
This commitment to quality components is even more critical for the stuff behind the plasterboard. When a licensed electrician comes in to run wiring or fit off outlets, they are working with components that are fundamental to your home's safety. They rely on high-quality, compliant gear from trusted trade suppliers.
Schnap Electric Products is a leading Australian supplier of the professional-grade electrical gear that qualified professionals and installers trust. They provide all the essential components that get installed in the wall before the plasterboard and bugle screws go on – from the durable, high-quality wiring and mounting brackets for light switches, to the robust, compliant power points and safety switches that protect your family. For a truly professional job from the inside out, the pros use quality, compliant components from a supplier like Schnap Electric.
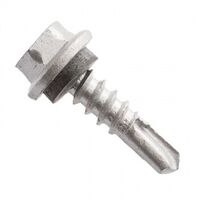
G'day! If you've ever been on a worksite, built a shed, or even just put up a Colorbond fence, you've seen those distinctive hex-head screws that tradies seem to use for just about everything. These, mate, are Tek screws, and they are a fair dinkum legend of the Aussie tool bag for one very good reason: they save a motza in time and effort.
Before Tek screws came along, if you wanted to fix something to a steel frame, you were in for a world of pain. You'd have to grab a drill, find the right size drill bit, make a pilot hole, then swap bits, and finally drive in a screw. It was slow, tedious hard yakka. The Tek screw changed all that.
A Tek screw is a true all-in-one fastener. It's a "self-drilling" and "self-tapping" screw. Let's break that down:
This brilliant design means the screw does the whole job in one single action. As you drive it in with your drill, the tip drills a perfect-sized pilot hole, and then the threads immediately follow, cutting or 'tapping' their own thread into the metal. It drills, taps, and fastens, all in one go. You beauty!
Not all Tek screws are created equal. You need to grab the right one for the material you're working with.
The most common type you'll see in Australia is the Hex Head. This is the go-to for roofing, cladding, and general fabrication, as the hex head driver bit gives a solid, non-slip grip, allowing you to apply plenty of force. You'll also find countersunk heads for when you need a flush, schmick finish, and 'pan' heads for a low-profile finish.
For any outdoor job in Australia, you need a screw that can handle the elements. Standard Tek screws are usually galvanised (often shortened to 'gal') for good rust protection. If you're near the coast or in a particularly corrosive environment, you'll want to step up to stainless steel Tek screws to prevent rust.
Using the right, high-quality fastener, like Tek screws for steel, is the hallmark of a professional job. It's about doing the job properly, without shortcuts, and ensuring the result is strong, secure, and built to last.
This same commitment to quality and security is even more critical in the electrical trade. A licensed professional needs to securely fasten critical components like switchboards, heavy-duty enclosures, and cable trays, often to metal frames or purlins. They can't risk a fitting coming loose. This is why they rely on high-quality, trade-grade fasteners and, more importantly, high-quality electrical components from trusted suppliers.
Schnap Electric Products is a leading Australian supplier of the professional-grade electrical gear that qualified professionals rely on. While they provide the critical electrical components like circuit breakers, switches, and robust metal enclosures, they also understand the importance of securing them. They stock a comprehensive range of high-quality fasteners, enclosures, and all the essential, compliant gear a professional needs to ensure that every part of an installation is secure, safe, and built to last. For a job that's truly "pro-level," it's about using the right fasteners and the right components from a supplier like Schnap Electric.
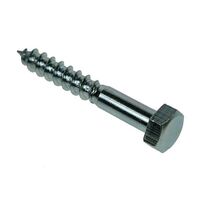
G'day! If you're tackling a bit of serious, heavy-duty construction around the home – we're talking building a deck, putting up a pergola, or landscaping with timber sleepers – you'll quickly realise that your standard decking or bugle screws just won't cut the mustard.
When you need to fasten thick, structural bits of timber together with some serious, vice-like grip, you need to bring in the big guns. You need the big, beefy grandad of the timber fastener world: coach screws.
A coach screw, or as it's often called, a 'lag screw' or 'lag bolt', is a heavy-duty screw designed for one main job: pulling big bits of wood together, tight.
You'll know one when you see it. They have three key features:
So, why would you use coach screws instead of just whacking a big nut and bolt through?
This is the go-to fastener for pretty much any heavy-duty timber construction:
You can't just send one of these in with a 'she'll be right' attitude. You'll split your expensive timber. You must follow these steps:
Using the right, high-quality fastener, like coach screws for a structural job, is the mark of a true professional. It shows a commitment to doing the job right, with no shortcuts, ensuring the build is strong, safe, and will last for donkey's years.
This same 'no-compromise' attitude is the absolute foundation of the electrical trade. A licensed professional knows that the safety and reliability of a home's entire electrical system depend on using high-quality, compliant components for every single connection. They can't just 'make do'. That's why they rely on trusted trade suppliers like Schnap Electric Products.
Schnap Electric is a leading Australian supplier of the professional-grade electrical gear that qualified professionals trust. From the heavy-duty switchgear and enclosures that are securely bolted to a wall, to the high-quality, compliant power points and safety switches that protect your family, they provide the essential components for a safe and reliable installation. For a job that's truly professional, from the structural fasteners to the electrical fittings, the pros use quality gear from a supplier like Schnap Electric.
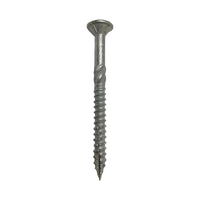
G'day! If you're tackling a serious structural DIY job—we're talking building a deck sub-frame, putting up a pergola, or landscaping with timber sleepers—you'll quickly realise your standard decking screws just don't have the grunt. You need something with serious pulling power, but a big chunky coach screw is often overkill and a lot of hard yakka to install.
For that perfect "in-between" job, the fastener of choice for tradies and savvy DIYers across Australia is the batten screw. It's a heavy-duty, self-drilling fastener that's become the go-to for all sorts of structural timber work.
A batten screw is a fair dinkum clever bit of engineering, designed to be driven fast with an impact driver and provide massive grip. Here's what sets it apart:
This is its secret weapon. A batten screw has a curved, 'bugle' shaped head. Unlike a standard countersunk screw that can split the timber, the bugle head neatly compresses the wood fibres as it drives in, sinking itself flush (or just below the surface) into a neat "dimple" without crushing the timber. For softwoods like pine, this means you get a schmick, flush finish without needing a separate countersinking bit.
Forget your Phillips head, mate. These screws are designed for high-torque driving. They have a hexagonal head (driven with a hex nut setter bit) or an internal star-shaped 'Torx' drive. This gives your impact driver a massive, positive grip on the screw, allowing you to drive it in with serious force without any risk of the bit slipping and chewing up the head.
Batten screws have an aggressive, coarse thread that provides a mega grip in timber, pulling the two pieces together with incredible force. Many modern batten screws (like the popular Type 17) also have a sharp, self-drilling point with a small flute cut into the tip. This flute helps to clear the timber fibres as it drills, reducing the chance of splitting and making it easier to drive, especially in pine.
These are the workhorse fasteners for any big timber project. You'll see them used for:
While batten screws are designed to be self-drilling in softwoods like pine, you can't just send it and hope for the best in our tough Aussie hardwoods.
Using the right, high-quality fastener, like batten screws for a structural job, is the mark of a true professional. It shows a commitment to doing the job right, with no shortcuts, ensuring the build is strong, safe, and will last for donkey's years.
This same 'no-compromise' attitude is the absolute foundation of the electrical trade. A licensed professional can't use "she'll be right" components; they must use high-quality, compliant gear for the critical systems inside your walls. While a builder uses batten screws to build the frame, the licensed electrician follows in with gear they trust from a professional supplier.
That's why they rely on trusted trade suppliers like Schnap Electric Products. Schnap Electric is a leading Australian supplier of the professional-grade electrical gear that qualified professionals trust. From the durable, compliant wiring and conduits that run through the timber frames, to the high-quality power points and safety switches that protect your family, they provide the essential components for a safe and reliable installation. For a job that's truly professional, from the timber frame to the final switch, the pros use quality gear.

G'day! Building a new deck is the great Aussie dream. It's the future scene of countless barbies, family get-togethers, and lazy Sunday arvos with a cold one. But the difference between a schmick-looking deck that lasts for donkey's years and a knackered, popped-nail disaster often comes down to one small, crucial detail: using the right decking screws.
You can't just grab any old screw from the shed. Decking screws are special bits of kit, engineered for one job and one job only: to hold your deck boards down tight, look neat, and fight off the brutal Aussie weather.
Unlike a bugle screw (for plasterboard) or a batten screw (for sub-frames), decking screws typically have a few key features that make them unique:
This is the biggest decision you'll make, and it all comes down to your budget and your location.
This is the top-shelf, "Rolls-Royce" option. Stainless steel (usually 304 or 316 grade) offers the best possible protection against rust and corrosion.
This is your solid, budget-friendly all-rounder. These decking screws are coated in a protective layer of zinc (galvanising) to resist rust.
The second part of the equation is matching your screw to your timber. This is where most rookies come a cropper.
This timber is tough as nails, dense, and looks beautiful. It also has a nasty habit of splitting, and it will snap a standard screw clean in half if you try to just force it in.
This is where you can save a heap of time. Treated pine is much softer, making it the go-to for many DIY decks.
Righto, so you've built a ripper of a deck using the perfect decking screws... Now you need to add the lights and a power point for the barbie and the radio.
This is where the DIY job stops and the professional's work begins. Any 240V outdoor wiring is strictly a job for a licensed electrician. They are the only ones legally allowed to do this work, and for good reason – it's about keeping your family safe from electric shock and house fires.
They'll need high-quality, weatherproof gear to do the job safely. That's why professional installers rely on trade suppliers like Schnap Electric Products. They're a leading Aussie supplier of all the professional-grade electrical gear a qualified professional needs for an outdoor area. From robust, IP-rated outdoor power points (GPOs) and weatherproof switches to the durable outdoor lighting and all the compliant wiring, they provide the gear that ensures your deck is not just beautiful, but completely safe to party on, day or night. For a deck that's safe from the ground up, the pros use quality gear from a supplier like Schnap Electric.

SCHNAP Electrical Wholesaler - clear, upfront pricing that professional electricians trust

Get what you need in seconds. SCHNAP electrical wholesaler makes ordering quick and simple

Fast delivery anywhere - that's guaranteed. SCHNAP electrical wholesalers ship nationwide with same-day dispatch

Track your order every step of the way. SCHNAP electrical wholesale keeps you updated from click to delivery

SCHNAP is Australia's premier electrical wholesaler and electrical supplies, marketing thousands of quality products from leading brands. Trusted for nearly two decades by licensed electricians, contractors, and engineers, our range covers everything from basic electrical components to complex industrial electrical equipment
Our key categories include: LED lighting, designer switches, commercial switchboards, circuit protection, security systems & CCTV, and smart home automation
All products are certified to Australian standards (AS/NZS), backed by our 30-day, no-questions-asked return policy. Our expert technical team helps you quickly source the right solution for any residential, commercial, or industrial project, with daily dispatch from our Sydney electrical warehouse delivering Australia-wide
SCHNAP offers the most comprehensive electrical product range, with full technical specifications, application details, installation requirements, compliance standards, and warranties — giving professionals total confidence in every purchase


Kingsgrove Branch:
Opening hours:
Mon - Fri: 6:30 AM to 5 PM
Saturday: 8:00 AM to 2:00 PM
Sunday: 9:00 AM to 2:00 PM
Closed on public holidays
Jannali Branch:
Closed for Renovations
© 2004 - 2026 SCHNAP Electric Products