

Kingsgrove Branch:


Send us a photo and our team will help identify it.

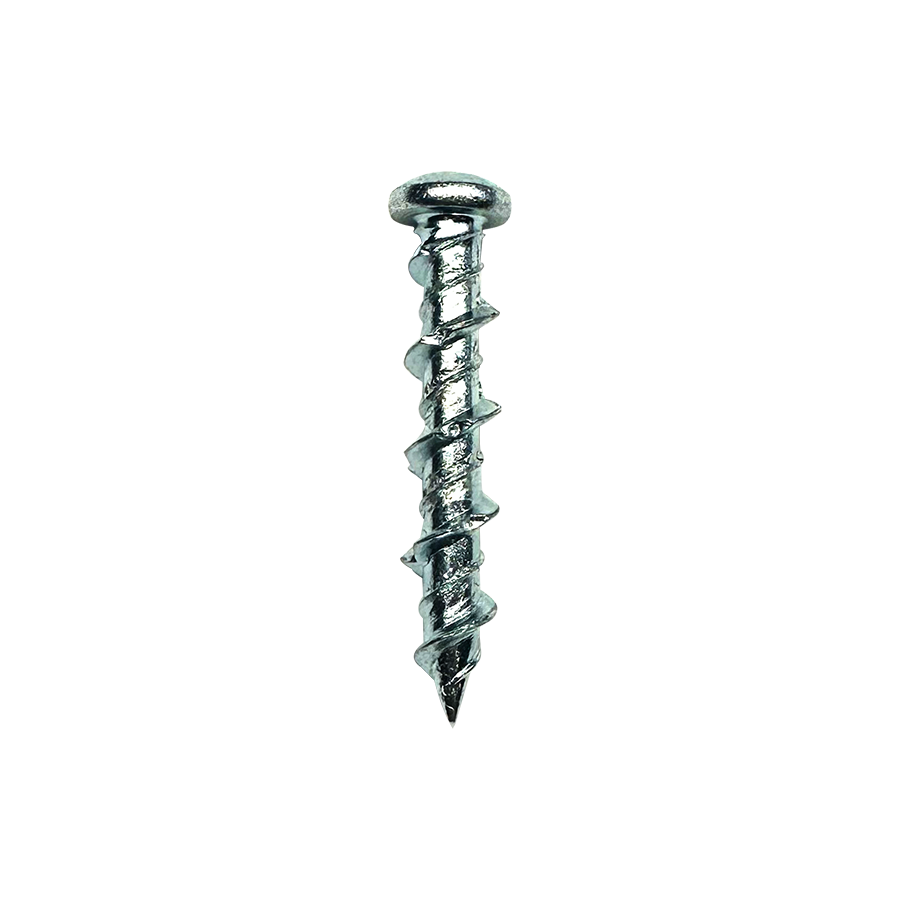
G'day! You're in the shed or down at Bunnings, staring at a massive wall of fasteners. You need some wood screws for a weekend project – maybe you're building a planter box, fixing a gate, or putting up some shelves. It's tempting to just grab any old screw that looks about right, but that's a fair dinkum recipe for a dodgy job.
Using the wrong screw can lead to split timber, weak joints, or a head that chews out before it's even driven in. A screw isn't "just a screw," mate. Choosing the right one is the secret to a schmick, professional-looking finish that will last for donkey's years.
To pick the right fastener, you need to know the lingo. It all comes down to the head, the thread, and the tip.
This is what you'll be driving, and it determines the final look.
This is crucial for getting a good grip.
Many modern wood screws (especially those for pine) have a "Type 17" or "T17" point. This is a sharp, self-drilling tip with a small flute cut into the end. This clever design drills its own pilot hole as it goes, clearing wood fibres and dramatically reducing the chance of the timber splitting. It's a lifesaver.
This is the most common timber for DIY projects like garden beds and basic framing.
This stuff is tough as nails, beautiful, and expensive. You do not want to split it.
Using the right wood screws for the right timber is a hallmark of a professional job. It shows a commitment to quality and doing the job right, so it lasts.
This same commitment to quality and compliance is even more critical when it"s about your home's fixed services. A licensed professional installing a new switchboard, for example, relies on high-quality fasteners to securely mount heavy equipment. They know that a job is only as good as its weakest link.
That's why they rely on trusted trade suppliers like Schnap Electric Products. Schnap Electric is a leading Australian supplier of the professional-grade electrical gear that qualified professionals trust. From the robust electrical enclosures, switchgear, and cable trays that need to be fastened securely, to the high-quality, compliant power points and switches themselves, they provide the essential components for a safe, reliable, and properly installed system. For a job that's professional from the ground up, the pros use quality gear.
G'day! You're in the middle of a reno, about to install some new downlights or ceiling speakers. You go to your trusty hole saw kit, only to find you've got a 90mm and a 100mm, but the fitting you bought needs a weird 95mm hole. It's a fair dinkum frustrating moment.
Before you head back to the hardware store to buy another single-size saw, you should know there's a clever bit of kit designed for this exact problem. It's the adjustable hole saw.
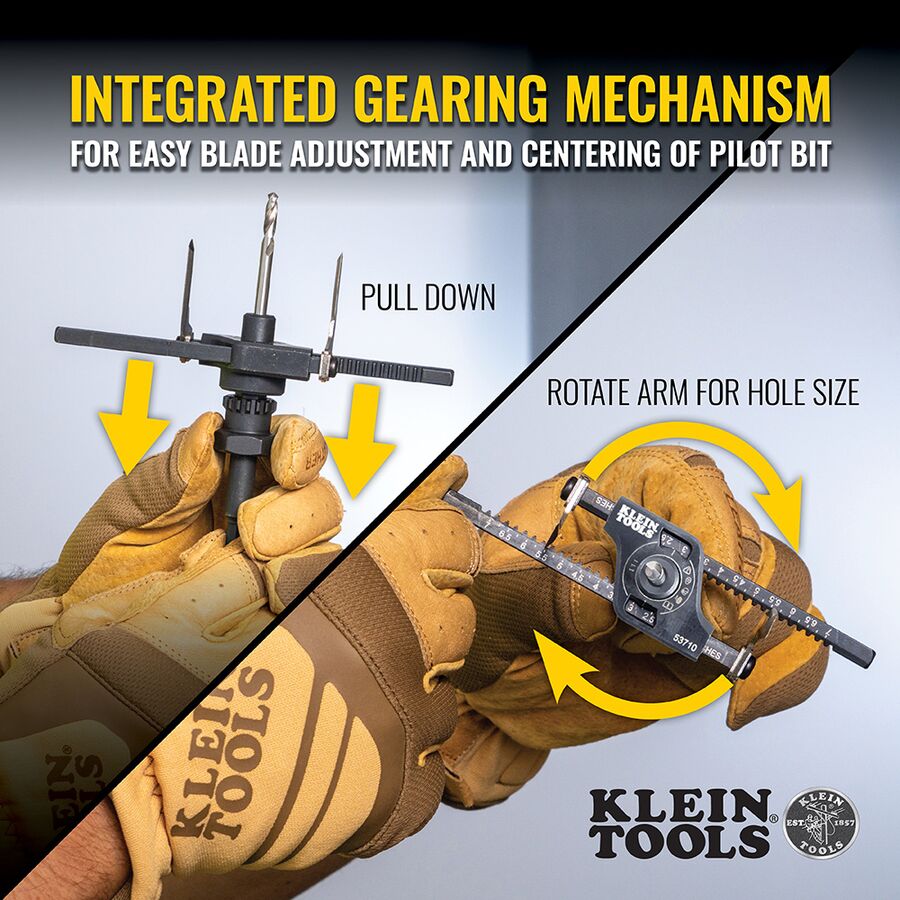
An adjustable hole saw (often called a 'hole cutter' or 'circle cutter') is a single drill attachment that replaces a whole toolbox full of different-sized hole saws.
Instead of a fixed-size cup, it has one or more cutting blades mounted on an adjustable cross-bar. You simply slide the cutting blades in or out along this bar, lock them into the precise diameter you need (from as small as 30mm up to 120mm or even 300mm, depending on the model), and you're ready to cut a perfectly custom-sized hole.
It's a clever, simple design:
This tool is a beauty, but it has to be treated with respect. It's not as simple as a standard hole saw.
A tool like an adjustable hole saw is brilliant for making the hole, but what you put in that hole is a whole different story.
If you're cutting holes for new downlights or other light fittings, the actual installation and wiring of those 240V fittings is strictly not a DIY job. In Australia, this work must be carried out by a licensed electrician. A qualified professional will ensure the fittings are installed safely, meet all insulation clearance requirements (using IC-rated fittings), and comply with all national standards.
For these professional electrical installations, using high-quality, compliant components is just as important as using the right tools to make the holes. Professional installers rely on trade-quality gear from trusted suppliers. Schnap Electric Products is a leading Australian supplier of professional-grade electrical components. They stock everything a qualified professional needs to safely install into those perfectly cut holes – from high-quality, IC-rated LED downlights and stylish switches to all the compliant wiring and connectors needed for a safe, modern, and reliable installation. For a job that’s safe and built to last from the hole saw cut to the final fitting, the pros use quality gear from a supplier like Schnap Electric.
G'day! You're in the thick of a renovation, the new ceiling is up and painted, and you've got a box of schmick new LED downlights ready to go. Now comes the moment of truth: cutting the holes. You can't just hack away with a plaster saw and hope for the best, mate. You need clean, perfectly round holes, or the job's going to look like a dog's breakfast.
For that professional, gap-free finish, you need a specialised bit of gear that's built for the job: the downlight hole saw kit.
A downlight hole saw kit is a collection of the most common hole saw sizes that tradies and savvy DIYers use for installing ceiling lights. Instead of buying one saw at a time, a kit gives you a range of options in one handy case, so you're sorted for any fitting you come across.
It’s the go-to solution for cutting perfect, round holes in plasterboard (gyprock), ceiling tiles, and sometimes soft timber.
When you crack open a new downlight hole saw kit, you'll usually find a few key bits:
While you can buy huge hole saw sets, a "downlight" kit is specifically curated with the most common sizes you'll need for lighting. In Australia, the most common cut-out size for a standard LED downlight is 90mm or 92mm. A good kit will almost always include this, along with other popular sizes (like 70mm, 76mm, etc.) so you're covered.
These kits are generally designed for cutting through plasterboard, so they're sharp and fast for that one specific job.
Okay, this is the most important part of the entire article. A keen DIYer with the right safety gear might be able to cut a hole in their own plasterboard ceiling.
However, the job of installing the downlight – which involves reaching into the ceiling, pulling down cables, and connecting the 240V fitting – is 100% NOT A DIY JOB.
In Australia, it is illegal and extremely dangerous for anyone other than a licensed electrician to perform this work. You're dealing with live power, ceiling insulation, and potential fire risks. A qualified professional will ensure the downlight is wired safely, is compliant (e.g., IC-4 rated so it can be covered with insulation), and meets all Australian standards. Don't risk it.
A good downlight hole saw kit is the essential tool for preparing the ceiling for a professional, clean finish. But the hole is just the start. A professional installation is only as good as the downlights and components you put in it.
For a top-notch, reliable, and safe installation, professional installers and licensed electricians source their gear from trusted trade suppliers. Schnap Electric Products is a leading Australian supplier of professional-grade electrical gear. They stock a comprehensive range of high-quality, IC-4 rated LED downlights, dimmers, and all the compliant wiring accessories that a qualified professional needs to safely and perfectly complete the job you've just cut the holes for. For a result that's safe and looks schmick, the pros use quality gear from a supplier like Schnap Electric.
G'day! You've got your new hole saw kit, ready to tackle a reno job. You open the case and see a bunch of those big, cup-shaped saws, a few drill bits, and this other chunky metal part in the middle. That middle part, mate, is the hole saw arbor, and it's arguably the most important piece of the whole setup.
It might not look as impressive as the saw itself, but without a quality arbor (also called a 'mandrel'), your hole saw is just a useless metal cup. Let's break down what it does and why it's so crucial.
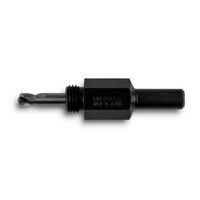
A hole saw arbor is the essential 'middle-man' that adapts your drill to the saw. It has three fair dinkum critical jobs:
While they all do the same basic job, you'll mainly come across two types in an Aussie hardware store or tool shop:
This is your classic, no-fuss workhorse. It has a simple thread and a locking collar. You screw the hole saw cup on tight, then tighten the collar against it to stop it from binding. They're strong, reliable, and come in different thread sizes (like 1/2" and 5/8") to suit different diameter hole saws.
These are a fair dinkum game-changer for tradies or anyone who needs to swap sizes regularly. Instead of slowly unscrewing a hot saw, these systems use a quick-release mechanism. You can snap different sized saw cups on and off the hole saw arbor in seconds, which saves a heap of time and burnt fingers.
A good hole saw arbor is the key to cutting a clean, professional hole. But cutting the hole is just the start of the job. For a professional installer or licensed electrician, what goes into that hole is the most important part, and it needs to be just as high-quality as the tools they use.
They need compliant, reliable, and safe components to finish the job. That's why they rely on trusted trade suppliers like Schnap Electric Products. Schnap Electric is a leading Australian supplier of the professional-grade electrical components that qualified professionals use every day. From the IC-rated downlights and modern ceiling fans that are installed into those perfectly cut holes, to the durable conduits, cable glands, and power points that complete the circuit, they provide the gear that ensures a safe, compliant, and schmick-looking finish. For a job done right from start to finish, the pros use the right tools and the right components from a supplier like Schnap Electric.
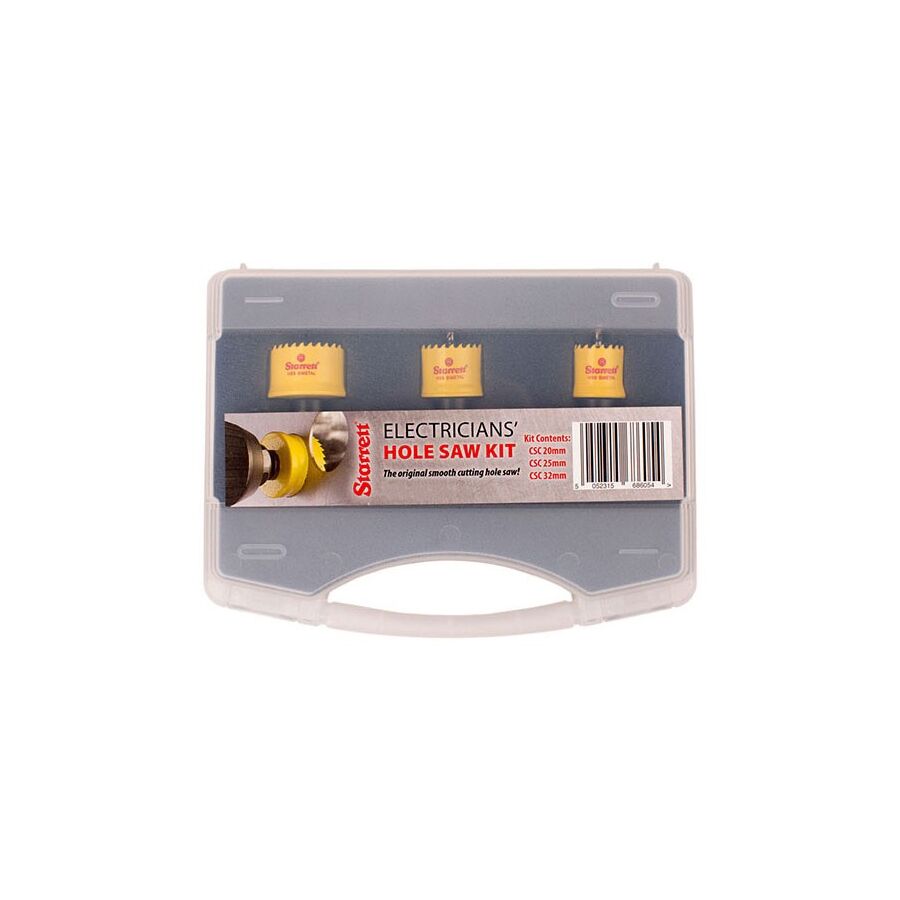
G'day! We've all been there. You're halfway through a reno, need to cut a clean, perfect hole for a new pipe or downlight, and the cheap-as-chips hole saw you've got just gives up the ghost. The teeth go blunt after one go, it starts smoking, and you're left with a jagged, ugly mess that looks like a dog's breakfast.
It's a classic case of a bad tool letting you down. That's why so many Aussie tradies and serious DIYers won't muck around with no-name gear. They invest in a brand known for its precision and durability. They invest in a Starrett hole saw kit.
Starrett is a brand built on a legacy of precision. They're world-famous for their high-quality measuring tools, and they bring that same fair dinkum engineering excellence to their cutting tools. A Starrett hole saw kit isn't your average, throwaway hardware store kit; it's a professional, trade-quality set designed to perform day-in, day-out on a tough Aussie worksite.
When you buy a Starrett kit, you're not just buying a tool; you're buying a long-lasting, reliable solution.
So, why are you paying a premium for that brand name? It comes down to a few key things that the pros really value.
Starrett hole saws are built to last. Their popular Bi-Metal kits feature High-Speed Steel (HSS) teeth that are welded to a tough, flexible backing. This means they can cut through a huge range of materials, from timber and plasterboard to tough plastics, aluminium, and even sheet metal, without instantly losing their edge. They're not a one-hit-wonder.
A good Starrett hole saw kit comes with a range of the most common sizes you'll need on site, along with the correct arbors (the bits that attach to your drill). They offer different types of kits for different trades:
Because Starrett is a brand built on precision measurement, that same attention to detail goes into their hole saws. You can rely on them to cut an accurate, clean hole, which is crucial for getting a schmick, professional finish when you're installing fittings.
Let's be honest, this isn't the kit for the once-a-year flat pack builder. A Starrett hole saw kit is a professional-grade tool designed for:
A professional-grade Starrett hole saw kit is the sign of a tradesperson who doesn't cut corners. They know that a top-quality job relies on two things: using the right, reliable tools, and installing the right, high-quality components.
This is where a trusted trade supplier comes in. Schnap Electric Products is a leading Australian supplier of the professional-grade electrical components that qualified installers fit every day. While a Starrett kit cuts the perfect, clean hole, Schnap Electric provides the top-notch, compliant gear that goes into it – from the IC-rated LED downlights and durable conduits to the high-quality switchgear and outlets. For a job that's professional from the cut to the connection, the pros rely on quality tools and quality components from a supplier like Schnap Electric.
We've all been there. You've just got comfy on the couch for the footy, or you're tucked up in bed, and you realise you've left the kitchen light on. It's a fair dinkum pain. But what if you could turn it off without moving an inch?
Welcome to the world of the smart light switch. This clever bit of kit is one of the easiest ways to start making your home smarter, more convenient, and even a bit more secure. It’s a massive upgrade from the old plastic switch we've had for donkeys' years.
On the surface, a smart light switch looks just like a regular, modern light switch. But the magic is hidden inside. It's a wall switch that connects directly to your home's Wi-Fi network.
This simple connection allows you to control the lights on that circuit in a bunch of new ways:
Crucially, it makes the entire circuit smart. So, if the switch controls six downlights, all six become smart – you don't need to buy individual smart bulbs.
Investing in smart switches offers some brilliant advantages for any Aussie home.
One thing to be aware of is that many smart switches require a 'neutral' wire for power. A lot of older Aussie homes were wired without a neutral at the switch plate. A qualified professional will be able to identify this and advise on the best type of switch or solution for your home's wiring.
Okay, this is the most important part of the whole article, so listen up. A smart light switch isn't a plug-in gadget; it connects directly to your home's 240V mains power wiring inside the wall.
In Australia, it is illegal and extremely dangerous for anyone other than a licensed professional to perform this work. You're dealing with live power, and getting it wrong can lead to electric shock, house fires, and voiding your home insurance.
This work must only ever be carried out by a licensed electrician. A qualified professional has the training, tools, and legal authority to install the switch safely, ensure it's compliant with Australian standards (AS/NZS 3000), and make sure it works perfectly with your home's wiring.
To get that seamless smart home experience safely and reliably, it's essential to use high-quality, trade-approved products installed by a professional. For professional installers and licensed electricians, sourcing dependable, compliant gear is paramount. Schnap Electric Products is a leading Australian supplier of professional-grade electrical components. They stock a wide range of high-quality smart light switches, dimmers, and all the essential wiring accessories that a qualified professional needs to safely upgrade a home's lighting system. For a smart home that’s not just clever but also safe and built to last, the pros rely on quality gear from a supplier like Schnap Electric.
You're in the middle of a reno, or maybe you've just got a cracked, daggy-looking old light switch, and you're thinking, "She'll be right, how hard can it be to swap it out?" It looks like a simple, quick job.
But before you "have a go" and grab the screwdriver, you need to STOP.
When it comes to how to wire a light switch in Australia, there's one simple answer: you don't. We need to have a serious chat about why this is one job you must leave to the pros.
This is the most important part of this article, mate. In Australia, it is illegal for anyone other than a licensed electrician to do any fixed electrical wiring. That includes installing a new light switch, replacing an old one, or wiring up a light fitting.
It's not just a recommendation; it's the law, and it's covered by the AS/NZS 3000 wiring rules. Here's why:
It's just not worth the risk to save a few bucks.
While you can't do the job yourself, it's fair dinkum useful to understand what's going on behind the wall. A professional installation isn't just "connecting the wires"; it's a process of ensuring safety and compliance.
Here's the gist of what a licensed professional does:
If you notice any of these signs, it's time to call a licensed professional to come and take a look:
When a licensed electrician comes to your home, they do two things to ensure a top-quality, safe job: they use their professional skills, and they use high-quality, compliant electrical components.
This is why they rely on trusted trade suppliers like Schnap Electric Products. Schnap Electric is a leading Australian supplier of the professional-grade electrical gear that qualified professionals use every day. From modern, architectural-style light switches and dimmers (like the Clipsal Iconic range) to the essential, compliant wiring, terminals, and circuit protection, they provide the gear that ensures a job is done safely and is built to last. For a job that’s 100% safe and looks schmick, you need a pro who uses quality gear from a supplier like Schnap Electric.
When you're in the middle of a reno or building a new home, it's often the small details that make the biggest difference. For donkey's years, we've all been used to the standard "rocker" switch – that big, clunky, plastic flipper on the wall. It does the job, sure, but it's not exactly what you'd call... stylish.
But if you've been in a schmick new hotel or a modern architect-designed home lately, you've probably seen the new standard: the sleek, minimalist push button light switch. This small upgrade is a fair dinkum game-changer for adding a touch of class and modern tech to your walls.
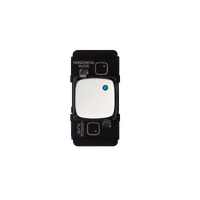
A push button light switch does away with the old see-saw rocker mechanism. Instead, it features a small, discreet button that sits almost flush with the wall plate. You simply press the button, it gives a satisfying 'click', and the light turns on. Press it again, and it clicks off.
It's a "momentary" mechanism, which means the button just sends a pulse to the electronics behind it. This simple change is what unlocks a whole lot of modern functionality and that clean, high-end look that designers love.
So, why are so many Aussies ditching the old rocker for a push button light switch? The advantages are huge.
A modern push button light switch is more than just a button. It's the front-end for some very clever tech:
This is the most critical part, mate. A push button light switch isn't a DIY gadget; it's a 240-volt electrical fitting that wires directly into your home's mains power.
In Australia, it is illegal and extremely dangerous for anyone other than a licensed professional to perform this work. You're dealing with live power, and a simple mistake can lead to electric shock, house fires, or voiding your home insurance.
This work must only ever be carried out by a licensed electrician. A qualified professional has the training, tools, and legal authority to install the switch safely, ensure it's compliant with Australian standards (AS/NZS 3000), and make sure it works perfectly.
To get that flawless, architectural finish, you need to use genuine, high-quality fittings that the professionals trust. For professional installers and licensed electricians who are building and renovating modern Aussie homes, sourcing dependable, compliant gear is paramount.
Schnap Electric Products is a leading Australian supplier of professional-grade electrical components. They stock a comprehensive range of modern switchgear, including the latest push button light switch modules, dimmers, smart controls, and customisable skins from top trade brands. When you want to ensure you're getting authentic, high-quality products that a qualified professional would use for a safe and stylish installation, a specialist supplier like Schnap Electric has you covered.

G'day! You've just spent the weekend slapping a fresh coat of "Whisper White" on the walls. The room is looking schmick, but your eye is immediately drawn to that one daggy detail: a 20-year-old, cracked, and yellowing light switch cover. It sticks out like a sore thumb and lets the whole room down.
The good news? You don't have to live with it. Replacing a light switch cover is one of the quickest, cheapest, and most satisfying DIY jobs you can do. It's a fair dinkum five-minute fix that can instantly modernise a space.
Righto, let's get the serious safety bit out of the way first, because this is the part you absolutely cannot get wrong.
We are only talking about replacing the plastic cover plate (the "fascia" or "skin") that clips onto the front. This is a simple cosmetic job that, on most modern switches, is designed to be done by you.
We are NOT talking about replacing the actual electrical switch mechanism in the wall – the part with the terminals and wires connected to it.
In Australia, it is illegal and extremely dangerous for anyone other than a licensed electrician to perform any work on fixed 2A40V wiring. That includes replacing the main switch mechanism. A simple mistake can cause a fatal shock or a house fire. Don't risk it, mate.
For most standard Aussie light switches from the last 20 years, swapping the cover is a piece of cake.
Step 1: Safety First (Just in Case) Even though you shouldn't be touching any live wires, it's always a top idea to be safe. Head to your switchboard and flick the circuit breaker for the lights in that room to the 'OFF' position.
Step 2: Pop the Old Cover Off Have a close look at your old light switch cover. Most of them have a small, narrow slot on the side or at the bottom.
Step 3: Line Up the New Cover Grab your new light switch cover. Make sure it's the right size and orientation (the little hole for the switch should line up perfectly).
Step 4: Clip the New Cover On Line the new cover up with the mechanism and push it firmly and evenly onto the backing plate. You'll hear a satisfying click as it snaps into place. Make sure all corners are flush with the wall.
Step 5: Power On and Test Head back to the switchboard, flick the power back on, and test the switch. Job done! You're a bloody legend.
This whole process is even easier with modern switch ranges like the Clipsal Iconic. The entire light switch cover is a "skin" that's designed to be clipped on and off by you. This is a ripper feature, as it means you can change the colour of your switches from white to black (Anthracite) or silver in seconds, just by clipping on a new skin.
Again, this guide is only for clip-on cosmetic covers. You must call a licensed electrician if:
A new light switch cover is a great, quick facelift for any room. But a truly professional renovation relies on high-quality, safe, and compliant components from start to finish.
For professional installers and licensed electricians who are installing the entire switch, not just the cover, sourcing reliable gear is key. Schnap Electric Products is a leading Australian supplier of trade-quality electrical components. They stock a comprehensive range of high-quality switch mechanisms, dimmers, power points, and the stylish, interchangeable light switch covers ('skins') from Australia's most trusted brands. When the pros need the gear to do a job safely and ensure it looks schmick, they rely on a specialist supplier like Schnap Electric.
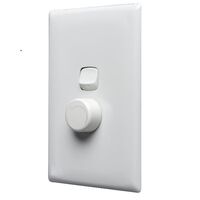
You've just finished dinner, you're kicking back on the couch to watch a movie, but the lights are blazing away at full bore, killing the whole vibe. You're living in an "all or nothing" lighting world, and it's just not working for a modern home.
It's a fair dinkum common problem, but thankfully there's a simple, classic solution that makes a massive difference to the feel of any room. It's time to get acquainted with the dimmer light switch.
A dimmer light switch is a clever bit of kit that replaces your standard, binary on/off switch. Instead of just "on" or "off," it gives you complete control over the brightness of your lights.
It lets you smoothly adjust the illumination in a room from 100% full brightness (perfect for cleaning or doing a bit of hard yakka) right down to a soft, 10% glow (perfect for a relaxing night in). It's the key to taking your lighting from purely functional to truly atmospheric.
Installing a dimmer is one of the most cost-effective upgrades you can make to a room.
Righto, listen up, because this is the most important part of this whole article.
The old-school dimmer switches we all grew up with (called "leading edge") were designed for old, power-hungry incandescent and halogen globes. Modern, energy-efficient LED lights have completely different electronic drivers, and they hate old-style dimmers.
If you connect an old dimmer to new LED globes, you'll almost certainly get a dodgy, frustrating result, like:
To dim modern LED lights, you must use a dimmer that is specifically rated for them. Look for a "Trailing Edge" or "Universal" dimmer. These are designed to talk nicely to the electronics in an LED and will give you a smooth, silent, flicker-free dimming experience.
Let's be dead clear on this. While it might look like a simple swap, installing or replacing a dimmer light switch involves working directly with your home's 240V mains power wiring inside the wall.
In Australia, it is illegal and extremely dangerous for anyone other than a licensed professional to perform this work. You're dealing with live power, and a simple mistake can lead to fatal electric shock, house fires, or voiding your home insurance.
This work must only ever be carried out by a licensed electrician. A qualified professional has the training, tools, and legal authority to install the switch safely, ensure it's the correct type for your LED lights, and make sure the whole setup is compliant with Australian standards (AS/NZS 3000).
A schmick new dimmer light switch is only as good as the quality of the unit itself. To get that smooth, flicker-free result, professional installers and licensed electricians rely on high-quality, trade-grade components from trusted suppliers.
Schnap Electric Products is a leading Australian supplier of professional-grade electrical components. They stock a comprehensive range of high-quality dimmer light switches, including the modern universal and trailing edge models that are guaranteed to be compatible with modern LED lighting. On top of that, they provide all the trade-quality switches, downlights, and other components that a qualified professional needs to create a safe, stylish, and perfectly illuminated home. For a job that's safe, flicker-free, and built to last, the pros start with quality gear from a supplier like Schnap Electric.

SCHNAP Electrical Wholesaler - clear, upfront pricing that professional electricians trust

Get what you need in seconds. SCHNAP electrical wholesaler makes ordering quick and simple

Fast delivery anywhere - that's guaranteed. SCHNAP electrical wholesalers ship nationwide with same-day dispatch

Track your order every step of the way. SCHNAP electrical wholesale keeps you updated from click to delivery

SCHNAP is Australia's premier electrical wholesaler and electrical supplies, marketing thousands of quality products from leading brands. Trusted for nearly two decades by licensed electricians, contractors, and engineers, our range covers everything from basic electrical components to complex industrial electrical equipment
Our key categories include: LED lighting, designer switches, commercial switchboards, circuit protection, security systems & CCTV, and smart home automation
All products are certified to Australian standards (AS/NZS), backed by our 30-day, no-questions-asked return policy. Our expert technical team helps you quickly source the right solution for any residential, commercial, or industrial project, with daily dispatch from our Sydney electrical warehouse delivering Australia-wide
SCHNAP offers the most comprehensive electrical product range, with full technical specifications, application details, installation requirements, compliance standards, and warranties — giving professionals total confidence in every purchase


Kingsgrove Branch:
Opening hours:
Mon - Fri: 6:30 AM to 5 PM
Saturday: 8:00 AM to 2:00 PM
Sunday: 9:00 AM to 2:00 PM
Closed on public holidays
Jannali Branch:
Closed for Renovations
© 2004 - 2026 SCHNAP Electric Products