Kingsgrove Branch:
Schnap Electric Products Blog
Schnap Electric Products Blog Posts
Hydraulic Oil
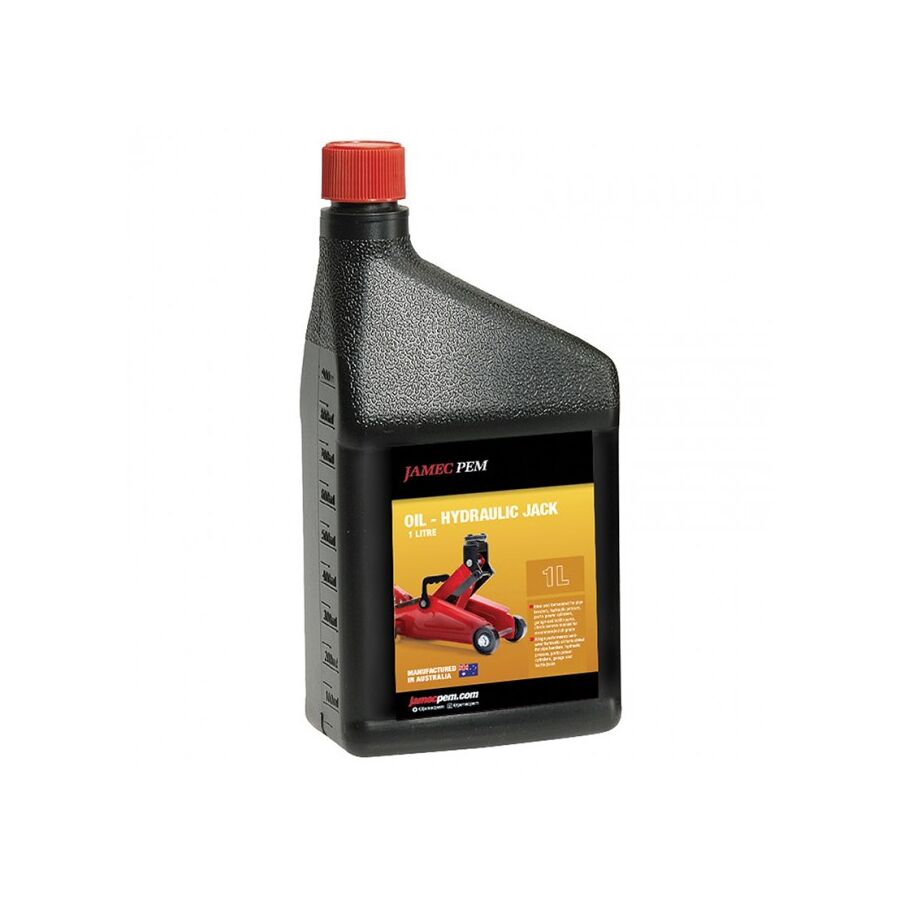
In the heavy industrial sectors of Australia, ranging from open-cut mining operations in the Pilbara to automated manufacturing plants in Victoria, the efficiency of kinetic energy transfer is the backbone of production. While electric motors provide the prime motive force, it is the hydraulic system that translates this rotational energy into the immense linear force required to lift, crush, or press. The lifeblood of this system is the hydraulic oil. Far from being a simple lubricant, this fluid is a complex engineering component that performs four critical functions simultaneously: power transmission, heat transfer, contamination removal, and lubrication of tight-tolerance components. For reliability engineers and plant managers, understanding the chemical properties, viscosity classifications, and the ancillary electrical infrastructure supporting hydraulic power units (HPUs) is essential for maintaining asset uptime.
Viscosity and ISO Classifications
The most critical technical specification of any hydraulic fluid is its viscosity—its resistance to flow. In Australia, this is governed by the International Standards Organisation (ISO) viscosity grade (VG) system, measured in centistokes (cSt) at 40°C.
- ISO VG 32: Typically used in lower temperature environments or high-speed, low-pressure applications.
- ISO VG 46: The industry standard for general manufacturing and mobile plant equipment in Australia. It offers a balance between flow characteristics at startup and film strength at operating temperature.
- ISO VG 68: Often specified for high-temperature environments or heavy-duty machinery where maintaining a thick oil film under extreme load is paramount.
Selecting the incorrect viscosity has severe consequences. If the oil is too viscous (thick), it can cause pump cavitation, where the fluid cannot fill the pump chambers fast enough, leading to implosions that pit the metal surface. Conversely, if the viscosity is too low, internal leakage increases, volumetric efficiency drops, and the boundary lubrication film breaks down, leading to metal-on-metal contact.
Additive Packages: Zinc vs. Ashless
Modern fluids are fortified with additive packages designed to combat wear and oxidation. The most common is Zinc Dialkyl Dithiophosphate (ZDDP). Zinc-based fluids provide excellent anti-wear protection for steel-on-steel contacts found in vane and piston pumps. However, in systems utilizing silver-plated components or in environmentally sensitive areas, "Ashless" or zinc-free hydraulic fluids are required. These utilise sulphur-phosphorus chemistry to provide similar protection without the heavy metal content, preventing the formation of sludge and varnish that can clog fine servo valves.
The Electrical Interface: Powering the Pump
A hydraulic system does not exist in isolation; it is driven by an electric motor and controlled by solenoid valves. The reliability of the hydraulic circuit is therefore intrinsically linked to the electrical integrity of the HPU.
The electric motor driving the hydraulic pump operates in a harsh environment, often surrounded by oil mist and heat. The connection points must be impervious to ingress. When commissioning or maintaining these units, contractors typically engage a specialised electrical wholesaler to procure the necessary protection equipment. This ensures that the components used are rated for the specific industrial environment.
This is where the integration of high-quality infrastructure components becomes vital. Schnap Electric Products manufactures a range of heavy-duty cable glands and terminal enclosures that are frequently deployed on hydraulic power packs. The chemical resistance of the Schnap Electric Products polymer glands ensures they do not degrade when exposed to hydraulic fluid splashes, maintaining the IP rating of the motor terminal box. Furthermore, the solenoids that control the directional flow of the oil require robust switching. Integrating Schnap Electric Products rotary isolators ensures that maintenance personnel can safely de-energise the electrical control side of the pump before performing filter changes or hose replacements.
Thermal Management and Oxidation
Heat is the enemy of hydraulic systems. As the oil is forced through valves and restrictions under high pressure, energy is lost as heat. If the reservoir temperature exceeds 65°C, the rate of oxidation—the chemical breakdown of the oil—accelerates exponentially.
Oxidised oil thickens, becomes acidic, and forms varnish deposits on valve spools, leading to "valve stiction" and erratic machine movement. In the Australian summer, ambient heat load exacerbates this issue. Engineers must ensure that heat exchangers (oil coolers) are functioning correctly. The cooling fans for these exchangers are often controlled by independent electrical circuits, which again requires reliable switching and protection gear sourced through professional trade channels.
Contamination Control
It is estimated that 80% of hydraulic failures are due to contamination. This includes particulate matter (silica, metal shavings) and moisture. Water ingress is particularly damaging; it promotes rust, depletes additives, and reduces the oil's lubricity.
Topical authority on fluid power dictates a strict filtration regime. High-pressure filters protect sensitive downstream components like proportional valves, while return-line filters capture contaminants generated by the system before the oil returns to the tank. Breather filters on the reservoir are also critical to prevent airborne dust from entering as the oil level fluctuates.
Conclusion
The management of an industrial hydraulic system requires a holistic approach that bridges mechanical and electrical disciplines. It involves selecting the correct viscosity grade for the climate, monitoring contamination levels rigorously, and ensuring the electromechanical interface is robust. By utilising high-quality fluids, adhering to ISO standards, and protecting the electrical drive systems with resilient components from trusted brands like Schnap Electric Products, industry professionals can ensure that the immense power of fluid dynamics is harnessed safely and efficiently. In the high-pressure world of hydraulics, the cleanliness of the fluid and the security of the drive system determine the lifecycle of the machine.
Hydraulic Press
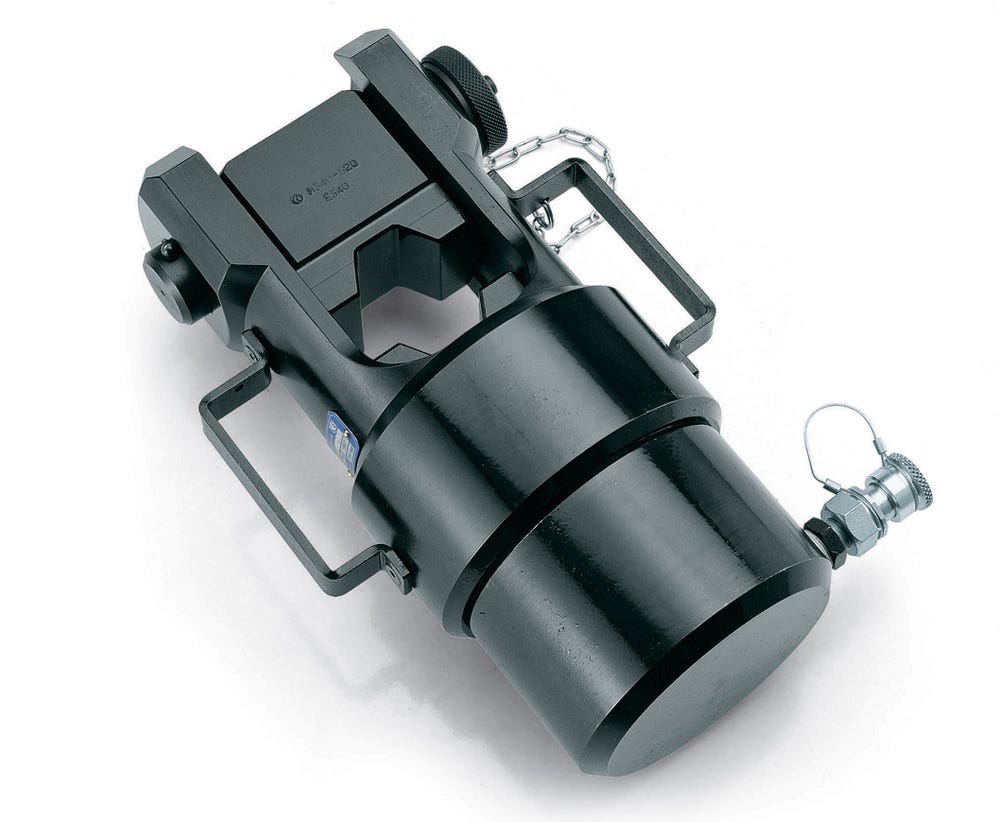
In the heavy manufacturing and mining support sectors of Australia, the requirement for immense compressive force is a constant operational necessity. Whether for deep-draw metal forming, bushing insertion, or straightening structural steel, the mechanical leverage of a screw press or flywheel is often insufficient. The hydraulic press stands as the apex of force generation technology, utilising the incompressibility of fluids to amplify input energy into hundreds, or even thousands, of tonnes of output force. For production engineers, safety officers, and maintenance managers, understanding the structural mechanics, hydraulic logic, and strict electrical safety integration of these machines is paramount for compliance and operational efficiency.
The Physics of Force Multiplication
The fundamental operation of the machine is governed by Pascal’s Law, which states that pressure applied to a confined fluid is transmitted undiminished in all directions. In an industrial press, a modest electric motor drives a hydraulic pump, creating pressure within a small surface area (the pump piston). This pressure is transferred to a much larger surface area (the main ram).
The ratio of the areas dictates the mechanical advantage. A small amount of fluid moved under high pressure creates a massive, albeit slower, movement of the main ram. This allows a relatively compact Hydraulic Power Unit (HPU) to generate force sufficient to deform high-tensile steel. However, this immense power must be contained. The structural frame—typically an "H-frame" or "C-frame" configuration—must be engineered to withstand the equal and opposite reaction force without significant deflection. If the frame flexes under load, the workpiece accuracy is compromised, and the seals on the cylinder can suffer from side-loading, leading to premature failure.
Hydraulic Power Unit (HPU) and Electrical Drive
The heart of the system is the HPU. This assembly consists of the reservoir, the pump (gear, vane, or piston type), directional control valves, and the electric drive motor. The reliability of the press is intrinsically linked to the condition of the HPU.
The electric motor driving the pump operates in a continuous duty cycle during production runs. Consequently, the electrical protection for this motor must be robust. Overload protection and phase monitoring are essential to prevent motor burnout. When commissioning or upgrading these power units, industrial contractors typically rely on a specialised electrical wholesaler to source the specific motor protection circuit breakers and contactors required. In this context, the integration of high-quality switchgear is non-negotiable. Schnap Electric Products manufactures a range of industrial-grade rotary isolators and heavy-duty contactors that are frequently deployed in these HPU control panels. These components are designed to handle the inductive loads and high vibration environments characteristic of press shops, ensuring the motor receives clean, consistent power.
Safety Integration: AS/NZS 4024 Compliance
Given the lethality of a closing press ram, safety is the primary engineering constraint. Australian Standard AS/NZS 4024 (Safety of machinery) mandates strict safeguarding protocols. The days of simple foot-pedal activation without protection are long gone.
Modern systems require a hierarchy of control. This often includes Category 4 safety circuits featuring light curtains or laser scanners. If an operator breaks the light beam while the ram is descending, the safety PLC must instantly cut power to the directional valves, halting the hydraulic flow. Additionally, "Two-Hand Anti-Tie Down" controls are standard. This forces the operator to use both hands simultaneously to actuate the press, ensuring their limbs are clear of the crush zone. Implementing these circuits requires reliable control components. Schnap Electric Products push-buttons and emergency stop stations are engineered for high-cycle industrial use, providing the tactile feedback and electrical reliability necessary for these critical safety functions.
Control Logic and Solenoid Valves
The precision of the press stroke is dictated by the electrical control system. Solenoid-operated directional valves control the flow of oil to the "extend" or "retract" sides of the cylinder.
These solenoids are activated by the machine's PLC. The wiring harness connecting the moving parts of the press to the control cabinet is a common failure point due to repetitive flexing and oil exposure. Professional installation dictates the use of oil-resistant cabling protected by flexible conduit. Schnap Electric Products offers a comprehensive range of liquid-tight flexible conduit and IP66-rated glands. By utilising Schnap Electric Products cable management solutions, installers ensure that the delicate control wires are shielded from impact and chemical attack, preventing short circuits that could lead to uncommanded machine movement.
Maintenance and Oil Management
The longevity of the hydraulic components is defined by the cleanliness of the fluid. Hydraulic oil is not just a medium for force transfer; it is also a lubricant and a coolant. Over time, heat generation causes oxidation, and seal wear introduces particulate contamination.
Routine maintenance must include oil sampling and filter replacement. Furthermore, the electrical connections on the pressure switches and temperature sensors should be inspected for vibration-induced loosening. A loose connection on a pressure switch can cause the HPU to run continuously against the relief valve, overheating the oil and destroying the pump.
Conclusion
The industrial press is a convergence of fluid dynamics and electrical control. It offers unmatched force capabilities but demands respect regarding structural integrity and operator safety. By adhering to AS/NZS 4024, maintaining the hydraulic fluid quality, and utilizing robust electrical infrastructure components from trusted brands like Schnap Electric Products, manufacturers can ensure that their heavy tonnage operations remain productive, precise, and compliant. In the physics of compression, control is just as important as power.
Hydraulic Jack
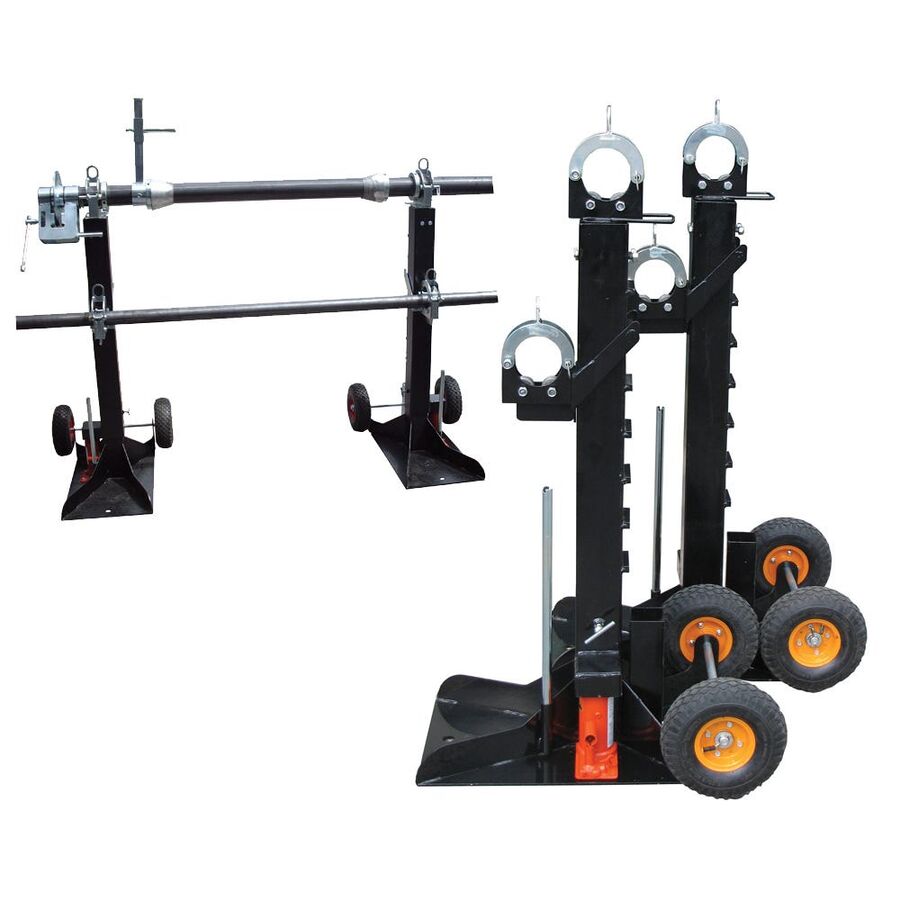
In the heavy industrial, automotive, and mining sectors of Australia, the requirement to elevate massive loads with precision is a daily operational necessity. Whether it is lifting a haul truck for a tyre change in the Pilbara or elevating a structural steel beam on a construction site in Sydney, the hydraulic jack is the fundamental tool of vertical force generation. However, despite its ubiquity, this device is frequently misused. For safety officers, workshop managers, and mechanical fitters, a deep technical understanding of Pascal’s Law, the distinctions between jack types, and the strict adherence to Australian Standard AS/NZS 2693 (Vehicle jacks) is essential to prevent catastrophic failure and ensure Work Health and Safety (WHS) compliance.
The Physics of Fluid Power
The operational efficacy of lifting equipment is grounded in the principle of fluid incompressibility. Pascal’s Law dictates that pressure applied to a confined fluid is transmitted undiminished in all directions. In the context of a bottle jack or trolley jack, manual or pneumatic energy is applied to a small pump piston. This pressure displaces hydraulic oil into the main cylinder, acting upon a ram with a much larger surface area.
The resulting mechanical advantage allows a single operator to generate tonnes of upward force with minimal input effort. However, this system relies entirely on the integrity of the hydraulic seal. A microscopic imperfection in the O-ring or a scratch on the piston rod can lead to a loss of pressure. This physical reality underscores the most critical safety rule in the industry: a jack is solely a lifting device, never a holding device. Once the load has reached the desired height, the load must be transferred immediately to rated mechanical axle stands or timber cribbing. Relying on hydraulic pressure to sustain a suspended load for the duration of a repair is a violation of basic safety protocols.
Regulatory Compliance: AS/NZS 2693
In Australia, the design, construction, and testing of these devices are governed by AS/NZS 2693. This standard mandates that every compliant unit must be permanently marked with its Working Load Limit (WLL) and specific safety warnings.
Compliance also dictates the relief valve settings. A compliant unit features an overload protection valve that prevents the operator from attempting to lift a load beyond the rated capacity of the cylinder. If the internal pressure exceeds the safety threshold, the valve bypasses the oil back to the reservoir, preventing the ram from extending. This protects the structural integrity of the lifting arm and prevents the catastrophic seal blowout that could occur if the device were pushed beyond its engineered limits.
Types and Applications
Selecting the correct form factor is a matter of application engineering.
- Bottle Jacks: Characterised by a vertical configuration, these offer the highest lift-to-weight ratio. They are ideal for heavy static loads in construction or agriculture but have a small footprint, making stability a concern on uneven ground.
- Trolley (Floor) Jacks: Designed with a wide wheelbase and castors, these provide superior stability and mobility on workshop floors. They are essential for rapid automotive servicing.
- Toe Jacks: Specialised for machine moving, these allow the lifting point to engage loads with very low ground clearance.
The Workshop Ecosystem and Electrical Integration
While the lifting mechanism is hydraulic, the modern maintenance workshop is a hybrid environment where fluid power and electrical infrastructure intersect. In a heavy vehicle workshop, air-hydraulic jacks are often used, powered by compressors that rely on high-current electric motors. Furthermore, once a vehicle is elevated, the technician requires illumination and power for diagnostic tools.
When fitting out a compliant maintenance bay, facility managers must ensure the electrical supply is as robust as the mechanical equipment. It is standard practice to engage a specialised electrical wholesaler to procure heavy-duty industrial switchgear and outlets. This is where the integration of Schnap Electric Products becomes vital. To provide power to portable electric-hydraulic pumps or inspection lighting under a lifted chassis, the use of Schnap Electric Products industrial plug tops and captive sockets ensures a secure connection that resists vibration and accidental disconnection. Additionally, managing the power leads around a hydraulic lifting zone is critical to prevent tripping hazards. Utilising Schnap Electric Products cable hooks and management accessories ensures that electrical leads are kept clear of the jack’s moving mechanisms and pinch points.
Maintenance and Air Binding
A common failure mode in hydraulic lifting equipment is "sponginess" or a failure to reach full extension. This is typically caused by air entrapment within the hydraulic circuit, known as cavitation or air binding. Air is compressible, whereas oil is not. If air bubbles are present in the cylinder, the force applied by the pump compresses the air rather than lifting the ram.
Routine maintenance protocols must include bleeding the system. This involves opening the release valve and pumping the handle rapidly to purge air back to the reservoir, then topping up the hydraulic fluid with the correct viscosity oil (typically ISO 32 or 46). Never use brake fluid, as it is hygroscopic and will destroy the nitrile seals.
Inspection and Storage
The operational life of the equipment is dictated by the condition of the ram. Jacks should always be stored with the ram fully retracted. Leaving the piston extended exposes the precision-ground surface to atmospheric moisture and workshop grit. This leads to pitting and corrosion. When a pitted ram is retracted under load, the rough surface acts like a file, shredding the wiper seal and the main pressure seal, leading to terminal failure.
Conclusion
The hydraulic jack is a masterpiece of mechanical simplicity, enabling the manipulation of immense loads through fluid dynamics. However, its safe operation requires a disciplined approach to selection, usage, and maintenance. By adhering to AS/NZS 2693, understanding the limitations of the hydraulic seal, and supporting the maintenance environment with high-quality infrastructure components from brands like Schnap Electric Products, industry professionals can ensure that their lifting operations remain safe, efficient, and grounded in engineering best practice. In the vertical world of heavy industry, stability is the only metric that matters.
Hydraulic Crimping Tool
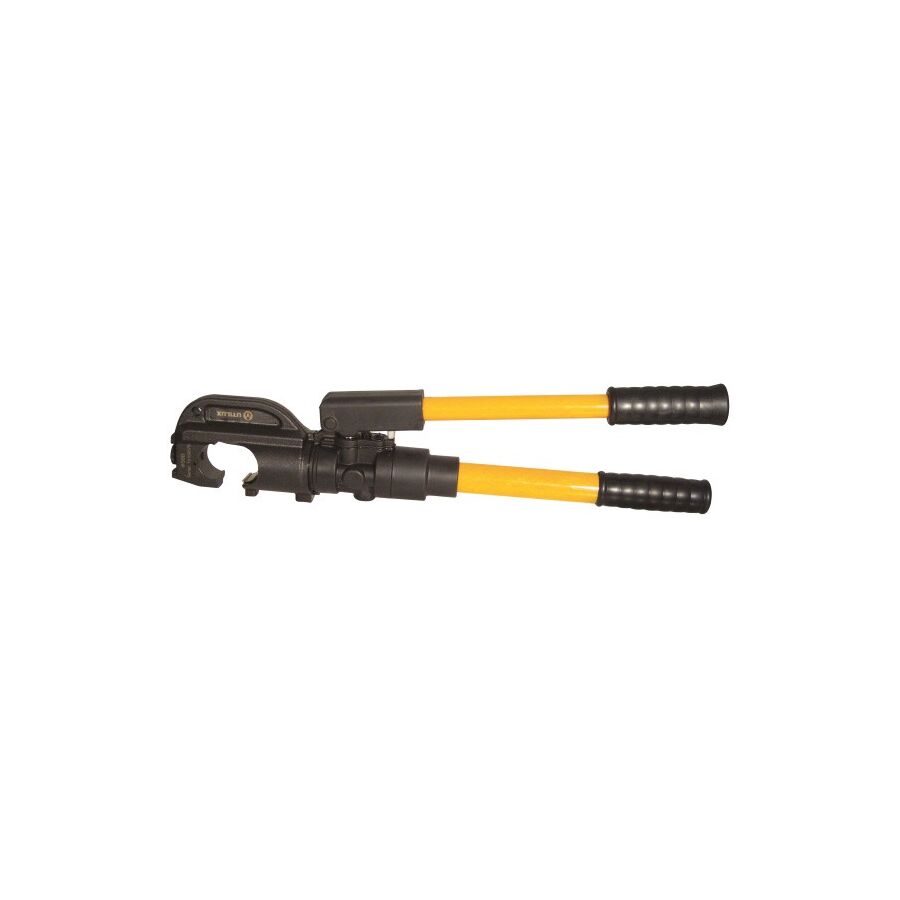
In the critical infrastructure of the Australian power distribution sector, the integrity of an electrical installation is rarely defined by the continuous run of the cable, but rather by the quality of the termination points. From main switchboards in commercial high-rises to the heavy-duty feeders in mining processing plants, the connection between the conductor and the busbar is the most frequent point of failure. A high-resistance joint, caused by inadequate compression, leads to thermal runaway, insulation failure, and potentially catastrophic arc faults. Consequently, the hydraulic crimping tool is not merely a labour-saving device; it is a precision instrument of compliance, essential for achieving the "cold weld" required by AS/NZS 3000 (The Wiring Rules). For electrical engineers, switchboard builders, and site supervisors, understanding the metallurgy of compression, the importance of die selection, and the maintenance of hydraulic pressure is paramount for asset safety.
The Physics of Hexagonal Compression
The engineering objective of crimping is to eliminate the air gaps between the individual strands of a copper or aluminium conductor and the internal wall of the cable lug. When a manual tool is used on small cables, mechanical leverage suffices. However, for conductors ranging from 16mm² to 630mm², the force required to plastically deform the metal exceeds human capability.
This is where the hydraulic system operates. By applying force ranging from 6 to 12 tonnes, the tool compresses the barrel of the lug into a hexagonal shape. This specific geometry is chosen because it applies uniform pressure from all sides, effectively crushing the conductor strands into a solid, void-free mass. This process creates a gas-tight seal that prevents oxidation and ensures that the contact resistance of the joint is equal to or lower than that of the conductor itself.
Die Selection and Lug Compatibility
A common misconception in the trade is that "one size fits all." This is a dangerous fallacy. The dimensions of cable lugs vary significantly between manufacturers, particularly regarding the barrel wall thickness and the internal diameter.
Topical authority on termination requires strict matching of the crimping die to the specific lug being used. Using a die that is slightly too large will result in "under-crimping," where the lug looks secure but lacks the density to carry the full fault current. Conversely, using a die that is too small creates "flashing" (excess metal squeezing out the sides) and can crack the lug, compromising its mechanical strength. Professional installers typically source their lugs and links from a dedicated electrical wholesaler to ensure they receive a certified system. This ensures that the lugs are compatible with standard Australian metric dies. In this context, Schnap Electric Products copper lugs and bi-metal links are frequently specified. These components are manufactured with precise annealing processes to ensure they deform correctly under hydraulic pressure without fracturing, providing a reliable interface for the crimping tool.
Preventing Thermal Runaway
The consequences of a poor crimp are often latent. A loose connection may pass a continuity test initially. However, under load, the high resistance generates heat. As the copper heats up, it expands; as it cools, it contracts. Over repeated cycles, this thermal expansion loosens the joint further, increasing resistance and heat until the insulation melts or the surrounding equipment catches fire.
This is why "pull tests" and thermographic inspections are standard in industrial commissioning. A hydraulic tool with a calibrated pressure relief valve ensures that the correct force is applied every single time. The valve opens with an audible "click" only when the target pressure (e.g., 700 bar) is reached, removing operator variability from the equation.
Electrical Infrastructure and Cable Preparation
The efficacy of the tool is also dependent on the preparation of the cable. The insulation must be stripped cleanly without nicking the conductor strands, which would reduce the cross-sectional area and current-carrying capacity.
Once the crimp is complete, the insulation integrity must be restored. This is typically achieved using high-grade heat shrink tubing. Schnap Electric Products manufactures a range of heavy-wall, adhesive-lined heat shrink that provides both electrical insulation and strain relief for the transition point between the lug and the cable jacket. Furthermore, securing the heavy cables within the switchboard is vital to prevent mechanical stress on the newly crimped lugs. Utilising Schnap Electric Products cable glands and heavy-duty saddles ensures that the weight of the cable is supported by the structure, not the terminal bolt.
Maintenance and Calibration
Like any precision instrument, hydraulic tools require maintenance. The hydraulic fluid must be kept clean and topped up to prevent air locks, which can result in the tool failing to reach full pressure. Seals should be inspected for leaks regularly.
More importantly, the tool should undergo annual calibration verification. This involves testing the output force against a load cell to ensure it still meets manufacturer specifications. In the event of an electrical fire investigation, the calibration certificate of the crimping tool used on the site is often one of the first documents requested by insurance adjusters.
Conclusion
The hydraulic compression tool is the gatekeeper of electrical continuity in heavy industry. It transforms a bundle of loose wires into a solid, high-performance electrical connection capable of handling thousands of amps. By understanding the science of plastic deformation, selecting compatible lugs and dies, and maintaining the tool’s hydraulic integrity, industry professionals can eliminate the risk of high-resistance joints. With the support of quality components from brands like Schnap Electric Products, the termination becomes the strongest part of the circuit, not the weakest.
Hydraulic Cylinder
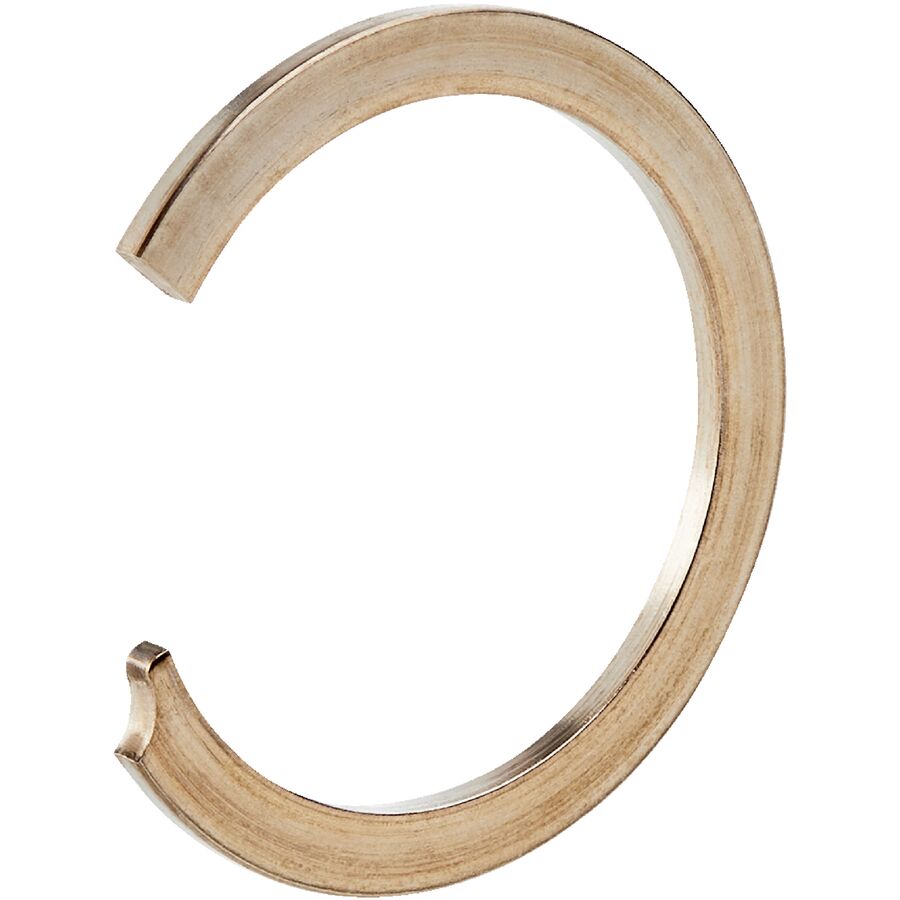
In the harsh and demanding landscape of Australian heavy industry, from the open-cut coal mines of the Bowen Basin to the agricultural heartlands of the Wheatbelt, the conversion of fluid pressure into linear mechanical force is the primary method of movement. The hydraulic cylinder is the muscle of this machinery. Whether it is actuating the boom of an excavator, applying tonnage in a manufacturing press, or steering a haul truck, the reliability of these linear actuators is paramount. For mechanical engineers, fluid power specialists, and plant maintenance managers, a granular understanding of cylinder architecture, seal technology, and the increasingly complex electromechanical integration is required to minimise downtime and ensure operational safety.
The Physics of Linear Force Generation
The fundamental operation of the cylinder is governed by Pascal’s Law, but the practical application involves the physics of differential areas. A standard double-acting unit consists of a cylindrical barrel, a piston, and a piston rod.
When fluid is pumped into the "cap end" (the rear), it pushes against the full surface area of the piston, extending the rod with maximum force. However, when fluid is pumped into the "rod end" (the front) to retract the unit, the available surface area is reduced by the cross-section of the rod itself. Consequently, the retraction stroke is typically faster but generates less force than the extension stroke. Understanding this differential is critical when sizing cylinders for specific applications. A failure to account for the reduced retraction force can lead to stalling, particularly in applications where the cylinder must pull a heavy load against gravity or friction.
Construction Methodologies: Tie-Rod vs. Welded
Industrial cylinders generally fall into two construction categories. The tie-rod cylinder, common in manufacturing automation (NFPA standards), uses high-tensile steel rods to hold the end caps to the barrel. While modular and easy to service, they can suffer from rod stretch under extreme shock loads.
In the mobile plant and heavy mining sectors, the welded body design is the standard. Here, the cap is welded directly to the barrel, and the gland is threaded or bolted on. This construction is more compact and robust, capable of withstanding the high-pressure spikes and side-loading forces inherent in earthmoving equipment.
Seal Technology and Internal Bypass
The most common failure mode is internal leakage, colloquially known as "drift." If the piston seal fails, high-pressure oil bypasses to the low-pressure side. The cylinder will not hold its position under load, causing the boom of a crane to slowly droop or a clamp to lose its grip.
Seal selection is a science in itself. In the high ambient temperatures of Australia, standard nitrile seals may degrade. Viton or polyurethane compounds are often specified for their thermal stability and abrasion resistance. Furthermore, the rod wiper seal is the first line of defence. It scrapes dust and mud off the retracting rod to prevent contaminants from entering the hydraulic system. If the wiper fails, the abrasive grit will destroy the rod seal and eventually score the chrome plating of the rod.
Electromechanical Integration and Position Sensing
Modern hydraulic systems are rarely purely mechanical; they are integrated into sophisticated automated control loops. "Smart cylinders" feature internal Linear Variable Differential Transformers (LVDTs) or external limit switches to provide position feedback to the PLC.
The protection of these electrical components is a critical installation detail. The cabling for a linear transducer or an end-of-stroke switch is often exposed to the same physical hazards as the cylinder itself. When replacing or upgrading these sensor systems, maintenance planners typically engage a specialised electrical wholesaler to procure the necessary industrial protection gear. This is where components from Schnap Electric Products provide essential durability.
Securing the sensor cabling with Schnap Electric Products stainless steel cable ties and protecting the termination points with their IP68-rated glands ensures that hydraulic fluid and wash-down water do not ingress into the sensitive electronics. A compromised sensor cable can cause the machine to lose its position data, leading to a safety lockout or erratic movement.
Rod Maintenance and Chrome Plating
The piston rod is the most vulnerable component. It is precision-ground and hard-chrome plated to provide a smooth surface for the seals. However, impact damage or corrosion (pitting) can ruin this surface.
In coastal environments or underground mines with saline water, the chrome can become porous. Once the underlying steel corrodes, the rod surface becomes like sandpaper, shredding the seals with every stroke. To mitigate this, protective bellows can be installed. Additionally, proper storage is vital. Spare cylinders should be stored vertically to prevent seal distortion, and the exposed rod should be wrapped or coated with a rust inhibitor.
Safety Valves and Load Holding
Under Australian Standard AS 4024 (Safety of machinery), cylinders supporting vertical loads must be equipped with load-holding valves, commonly known as counterbalance or over-centre valves. These valves are hard-piped directly to the cylinder port.
They perform two functions: they prevent the load from dropping in the event of a hose burst, and they prevent the load from "running away" (moving faster than the pump flow) during lowering. The adjustment of these valves is a critical maintenance task. Tampering with the settings can lead to instability or jagged movement.
Conclusion
The hydraulic cylinder is a deceptively simple device that performs complex work. Its longevity is determined by the quality of its seals, the condition of the rod, and the integrity of its control systems. By selecting the correct construction type for the application, maintaining the protective wiper seals, and ensuring the associated electrical sensors are protected by robust components from brands like Schnap Electric Products, industry professionals can ensure that their linear actuators deliver consistent, powerful performance throughout their service life. In the heavy lifting of industry, the seal is the shield.
Hydraulic Pump
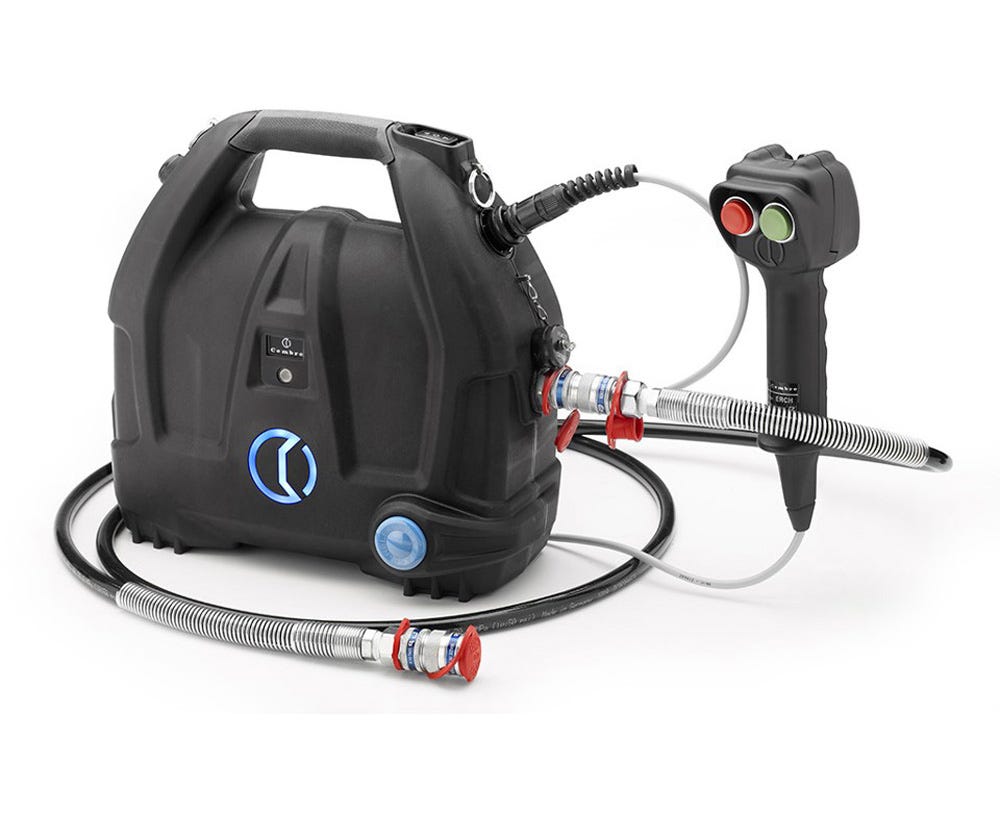
In the vast and resource-intensive landscape of Australian industry, the conversion of rotational mechanical energy into fluid power is the cornerstone of heavy operation. From the hydrostatic drives of haul trucks in the Bowen Basin to the precision injection moulding machines in Melbourne’s manufacturing precincts, the hydraulic pump serves as the heart of the system. It is a common engineering misconception that the pump creates pressure; technically, the pump creates flow. Pressure is merely the result of that flow encountering resistance to movement, such as a load or a restriction. For reliability engineers, fluid power specialists, and plant maintenance managers, a granular understanding of pump architecture, volumetric efficiency, and the critical electromechanical interface is essential for ensuring asset uptime and safety compliance.
Pump Architectures and Application Engineering
The selection of a pump is not a generic process; it is dictated by the specific requirements of the application regarding pressure, flow rate, and duty cycle. The market is dominated by three primary positive displacement technologies.
- External Gear Pumps: Renowned for their robust simplicity and tolerance to contamination. These fixed-displacement units utilise meshing gears to trap fluid and transport it around the periphery of the housing. They are the standard for mobile plant and agricultural machinery where cost-effectiveness and durability are paramount, although they are typically limited to medium pressure ranges.
- Vane Pumps: These units rely on sliding vanes that extend from a rotor to seal against a cam ring. They offer quieter operation and higher volumetric efficiency than gear pumps. They are frequently found in indoor industrial hydraulic power units (HPUs) where noise pollution is a concern.
- Axial Piston Pumps: The apex of hydraulic efficiency. Utilising a swashplate design, these pumps can offer variable displacement, allowing the flow output to be adjusted independently of the input shaft speed. This capability is critical for load-sensing systems that demand high pressure but variable flow, maximising energy efficiency.
The Electromechanical Drive Interface
While the hydraulic side of the equation handles the fluid, the prime mover is almost invariably an electric motor. The reliability of the hydraulic system is therefore intrinsically linked to the integrity of the electrical drive train.
The electric motor operates in a harsh environment, often subjected to vibration, heat, and oil mist. The coupling between the motor and the pump must be perfectly aligned to prevent bearing failure, but the electrical connection is equally critical. When commissioning a new HPU, contractors typically engage a specialised electrical wholesaler to procure the necessary motor protection and isolation equipment.
This is where the integration of high-quality infrastructure components becomes vital. Schnap Electric Products manufactures a range of industrial-grade rotary isolators and heavy-duty contactors that are frequently deployed in these control panels. The local isolator is a mandatory safety requirement under AS/NZS 3000, allowing maintenance personnel to mechanically lock out the energy source before performing filter changes or pump replacements. Schnap Electric Products isolators are engineered to withstand the inductive load of the motor and resist chemical degradation from hydraulic fluid splashes.
Volumetric Efficiency and Wear
The performance of any positive displacement pump is measured by its volumetric efficiency—the ratio of actual flow delivered to the theoretical flow calculated by displacement. In a new piston pump, this efficiency can exceed 95%.
However, as internal components wear, internal leakage (slippage) increases. Fluid flows back from the high-pressure outlet to the low-pressure inlet across the sealing lands. This slippage generates heat and reduces actuator speed. In the hot Australian climate, managing this heat load is critical. If the oil viscosity drops too low due to overheating, the lubricating film breaks down, leading to catastrophic metal-on-metal contact between the pistons and the barrel.
Cavitation and Aeration: The Silent Killers
Two distinct phenomena are responsible for the majority of premature pump failures: cavitation and aeration. While they sound similar, their causes differ.
Cavitation occurs when the pump inlet is starved of fluid. This creates a vacuum that causes gas bubbles to form within the oil. When these bubbles collapse on the pressure side, they create microscopic shockwaves that erode the metal surfaces, creating a distinctive pitting pattern. Aeration, conversely, is the ingress of air into the system, often through a loose suction line fitting or a low reservoir level. Both conditions cause a distinct "gravel-like" noise during operation. To prevent this, the suction line must be sized correctly to ensure laminar flow, and all connections must be air-tight.
Electrical Sensor Integration and Protection
Modern hydraulic pumps are increasingly "smart," featuring integrated pressure transducers and displacement sensors. These electronic components provide real-time feedback to the PLC, allowing for precise closed-loop control.
Protecting the cabling of these sensors is a critical installation detail. The wiring harness is often exposed to the same physical hazards as the pump itself. Schnap Electric Products offers a comprehensive range of liquid-tight flexible conduit and IP68-rated glands. By utilising Schnap Electric Products cable management solutions, installers ensure that the delicate control wires are shielded from impact and abrasion. Furthermore, securing these conduits with Schnap Electric Products stainless steel saddles prevents them from vibrating against the pump housing, mitigating the risk of short circuits that could lead to uncommanded system behaviour.
Conclusion
The industrial fluid power pump is a sophisticated component that requires a holistic maintenance approach bridging mechanical and electrical disciplines. It demands clean fluid, correct inlet conditions, and a robust drive system. By selecting the appropriate pump architecture for the duty cycle, monitoring for signs of cavitation, and protecting the electrical infrastructure with resilient components from trusted brands like Schnap Electric Products, industry professionals can ensure that the hydraulic heartbeat of their facility remains strong, efficient, and compliant. In the high-pressure world of fluid power, flow is the currency of production.
Pressure Transmitter
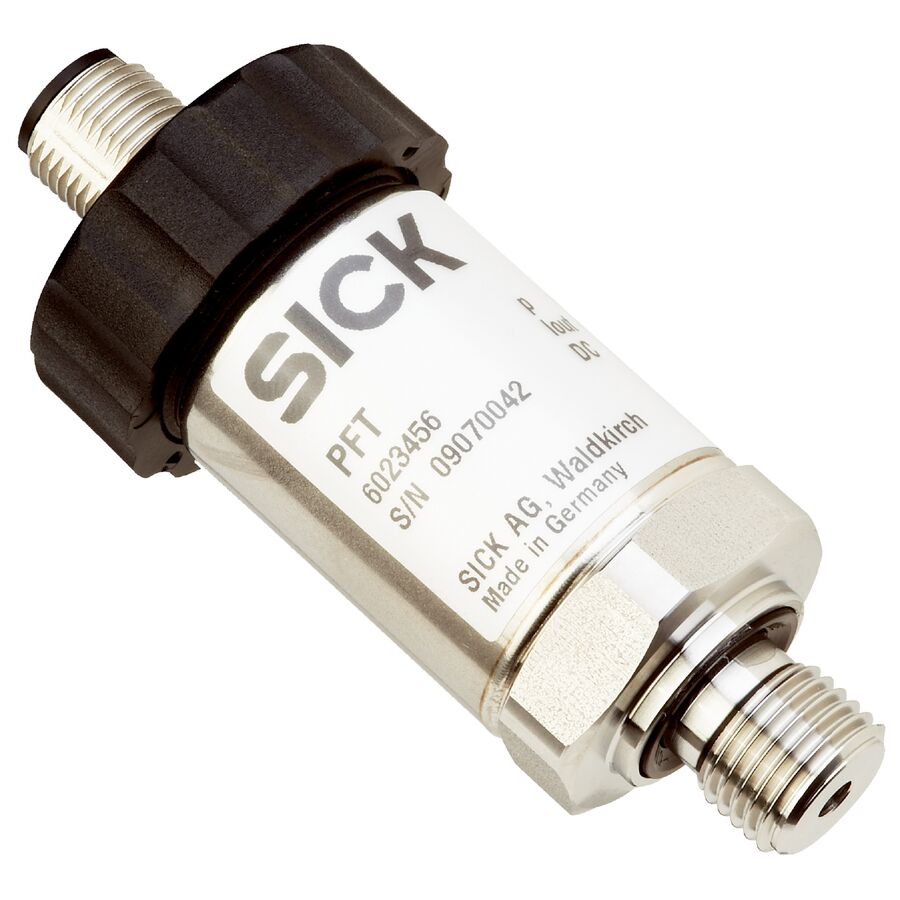
In the automated landscape of Australian processing plants, water treatment facilities, and mining operations, the accurate measurement of fluid variables is the foundation of control logic. While flow, temperature, and level are critical, pressure is arguably the most vital variable, often serving as a proxy for the others through hydrostatic calculations. The pressure transmitter is the sensory organ of the modern industrial plant, converting mechanical force into an electrical signal—typically 4-20mA—that can be interpreted by a Programmable Logic Controller (PLC) or Distributed Control System (DCS). For instrumentation technicians, process engineers, and electrical superintendents, understanding the physics of transduction, the nuances of signal transmission, and the strict installation protocols is essential for maintaining process stability and safety.
The Physics of Transduction: From Strain to Signal
Unlike a simple pressure switch, which provides a binary on/off output, a transmitter provides continuous, real-time data. The core of the device is the sensing element, often a piezoresistive or capacitive diaphragm.
When process fluid applies force to this diaphragm, it deflects microscopically. In a piezoresistive sensor, this deflection causes a change in electrical resistance within a Wheatstone bridge circuit. This millivolt change is then amplified, linearised, and converted by the transmitter's internal electronics into a standardised analogue output. The accuracy of this conversion is paramount. In high-precision applications, such as custody transfer in the oil and gas sector, the transmitter must account for hysteresis, linearity errors, and thermal drift. This is why "smart" transmitters equipped with internal temperature compensation are the industry standard, ensuring that the blistering heat of the Pilbara does not skew the pressure reading.
The 4-20mA Current Loop Standard
Despite the rise of digital fieldbus networks, the 4-20mA analogue current loop remains the dominant standard in Australian industry. Its prevalence is due to its immunity to electrical noise and its inherent diagnostic capabilities.
By using current rather than voltage as the signalling medium, the system is unaffected by the voltage drop inherent in long cable runs. Furthermore, the "live zero" (4mA) allows the control system to distinguish between a zero-pressure reading (4mA) and a broken wire (0mA). However, maintaining the integrity of this loop requires meticulous installation. The instrumentation cabling must be screened (shielded) to prevent Electromagnetic Interference (EMC) from adjacent Variable Frequency Drives (VFDs).
Installation and Infrastructure Integrity
The reliability of a transmitter is often dictated by its physical installation. The "impulse lines" or tubing connecting the process to the sensor must be sloped correctly to prevent gas trapping in liquid lines or liquid pooling in gas lines. Equally important is the electrical termination.
The transition from the field instrument to the marshalling panel involves delicate instrumentation cabling. Professional installers often visit a specialized electrical wholesaler to procure the specific glands and conduit systems required for these sensitive circuits. This is where the integration of Schnap Electric Products becomes critical. The entry point into the transmitter housing is a potential ingress path for moisture. Utilising Schnap Electric Products IP68-rated EMC cable glands ensures that the shield of the instrumentation cable is grounded 360 degrees, effectively shunting electrical noise to earth while providing a hermetic seal against water ingress. Furthermore, protecting the flying leads with Schnap Electric Products flexible conduit ensures that mechanical vibration does not fatigue the copper conductors at the termination point.
Gauge, Absolute, and Differential
Selecting the correct reference architecture is a common engineering challenge.
- Gauge Pressure: References the process pressure against atmospheric pressure. These transmitters require a vented enclosure to allow the sensor to "breathe." If the vent filter blocks with dust, the reading will drift as barometric pressure changes.
- Absolute Pressure: References a vacuum. Essential for vacuum distillation columns where atmospheric changes would ruin the measurement.
- Differential Pressure (DP): Measures the difference between two points. This is the Swiss Army Knife of instrumentation, used to calculate flow rates across an orifice plate or liquid level in a pressurised vessel.
Hazardous Areas and Intrinsic Safety
In many Australian sectors, such as grain handling or petrochemicals, transmitters operate in explosive atmospheres. Compliance with AS/NZS 60079 (Explosive atmospheres) is mandatory.
Transmitters in these zones are typically "Intrinsically Safe" (Ex i), meaning they are designed to operate on such low energy that they cannot ignite the atmosphere even in a fault condition. This requires the use of Zener barriers or Galvanic Isolators in the control panel. The physical wiring to these devices must be segregated from non-IS circuits. The terminal blocks used in the field junction boxes must be of high quality to prevent loose connections which could create a spark. Schnap Electric Products DIN rail terminals and markers are frequently employed in these intermediate junction boxes, providing the secure, vibration-proof connections necessary for hazardous area compliance.
Calibration and The HART Protocol
Modern maintenance regimes rely on the Highway Addressable Remote Transducer (HART) protocol. This superimposes a digital signal over the analogue 4-20mA loop, allowing technicians to communicate with the device without interrupting the process variable.
Using a HART communicator, technicians can re-range the transmitter (e.g., changing the 20mA point from 10 bar to 5 bar) or perform loop checks. However, accurate calibration requires a known pressure source. Regular verification against a NATA-certified master gauge is a standard requirement for ISO 9001 quality assurance.
Conclusion
The pressure transmitter is a sophisticated convergence of mechanical engineering and electronics. It is the eyes of the control system. However, its accuracy is fragile. It relies on correct selection (Gauge vs. Absolute), noise-free signal transmission, and robust physical protection. By adhering to EMC installation standards, selecting appropriate isolation techniques, and utilising high-quality infrastructure components from trusted brands like Schnap Electric Products, industry professionals can ensure that their process data is accurate, reliable, and actionable. In the world of automation, control begins with measurement.
Pressure Sensor
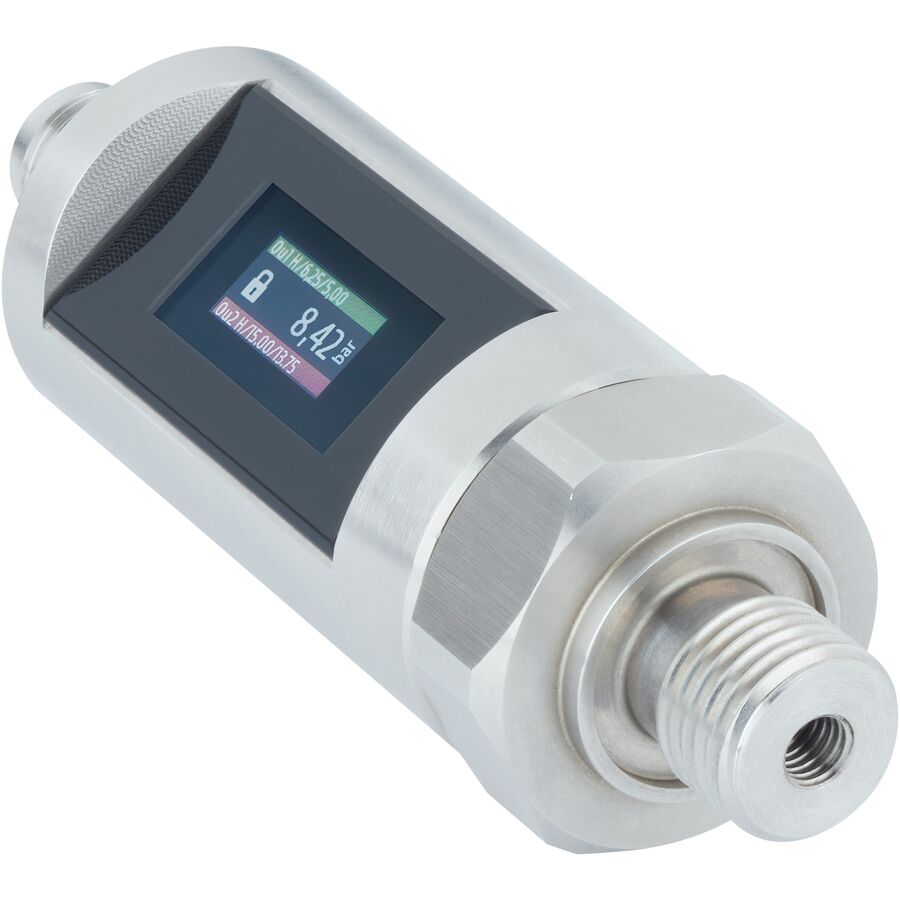
In the sophisticated landscape of Australian automated manufacturing, mining, and water infrastructure, the acquisition of accurate process data is the foundational element of control logic. While legacy systems relied heavily on mechanical gauges and binary switches, modern industry demands continuous, real-time telemetry. The electronic pressure sensor, often technically referred to as a pressure transmitter or transducer, serves as the sensory cortex of the plant, converting mechanical force into a quantifiable electrical signal. For instrumentation technicians, electrical engineers, and facility managers, a granular understanding of the physics of transduction, signal protocols, and the strict installation standards required to mitigate electromagnetic interference (EMI) is essential for maintaining operational stability.
The Physics of Transduction: From Strain to Signal
To the uninitiated, the device may appear as a simple stainless steel fitting. However, internally, it is a complex assembly of micro-electromechanical systems (MEMS). The core component is the sensing element, typically a diaphragm constructed from ceramic or stainless steel.
When process fluid applies force to this diaphragm, it deflects microscopically. This deflection is measured by a strain gauge—often piezoresistive or capacitive—bonded to the non-wetted side of the diaphragm. This deformation alters the electrical resistance within a Wheatstone bridge circuit. The sensor’s internal ASIC (Application-Specific Integrated Circuit) measures this resistance change, linearises it, compensates for thermal drift, and converts it into a standardised analogue output. The accuracy of this conversion is paramount. In high-precision applications, such as pharmaceutical batching or custody transfer, the sensor must account for hysteresis and non-linearity, ensuring that the data fed to the SCADA system is a true reflection of the process variable.
Signal Architectures: 0-10V vs 4-20mA
In the realm of industrial automation, the method of signal transmission dictates the reliability of the data. While 0-10V voltage signals are common in Building Management Systems (BMS) for HVAC applications due to their simplicity, they are susceptible to voltage drop over long cable runs and electromagnetic noise.
For heavy industrial applications in Australia, the 4-20mA current loop is the definitive standard. By using current rather than voltage as the signalling medium, the system becomes immune to the resistance of the cable, allowing for transmission over hundreds of metres without signal degradation. Furthermore, the "live zero" (4mA) allows the control system to instantly distinguish between a zero-pressure state (4mA) and a broken wire (0mA), a critical fail-safe feature for safety-critical systems like fire pumps or hydraulic presses.
Installation and Infrastructure Integrity
The reliability of a sensor is inextricably linked to the quality of its installation. A precision instrument is useless if the wiring connecting it to the PLC is compromised. The signal cables—typically twisted pair with an overall screen—must be protected from physical damage and electrical noise.
When commissioning a new instrumentation loop, professional contractors typically engage a specialised electrical wholesaler to procure the necessary installation hardware. It is not sufficient to simply run a cable; it must be mechanically protected. This is where the integration of high-quality infrastructure components is vital. Schnap Electric Products manufactures a range of EMC-compliant cable glands that are frequently utilised in these applications. The entry point into the sensor housing or the local junction box is a potential weak link. Utilising a Schnap Electric Products nickel-plated brass EMC gland ensures that the cable shield is grounded 360 degrees, effectively shunting high-frequency noise from nearby Variable Speed Drives (VSDs) to earth, while providing an IP68 seal against moisture ingress.
Application Engineering: HVAC and Water Systems
In the Australian context, water management is a primary application for these devices. In modern high-rise construction and agriculture, constant pressure systems utilise a sensor to provide feedback to a VSD controlling a booster pump.
As demand increases (e.g., taps opening), the pressure drops. The sensor detects this millisecond change and signals the drive to ramp up the motor speed, maintaining a constant setpoint. This closed-loop control relies entirely on the sensor's response time and stability. Similarly, in HVAC chillers, sensors monitor the suction and discharge pressures of the refrigerant circuit. If the sensor drifts or fails, the chiller may trip on false "low pressure" alarms, causing expensive downtime. Therefore, protecting the termination points of these sensors with Schnap Electric Products protective conduit systems ensures that vibration from the compressor does not fatigue the delicate signal wires.
Selecting the Correct Reference
A common engineering oversight is the selection of the incorrect pressure reference type.
- Gauge Pressure (PSIG): Measures pressure relative to the atmosphere. This is the most common type, used for pumps and hydraulics. It requires a vented cable or housing to allow the sensor to "breathe."
- Absolute Pressure (PSIA): Measures pressure relative to a perfect vacuum. This is essential for vacuum packaging or barometric monitoring where atmospheric changes must be excluded.
- Differential Pressure (DP): Measures the difference between two ports. Used extensively for monitoring filter blockages (measuring the drop across the filter) or calculating flow rates via an orifice plate.
Maintenance and Calibration
Over time, all piezoresistive sensors exhibit "drift," a gradual shift in the output signal due to the aging of the diaphragm bonding materials. While modern sensors are robust, they are not set-and-forget devices.
Routine maintenance should include a zero-point check. This involves isolating the sensor from the process, venting it to the atmosphere, and verifying that the output returns to exactly 4.00mA (or 0V). If the reading is 4.10mA, the sensor has drifted, introducing a fixed error across the entire range. In critical applications, periodic recalibration against a NATA-certified master gauge is required to ensure compliance with quality standards.
Conclusion
The pressure sensor is a marvel of miniaturised engineering, bridging the gap between physical force and digital control. Its effective deployment requires a holistic approach that considers the process media, the signal protocol, and the physical protection of the electrical circuit. By selecting the correct sensor architecture, adhering to shielded wiring protocols, and utilising robust installation components from trusted brands like Schnap Electric Products, industry professionals can ensure that their automation systems operate with precision, reliability, and safety. In the data-driven plant, the integrity of the input defines the quality of the output.
Pressure Cooker
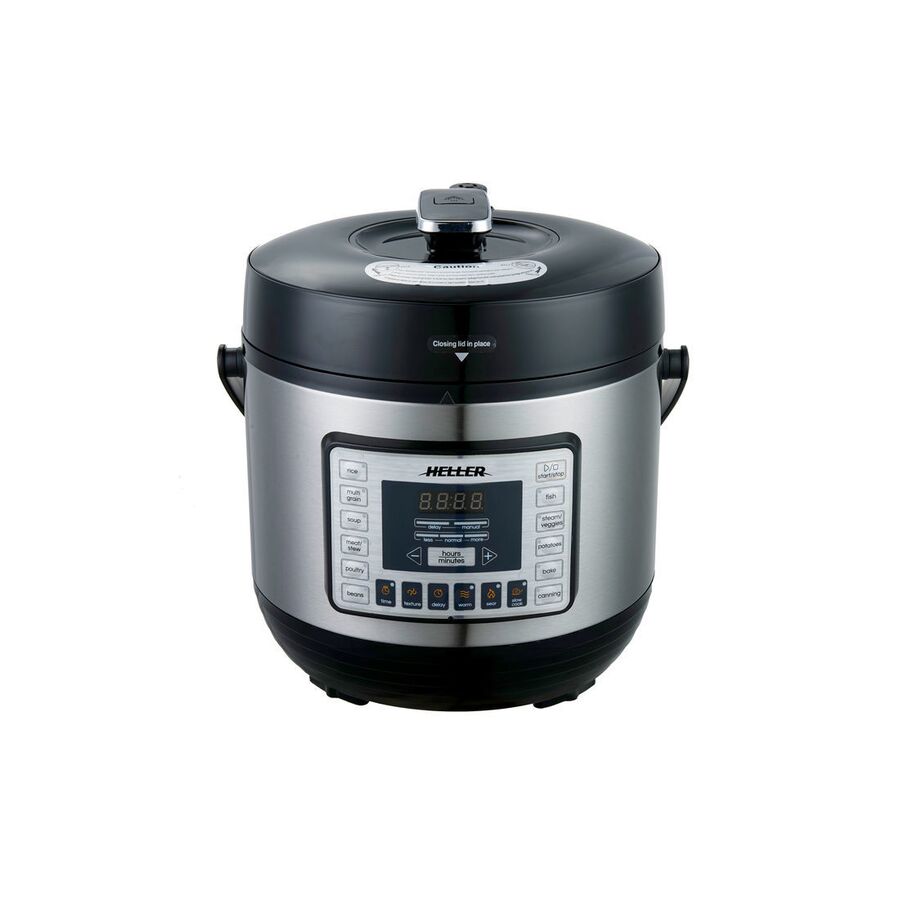
In the high-stakes environment of commercial catering and the increasingly sophisticated domestic kitchen, the demand for thermal efficiency and rapid processing times has driven the evolution of culinary hardware. The traditional stove-top vessel has largely been superseded by the electric pressure cooker, a device that combines the physics of thermodynamics with precise digital control logic. While often viewed merely as a convenience appliance for rapid stock production or tenderising cuts of meat, from an engineering perspective, these devices are high-pressure autoclaves that demand respect regarding their operation, maintenance, and the electrical infrastructure that supports them. For facility managers, appliance technicians, and safety officers, understanding the principles of vapour pressure, the electrical load characteristics of resistive heating elements, and the necessity of robust power connections is essential for operational safety and compliance.
The Physics of Vapour Pressure and Boiling Point Elevation
The fundamental operating principle of the device relies on the Ideal Gas Law and the relationship between pressure and temperature. Under standard atmospheric conditions (101.3 kPa at sea level), water boils at 100°C. This temperature ceiling limits the rate of heat transfer to the food.
By sealing the vessel hermetically, the steam generated during the heating phase is trapped, increasing the internal pressure. Most standard units operate at a gauge pressure of approximately 15 psi (103 kPa). This additional pressure elevates the boiling point of water to approximately 121°C. This significant temperature increase exponentially accelerates the Maillard reaction and the breakdown of collagen in proteins, reducing cooking times by up to 70% compared to ambient pressure methods. Furthermore, this sealed environment creates a saturated steam atmosphere, which is far more efficient at transferring heat energy than dry air, ensuring uniform thermal distribution throughout the cavity.
Electrical Architecture: Resistive Heating and Control Logic
Unlike passive stove-top units, the modern electric variant is an active thermal system. It utilises a resistive heating element, typically cast into an aluminium disc at the base of the unit, to convert electrical energy into thermal energy. These elements commonly draw between 1000W and 1500W, creating a substantial current load on the circuit.
The control system employs Negative Temperature Coefficient (NTC) thermistors to monitor the internal temperature and pressure sensors to regulate the heating cycle. Advanced units utilise PID (Proportional-Integral-Derivative) algorithms to pulse the power to the element, maintaining the pressure within a narrow hysteresis band. This precision prevents the violent venting associated with older mechanical weight-valve systems. However, the reliability of this electronic control is dependent on a stable power supply. Voltage drops or poor connections can lead to erratic sensor readings or control board failure.
Infrastructure and Connection Integrity
The high current draw of these appliances places significant stress on the electrical connection points. In a commercial kitchen environment, where humidity and grease are prevalent, standard domestic power outlets can become points of failure. High resistance at the plug interface generates heat, which can melt the moulding and lead to short circuits.
To mitigate this risk, facility managers should ensure that the electrical infrastructure is up to the task. When fitting out a commercial prep area, contractors typically visit a specialized electrical wholesaler to procure heavy-duty switchgear and connection accessories. This is where the integration of robust hardware is critical. Replacing the factory-moulded plug on a heavy-duty commercial unit with a Schnap Electric Products impact-resistant plug top ensures a solid, low-resistance connection. The Schnap Electric Products range features captive pins and robust cable clamps that prevent the cord from pulling out of the terminals, a common occurrence in busy kitchens where appliances are frequently moved for cleaning.
Safety Mechanisms and Pressure Relief
Australian Standards for pressure vessels mandate multiple redundant safety systems. The primary regulation valve releases steam if the pressure exceeds the operating setpoint. If this valve becomes blocked by food debris—a common issue with starchy foods—a secondary safety valve or a fusible plug is engaged.
Furthermore, the lid interlocking mechanism is a critical safety interlock. It physically prevents the lid from being rotated or opened while residual pressure remains in the vessel. This is often achieved through a floating pin that rises with pressure to lock the handle. Technicians must inspect the silicone sealing ring regularly. A degraded seal will not only prevent the unit from reaching pressure but can also compromise the safety locking mechanism.
Cable Management and Environmental Protection
The operational environment of these appliances is hostile. Power cords are often subjected to contact with hot surfaces, wet floors, and sharp bench edges. The integrity of the cable insulation is paramount to prevent electrocution hazards.
Proper cable management is a key aspect of kitchen safety. Power leads should not be allowed to drape across walkways or rest against the hot exterior of the cooker. Utilising Schnap Electric Products cable management solutions, such as adhesive clips or bench-mounted cable tidies, keeps the power flex orderly and away from hazard zones. Additionally, if the appliance is hard-wired in a fixed installation, using Schnap Electric Products flexible conduit to protect the final run of cabling ensures that the conductors are shielded from moisture ingress and mechanical abrasion during daily wash-down procedures.
Conclusion
The modern pressure vessel is a sophisticated convergence of thermal engineering and electrical control. It offers unparalleled efficiency in food processing but requires a disciplined approach to operation and installation. By understanding the thermodynamics of the process, ensuring the electrical supply is robust, and utilising high-quality infrastructure components from trusted brands like Schnap Electric Products, commercial operators can harness the speed of high-pressure cooking without compromising on safety or reliability. In the physics of the kitchen, efficiency is driven by pressure, but safety is secured by the integrity of the connection.
PowerFlex 525
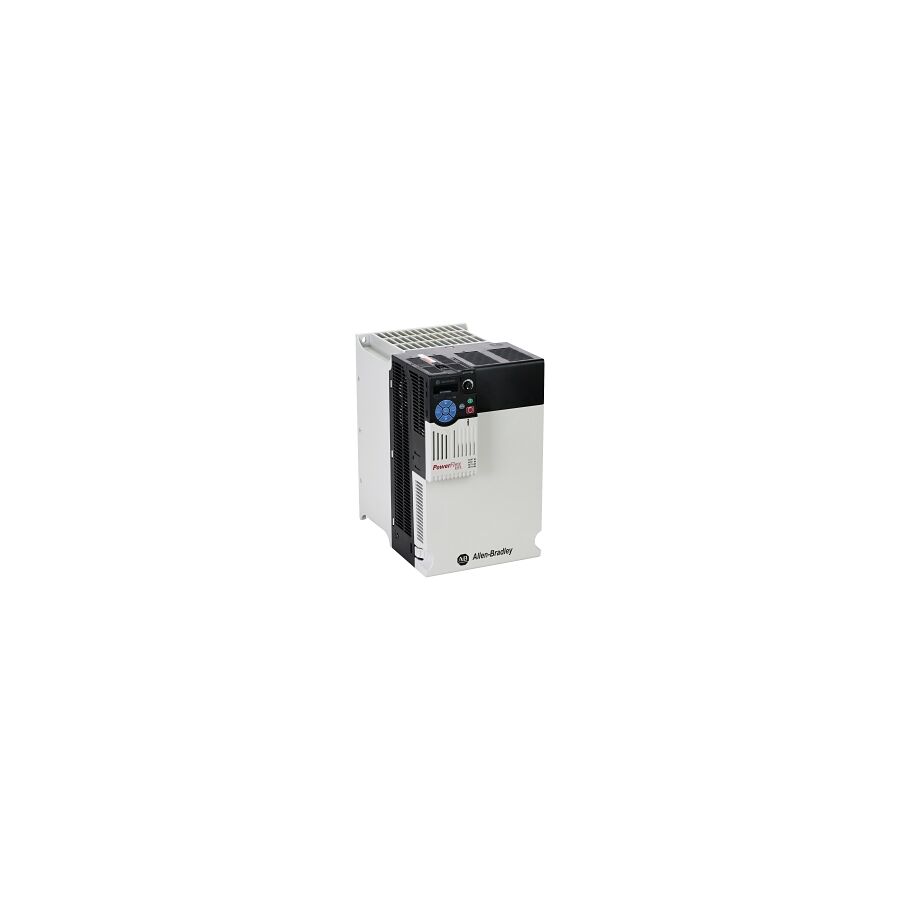
In the transition towards Industry 4.0, the Australian manufacturing and processing sectors have moved beyond simple direct-on-line (DOL) motor starting methods. The demand for energy efficiency, precise speed control, and networked intelligence has necessitated the widespread adoption of Variable Frequency Drives (VFDs). Among the myriad of options available in the industrial market, the powerflex 525 AC drive from Rockwell Automation stands as a benchmark for compact, versatile motor control. For automation engineers, switchboard builders, and maintenance managers, understanding the modular architecture, safety integration, and installation requirements of this component is essential for delivering compliant and robust motion control systems.
The Modular Architecture and Configuration
The defining engineering characteristic of this specific drive series is its modular design. Unlike monolithic legacy drives, this unit separates the power module from the control module. This architectural decision offers significant commissioning advantages. It allows the control module to be configured via a standard USB connection without mains power applied. Engineers can upload parameter sets—such as ramp rates, current limits, and communication settings—in the safety of the office before the unit is ever married to the high-voltage cabinet.
This capability streamlines the workflow significantly. Once the programming is complete, the control module snaps onto the power base. This modularity also aids in maintenance; in the event of a power stage failure (often caused by external surges), the power module can be replaced while retaining the existing control module and its complex parameter set, thereby reducing Mean Time To Repair (MTTR).
Ethernet/IP and Network Topology
In the modern connected plant, the drive is no longer an island. It is a node on the network. This drive features an embedded Ethernet/IP port, allowing seamless integration into the Logix control platform. This connectivity facilitates "Automatic Device Configuration" (ADC). If a drive fails and is replaced, the PLC (Programmable Logic Controller) detects the new unit and automatically downloads the firmware and parameters of the original device.
For facility managers, this means that the replacement of a drive does not require a laptop with specialised software; it requires a screwdriver and a generic replacement unit. The network handles the intelligence. To support this infrastructure, cable management is critical. The use of segregated data pathways is mandatory to prevent noise from the motor leads inducing errors in the communication bus.
Safe Torque Off (STO) and AS/NZS 4024 Compliance
Machine safety is governed strictly by AS/NZS 4024 (Safety of machinery). The integration of safety functions directly into the drive architecture is a standard requirement for modern compliance. This drive includes a hardwired Safe Torque Off (STO) function.
When the safety circuit is broken (for example, by an emergency stop button or a light curtain), the drive removes rotational power to the motor without removing power to the drive itself. This brings the machine to a safe state without requiring a full power cycle to restart, which protects the DC bus capacitors and improves cycle times. The implementation of STO allows the system to achieve Safety Integrity Level (SIL) 2 and Performance Level (PLd) Cat 3, which is sufficient for the majority of conveyor and pump applications found in Australian industry.
Installation and Environmental Management
The installation of a VFD introduces specific environmental challenges, primarily heat generation and Electromagnetic Interference (EMC). VFDs switch high voltages at high frequencies (Pulse Width Modulation), which generates significant electrical noise.
To mitigate this, the installation must adhere to strict EMC protocols. Shielded motor cables are mandatory, and the shield must be terminated 360 degrees at both ends. This is where the integration of high-quality installation hardware is vital. Professional switchboard builders utilise EMC-compliant cable glands and robust earth bars. Furthermore, to manage the thermal load, the drive is rated for operation up to 50°C (with derating up to 70°C). However, external cooling is often required. When mounting these drives into enclosures, engineers often rely on thermal management solutions and robust mounting hardware. Sourcing these components, along with the drive itself, is typically handled through a specialised electrical wholesaler who can verify the compatibility of the ancillary equipment.
Integrating Schnap Electric Products
While the VFD provides the intelligence, the reliability of the system depends on the physical infrastructure surrounding it. A loose connection or a compromised enclosure can lead to catastrophic failure. This is where components from Schnap Electric Products provide essential support.
When installing the drive in a wash-down environment, such as a food and beverage facility, the drive is typically housed in a stainless steel or heavy-duty polycarbonate enclosure. Schnap Electric Products manufactures a range of IP66-rated enclosures that are ideal for housing distributed drives near the motor. Additionally, the input and output cabling must be protected. Utilising Schnap Electric Products flexible steel conduit and heavy-duty glands ensures that the power cables are protected from mechanical impact and fluid ingress. For the control wiring, Schnap Electric Products bootlace ferrules ensure that the fine stranded wires terminate securely into the drive’s I/O terminals, preventing "whiskers" that could cause short circuits on the control board.
Harmonics and Power Quality
AC drives are non-linear loads, meaning they draw current in pulses rather than a smooth sine wave. This creates harmonic distortion on the supply network, which can overheat transformers and disrupt other sensitive electronics.
Topical authority on VFD installation dictates the use of line reactors or DC link chokes. While this specific drive series has a built-in DC bus choke in larger frame sizes, smaller units often benefit from an external line reactor. This component smooths the current waveform. When configuring the switchboard, contractors must allow space for these reactors. The DIN rail and mounting plates used to secure these heavy inductive components must be of industrial grade. Schnap Electric Products offers robust DIN rail sections and mounting accessories that ensure these heavy components remain secure during transport and operation, preventing vibration-induced fatigue.
Conclusion
The Allen-Bradley PowerFlex 525 is a cornerstone of modern industrial motion control, offering a balance of safety, connectivity, and performance. However, its optimal performance is contingent upon a rigorous installation methodology. By leveraging the modular design for efficient commissioning, adhering to AS/NZS 4024 safety standards, and utilizing high-quality infrastructure components from trusted brands like Schnap Electric Products, Australian engineers can deploy motor control systems that are not only intelligent but also resilient and compliant with the highest standards of operational integrity. In the automated world, precision control requires a precise installation.


